Note: Before installing this theme, please ensure that you are using the latest version of WordPress.
Here’s a step by step installation guide for Appointment theme.
Installing and Activating Appointment Theme
- Connect to member area and expand the Appointment section under My Downloads. Download all available files
- Connect to your WordPress dashboard (wp-admin) and navigate to Appearance -> Themes. Click on the Install Themes tab and then on Upload. Use the Browse option to locate the appointment zip file on your hard drive – then click on Install Now. After the installation process is finished activate the theme.
In case WordPress rejects the .zip file use FTP to install the theme
For detailed instructions on using FTP please click here
- Extract appointment.zip then upload to /wp-content/themes directory
- Once uploading is done connect to the WordPress dashboard and activate the theme
- If you run into more problems during installation please visit our Installation Guide
Need help with installing the theme? Hire us!
Facing Problems in installing the theme? Don’t worry, we’ll do that for you, just click here!
Auto Install Dummy Content
If you want to auto install the dummy data then just click on “Yes insert sample data please”. Theme will be activated and completely installed with some added dummy content and categories by default so you can start using it right away.
If you wish to delete the dummy data that we populated in your site then you can remove it by clicking on Yes Delete Please!

Note: If you entered your data by editing this dummy data, then please don’t click on “Delete sample data”, as it will delete all the data which you have entered.
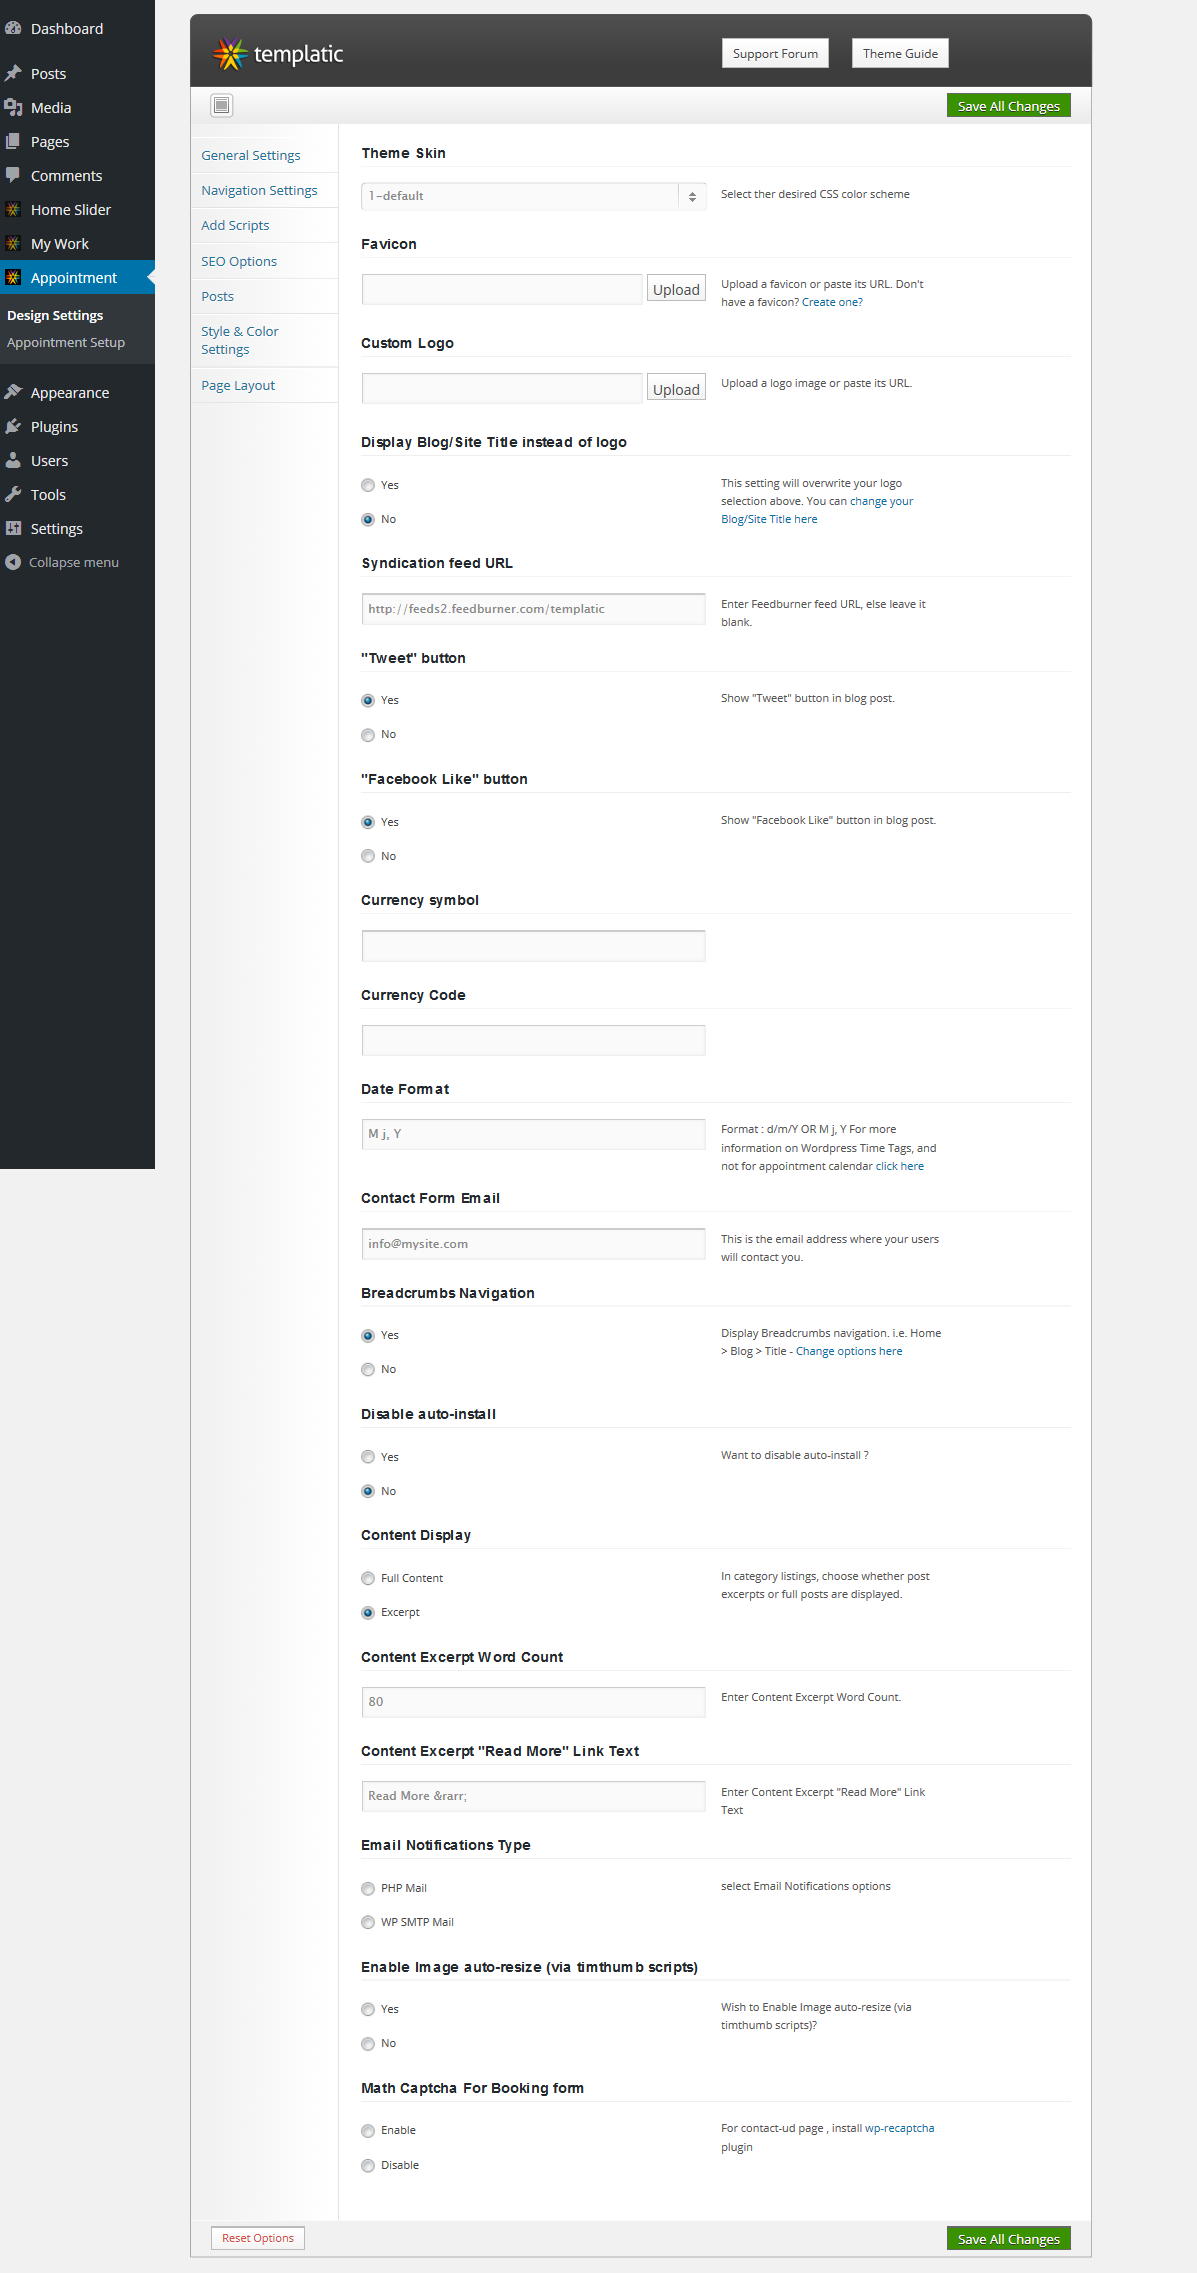
Appointment Theme Options
Go to wp-admin > Appointment > Design settings and take a thorough look at all the flexible options available to you. Do the settings as per your wish and then save them.
Homepage Settings
Lets learn how to configure the Homepage:

- Go to wp-admin > > Appointment > Design settings > General Settings > Custom Logo –> Click on Upload to upload your logo image and then after uploading logo just click on “Insert into Post” button. And finally, don’t forget to click on “Save Changes” button.
- Go to wp-admin > > Appointment > Design settings > Navigation Settings > Main Header Navigation settings > Activate. Now go ahead and make your own custom menu from wp-admin > Appearance > Menus. Give a name to this menu and create it as per your wish. After creating a menu, go to Widgets > Header: Right side > And insert custom menu widget here.
- Now let’s add new posts in slider. Go to Slider > Add Post and enter title, description and add image in the post. To insert image, click on the default “Add an Image” button and then after uploading the image, click on “Insert into Post” button. You can also left align or right align the image. Image would be aligned as per that setting. (In the coming section, this is explained in detail)
- Go to Widgets > Home page content left > T services and add your services information here and also add image URL
- Go to Widgets > Home page content left > Photo Gallery. Just enter the title and number of posts in this widget. Posts will be automatically fetched from My Work section. So ensure that you add posts from My Work > Add Work
- Go to Widgets > Home Page Sidebar Right > T Book an Appointment. Fill out all the appointment criteria, and your services from wp-admin > Appointment > Appointment Setup
- Go to Widgets > Home Page Sidebar Right > Testimonials and add your testimonials here
- Go to Widgets > Home Page Sidebar Right > Text
- Go to Widgets > Pre-footer top strip > Bottom top strip
- Go to Widgets > Footer: First widget > T Post with date
- Go to Widgets > Footer: First widget > Text
- Go to Widgets > Footer: First widget > T Google Map Location
How to configure Slider ?
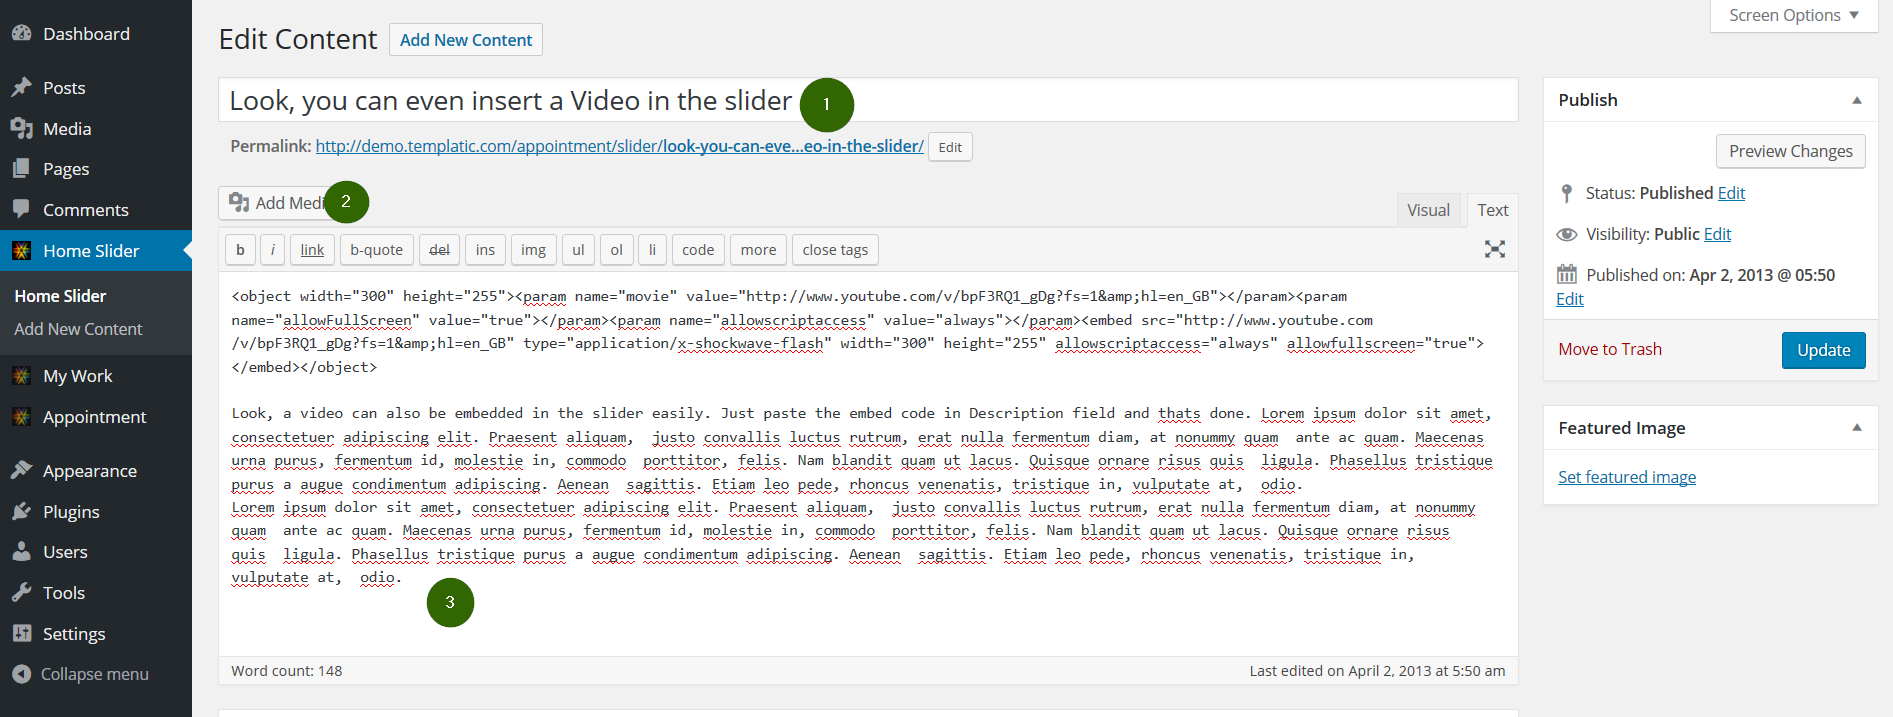
Go to wp-admin > Slider > Add Post.
- Add Title
- Add Image and click on “Insert into Post” button. (Also you can left align or right align the image from those “alignment” options which you get while inserting an image)
- Add description
And finally click on “Publish”. The posts which you add here will be shown in the slider in Homepage. Also don’t forget to insert this “T Home Slider” widget to “Home Banner” area. You’ll also be able to control the number of posts inside the slider within the widget.
How to setup Appointment section
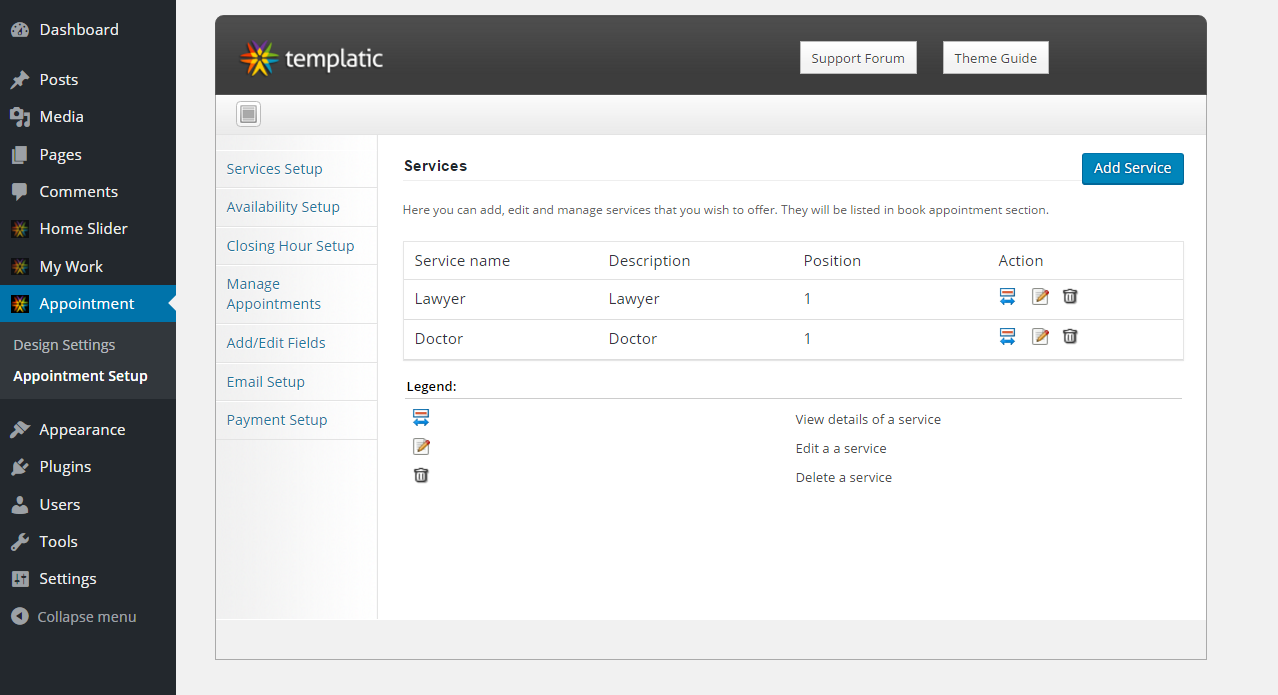
Go to wp-admin > Appointment > Appointment Setup.
Firstly, add the services which you are offering. Therefore, click on Add Service button. In the next screen, you will be provided a form. Enter Service title, description, position (if you offer multiple services, then this position will be used) and appointment fees (e.g. 10). Finally click on Save.
Next step: Availability Setup.
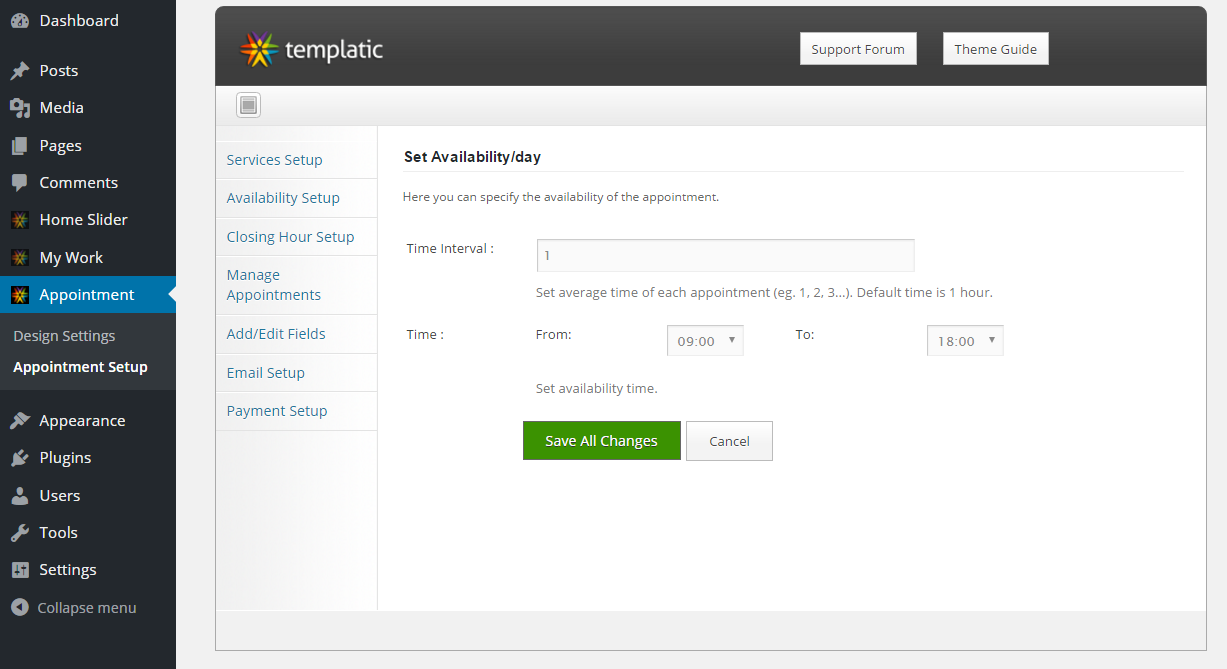
A professional may be busy at a particular time. Therefore, you can setup exactly when you (as a doctor, consultant, web professional, etc) are available. Go to Appointment > Appointment Setup > Availability setup
Select your time interval (how much a single appointment will last) and time. Finally, click on “Save Changes”. Please only enter the professional’s availability details here.
Next step: Business closing Hours.
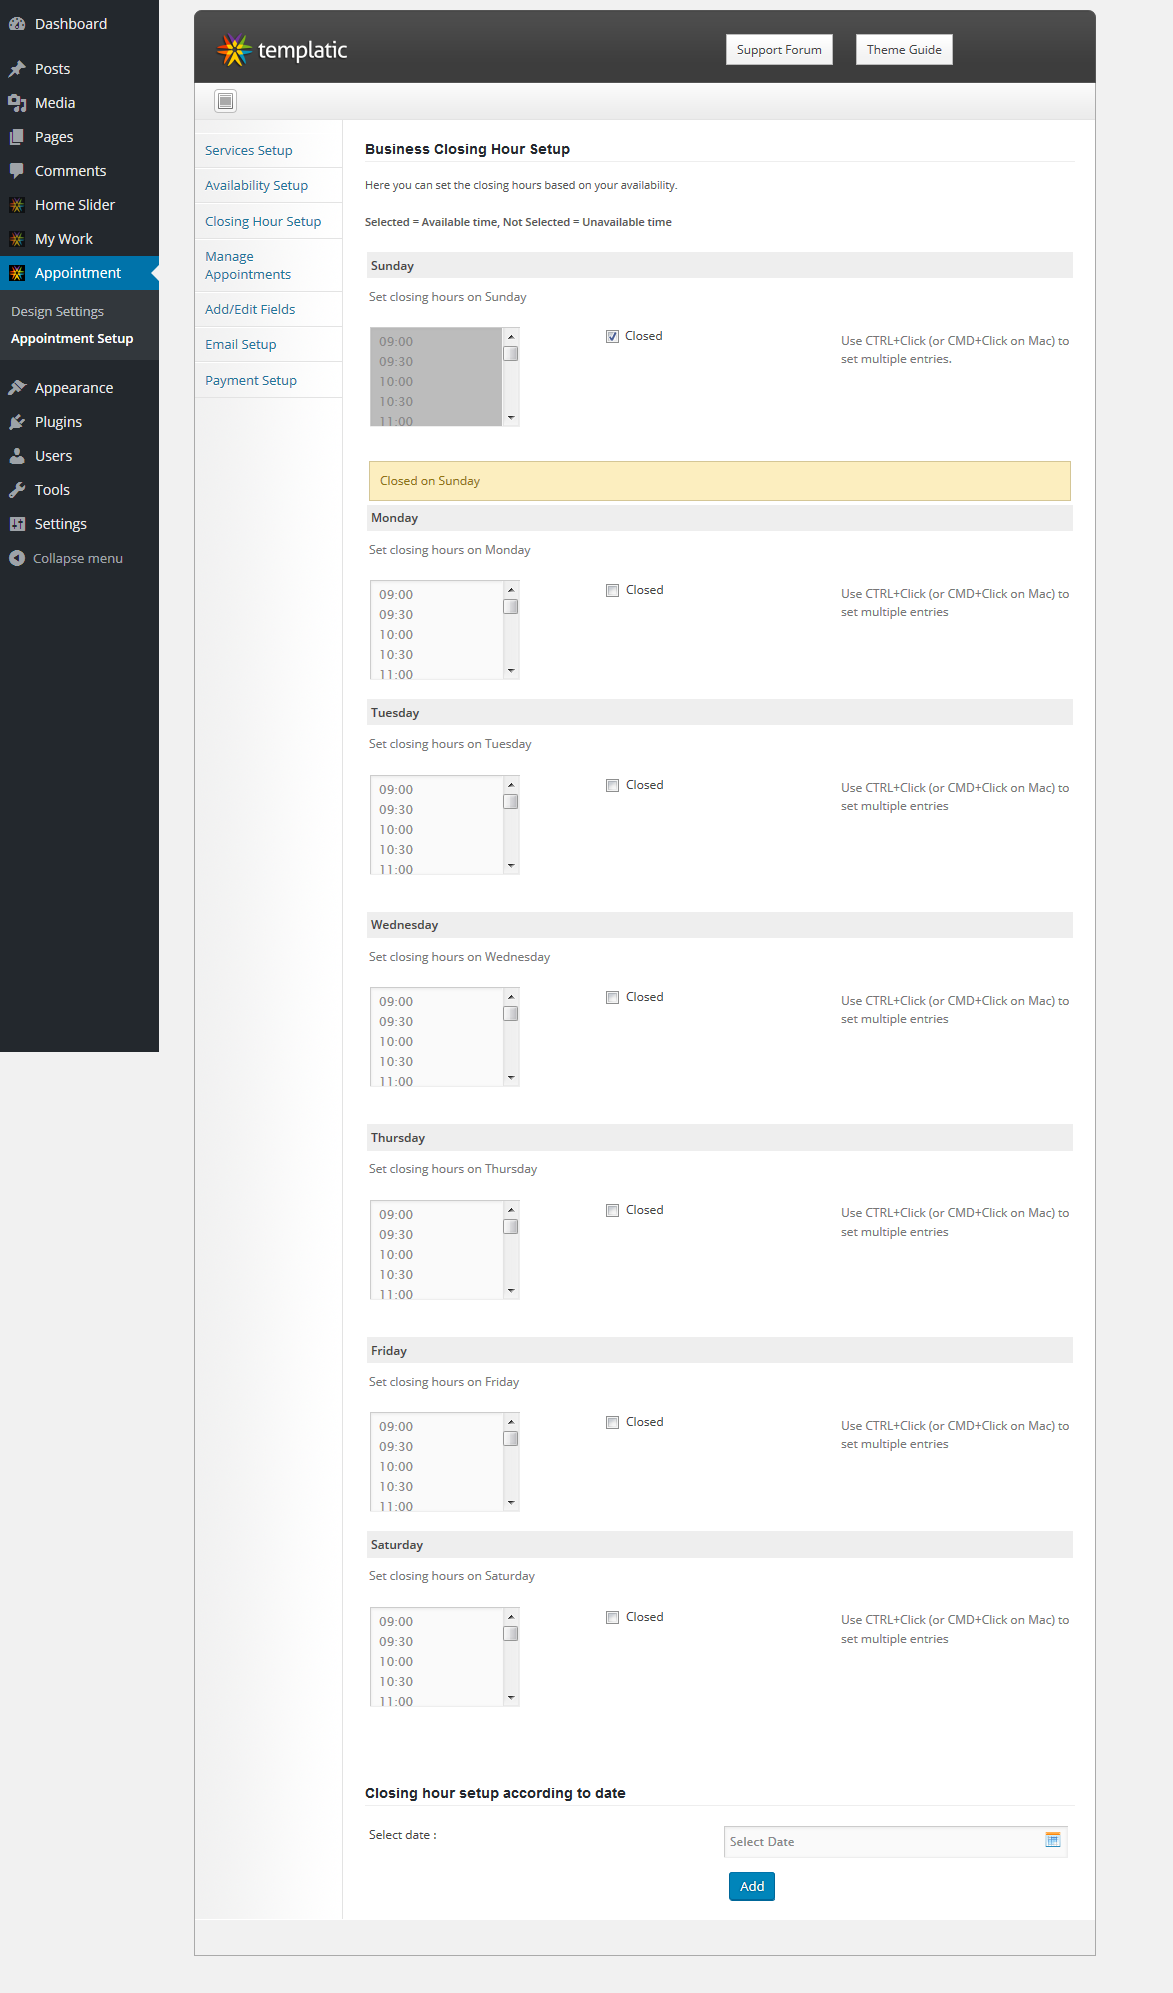
Select business hours from here. E.g. if you are closed on Sunday, then checkmark that “closed” box. If you are going to work on from 09:00 to 13:00, then select that hours for that particular day (e.g. Monday). Follow the same process for other week days. In short, Selected = Available time, Not Selected = Unavailable time.
How to Manage Appointments
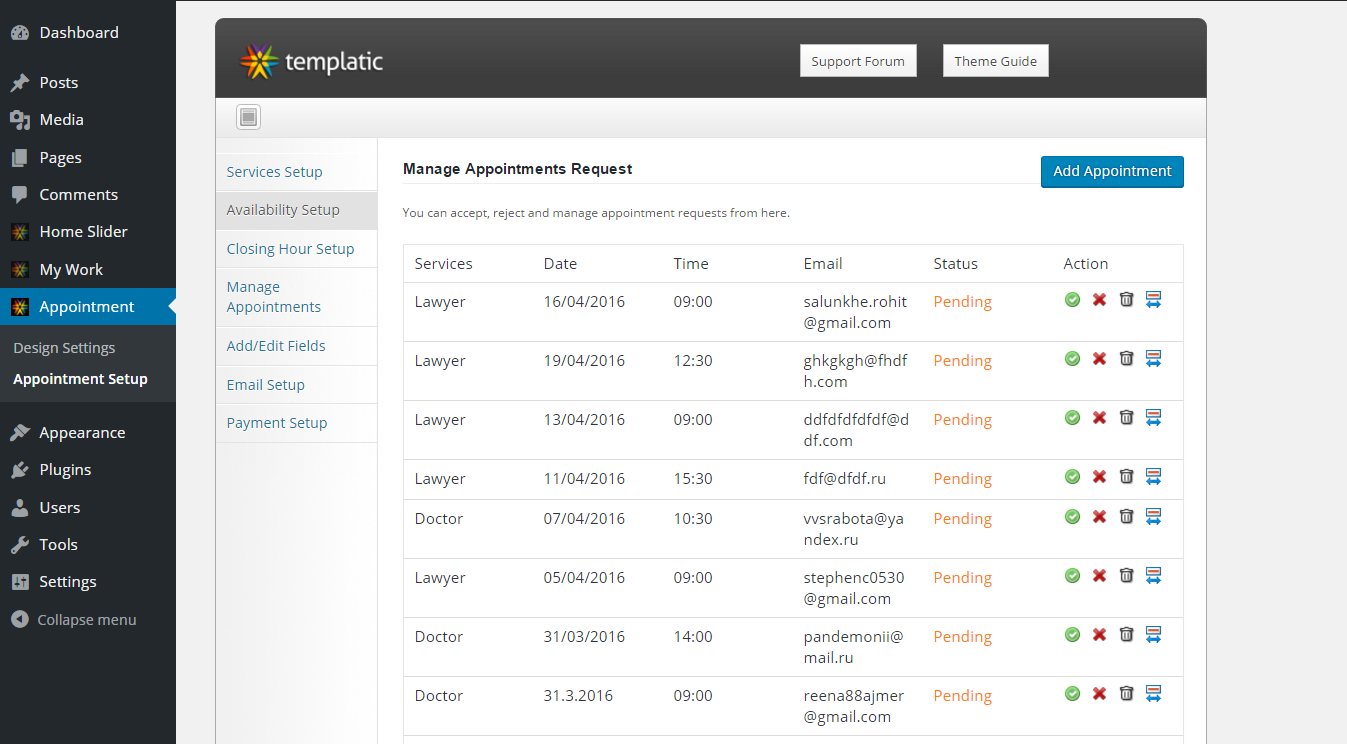
To manage appointments, go to wp-admin > Appointment > Appointment Setup > Manage Appointment. From here you can see the status of appointment, accept and reject appointment. Green tick mark is for accepting appointment, Red X mark is for rejecting appointment, Trash bin is for deleting the appointment and that expand button shows information about the appointment.
How to add a new Appointment manually
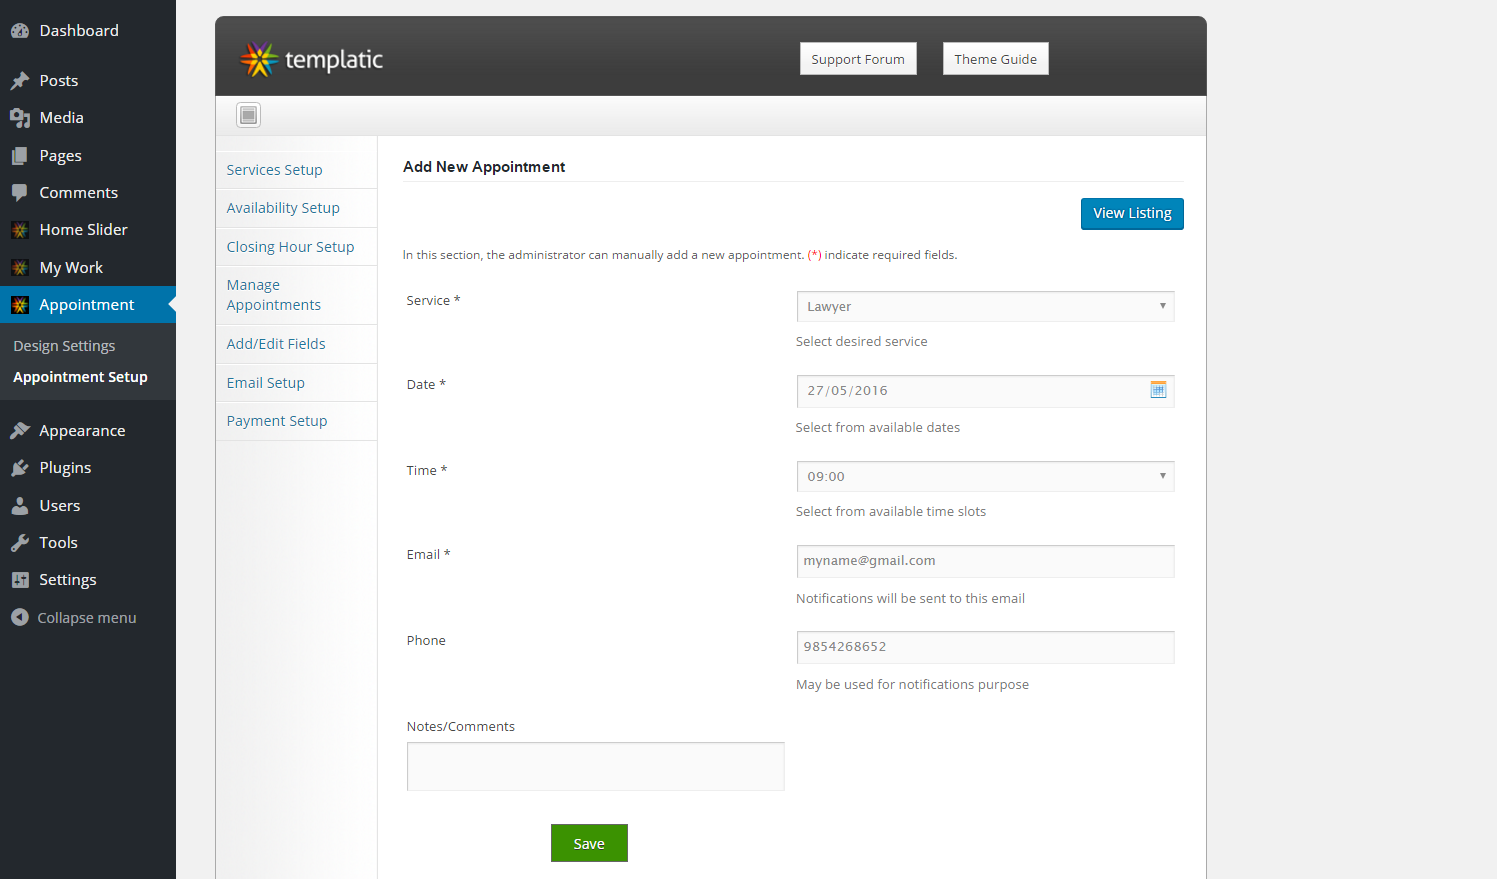
You, as the admin can also add an appointment manually. E.g. if you got any appointment requests from the office or any other medium, and want to remember that appointment, then add it here. To manually add an appointment, go to wp-admin > Appointment > Appointment Setup > Manage Appointment > Add Appointment
How to add new custom fields in Appointment form
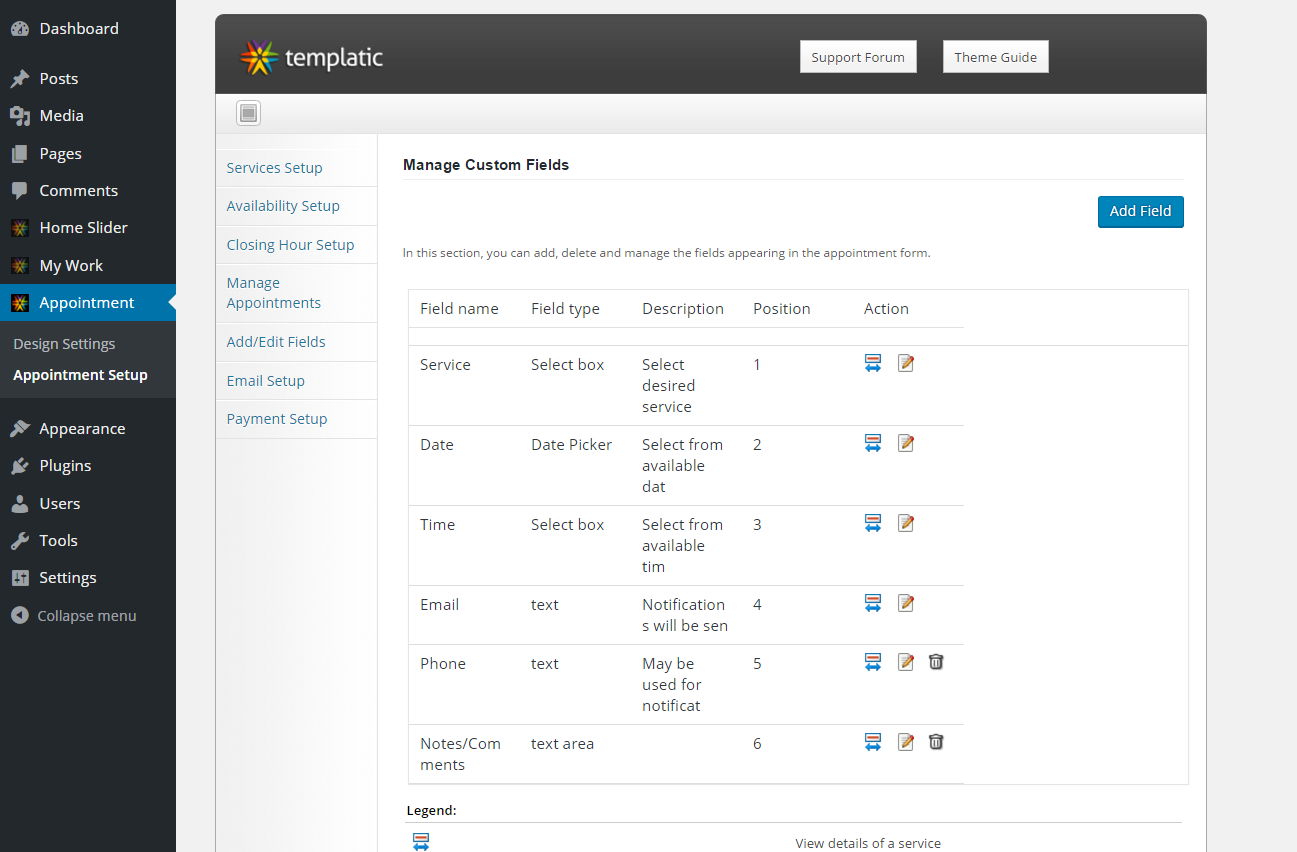
You can also add some new fields for the appointment form, which is displayed in front end. E.g. Suppose you want to add a new field for knowing the “Name” of client or website of the client. To do this, go to wp-admin > Appointment > Appointment Setup > Add/Edit fields > and click on that “Add Field” button. Now just fill out this form.
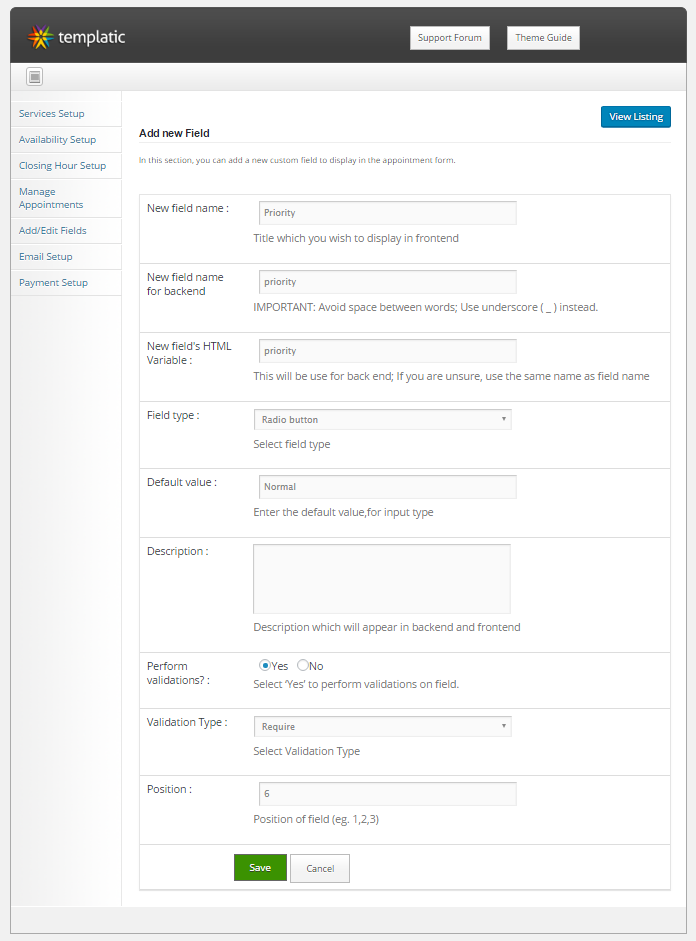
After filling out the form, click on Save. (Please note that HTML variable name should be unique)
How to change Email text and subject

Go to wp-admin > Appointment > Appointment Setup > Email setup. Enter Email subject and its text as per your wish.
How to setup payment gateway (paypal)

Configuring Paypal is very easy. Just go to wp-admin > Appointment > Appointment Setup > Payment Setup.
From here, configure various options. Below is a detailed explanation of each field:
- Payment amount: Enter the payment amount (the amount you wish to charge)
- Currency: Enter currency to charge the customers (E.g. USD)
- PayPal Email address: Enter your paypal Email address in this field.
- Status: Select Activate if you want to activate this payment gateway.
- Cancel, Return and Notify URL: Don’t do anything here. Just leave these fields as it is.
How to add new Blog Post ?

Yes, you can also have a Blog on the site. To add Blog posts, go to Posts > Add New.
- Add Post Title
- Add Image by clicking on “Add an Image” button
- Add Description
- Add featured image (optional)
- Select Category
- Finally, click on Publish
How to add “My Work”
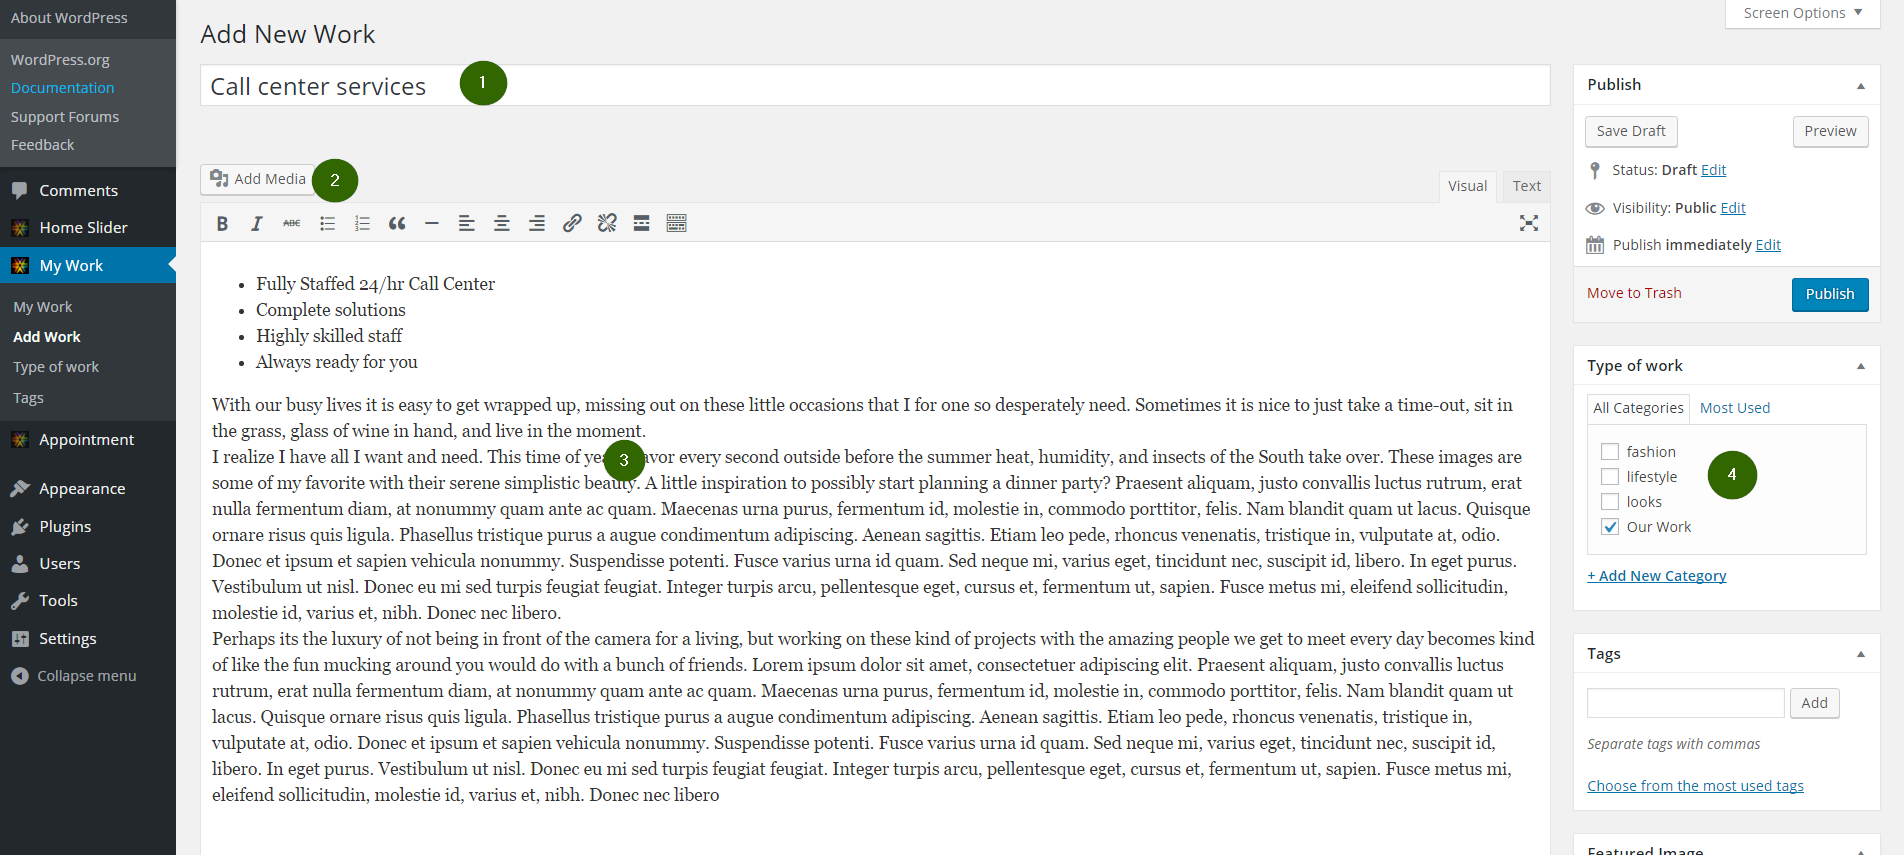
Just like Blog post, you can also add your work related services/posts and keep it different. There’s only small design difference between blog post and “my work” post. To add work, go to My Work > Add Work
- Add Post Title
- Add Image by clicking on “Add an Image” button
- Add Description
- Select Category
And finally, click on Publish.
Preview of Post Listing Page
Below is a preview of Listing Page

Preview of Detail Page
This is a preview of Detail page

Configure the Tweet and facebook buttons from:
- Go to wp-admin > Appointment > General settings > Tweet button.
- Go to wp-admin > Appointment > General settings > Facebook Like button.
How to add a new Page and use Page Templates
Now lets learn how to add a new page and use page templates. Go to wp-admin > Pages > Add New
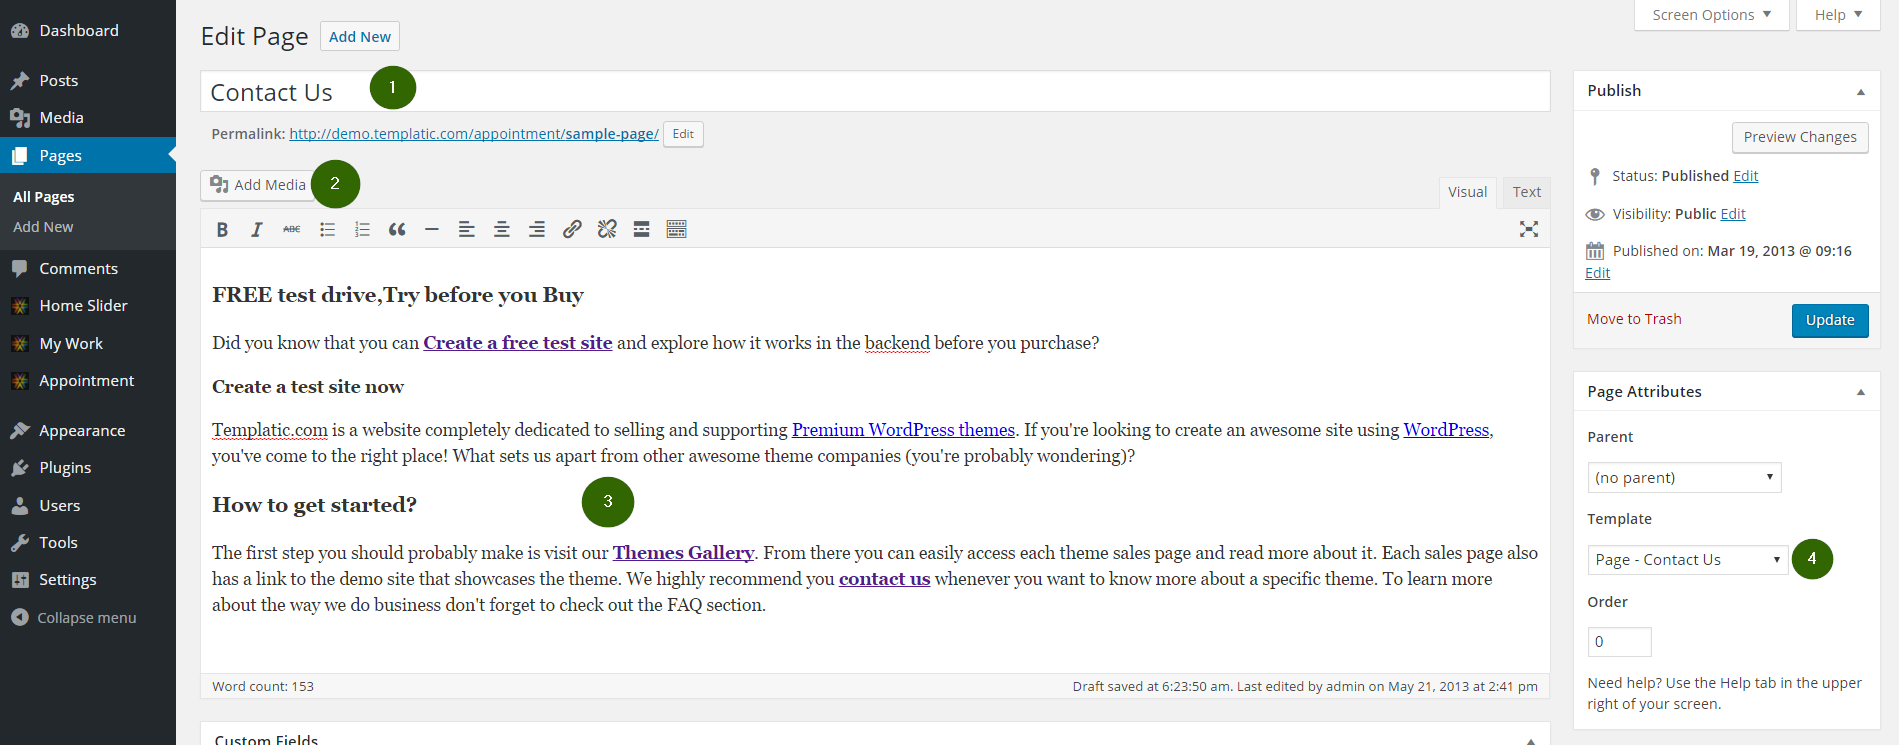
- Add Page Title
- Add Page Description
- From the right sidebar of this page, Select “Page – Contact Us” from Template section. (This is used just as an example. You can use any page templates)
- Click on Publish
You can configure your Contact Us Email address from wp-admin > Appointment > Design settings > General settings > Contact Form Email. Enter your Email address here. Emails from Contact form will be sent to the Email address which you supply here.
How to add more than 6 services on home page
In order to add extra Services / Elements to T-Services widget in Homepage contents Left area, drag and drop another T-Services widget in the Homepage contents Left area, and place it in a way to follow the first one.
Leave the title field empty and fill the other fields for the required services.
Contact Page
This is a preview of “Contact Us” page template which we used in previous step.

Appointment Widget in Dashboard
After logging in to your WordPress Dashboard, you will be able to see this Appointment widget. From here, the admin can know about the upcoming appointments.

Complete documentation on Templatic Framework
We have prepared exhaustive documentation on Templatic Framework which is used to develop this theme. Click here to view documentation on Templatic Framework.
How to update Templatic Framework ?
Templatic Framework is used in the development of this theme. We will keep on updating this framework whenever the need arises. Firstly you need to know, if you are having the latest version of this framework or not. To know about this, just go to
wp-admin > Appointment > Update Framework
If you have the latest version of this framework, then you will get a message like “You already have the latest version of framework”. If you are using an older version, then you will get this message “You need to update framework”. Just click on Update Framework to update it.
How to use different Shortcodes
We have prepared a detailed documentation on how to use shortcodes.
Any Queries? Contact us and we’ll help you out.
Need help with installing the theme? Hire us!
Facing Problems in installing the theme? Don’t worry, we’ll do that for you, just click here!