Theme installation
- To install the theme, login to your WordPress dashboard and navigate to Appearance ⇒ Themes.
- Click add new ⇒ Upload Theme.
- Using the file upload dialog, upload the Zip file you have downloaded from Templatic’s member area, and click install now.
- When the theme installation is complete, click activate to activate the theme. This will take you to the setup wizard.
Installing your theme through FTP
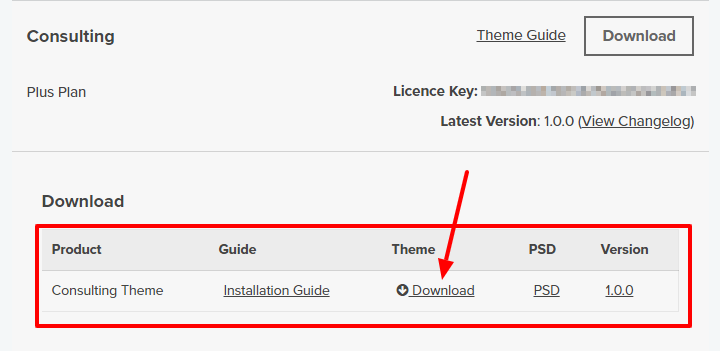
- Download the Consulting theme Installation file from the member area and extract them using software like 7-Zip. Use the “Extract here” option; don’t extract into a new folder.
- Navigate to /wp-content/themes/ and upload this folder.
- Now
- Login to your WordPress dashboard, navigate to Appearance ⇒ Themes. You will find the Consulting theme in the list. Activate it.
- Upon activation, you will be redirected to the setup wizard and it will install and activate the required plugins, and update your site with the sample data too. (Skip to the setup wizard)
- When asked to, enter the license key available inside our member area.
The theme setup wizard will help you initialize your theme by setting up plugins, sample data, etc. Even though it is optional, we highly recommend you follow these steps to set up your site easily.
The setup wizard
To quit the setup, you can use the “return to dashboard option”, but it is not recommended. The following are the steps of the setup wizard to help you prepare your website:
- Pressing “Start” will initiate the setup processing.
- Install child theme: This will install the child theme that will save all the customizations, so you can easily update the parent theme without losing the customizations. Click “Install” to proceed.
- Install Plugins: This step will configure your website with the required plugins for your site. Again click “Install”. You can remove the plugins you don’t need at a later stage.
- Import content: This will import the sample data. Sample data makes your website building process easier with the dummy data, images, and widgets in the places. With the sample data installed, your website will start looking like the theme demo and you can edit the parts you want to change to customize your site. Click import and wait till the dummy data is imported.
- At the end of the setup wizard, you can choose to “View the website” or “return to the dashboard” for further editing.
Setting up the Homepage
The homepage of the consulting theme is built of many strategically designed sections. Most of these can be edited through the Elementor drag and drop options.
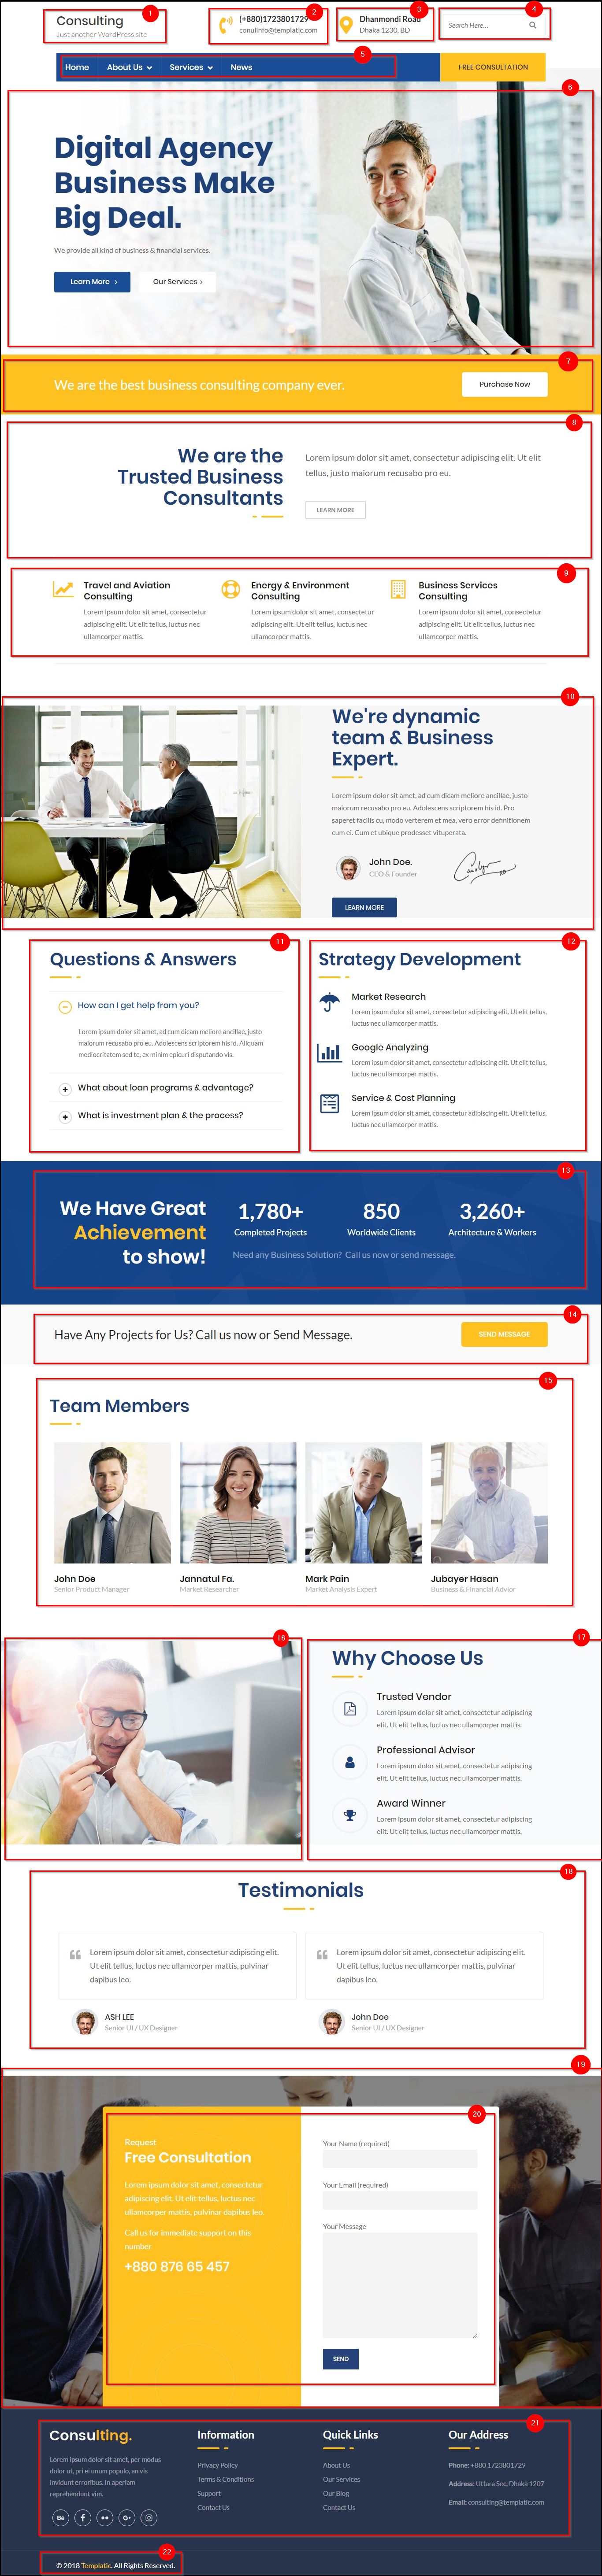
1) Site Identity
You can easily update the logo of your website by navigating to Appearance ⇒ Customize. The Logo can be uploaded using the upload logo option.
![]()
If you don’t have a logo to upload, you can use the site title instead. As shown in the theme demo, the site name will be highlighted as a logo. You can even manage the site Title and tagline easily.
You can also change the logo/site title directly through the Elementor Page builder. Click the “Edit with Elementor” option and change the
2) The contact info
All the three content blocks here can be managed at Appearance ⇒ Widgets ⇒ Header right widget area.

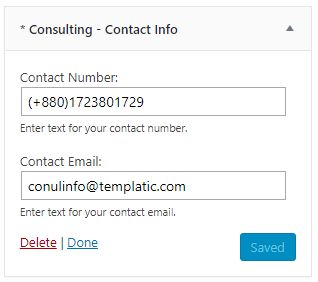
Consulting Contact info
This is a custom widget for the Consulting theme. This widget lets you display your firms contact information. This widget lets you enter the contact number as well as the email address.
If you don’t want to show this block, you can delete it right away.
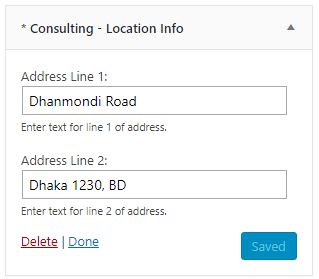
3) Address block
This is a two-line address to be displayed in the header. Just like the contact info widget, this is also a custom widget you get with the consulting theme.
You can change it by navigating to the Appearance ⇒ Widgets ⇒ “Header right” widget area. The widget *consulting – Location info lets you change the address.
4) The search bar
The search bar comes from the Header right widget area. It is the simple WordPress search widget.
5) Menus
You can create menus on your website with all the menu items you need in a matter of minutes. It is important to properly plan the menu items and place the links of all the important pages into the menu.
To create a new menu, you can navigate to Appearance ⇒ Menu ⇒ Create a new menu.

Create a new menu and set it as a primary menu.
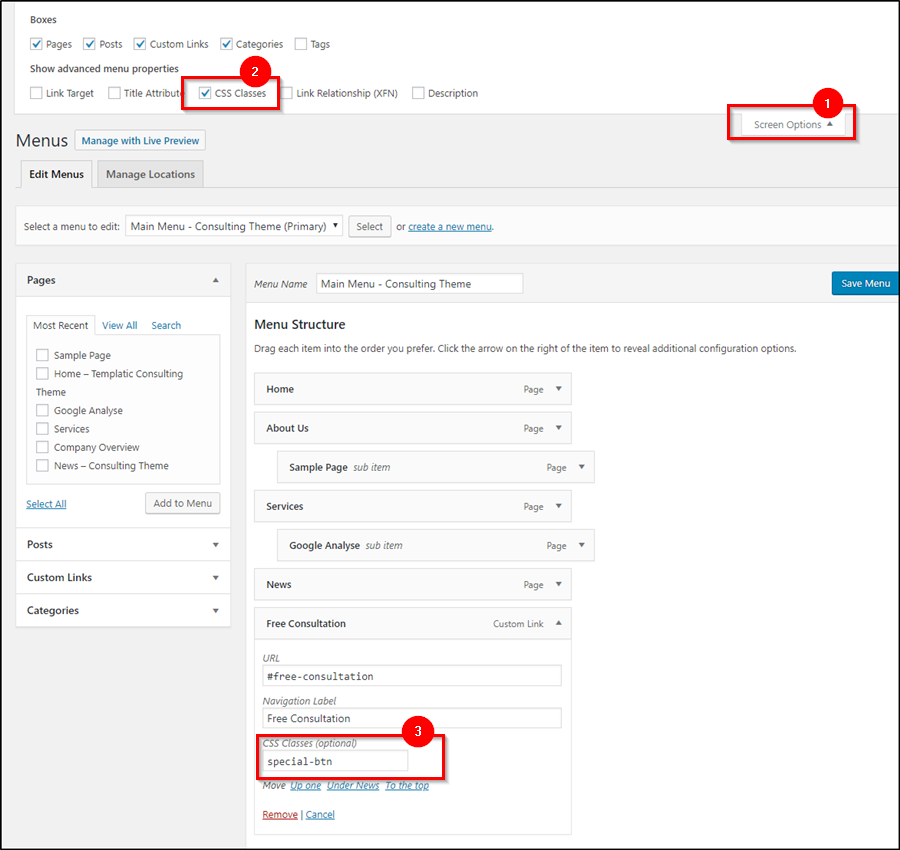
You can also change the menu button on the right end of the menu strip.
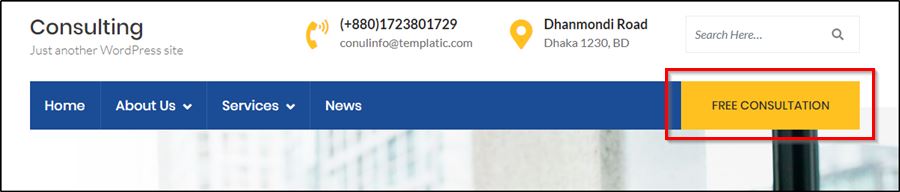
The consultation button beside the menu is nothing but a normal menu item. You can add any item from the left side. Just add class ‘special-btn’ and it will work.
6) Banner area
You can use the Elementor page building option to change the banner image and the text over it. The Gif below shows how you can do it.

7) The Call to action 1
Below the banner image is a small section that can act as a call to action for your consulting website. You can change the color of this section, the text, the button and the link through the Elementor page builder.

8) Text block
This section can be edited through the Elementor editor easily. You can change color, edit text, etc. This section is designed to display simple text and a button.
9) Service Features
This section can be used to display your services or business features. The section can be edited through the elementor page builder. Open the page with the Edit with Elementor option, click on the section, and you can change the title, move the feature blocks, update the icons and change the text easily.
If you need to add more features, simple duplicate the section as shown below:
10) Owner’s message
Here, as the owner of the business, you can write a message for your site visitors. This too, is a click and edit section. Open your homepage with the Edit with Elementor option and you can start editing this section easily.
Changing the image
Changing the message
Change the message through the Elementor editor’s options. You can change every single detail as well as the format of this section through the editor.
11) FAQ section
This is also a click and edit section through the Elementor page builder.
12) Text section
You can use this section to describe your business essentials. It is a normal text template with changeable icons.
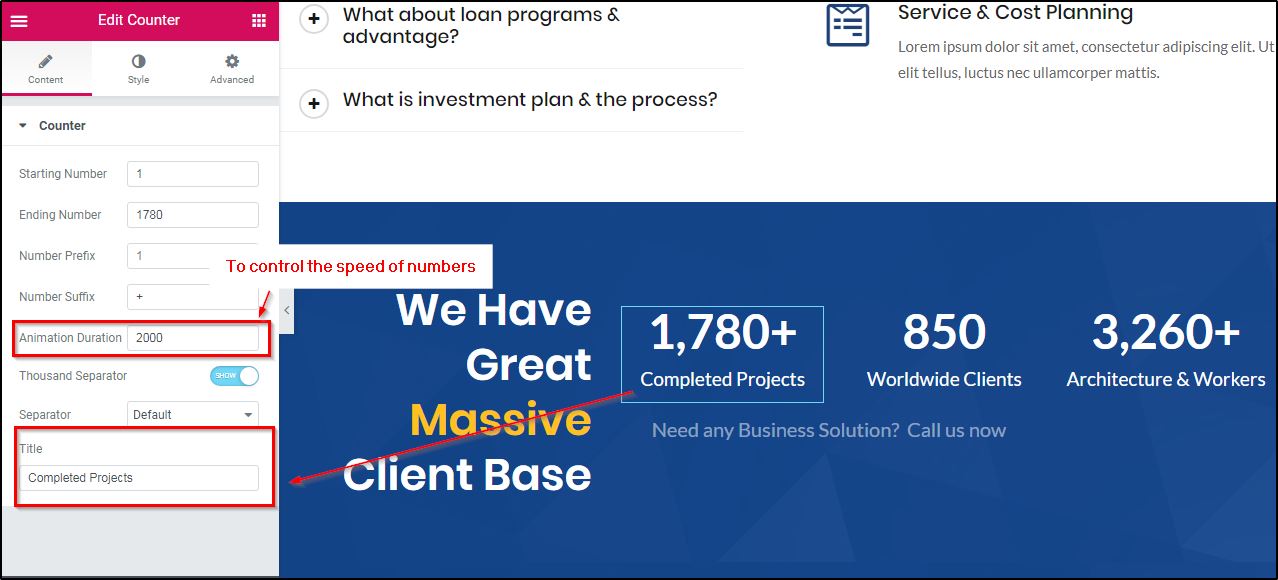
13) Business Statistics
The business Statistics is a beautiful section that is strategically designed to show numbers because they have a special impact on your clients. You can easily change the section using the Elementor page builder.
The number counter is an animated section to show the ascending affect. You can set the start number from where the counter will begin and an end number to show the final number. Besides you can also change the animation speed, the text below it, etc.
14) Call To Action 2
This section is similar to the Call to Action section right below the homepage banner area. You can edit it the same way you can change the Call to Action 1 section.
15) Team Members
This is a block that can be completely edited with the help of Elementor page builder.
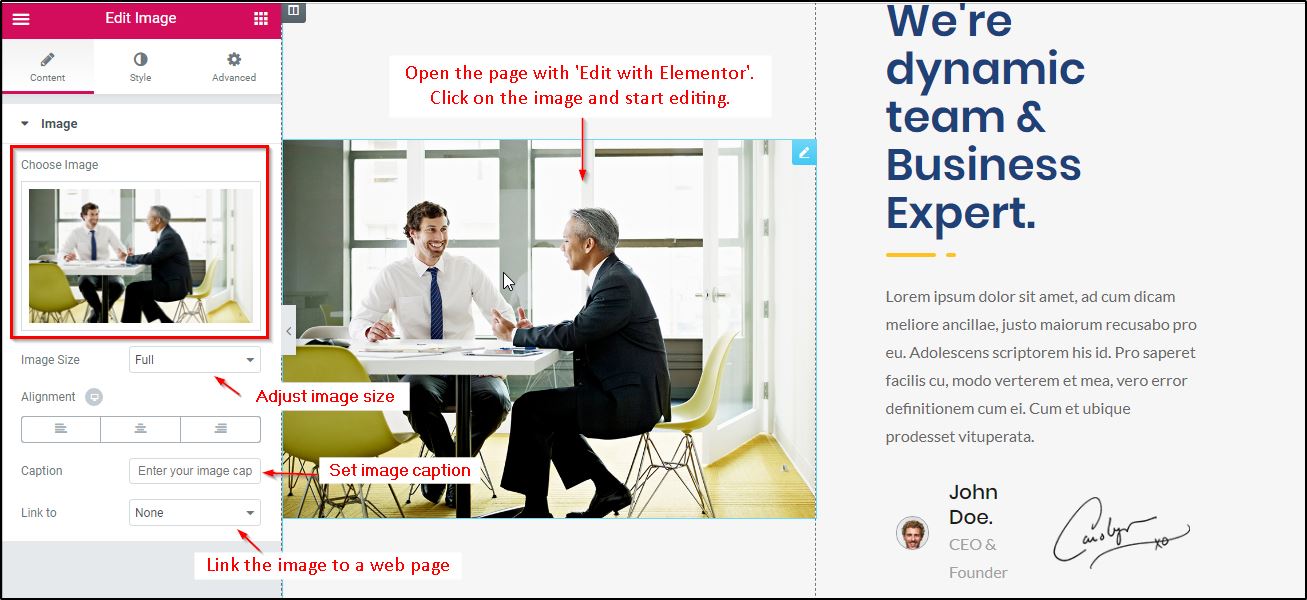
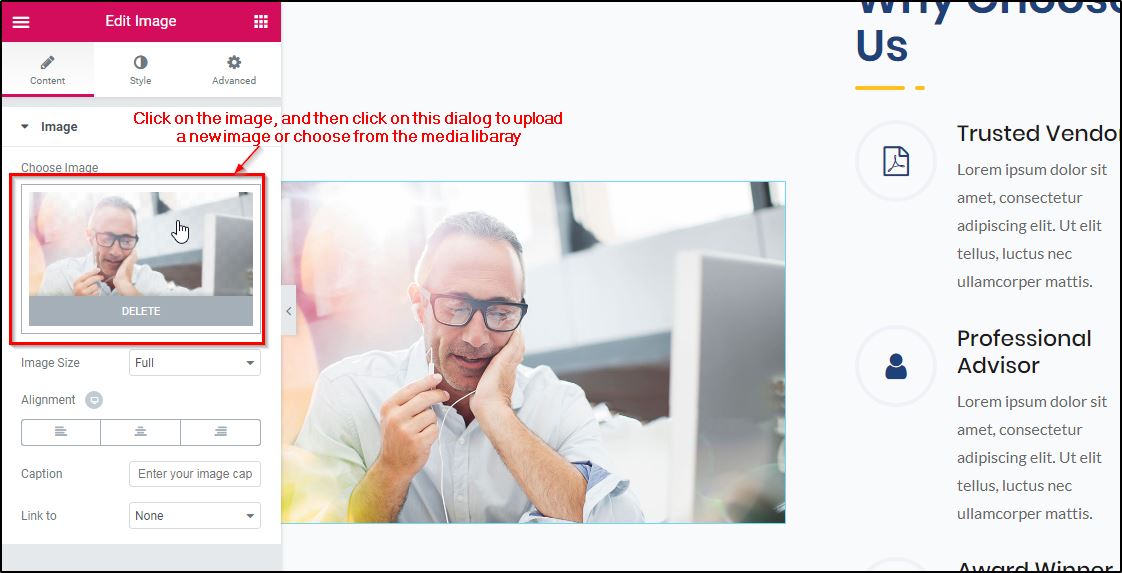
16) Image
Open the homepage with the Edit with Elementor option. Just click on the image to be changed and elementor options pertaining to it will appear in the sidebar. You can click “choose image” option to replace the image.
17) Text section
The text here can be edited easily when opened the page through the Elementor page builder. Just click on the text to change and start editing it.
18) Testimonials
The testimonials block can be edited through the elementor editor. You can click the part of this section (image, message, text) and start editing it right away.
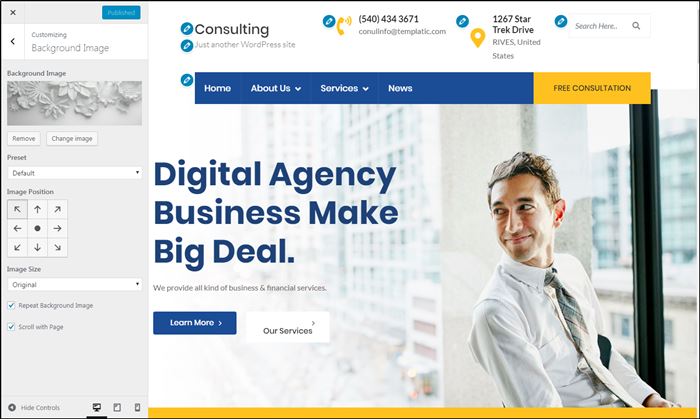
19) Changing the background image
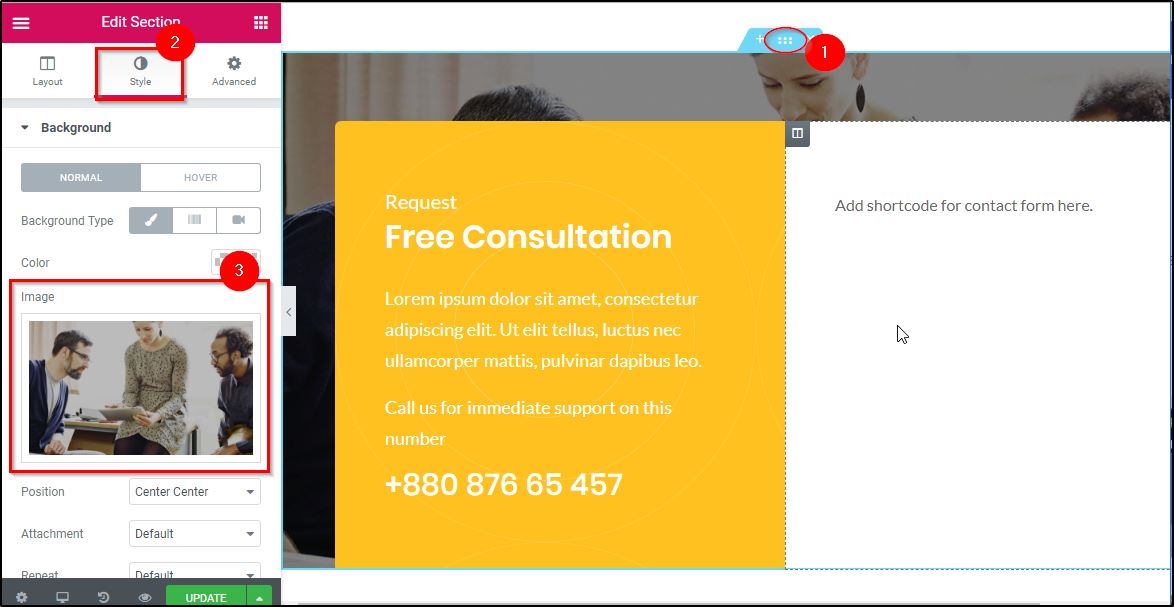
- Click on the blue menu icon on the top of the section
- When the sidebar shows the Elementor options for this section, switch to the Style tab.
- Click on the image, and upload a new one.
20) Contact info
The contact information section contains a text column and a contact form.
Changing the text
To change the text on the image, simple click on the text and start editing it. You can use the editor to write formatted text into it.
Also, using the style tab, you can change the background color of this section. You can set a single color or gradient as the background of this section.
Setting the contact form on the homepage
To embed the contact form here, simply copy the contact form shortcode from the contact section and paste it here.
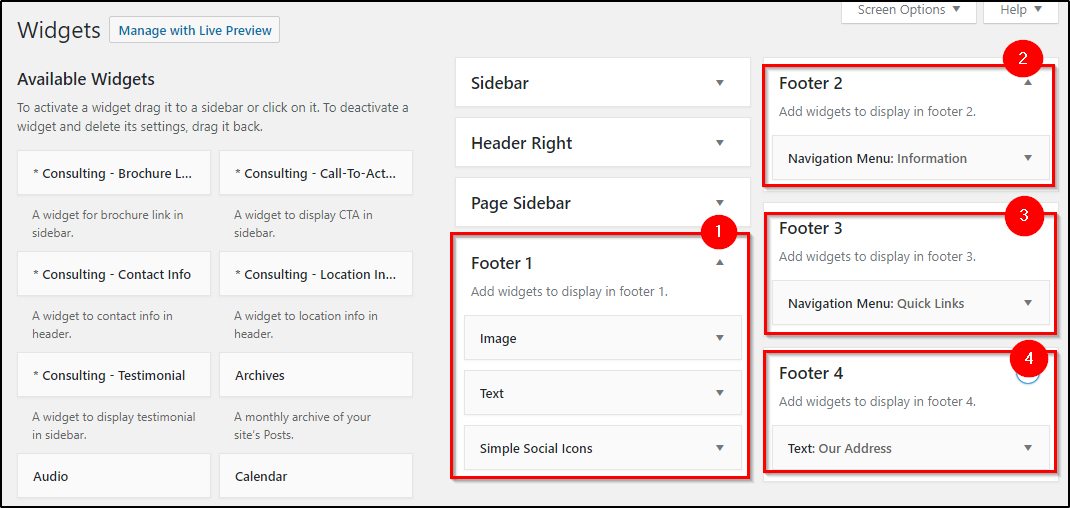
21) Changing Footer
The footer can be changed through the widgets. As you can see the footer is divided into four parts. To change what the footer shows, navigate to Appearance ⇒ Widgets.
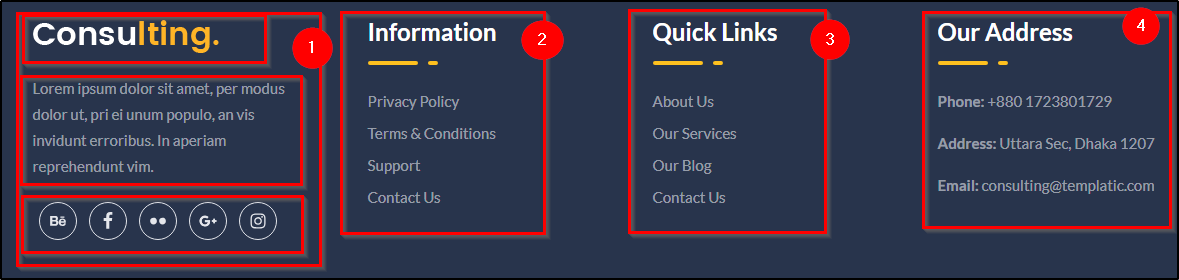
Navigate to Appearance ⇒ Widgets ⇒ Footer 1/Footer 2/Footer 3/Footer 4.
23) Footer credits
Change the footer credit by navigating to Appearance ⇒ Customize ⇒ Footer credit text.
The services page
This is a page to list all your services. The pre-designed service blocks can be easily edited using the Elementor page builder and you can replace the dummy text and images to represent your services.
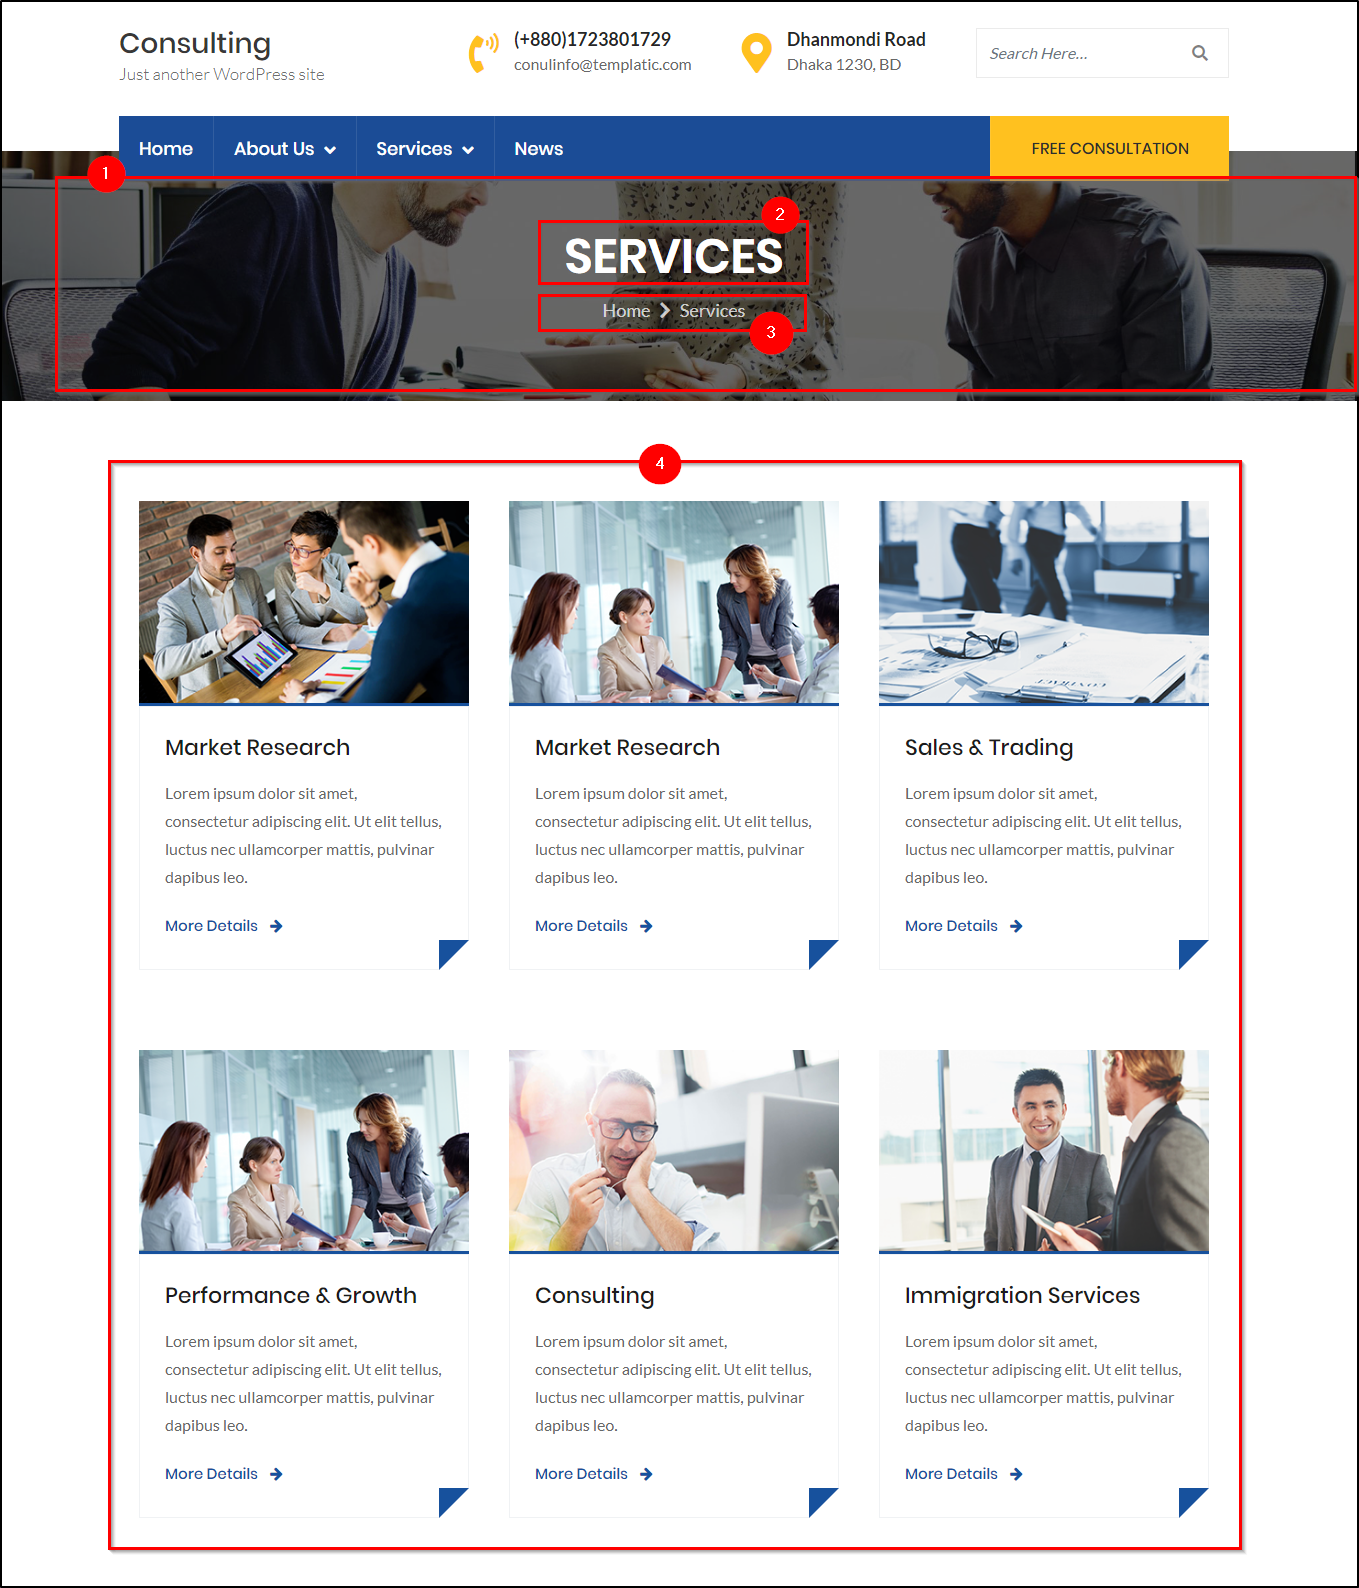
1) The Header image
You can change the header image of you page by navigating to Appearance ⇒ Customize ⇒ Header image. The ideal image dimension is 1920 × 250 pixels.

Note: Make sure that the service page is open in the live customizer’s preview window so that you can watch the changes applied.
2) Header image text
This is the service name. Whatever name you have set for the page will be shown here. Suppose the page name is “Our services”, then the text here will “Our consulting”.
3) Breadcrumbs
This is the breadcrumbs section. If you want to remove the breadcrumbs, you can do it by following the steps mentioned below:
- Navigate to Appearance ⇒ Editor.
- Make sure the file you are editing is the stylesheet (child-style.css). You can select the file you want to edit through the sidebar panel.
- paste the following code in the editor & hit save.
.consulting-page-header .thumb-overlay .breadcrumb-trail.breadcrumbs
{ display:none; }
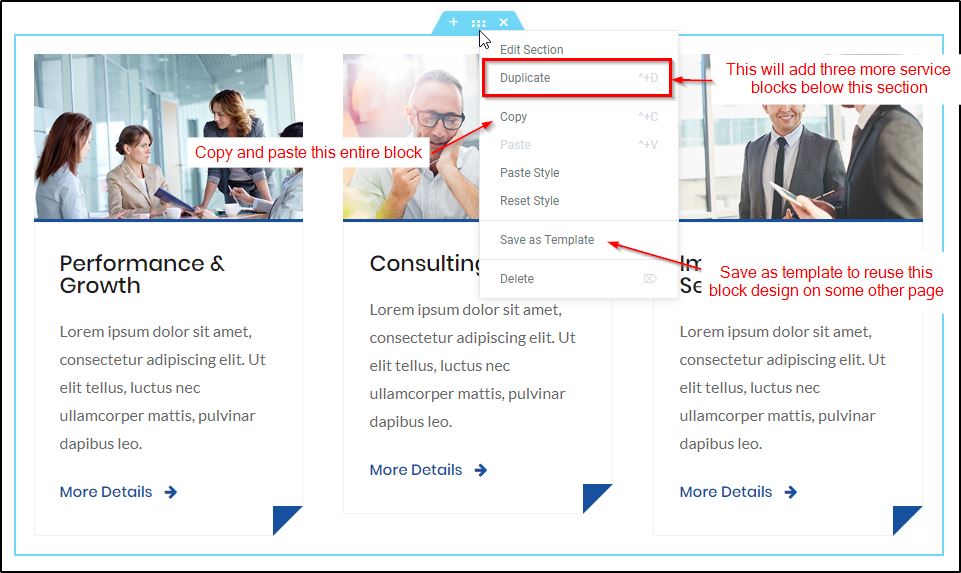
4) Service section
This section is a way to show the glimpse of all the services. You can easily change the structure of this section by clicking the blue section attached to the border of the block. You can choose the columns with varied section width using it.
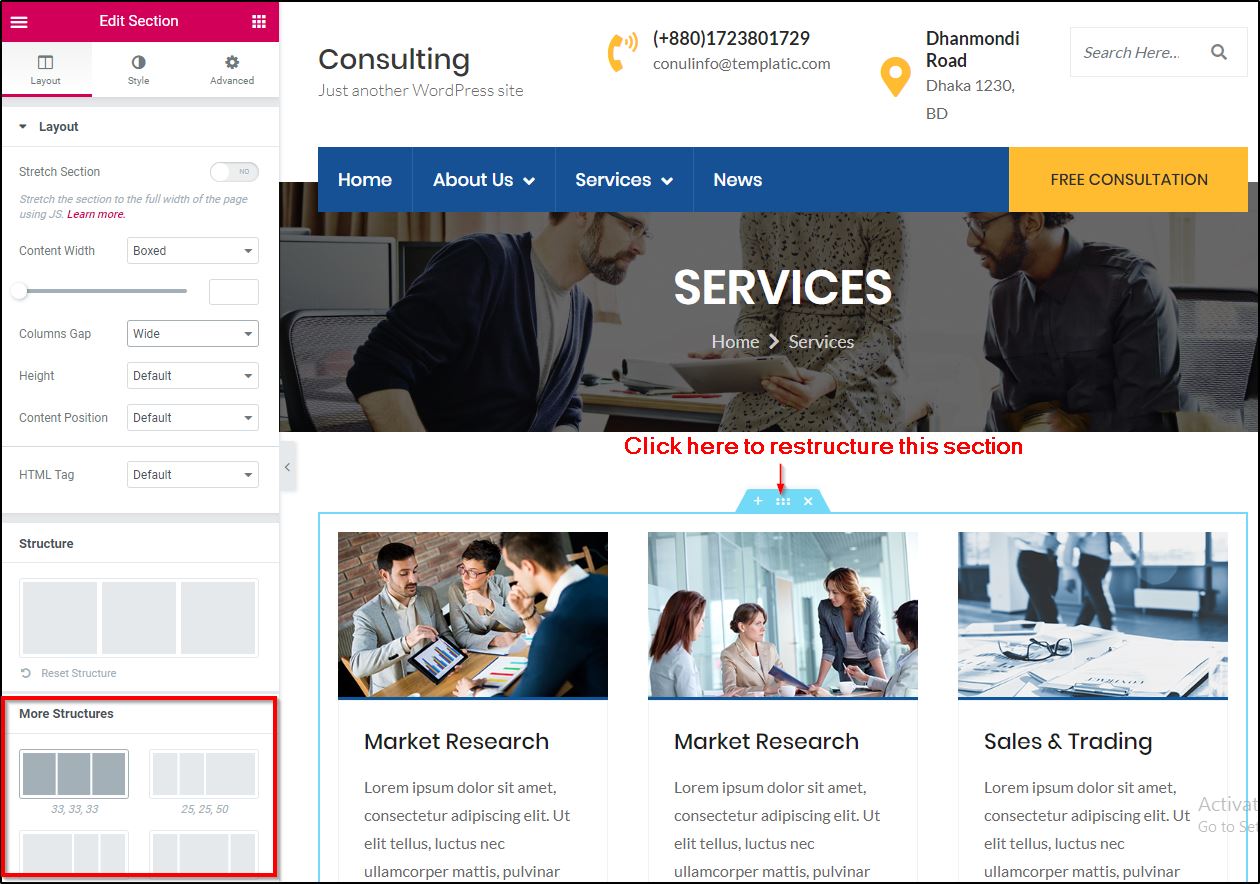
Besides, you can change the blocks that displays services through the Elementor page builder. Just click on the section (image, text, link) and start editing.
If you want to display more services, you can copy or duplicate these blocks. If you want to save this these blocks as template and reuse them.
The service detail page
This is yet another page format or template that you get with the Consulting website template. This can be used as a service detail page where you would like to describe a service/business section in detail.
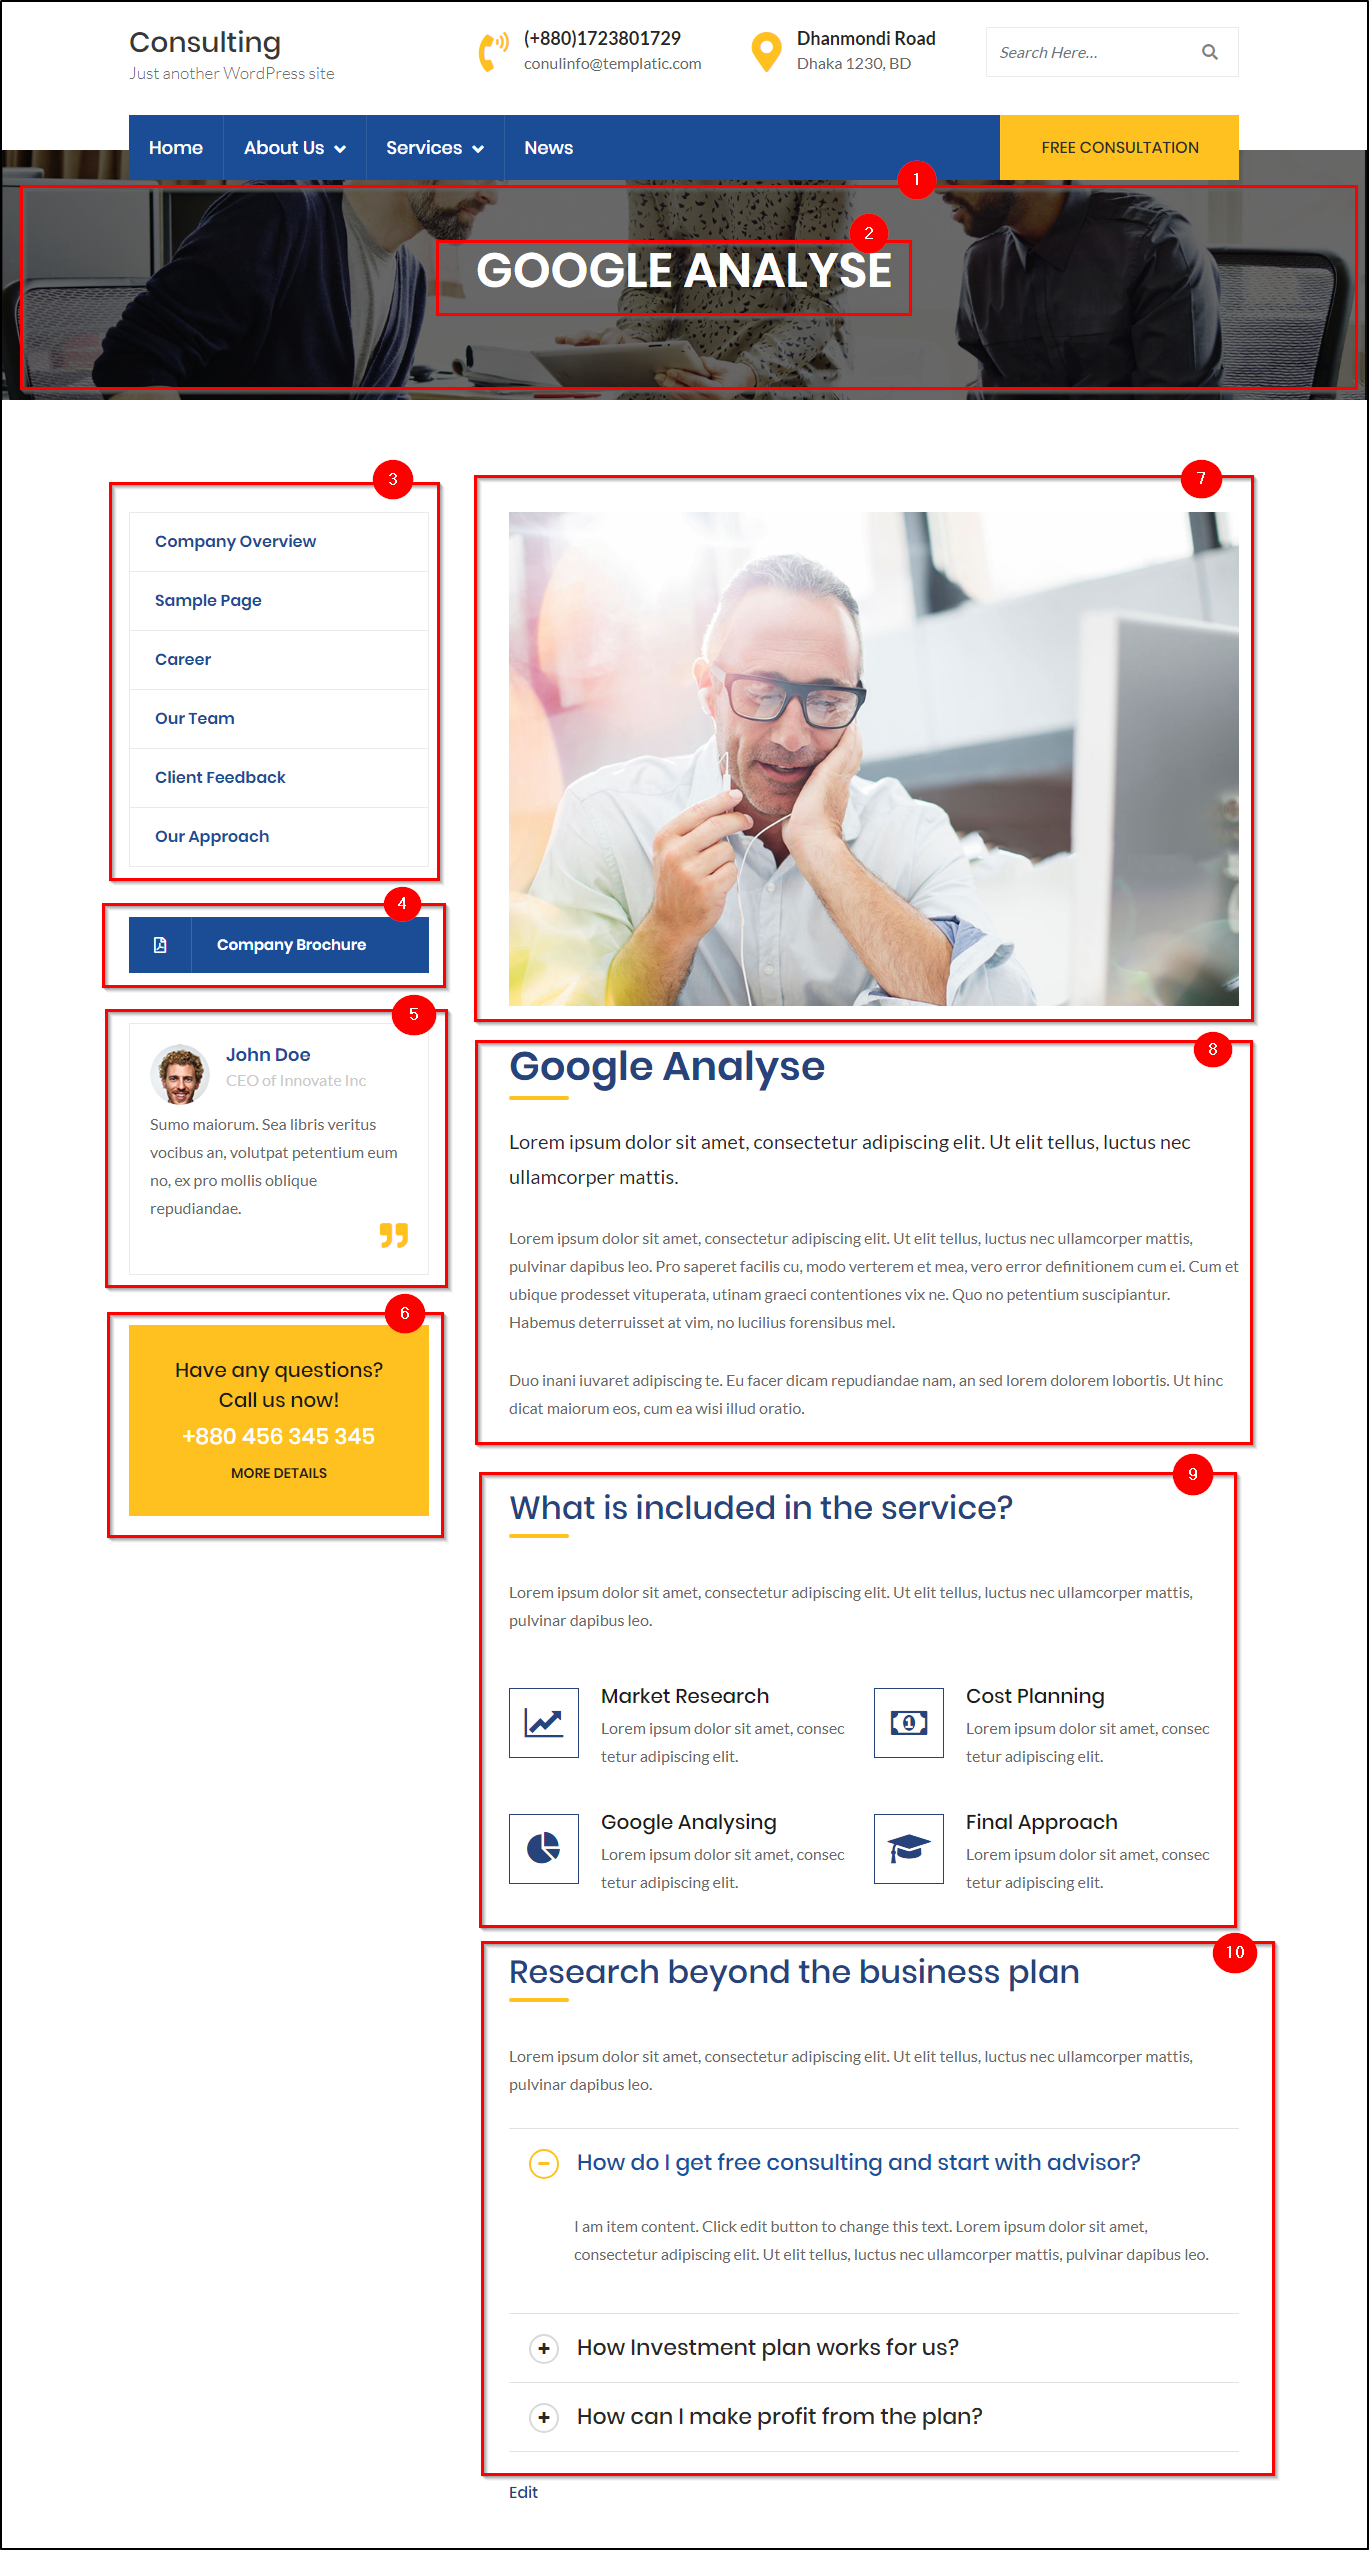
1) The header image
You can change the header image of you page by navigating to Appearance ⇒ Customize ⇒ Header image. The ideal image dimension is 1920 × 250 pixels.
2) Header text
This is nothing but the page name. Whatever name you have set for the service detail page will be shown here. It is same as the service page header.
3) The sidebar menu
This section can be used to display a list of navigation items on you page. This section can be changed through the live customizer. To edit it, navigate to Appearance ⇒ Menu ⇒ Page sidebar menu. Now you can adjust the menu items as per your requirements. 
Besides this, you can navigate to Appearance ⇒ Widgets ⇒ Page Sidebar widget area, and change the ‘Navigation menu’ widget. In the settings, choose “page sidebar menu”.
To change the menu items, navigate to Appearance ⇒ Menu ⇒ Choose a menu to edit ⇒ Page sidebar menu.

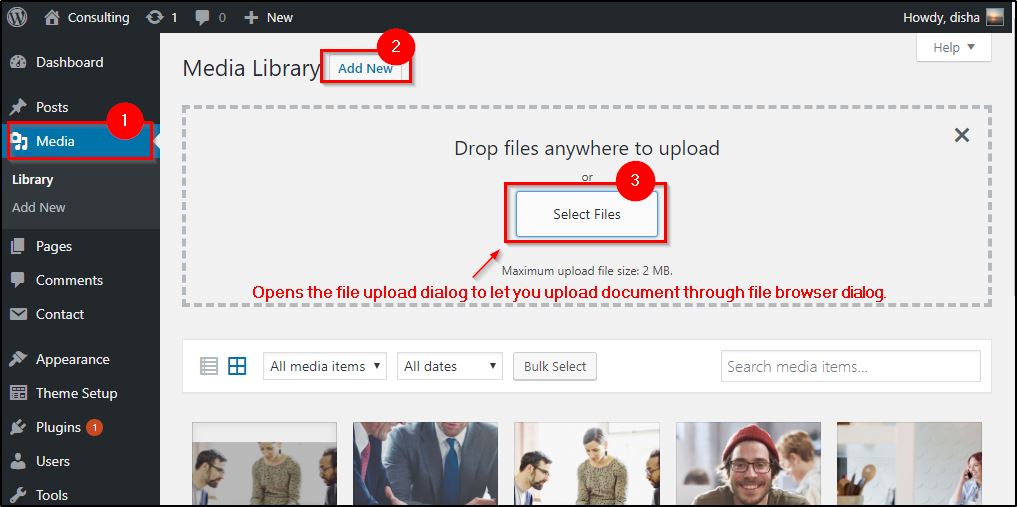
4) Company Brochure
This is a section where you can upload your company brochure or any other similar document. Upload the brochure by navigating to Media ⇒ Add New, select the PDF file you want to upload.
Open the live customizer and click the edit icon beside the company brochure widget.
To change it, you can also navigate to Appearance ⇒ Widgets ⇒ Page sidebar widget area ⇒ *Consulting Brochure widget. You can paste the link here if you have already uploaded the document.
5) Client Testimonial Block
This sidebar widget can be edited by navigating to Appearance ⇒ Widgets ⇒ Page Sidebar widget area ⇒ *Consulting – Testimonial
6) Call-To-Action
The call to action widget can be changed at Appearance ⇒ Widgets ⇒ Page Sidebar widget area ⇒ *Consulting – Call to Action.
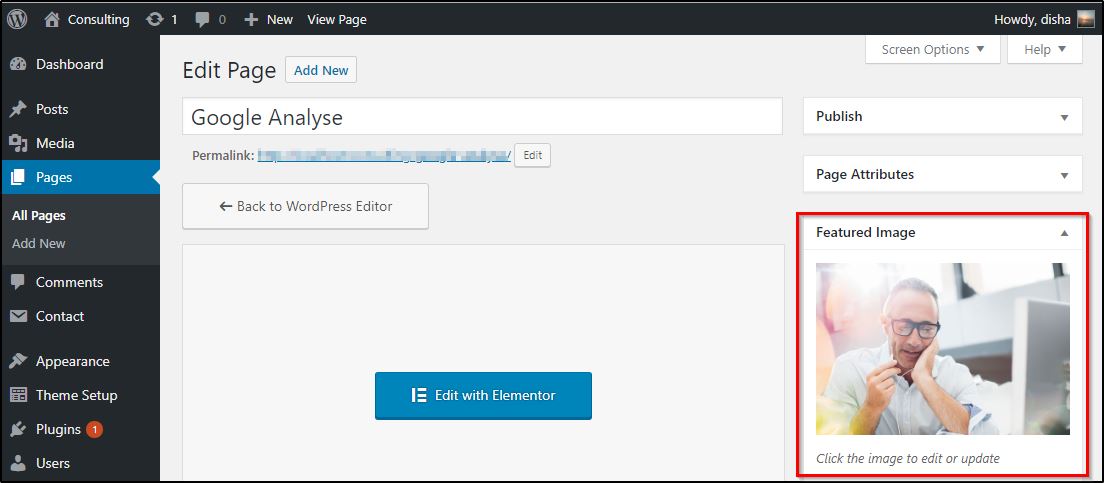
7) Featured image
You can change this featured image. Open the page through WordPress editor by navigating to Pages and open with the edit option. Upload the featured image here.
8) The main text area
This is the main text area that you can easily edit through the Elementor page builder.
9) The service section
The service section can be easily edited through the Elementor page builder. Below is an example of how to do it.
10) The FAQ section
Just like any other Elementor block, this section can also be changed by click and edit options.
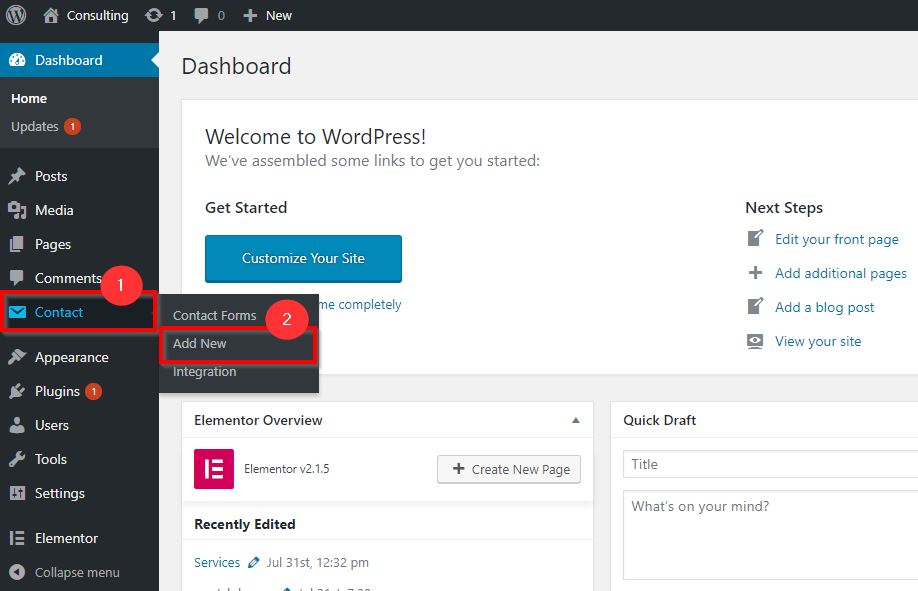
Contact form
For your consultancy website, the contact form will play a very important role.
With the setup wizard, all the necessary plugins will be installed automatically including the contact form. With this plugin, you can create all the contact forms you want by navigating to the wp-admin dashboard ⇒ Contact. To create a contact form, you can click on the “Add new contact form” button, while to view the existing form templates, you can click the first option – “contact forms”.
For consultancies or small business, you need a simple contact form with fields limited to name, email address, and message. So instead of creating a new contact form, you can browse the “contact forms” and use the example templates itself.
However, if you need more fields, you can refer to the contact form 7 documentation and create a custom contact form for your website.
Creating a contact form
With the contact form 7 plugin, you can easily create a custom contact form to collect the data that you want from the users using the form. Here’s the contact form 7 guide on how to edit the form fields to create a contact form. Moreover, there are other tabs to set up the mail, and for advanced settings. Moreover, you can also change the messages to be displayed at certain events like successful form submission, validation errors, wrong email address, etc.
Contact form shortcode
Once you have created a contact form, you can use it on the different pages through the shortcode.
The shortcode will look something like:
[contact-form-7 id=”234″ title=”contact form”]
You can create a text block wherever you want to insert the contact form and then paste the contact form shortcode there to insert the contact form.
With the consulting theme, you can create different contact forms and use them on different pages, as per your website’s requirements.
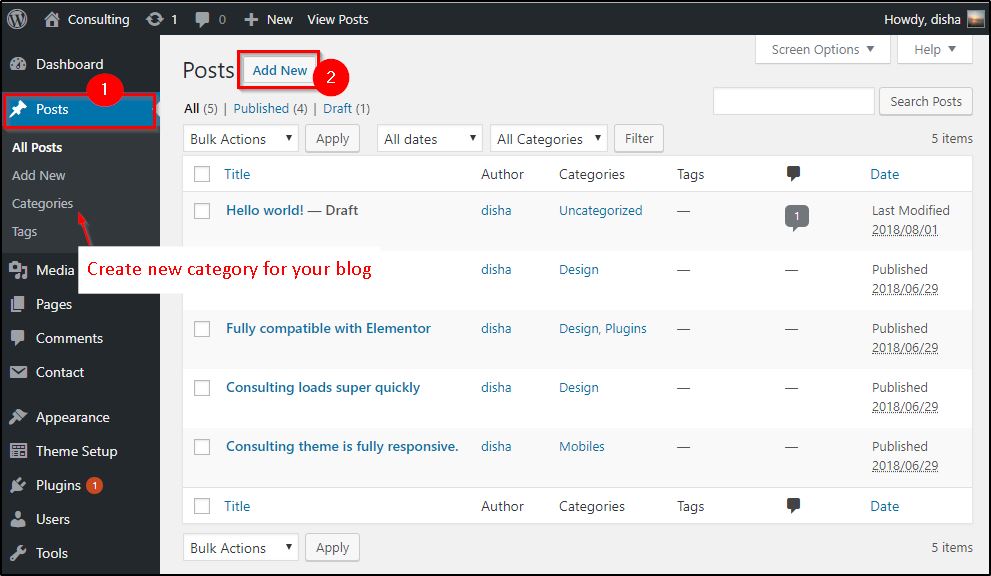
Using Blogs on your Consulting website
You can use your consulting business website as your blogging platform. To start blogging, you can navigate to wp-admin ⇒ posts ⇒ Categories and set the categories for your blogs.
Categories can be anything like business administration, finance, latest news, etc.
Blog page sidebar
You can manage the widgets of blog page at Appearance ⇒ Widgets ⇒ Sidebar. There are many widgets placed by default in the sidebar, you can remove the once you don’t like. Besides, you can rearrange them and also add new widgets too.

Set colors and image background
You can change the color and background of individual sections through the Elementor editor. However, you can also change the colors of your site at Appearance ⇒ Customize ⇒ Theme colors.
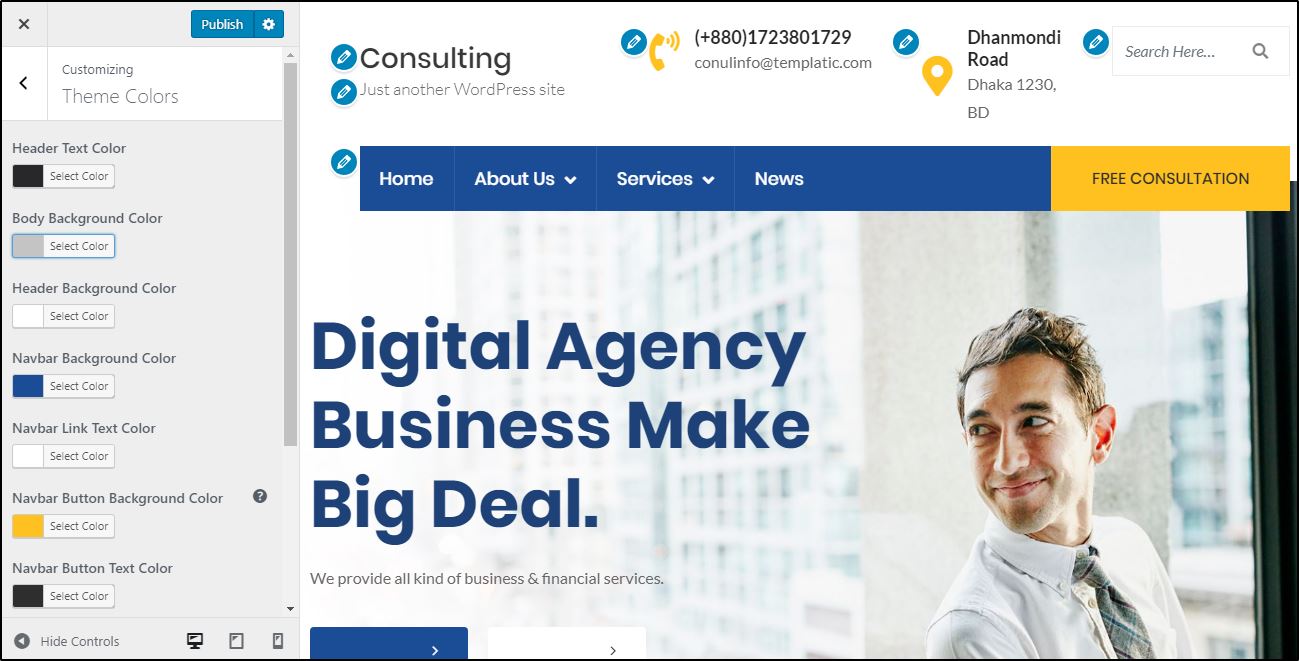
You can also set the background to your website using the image background option. Your site with an image border will look something like this.