Installing the theme
The Furniture Installation file can be downloaded from the members area of templatic.com
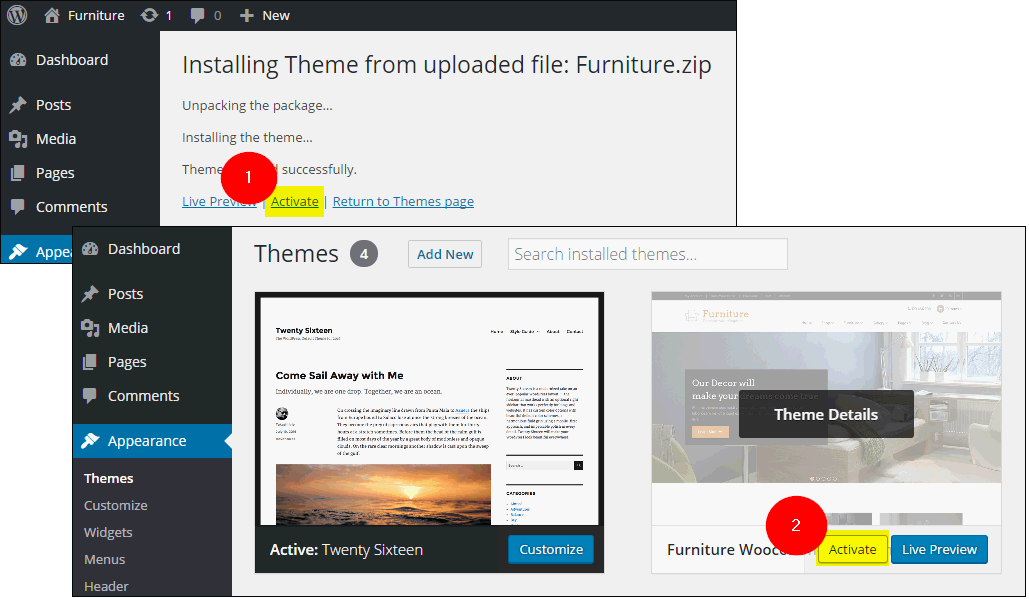
- Navigate to Dashboard ⇒ Appearance ⇒ Themes ⇒ Add new.
- Upload the install zip file of the theme.
- Activate the theme directly as seen at (1) or (2) Navigate to Dashboard ⇒ Themes and activate the theme.
- Once the theme is uploaded Navigate Dashboard ⇒ Plugins and upload the WooCommerce plugin and activate it.
- Repeat step 4 for installing with the relevant plugin files of you wish to add any of the recommended and compatible plugins in the theme.
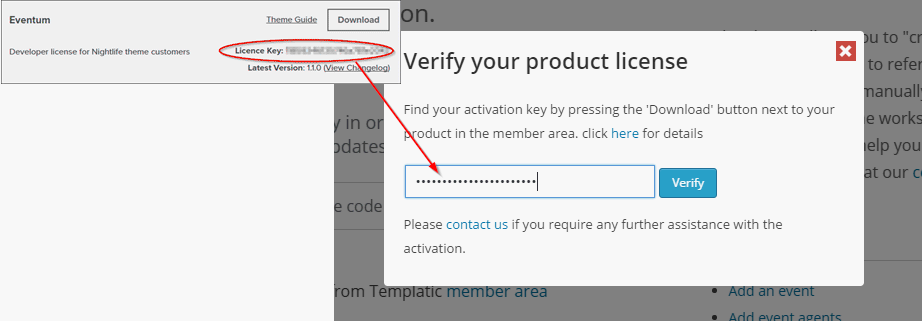
- On being asked for the activation key enter the activation key available at the members’ area. Where can I get my license key?
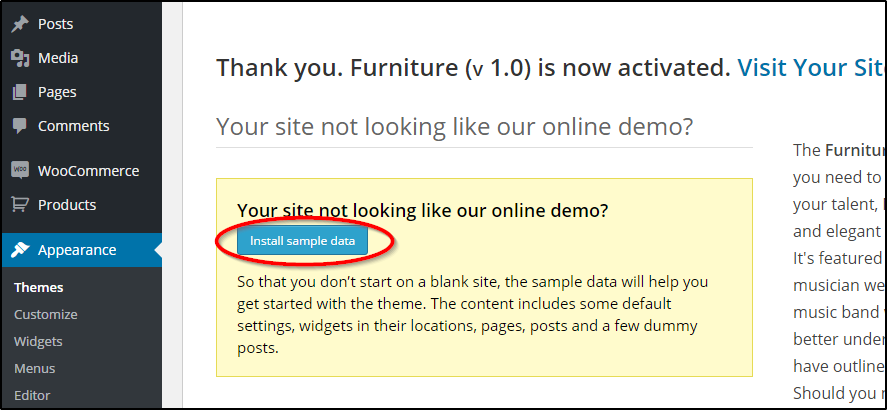
Installing Dummy data
Dummy data is the sample data that is available with the theme file. On getting the theme activated, you will be asked whether you want to populate the site with the dummy data. This data will populate the theme with sample data to make it appear just like the Theme Demo.
Basic steps for WooCommerce plugin right after activation
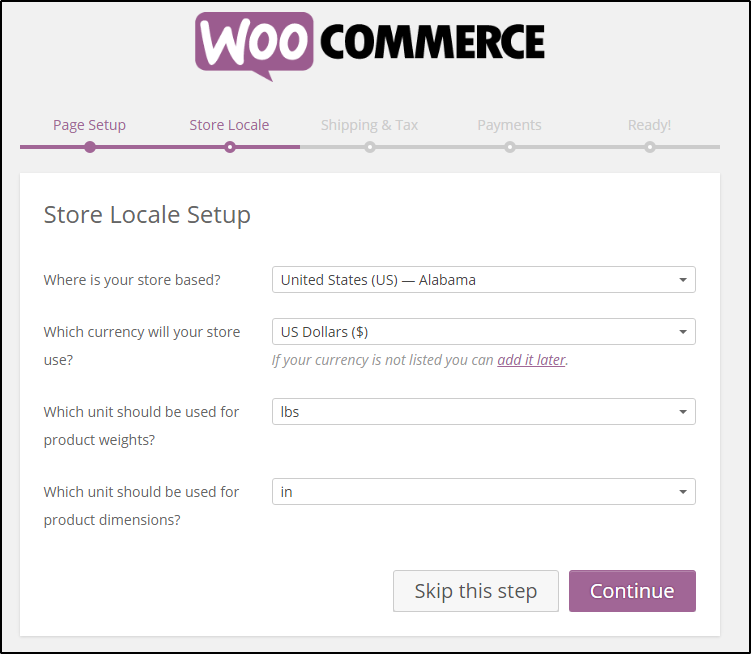
The very first step is to select where your shop is located. Specify the basic details about your shop over here. In this step you have to
- Specify the location of your shop.
- Select the website’s currency in which you want to accept payments.
- The next four options lets you set how the price will be displayed.
- Specify the unit of weight for product description.
- Common unit for describing the product dimension when required.
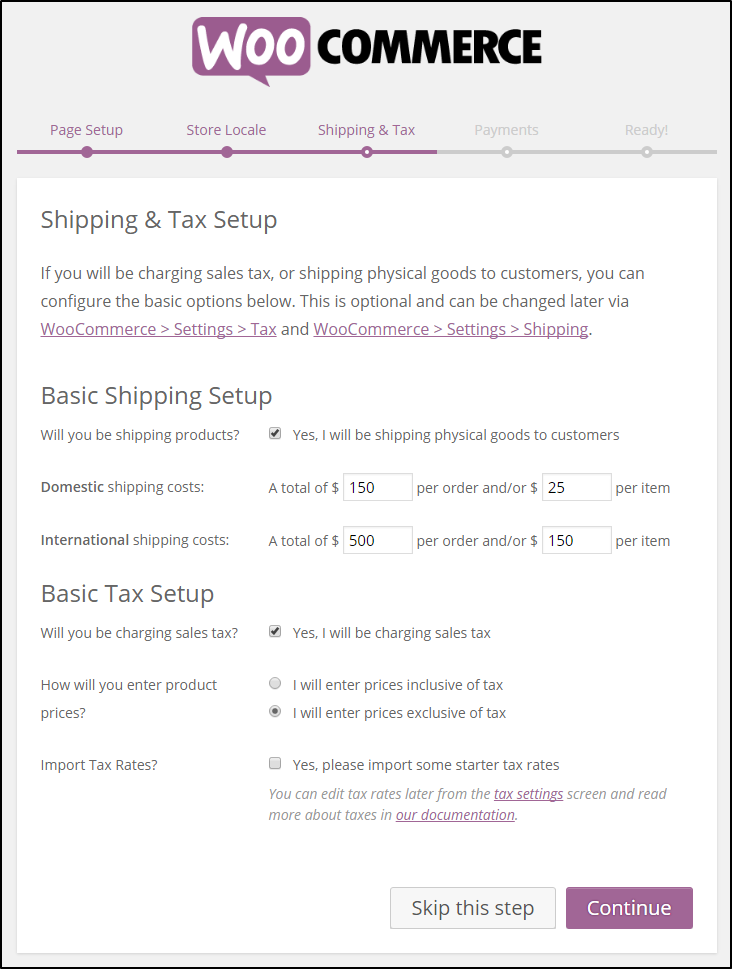
The next step is to setup the secondary options for the shop like shipping and taxation. If you check the checkbox against “Will you be shipping products?” and setup the shipping options at Dashboard ⇒ WooCommerce ⇒ Settings ⇒ Shipping.
Here, Basic Tax Setup options are available. Checking the “Will you be charging sales tax?” and select whether the you desire to add price inclusive or tax or wish to add the sales tax separately. The tax management can be done at Dashboard ⇒ WooCommerce ⇒ Settings ⇒ Shipping.
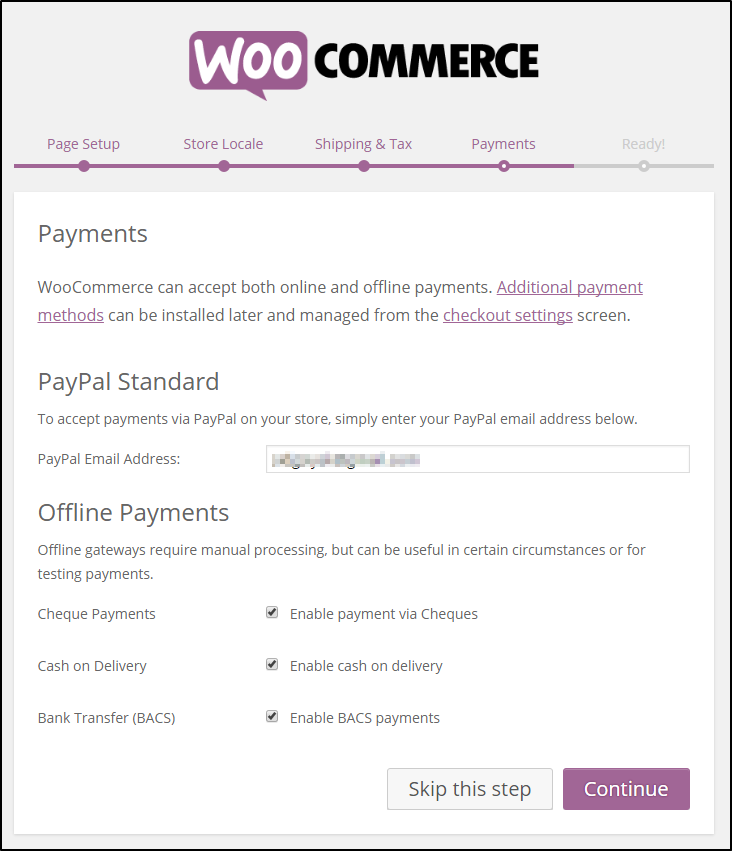
The last step allows to setup the payment options. The paypal service comes integrated but additional payment gateways can be downloaded and installed in the website.
The WooCommerce plugin lets have all the e-commerce functionalities into your website. To start selling your furniture online with the Furniture theme, all you need to do is to install the WooCommerce and the sample data available with the theme.
FTP install
To install the Furniture theme using FTP, follow the steps given below:
Note: If you do not have idea about the use of FTP, Please refer this FTP guide before proceeding.
- Download the installation file and extract it using software like 7-Zip. Use the “Extract here” option; don’t extract into a new folder.
- Navigate to /wp-content/themes/ and upload the extracted Furniture theme folder.
- Assuming you read the above linked FTP tutorial, navigate to /wp-content/plugins/ on your server and upload all the extracted folder of WooCommerce plugin
- Activate and enter the license key available inside our member area.
- Go to the Plugins section again and activate the WooCommerce plugin
- The additional extensions can be installed the same way you installed and activated the WooCommerce plugin.
- Navigate to Appearance ⇨ Themes and activate the Furniture theme.
- While in the Appearance ⇨ Themes section, click on the blue “Install sample data” button to populate your site with dummy data and make it look like our demo.
Managing Pages
Managing the home page
The homepage of the Furniture WooCommerce theme is composed of widgets placed in various widgets area. This section shows what is displayed using each widget in the homepage widget area. Navigate to Appearance ⇒ Widgets, to have a look at the available widgets(On the right side of the screen) and the widget areas(On the left side of the screen).
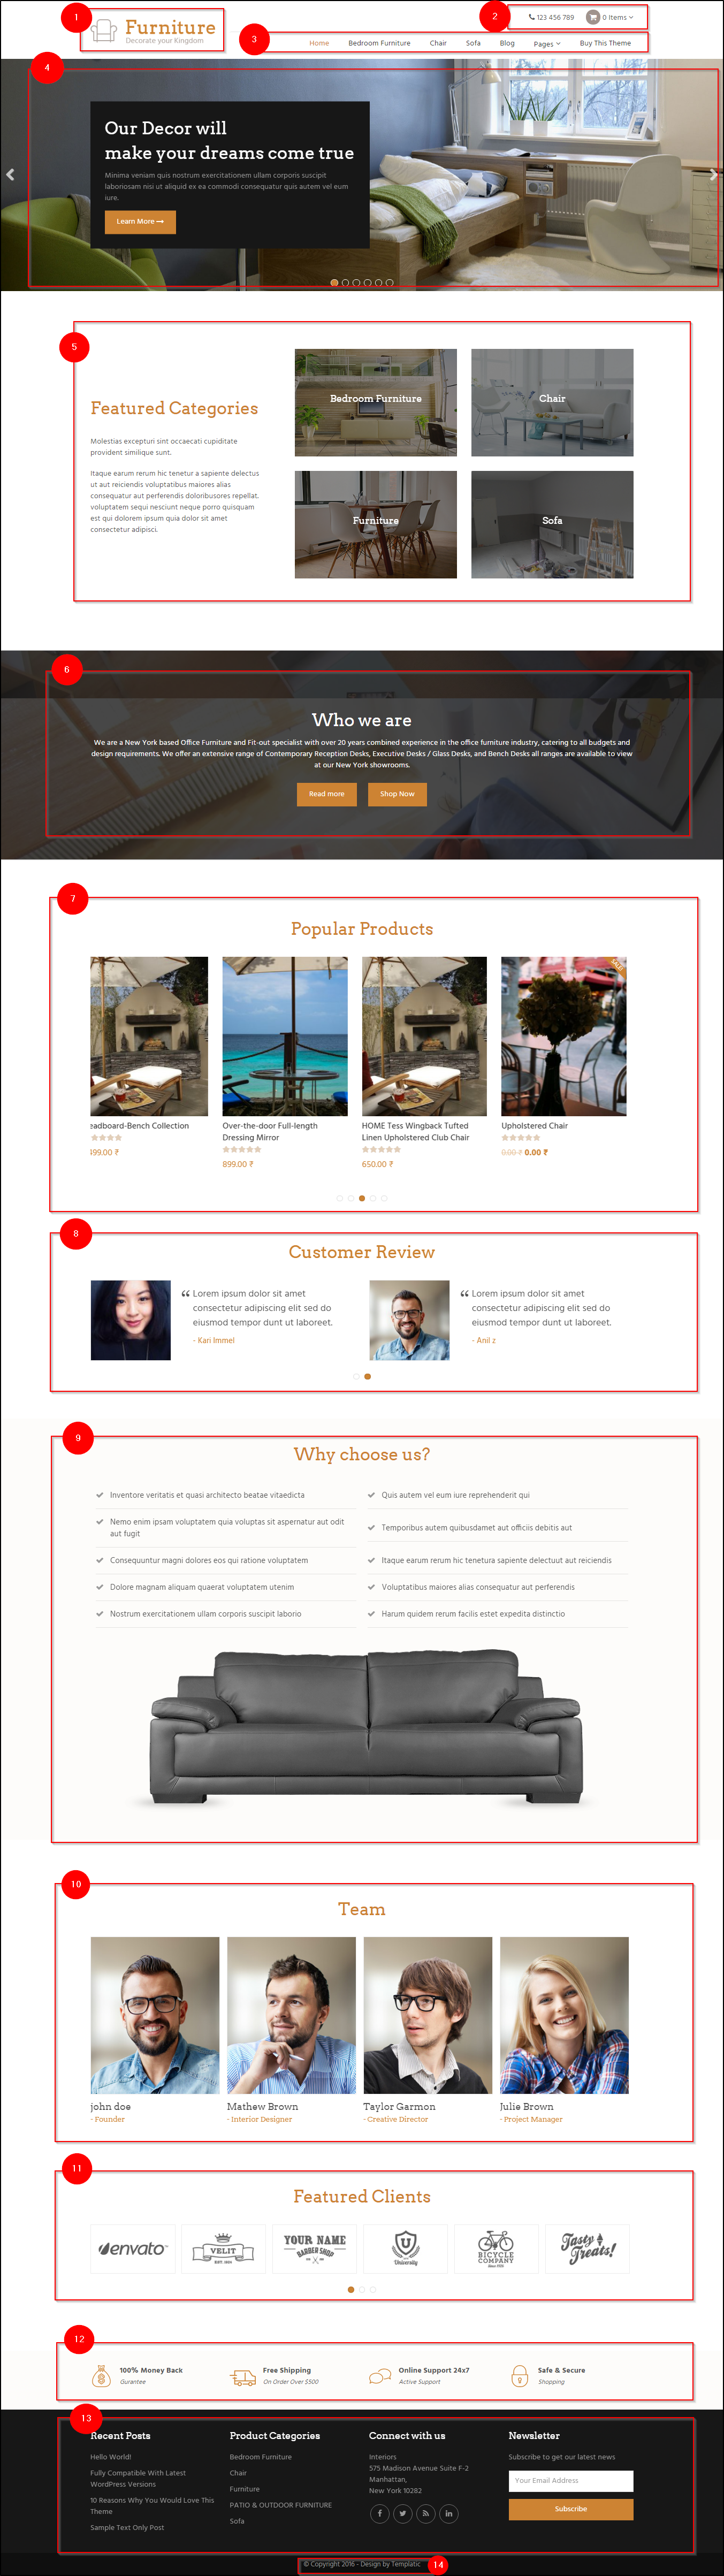
1) Logo and Site identity
Change the site logo at Appearance ⇒ Customize ⇒ Site Logo. If you do not want to set the logo, and use text for site name instead , you can set the site name at Appearance ⇒ Customize ⇒ Site Identity. From here you will be able to set the Site Title and the tagline. You can set the site icon from here that will be shown.

2) The number and cart
The contact number and the cart shown in the topmost line in header come from widgets placed in Header Right Widget Area. The text widget is used for displaying the contact number and the T → WooCommerce shopping cart widget is used to display the cart in the header.
3) Menu
To set the menu, navigate to Appearance ⇒ Menu ⇒ Select “Primary menu” from the dropdown ⇒ start editing the menu.
4) Homepage banner
This area is achieved by placing the T → Homepage banner widget at the Homepage banner Widget area. Through this widget, you can add any number of slider images and configure the text to be shown on each slider image.
5) Categories display
This is the T → Product Categories with details widget placed in the Homepage Content 1 widget area. This widget will allow you to select the categories to be displayed and manage the text that is shown on the left side.
6) The parallax section
The parallax section with text on it is derived with a text widget. Navigate to Appearance ⇒ Widgets ⇒ Homepage Full Content 2 widget area.
7) The popular products
The T → Carousal post slider placed in the Homepage Content 3 widget area, with the title “Popular products” shows the content of this area. The category can be selected and post of that categories will be shown in the slideshow in the carousal slider.
8) Customer review
The Customer review section uses the T → Testimonials widget, placed after the T → Carousal post slider widget in the Homepage Content 3 widget area.
9) The “Why choose us?” section
This section is derived by a very simple code placed in a text widget at Homepage Content 4 widget area.
10) The team
The team area can be used to introduce your staff and the business team. T → Carousal slider is placed into the Homepage Content 5 widget area to display the slider with the team members.
11) Featured Clients
The featured clients shown on the homepage also uses the T → Carousal slide widget placed in the Homepage Content 5 widget area with different configuration to show the clients logos.
12) Above footer
The above footer section contains well-formatted informative text and icons. This area is composed using the text widget in the Above footer widget area.
13) Footer
The footer widget area displays the content in four partitions. The widgets used in the footer shown in the image are
- Recent posts
- WooCommerce product categories
- T → Social Media
- T → Newsletter
14) Footer credits
The footer credits at the extreme bottom of the home page can be changed at Appearance ⇒ Customize ⇒ Footer.
Category page setup
The WooCommerce sidebar is the sidebar of the category page. Navigate to Appearance ⇒ Widgets ⇒ WooCommerce sidebar.
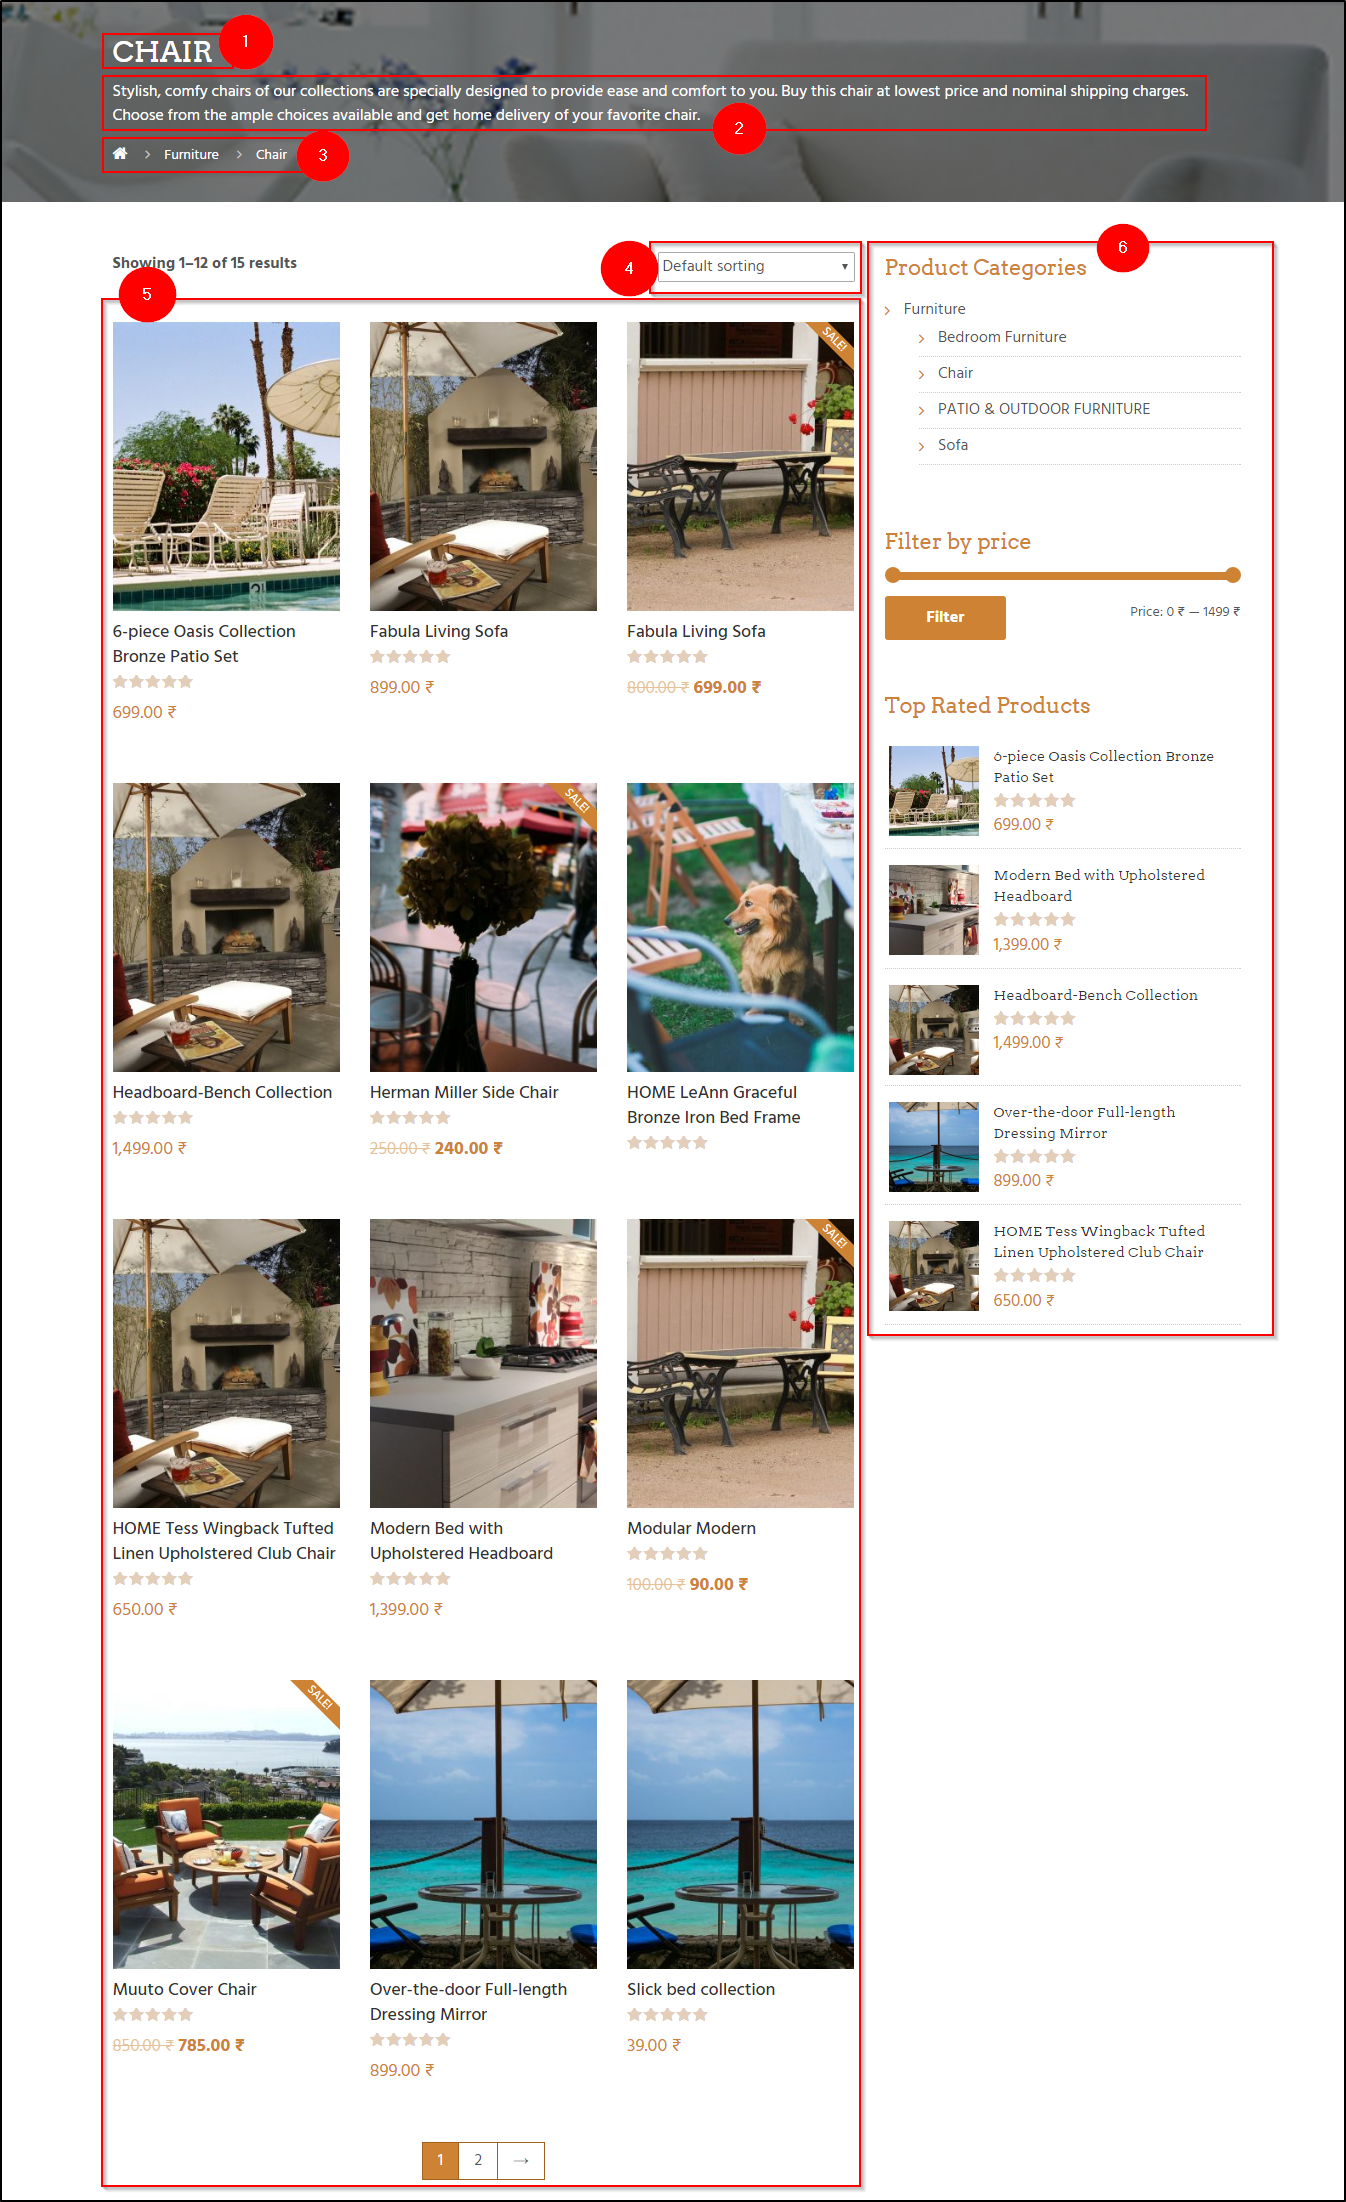
1) Category name
The Parallax section shows the name of the category for which the products will be shown on the category page.
2) Category description
The category description shows a few lines to describe the selected category. The Category description can be added while creating the category. Navigate to WooCommerce ⇒ Products ⇒ Categories and add the category description.
3) Breadcrumbs
The breadcrumbs are shown on the category page. To stop showing it copy the following code and Navigate to Appearance ⇒ Custom CSS Editor, and paste it there.
.breadcrumb {

display: none;

}
4) Sorting options
The sorting options are for the visitors to sort the products listed on the category page according to their requirements. The default sort order of the products on the category page can be set at WooCommerce ⇒ Settings ⇒ Products ⇒ Display ⇒ Default Product Sorting.
5) Products list
This area shows the grid of products on the category page. The number of products shown on the page at once can be specified at Dashboard ⇒ Settings ⇒ Reading ⇒ Blog Pages show at most.
6) Sidebar
The sidebar of the category page can be changed by adding and removing widgets to the WooCommerce sidebar area at Appearance ⇒ Widgets ⇒ WooCommerce sidebar.
The widgets that are shown in the image are the :
- WooCommerce Product Categories to show the categories selection option in the sidebar
- WooCommerce Price Filter to show a price filter bar
- WooCommerce Top Rated Products
Extensions
Additional functionalities can be included into your Furniture theme using the following plugins
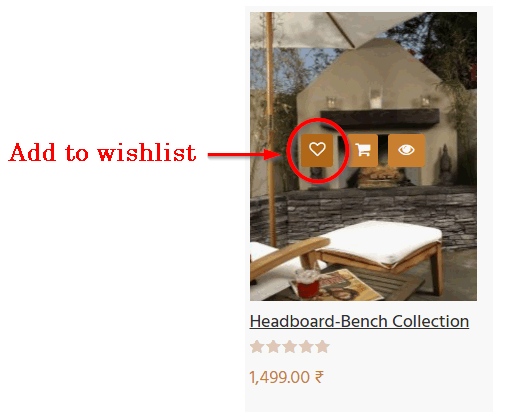
YITH WooCommerce Wishlist
Adding this plugin provides the option to add a product to wishlist. A wishlist page will be created and an option for add to wishlist will appear on the category page and the product detail page. Click here to download this plugin.
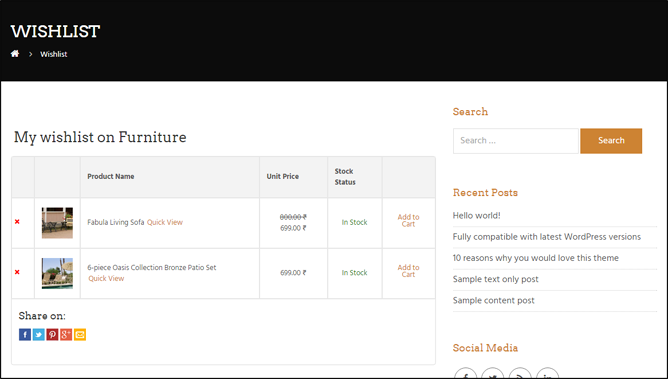
By this plugin a wishlist page will be automatically created. If you don’t find the wishlist page in the list you can easily create it by placing a short code into a new page and naming the page accordingly. The wishlist can be accessed by a page called “wishlist”. You can provide the link to the wishlist page in the menu. The following is a screenshot of a wishlist page.
The wishlist page will show the widgets of the “primary sidebar” widget area. To configure it navigate to Appearance ⇒ widgets ⇒ Primary sidebar widget area and change the widgets placed here based on what you want to show in the sidebar.
Use this guide to setup this plugin and integrate the wishlist facility into your website.
YITH WooCommerce Zoom Magnifier
Installing this plugin will enable zooming the product image portion when the mouse pointer lands there. This is an advanced feature for an e-commerce website selling products online. All you need to do is download and install this free plugin. To see the effect, take your mouse pointer on the product image on this page. The documentation of this plugin is available here.
YITH WooCommerce Compare
This plugin will enable compare the product with the other products. This plugin will add a button named “Compare” in the product detail page. Clicking this button will add the product to the compare list. When you go to another product and press the compare button, the pop-up will appear and show all the products and their details side by side so that the visitors can easily compare products of their choice on your website and choose the one they like the best from among them.
The plugin lets you decide what fields you want to show in the comparison pop-up. There’s a pro version available of this plugin for extended features. The free version can be downloaded from here. This guide will help you through the installation and use of this plugin.
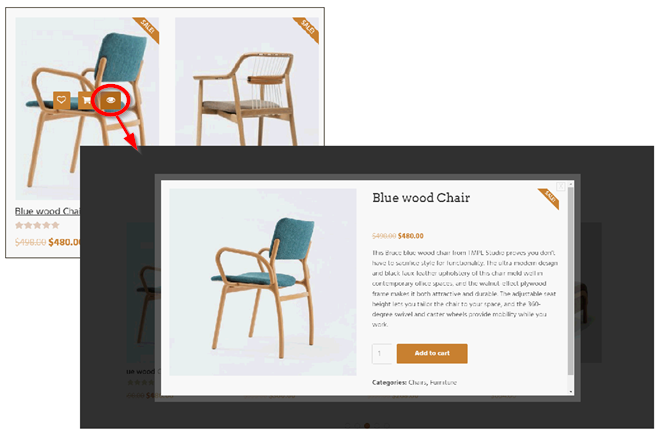
YITH WooCommerce Quick view
The quick-view plugin as the name suggests will enable the visitors to get a quick view of their desired product in a pop-up window. The plugin can be downloaded from here. This guide will help you with the installation and setup of the quick view plugin.
Other Settings
How to enable the RTL mode for the theme?
If you want to create a website in RTL Mode using the Furniture theme, that can be easily done. To enable the RTL mode navigate to Appearance ⇒ Theme Options ⇒ Is RTL?
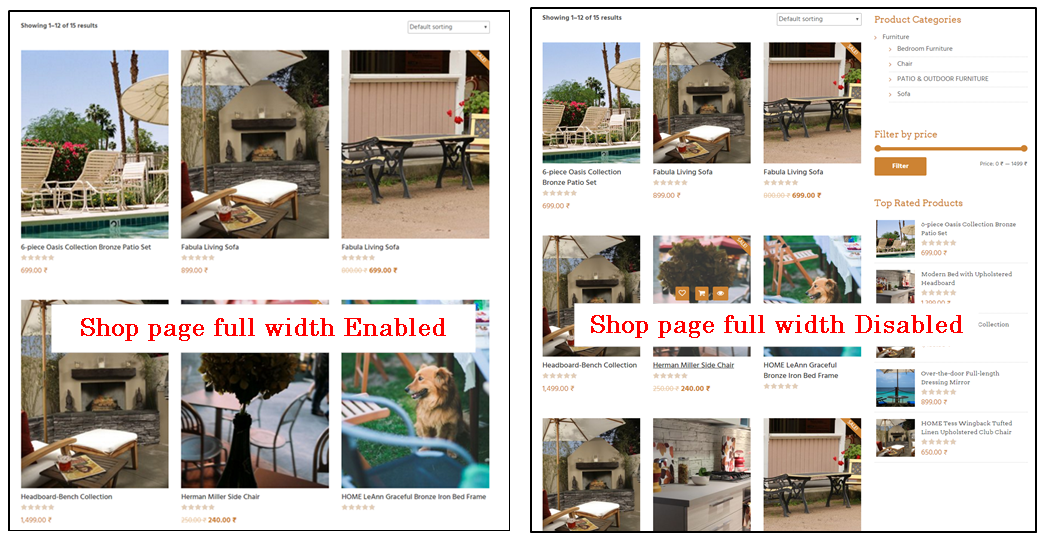
What is shop page full width?
This option is available at Appearance Theme settings shop page full width? With this option enabled, the shop page, i.e category page or product page will stop displaying the sidebar.
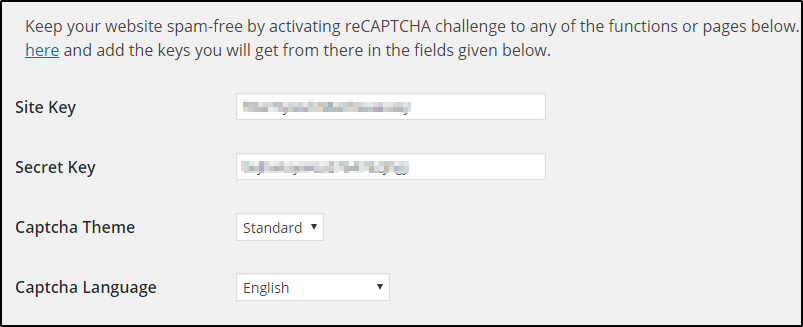
How to enable reCaptcha for the contact page?
To enable reCaptcha navigate to Appearance ⇒ Theme Options. Follow this link to get the required details and enter them here.