A common question among new Templatic theme users is “How do you replace the logo?” There are two ways to do it and either way is fine. However, there is one tricky part you need to understand first.
Website images come in many different formats. The most common are GIF, JPG, and PNG. Templatic theme logos are PNG images. Not only that, they are transparent PNG images. It means besides the logo in the image, everything else is transparent and you can simply place this transparent PNG image on any part of your website. Regardless of the background color or pattern, the image and your website will fit seamlessly. That’s the magic of transparent PNG images.
Here’s an example using the eShop theme logo:
![]()
It looks weird. I know. That’s because I opened up the logo.png file of the eShop theme in Adobe Photoshop (a tool for editing images) and saved the screenshot of it while the image is active in Photoshop.
The checker-board pattern behind the logo is the default background pattern of Photoshop, not of the logo. This pattern is what you see in Photoshop when your image’s background is transparent instead of a white, blue or another background color. It goes back to my point above, whatever background color or pattern you place the transparent image on top of, it fits in seamlessly.
If you are using Adobe Photoshop, here’s how to create a transparent logo PNG image:
- Create a new file to draw your logo, but make sure the background is transparent.
- Draw the logo then go to File > Save for Web & Devices…
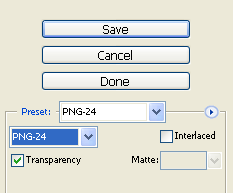
- Select the file format Transparent PNG-24.
- Save it as logo.png
Below are screenshots to help you follow the instructions above:


Now that you have a new transparent logo.png file, let’s focus on the two ways you can replace the logo in any Templatic theme.
First Way
Upload the new file to the correct folder to replace the default logo.png file that comes with the Templatic theme. Because you’ve saved the new logo file as logo.png, when you upload it to the correct folder, the server will ask you if it’s okay to overwrite the old logo file with the new one. Agree to it. From then on, whenever you try to go to the logo.png file on your website, you will see the new logo instead of the default logo.
In this eShop example, the logo.png file is located at wp-content > themes > eshop > images > logo.png.
If you don’t know how to upload to your web hosting server, ask your web host for your account’s FTP information first then download Firefox and install FireFTP. Here’s a simple tutorial on how to use FireFTP.
Second Way
- Upload the new logo to anywhere you want on the web.
- Copy the online address or URL of the file
- Log in to your site Administration area
- Go to Design Settings
- Click on the Header Logo Image tab
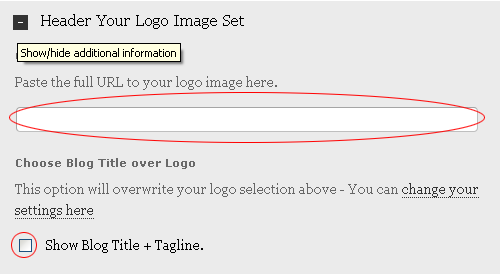
- Paste the new logo URL in the logo address box
- Make sure the Show Blog Title + Tagline checkbox is not checked
- Click on Save Changes
- Go back to the front page of your website and refresh it to see the new logo

That’s all you need to do to replace a logo :).
