Introduction
Job Board is a theme where Companies or Employees can post different jobs and resumes. Your users can pay you for posting jobs on the site. There are two custom post types we have provided in the theme: Jobs & Resumes. We have also provided two new user types: Job Provider & Job Seeker.
Job Provider will post Jobs on the site and Job Seeker will post Resumes on the site. There are multiple custom fields given for both where they can manipulate their Job’s or Resume’s information or data. Job Provider can also post multiple Jobs for his company. There are many other features which are explained in the guide below. So I would like to complete my introduction here and let’s start a tour of the theme.
Getting Started
Installing Job Board
- Connect to member area and expand the Job Board section under My Downloads. Download the theme to your hard drive.
- Connect to your WordPress dashboard (wp-admin) and navigate to Appearance -> Themes. Click on the Install Themes tab and then on Upload. Use the Browse option to locate the job board zip file on your hard drive – then click on Install Now. After the installation process is finished activate the theme.
In case WordPress rejects the .zip file use FTP to install the theme:
- Extract jobboard.zip then upload to /wp-content/themes directory
- Once uploading is done connect to the WordPress dashboard and activate the theme
- If you run into more problems during installation please visit our Installation Guide
For detailed instructions on using FTP please click here
Need help with installing the theme? Hire us!
Facing Problems in installing the theme? Don’t worry, we’ll do that for you, just click here!
Installing Sample Data
Do not edit the sample data because in case you delete it, your modifications will be lost. Always insert fresh data.
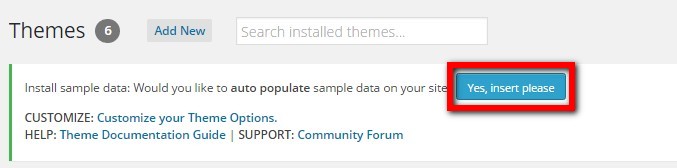
If you want to auto install the sample data then just click on “Yes insert sample data please”. Theme will be activated & completely installed with some added sample content and categories by default so you can start using it right away.
If you wish to delete the sample data that we populated in your site then you can remove it by clicking on “Yes Delete Please!”.
Basic Settings
Go to WP-admin → Job Board → Basic Setting. You can find some settings for pages, navigation, etc… Here is detailed explanation for different settings.
Navigation Settings

Go to WP-admin → Job Board → Basic Settings → Navigation Settings. Here you can set various navigation options:
a) There is a search widget, job button and resume button in this area which you can set this way:
Job Button: Select “Yes” in “Show ‘Job’ link in Main Menu” if you want to display Job button. It will list all the jobs from your site on a page.
Resume Button: Select “Yes” in “Show ‘Resume’ link in Main Menu” if you want to display resume button. It will list all the resumes from your site on a page.
Search: This is a widget named as “T → Search By Job and Location” and placed in “Header: Search Area”.
b) This is the area where you can place your own menu items using “Custom Menu” widget of WordPress. You can place this widget in “Header Navigation” area. Here are some tutorials you can use to create an effective menu – Article & Video.
c) Post a Job/Resume: Select “Yes” in “Display ‘Post a Job’ Button” if you want to display Post a Job button. Select “Yes” in “Display ‘Post a Resume’ Button” if you want to display Post a Resume button. All/ Full Time/ Part Time/ Freelance are the different job types given in the theme. These tabs list the jobs depending on their type. The Tabs, options can be differed from “Job Type” custom field in “Manage Custom Fields” section.
Note: If user is logged in as a Job Seeker then he will be able to see the “Post a Resume” button and if he is logged in as Job Provider then he will be able to see Post a Job Button.
Job Detail Page Settings

In Basic Settings → Job Detail Page settings you can find some options to set up the job detail page.
- This is job content area. It contains the data of the job that user have entered while adding the Job.
- Other Jobs: If you want to show other jobs from the same company then select “Yes” in “Show Other Jobs Listed by the Company”. You can also specify the number of jobs you want to display there using “Number of Other Jobs Listed by the Company” field. There is also a widget for the same purpose if you want to display other jobs in sidebar. This widget is named as “T → Other Jobs Listed by the Company”.
- Similar Jobs: From the field “Number of Similar / Related Jobs”, you can specify how much number of similar jibs you want to display. Similar Jobs section depends on the category of your job.
- Comments: If you want to let your users comment on the Jobs then select “Yes” in “Wish to Enable comments?”.
- Social Icons: Select “Yes” or “No” in different options like Print, Share, RSS, Email To Friend, etc… to display or hide them in front end.
- The sidebar affecting the Job detail page is named as “Job Detail Page: Sidebar”. You can find at WP-admin → Appearance → Widgets.
Submit Job Page Settings

Different settings for the different fields given on the form can be managed from WP-admin → Job Board → Advanced Settings → Manage Custom Fields. You can also add your own fields for the Jobs on this form using this section. It is explained in brief in Manage Custom Fields section.
For the fields which are not given in Custom field’s settings or the other related settings is given in Basic Settings → Submit Job Page Settings. You can find the below options to set up the submit Job Page.
Show WP- reCAPTCHA on: You can display the captcha on your Post A Job form or on new user registration form using these option.

Price Packages Type: You can choose here either your users will pay per post or pay per subscription. If you’ll choose pay per subscription then the users will be able to post unlimited posts until their subscription ends. Make sure to select at least one option from here to activate the price packages.
Currency Settings: You can change your currency, symbol, position, etc… from the fields given here like Add Currency Code, Add Currency Symbol, and Currency Symbol Position.
Default Status When Published: You can set the default status of the job when it is posted on the site by any user. If you want to approve the post first and then publish it on the site then you can set this option as “Draft”.
Default Status When Expired: You can set the default status of the job after it get expired in Job Listing Page Settings → Default status for job expired listings field.
Job Expiration Mail: This is a field where you can specify the number of days before the expiration date, pre expiry notification Email will be sent to Job Poster. It is named as “Job Expiry Email Notification” in “Job Listing Page Settings”.
Prices: Prices given on this from can be managed by “Manage Price Packages” section in Advanced Settings.
Submit Resume Page Settings
Different settings for the different fields given on the form can be managed from WP-admin → Job Board → Advanced Settings → Manage Custom Fields. You can also add your own fields for the Resumes on this form using this section. It is explained in Manage Custom Fields section.
If you want to display captcha on the submit resume page then go to Basic Settings → Submit Resume Page Settings and select “Yes” for “Show WP-reCAPTCHA on”.
Wherever on the form you are activating captcha settings make sure you have activated “WP- reCAPTCHA” plugin and given API keys in it.
Advance Settings
Manage Price Packages
Price packages are used when you want to charge your users for posting on your site. There are main two things which affect the total charge or where you can define your charges or amount:
a) Price Package Price: Go to Advanced Settings → Manage Price Packages. Here you can add/edit price packages as per your need. I have explained here the different options given to create the price package.
- Price Package Title: It is just simply defines a title for the package. It represents your package in frontend.
- Description of the price package: You can have a small description for the price package. This description will be displayed in the frontend on Post A Job page below the price package title.
- Package Cost: Simply, it indicates the cost for the package.
- Billing Period: This field indicates for how much time the post will remain published on the site.
- Status: From this option you can activate or deactivate the package. If it is in active status then only it will get displayed in front-end. This is very useful when you want to give some special offer packages for some time and after deactivating it you still need it in backend to activate in future.
- Recurring: If you have selected “Yes” here then your users will automatically charged when their billing period will get over and the post will published again. Please note that this option works only for PayPal.Also make sure that in your PayPal account – Auto Return has been set to “on”. This will allow the user to redirect to your site(Success page) after doing payment.
Note: Make sure to select any one Option in “Price Packages Type” field in “Submit Job Page Settings”.

b) Feature/Non-Featured Price: You might want to charge users extra amount for featured listings within a price package. In add/edit price package, below you can find a section named “Price settings for Featured listings”. Here you can define those charges. There are three fields given:
- Status: You can activate or deactivate additional price used for featured listings.
- Amount to be charged (For featuring on Home Page): Define your charges you want to charge your users for make their Job as featured on home page.
- Amount to be charged (For featuring on Categories Page): Define your charges you want to charge your users for make their Job as featured on category page.

A user will be charged with total of above both things. (Total charges = a+b). This is how the pricing works in Job Board3.
Manage Featured Listings
If you are adding Jobs from backend or bulk upload then please make sure that you have selected any one option for featuring posts in its custom fields section on Add/Edit Job page. Then only the ordering of the posts will be correct in front end.
Suppose if you want to display some of your posts differently or highlighted on your site then these posts are called as featured listings. In above Price Packages (b) section is used for that purpose.
If a user has paid to make the listing featured on home page then his post will be displayed little highlighted on homepage and will be ordered first too. The same way it works for category page if a user has paid to make his listing featured on category page.
Note that the featured listings will be always listed first. You can also make your listings featured on both home page as well as category page.
Manage Custom Fields
Whenever you are adding a custom field or a user field make sure that “HTML variable name” field should not contain any special characters except underscores (_) and it also should not have space.
Custom fields are the fields that are displayed with your Jobs or Resumes. It works like attributes of the posts. These fields are displayed as an input field in Post A Job/Resume Page and as an attribute field in Job/Resume detail page. You can add new or edit the existing custom fields in WP-admin -> Job Board -> Advanced Settings -> Manage Custom Fields.
When you will click on Add/Edit custom field you will be able to see the below options:

- Show for post-type: You can mention for which kind of post you want this field. Suppose if you want to display a field for jobs then you can select “Jobs” here.
- Field Type: Here you can select which kind of custom field you want. We have provided options like text, date picker, Multi checkbox, Radio, Select, etc…
- Option Values: This field is use full when you are using field type like checkbox, radio or select, etc… You can give these field’s options here. You can separate the values with comma.
- Title: The title for the field which will appear in custom field settings area.
- Field name (Front-end): The name you provide here will be displayed as the field’s name (label) in the front-end. Here front end stands for Post A Job page, Job detail page, Post a Resume page, etc…
- Field label (for back-end): The name you provide here will be displayed as the field’s name (label) in the back-end. Here back-end stands for WP-admin -> Jobs/Resumes-> Add/Edit Job/Resume page.
- HTML variable name: The HTML variable name for the custom field. IMPORTANT: It should be a unique name and it will be not editable after once you entered.
- Description: You can give a short description about this field. It will display below the field on the Post A Job/Resume page area.
- Default Value: In this field you can give the default value for the field.
- Position (Display order): This is a numeric value that determines the position of the custom field in the front-end and the back-end. e.g. 5
- Active?: This option activates or deactivates the field. It is also useful when you want to give some fields for some particular period only.
- Compulsory?: You can make the field compulsory by selecting “yes” here.
- Display location: Here you can select the location of the field whether you want to just display in front end or just in back-end or on both side.
- Is editable?: You can specify whether or not this field is editable. If you have selected “Yes” in this then when you will go to edit the custom field then some of the options from all this will not be available.
- Is deletable? : If “No” is selected in this option then you can’t delete the field from the back-end (i.e. Custom fields list).
- Show on Search Form?: If you have selected “Yes” here then the field will be displayed in Advanced Search page and your users can do the search with this field too!
- Show on detail page?: If you have selected “Yes” then only the field will be displayed in the detail page.
- Required field warning: If you have selected “yes” in “Compulsory?” field above then you can specify the error message for the field when user leaves it empty.
- Validation type: This field used to validate the field. You can specify which kind of data user will have to enter in this field. The options given there are:
Require means this field cannot be left blank. Phone No. means this field requires numeric values in phone number format. Digit means this field requires numeric values. Email means this field is requires a valid email format. - CSS class: If you want to apply some css to this field then you can specify the class name here.
- Extra Parameter: You can also give some parameters to the field using this option like onchange, maxlength, etc…
Custom fields section in JobBoard is virtually identical to features available in some of our other themes.
Manage User Profile Fields
Custom fields work as an attribute for the posts. The same way user profile fields are the fields for the user’s profile. These fields work as attributes for the user’s details in the user’s dashboard. You can add, edit or delete the user fields from WP-admin → Job Board → Advanced Settings → User Profile Fields.
When you will click on Add/Edit user profile field you will be able to see the below options:

- Field Type: Here you can select the type of the user profile field. We have provided options like Text, Text editor, Multi checkbox, Radio, Select, Upload etc…
- Field name (Front-end): The name you provide here will be displayed as the field’s name (label) in the front-end. Here front end stands for user’s dashboard or registration page.
- Field Description: You can give a short description about this field. It will display below the field.
- HTML variable name: The HTML variable name for the field. IMPORTANT: It should be a unique name and it will be not editable after once you entered.
- Position (Display order): This is a numeric value that determines the position of the custom field in the front-end and the back-end. e.g. 5
- Active?: This option activate or deactivate the field in front end and in backend.
- Compulsory?: You c an make the field compulsory by selecting “yes” here.
- Show on Registration page?: If you have selected “Yes” then only the field will be displayed in the registration page.
- Show on Profile page?: If you have selected “Yes” then only the field will be displayed in the user’s profile page.
Manage Notifications/Emails
Go to WP-admin → Job Board → Advanced settings → Email notifications & messages. Here, you can change the content of the emails or messages that are sent to admin and users. Use the shortcode-legends specified.
Manage Payment Options
Go to WP-admin → Job Board → Advanced settings → Payment Options. You can edit/activate/de-activate the available payment options. The payment methods currently we are having in the theme are:

- Paypal: You can have more info about PayPal settings in PayPal Settings article.
- Google Checkout: While setting up this method please make sure that “Merchant ID” you have provided is correct.
- Authorize.net: While setting up this method please make sure that “Transaction Key” you have provided is correct.
- Worldpay: While setting up this method please make sure that “Instant ID” & “Account ID” you have provided is correct.
- 2CO (2Checkout): While setting up this method please make sure that “Vendor ID” you have provided is correct.
- Pre Bank Transfer: The users will have to manually transfer the amount in the account ID you have mentioned here. It will be displayed on the thank you page.
- Pay cash on delivery: The users will have to pay cash in this method.
Transaction Report
![]()
Go to WP-admin → Job Board → Advanced settings → Transaction Report. Here you can see the report of the transaction being held on your site.
We have also provided a search form so that you can search particular transactions efficiently.
Manage Coupons
Coupon is basically used to provide your users a discounted price. Go to WP-admin → Job Board → Advanced settings → Manage Coupons. Here you can add or edit coupons.

You can give the discount in either some percentage or some amount by selecting the “Discount Type”. When your users will give the correct coupon code in the Post A Job page then he will get the discount.
Please make sure that you have selected “Yes” in “Enable coupon option on ‘Add job’ page”. Then only a text field to enter the coupon code on Post A Job page will be displayed.
Manage Bulk Upload/Export
Whenever you perform bulk upload make sure that you have uploaded the images in to “uploads” folder. Bulk upload will just provide the link to the images. It won’t upload the images.
Go to WP-admin → Job Board → Advanced settings → Manage Bulk Upload. Here you can upload or export your posts or properties.

We would always recommend you to download first sample CSV make changes according to this file or in this file and then upload your Jobs, Resumes, Posts. CSV file cannot contain special characters. The column name also cannot be changed. Otherwise the data will not be imported correctly.
Manage IP
Go to WP-admin → Job Board → Advanced settings → Manage IP. Here is the setting for managing IP addresses.

You can block or unblock the IP addresses from here. The IP addresses you have blocked previously appear here. Once you remove them from the list below, they will be unblocked. Suspicious IP addresses should be added to the list below in order to prevent listings done from that IP.
Other Important Aspects
Upgrading from Job Board v2 (or v1)
Upgrading will change your job details page URLs! The upgraded version is using custom post type and taxonomies to handle jobs so it inserts a “job” slug inside each URL
If you read this theme guide and the Job Board v3 blog post you probably know that v3 is very different compared to the older version. Because of that you must approach this upgrade carefully. Try to follow these steps:
- Backup Backup Backup! Before continuing please backup all your themes files and the whole database. That way, if something goes wrong you can easily revert to the last good configuration.
- Since there are so many differences between the two versions expect to lose all customizations done to your php files. Since theme design hasn’t changed you should be able to easily redo most of your design tweaks (css tweaks). Create another backup of your customized css files (style.css and the skin css e.g. 1-default.css)
- Once you’ve backed up everything download the new version from member area, unpack it and upload to your wp-content/themes/ folder. If you need further assistance with this step please read the following tutorial -> https://templatic.com/theme-support/tips-n-tutorials/how-to-upload-and-edit-files-on-your-server-ftp-tutorial/
- Once properly installed, connect to your wp-admin and head over to Appearance -> Themes and activate the new version
- You might have noticed that your jobs are not listed under “Jobs” but under regular WordPress posts. To fix this head over to Job Board -> Advanced Settings -> Manage bulk upload and click on “Click here” in the message at the top

- With that done your site should now have properly structured blog posts and jobs. It’s very likely that the upgrade messed up your widgets, you will have to re-do them
- If you run into any problems during the upgrade process, Contact Us and we’ll help you out ASAP.

Widgets of the Theme
Here are different widgets listed below which are provided with the theme. You can find them in WP-admin → Appearance → Widgets Section.
- T → Categories: This widget is used to display categories of Jobs, Resumes, Posts, etc… You will need to select in “Post Type” field that which custom categories you want to display. This widget is used to place in “Footer Area Link Widget ” or sidebar areas.
- T → Featured Companies: It displays a list of featured companies. You can upload the logos of the companies along with their site URL.
- T → Latest Jobs: This widget lists the latest added or published jobs on the site. It is used to place in sidebar areas of the theme. You can also specify the category ID of which category you want to display the posts. Please click here if you don’t know how to get category ID.
- T → Latest Resumes: This widget lists the latest added or published resumes on the site. It is used to place in sidebar areas of the theme. You can also specify the category ID of which category you want to display the posts. Please click here if you don’t know how to get category ID.
- T → Login & Dashboard Widget: It is placed in the sidebar areas of theme. Users can easily go to various places like login page, registration page, dashboard page, edit profile page, etc…
- T → Other Jobs Listed by the Company: It displays a list of Jobs posted by a Particular Company. It is used to place in Job Detail Page: Sidebar area. It works as same as “Other Jobs Listed by the Company” section on Job detail page.
- T → Search By Job and Location: It is a search where users can search with job title, address and surrounding area. It is used to place in “Header: Search Area”.
- T → Sidebar Advt 244x188px: This widget is used to give an advertisement on the site. It is placed in the sidebar areas of the site.
- T → Tag wise listing: It is used to display a list of Job or Resume Tags. You will need to select in “Post Type” field that which custom tags you want to display. This widget is used to place in “Footer Area Link Widget” or sidebar areas.
- T → Social media: This widget is used to link your social site’s account with your site & display various social icons. It is placed in “Header: Right Area”.
Difference Between Job Seeker and Job Provider
- Post A Job button is appeared when you are logged in as either Admin or Job Provider while Post a Resume button is appeared when you are logged in as Job Seeker.
- Job Seeker can not view the other Job Seeker’s resumes. Resumes are only viewable when you are logged in as either Admin or Job Provider while the Jobs can be viewed by everyone.
- If you want to apply for any job then only way is to login as Job Seeker and apply and if you want to see the resumes in detailed then only way is to login as either Admin or Job Provider.
Different Pages or Page Templates
Now let’s learn how to add a new page and use page templates. Go to wp-admin → Pages → Add New.
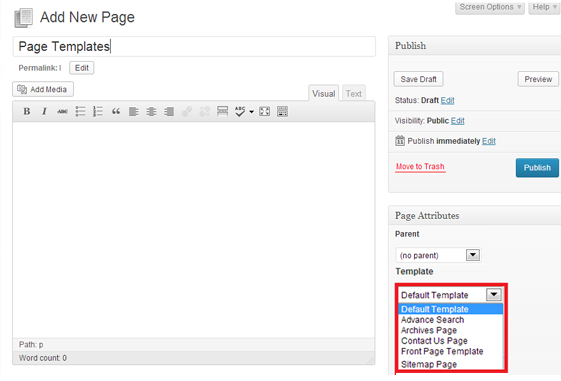
- Add Page Title
- Add Page Description
- From the right sidebar of this page, select a page template from Template section. (This is used just as an example. You can use any page templates)
- Click on Publish
There are different page templates given in the theme. Let’s have a quick look for use of each of them.
- Advanced Search: This page template creates a advanced search page which is as same as the advance search link below the search widget in header.
- Archives: This page lists all the posts of your site date wise.
- Contact Us: This template lets your users to contact by ending a mail from the site. You can configure your Contact Us Email address from WP-admin → Settings → General settings → Email Address. Emails from Contact form will be sent to the Email address.
- Job Listing Map: This page gives locations of your jobs on Google Map.
- Short Code: If you want to display some shortcodes on the page or some highlighted text and any else effects then select this template.
- Sitemap: This page template almost gives a whole idea to the user that which kind of data you are having on the site. Posts, categories, feeds, pages, etc…
Developer’s Section
Label or Text Change: In the theme wherever you want to change any text or label then you can first look in “language.php” file located at the theme root folder. In this file we generally define the labels used in the theme.
Style OR CSS: Mostly the theme’s CSS code is placed in “style.css” in the theme root folder and “Theme-color.css” in skins folder. Here Theme-color stands for the color skin name you have activated in Basic Settings → General Settings. We also recommend to use ”Firebug” add-on to make design related changes. Here are some links for tutorial of firebug.
Widgets: All the widgets given in the theme are coded in the file “widgets_functions.php” at “/themes/JobBoard3/library/functions” directory.
User’s Dashboard: If you want to edit the dashboard page in front end then you can look in “author.php” file from the theme root folder.
Edit Profile: If you want to customize the edit profile page then you can look in “edit_porfile.php” file located in “/themes/JobBoard3/library/includes” directory.
Category Pages: If you want to customize the category pages then you can look in the files resume_category.php & job_category.php files for Resumes and Jobs respectively.
Job/Resume Detail Page: If you want to customize the detail pages then you can edit the single-resume.php & single-job.php files for Resumes and Jobs respectively.
Any Queries? Contact us and we’ll help you out.
Frequently Asked Questions
How to create another job type?
Just by looking at the theme there doesn’t seem to be a clear way to add another job type (existing ones are Full Time, Part Time, Freelance). However, you can do this fairly easily. Head over to wp-admin -> Job Board -> Advanced Settings -> Manage custom fields and edit the Job Type and Availability fields. When the edit window opens modify the “Option values” field and add a new entry. In this example, we added the “New Type” option

As soon as you edit the Job Type field an option will be added to your header

How to remove taxonomy slugs from the URLs?
To remove job and resume slugs from your URLs read the following article:
https://templatic.com/theme-support/tips-n-tutorials/remove-taxonomy-slugs-from-your-urls/
How to edit the map inside Submit Job form?
To make this change connect to your server and open /libray/map/location_add_map.php. Find this around line 17
var CITY_MAP_CENTER_LAT = 40.714623;

var CITY_MAP_CENTER_LNG = -74.006605;

var CITY_MAP_ZOOMING_FACT = 13;
Now just change the values to your own.
Need help with installing the theme? Hire us!
Facing Problems in installing the theme? Don’t worry, we’ll do that for you, just click here!