Installing and activating Shopoholic
- Download the zip folder of “Shopoholic” theme from the members area of the templatic website.
- Now, login to your wordpress dashboard and navigate to Appearance >> Themes >> Add new >> Upload theme >> browse for the zip file you have downloaded and select it >> Install now.
- This will install your theme and then you can activate it.
- On being asked for the license key, go to your Templatic members’ area from where you downloaded the zip file,under “my downloads >> Shopoholic “, You’ll find the licence key there. Refer this screenshot.
- Go to Appearance >> Themes >> and press ” Install Sample Data” . This will install the dummy data,making your site look like our demo. The process of installing dummy data will take 2-4 minutes. Let it complete without interruption.This will give you a precise idea of how to proceed with your own original data. Though it is optional, but we highly recommend it.
- Shopoholic works with woocommerce. So once you are done with installing and activating shopoholic, Download woocommerce, and navigate to wp-admin >> Plugins >> Add new >> and upload the downloaded file here and click on install now. With the installation complete message you will find a link to “activate the plugin” Click it or you can go to Plugins >> Installed Plugins >> and activate the woocommerce plugin from there.
Installation using ftp
If you are new to ftp and its working please refer our ftp guide. That will help you get a better idea of how you can upload your files and organize them on the server using
FTP.
- For this also, download the zip folder of “Shopoholic” theme from the members area of the templatic website and the woocommerce plugin.
- Extract the zip file using software like 7-Zip. Extract to the same folder and be careful that you don’t create the double folder problem.
- Now, navigate to /wp-content/plugins/ and upload the extracted folder of woocommerce here. Similarly, navigate to /wp-content/themes/and upload the extracted folder of Shopoholic.
- Then,Login to your wordpress dashboard and navigate to Appearance >> Themes >> Installed themes and you will find Shopoholic there. After this, Go to plugins >> Installed plugins and activate the woo-commerce plugin.
- You can install sample data from Appearance >> Themes to make it look exactly like our demo.
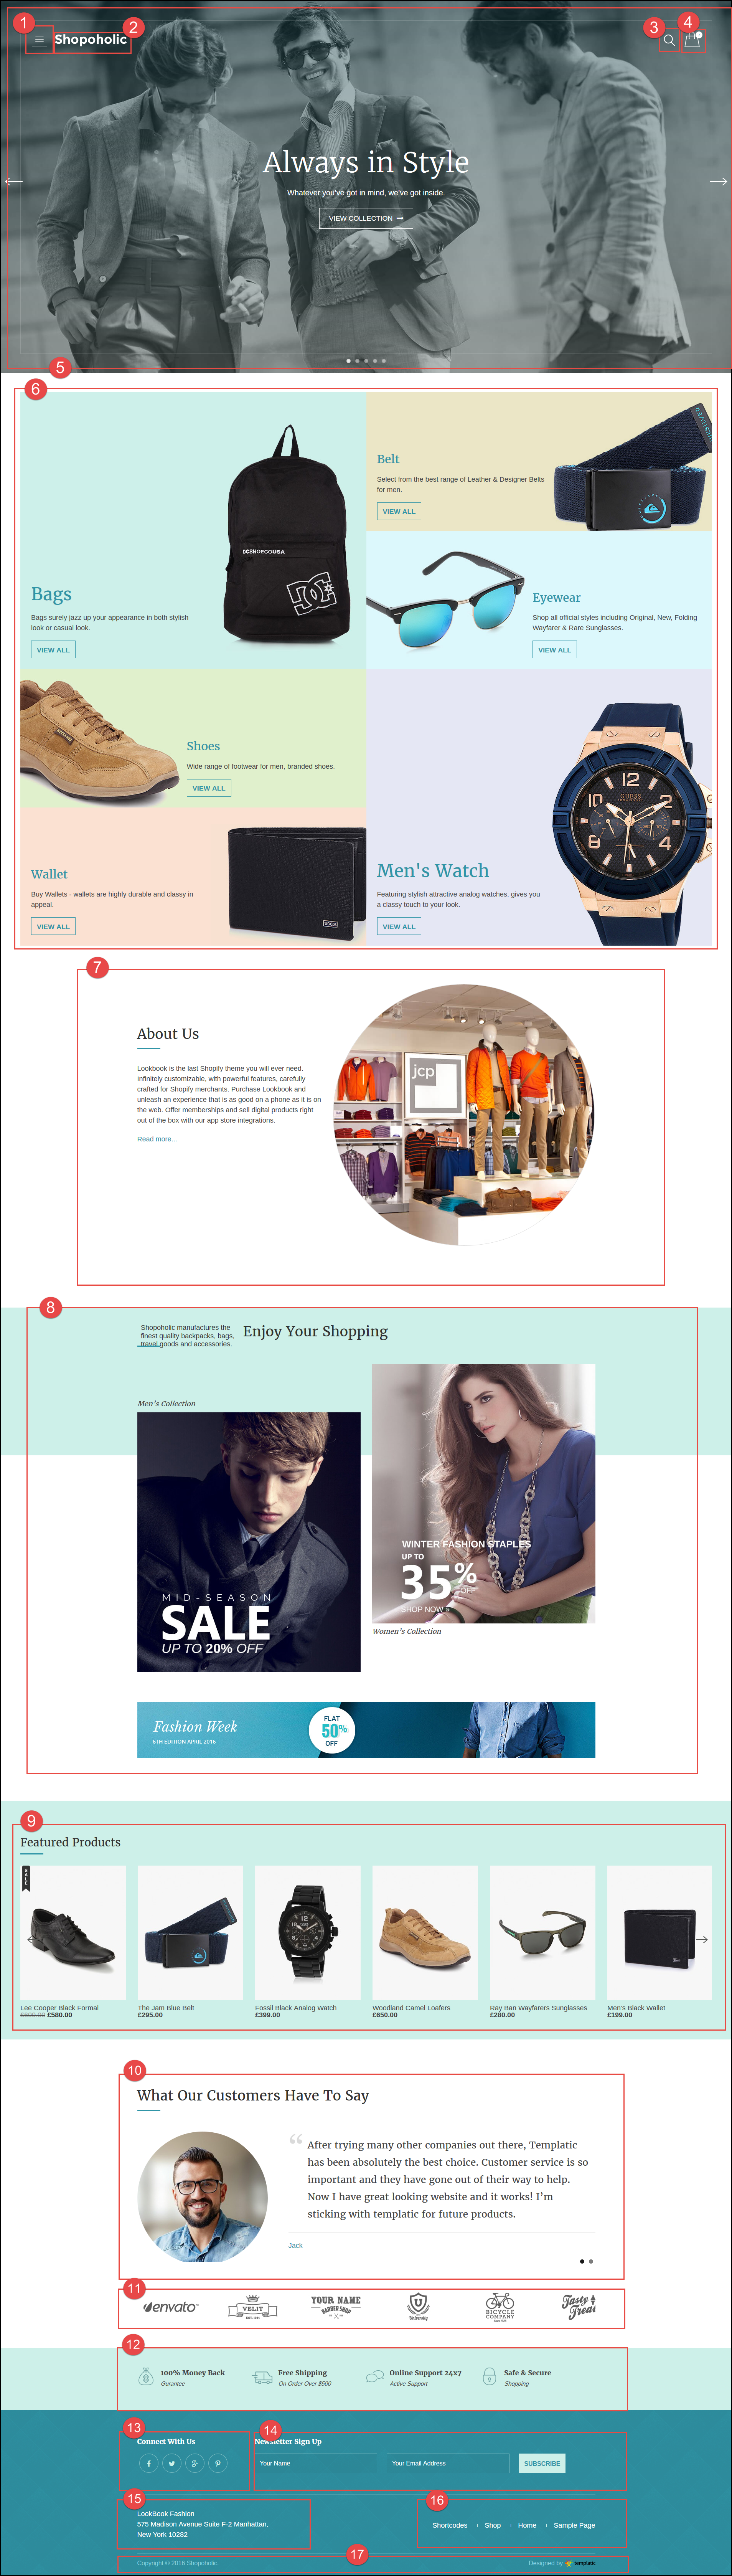
Home Page Setup
-
The full-screen menu (secondary ) :
This menu can be set by navigating to Appearance >> Menus. Choose the Main menu at “select a menu to edit” and then start editing it. You can add, remove and manage the hierarchy of the menu from the “Menu Structure” section. When you are done editing the menu, click the “save menu” button and changes in the menu will be reflected on the front end.
Alternately, You can also create an all new menu with the menu items of your choice and display it over here by choosing the location “secondary”. -
Site-Name / logo and tagline :
The site name can be changed by Appearance >> Customization >> Site Identity and changing the “site title” field. You can also set the site tagline from here. It you don’t want to show the tagline leave it blank.
-
WooCommerce products search:
Clicking on the icon will pop-up a product search. It comes from Appearance >> Widgets >> “Header right area” widget area >> WooCommerce product search.
-
Cart:
This is a shpping cart icon and the number above it represents the number of items in shopping cart of the active user. Clicking on it will show you the content of the cart and it also allows your users to directly checkout from here.You can set this widget from It comes from Appearance >> Widgets >> “Header right area” widget area >>T – WooCommerce shopping cart.
-
The banner:
The banner comes from Appearance >> Widgets >> Widget area “Homepage banner” >> T- Homepage banner slider. From here you can set the images to be displayed in the banner and the text on the image. You can also set where the “view collection” button on each banner leads you. Images of dimension 1903 X 1082 is best suited for this area.
-
Categories:
These beautiful display of the categories of your products automatically adjusts itself on the basis of the chosen categories. You can manage this portion from Appearance >> Widget >> Widget area “Below homepage banner” >> T-product categories with details. From here you can multi-select the categories to be displayed in this portion.
If you want to change the image in the background of a particular category, you can do it by navigating to dashboard >> products >> categories >> press edit under the “category name” >> background image. The best fitted images are of dimension 902 X 758.
-
About us :
This portion comes from coding contained in a text widget. To make changes here, change the code in the text widget at Appearance >> Widgets >> Widget area “Home Page Content” >> Text widget.
There are three text widgets in the “Home Page content” widget area, so be careful when you are changing the code of a text widget. -
Below about us :
The portion below this also comes from coded text widget. To make changes here, go to Appearance >> Widgets >> Widget area “Homepage content” and tweak the coding in the Text widget you find relevant code.
-
Slider of product images :
Slider you see here is a widget called T- Carousel post slider. It will show you images and a little data from a specific category on the home page. To make changes in this portion navigate to Appearance >> Widget >> Widget area “Home page content” >> T- Carousel post Slider. From here you can select the category,set the number of items and the slideshow options.
-
Testimonials:
You can make changes to this part at Appearance >> Widgets >> Widget area “Home page content” >> Testimonials. Make changes to the “What customers have to say about us? ” with this.
-
Slider:
The slider below the testimonials can be used to show the brand icons of the brands allied with you or the brands that are available at your site. You can also set links to the brand icons.
To configure this slider go to Appearance >> Widgets >> Widget area “Home page content” >> T – carousel slider. -
Below the slider:
This portion again, is managed by the code in a text widget. You can change it by changing the code in the text widget.
-
Connect with us:
You can go to Appearance >> Widgets >> Widget area “Footer 1” >> T-Social Media and add or remove the icons and links to the social sites. Here you can provide the social media links of the social accounts of your site. This will provide the visitors to connect with your social media profiles instantly.
-
Newsletter sign up :
This will provide the users with a compact form with which they can sign up for a newsletter. Change this at Appearance >> Widgets >> Widget area “Footer 2” >> T- Newsletter Subscribe.
-
The address:
This is a footer widget that will let you enter the text such as address, phone number, email and other details in the footer.You can also use this widget to set the links like privacy policy, Returns policy and disclaimer etc. in your footer. It can be formatted as required by coding at Appearance >> Widgets >> Widget area “Footer 3” >> Text.
-
Footer Menu:
The menu you see at the footer comes from Appearance >> Widgets >> Widget area “Footer 3” >> custom menu widget. Navigate there and it will let you set your menu as the footer menu.
-
The footer text:
This is the text at the extreme bottom of the site. It generally contains texts like “copyright 2016 reserved by shopoholic” or so. You can change this text at Appearance >> Customize >> Footer text >> and change the text.
-
How to set a footer image?
To set a footer image you can go to Appearance >> Customize >> Footer image >> Upload the footer image. This will set the footer image in the background of the footer
-
How to change the colors in the site ?
You can change the color scheme of the theme by going to Appearance >> Customize >> colors.
-
How to create Menus?
To create menu you can go to the dashboard >> Appearance >> Menus >> create new. Or if you want to edit a menu already there, you can select the menu and start editing it by a simple drag and drop method. You can also go to appearance >> customize >> Menu and create/edit menus and how they look at their location from there.
-
Using the Custom css editor
Custom.css editor can be found at Appearance >> custom.css editor and place your css code here. This will replace the css class in the css file. So that you won’t have to go and find the css file and the line where the change is to be made. Just put the code in custom css editor and it will overwrite the css.
-
Setting header image and background image
You can set the header image by Appearance >> Customize >> Header Image >> and adding an image there. To set the background image go to Appearance >> Customize >> background image >> and uploading/selecting the image. You can also set the background repeat and background position from here.
Category Page setup
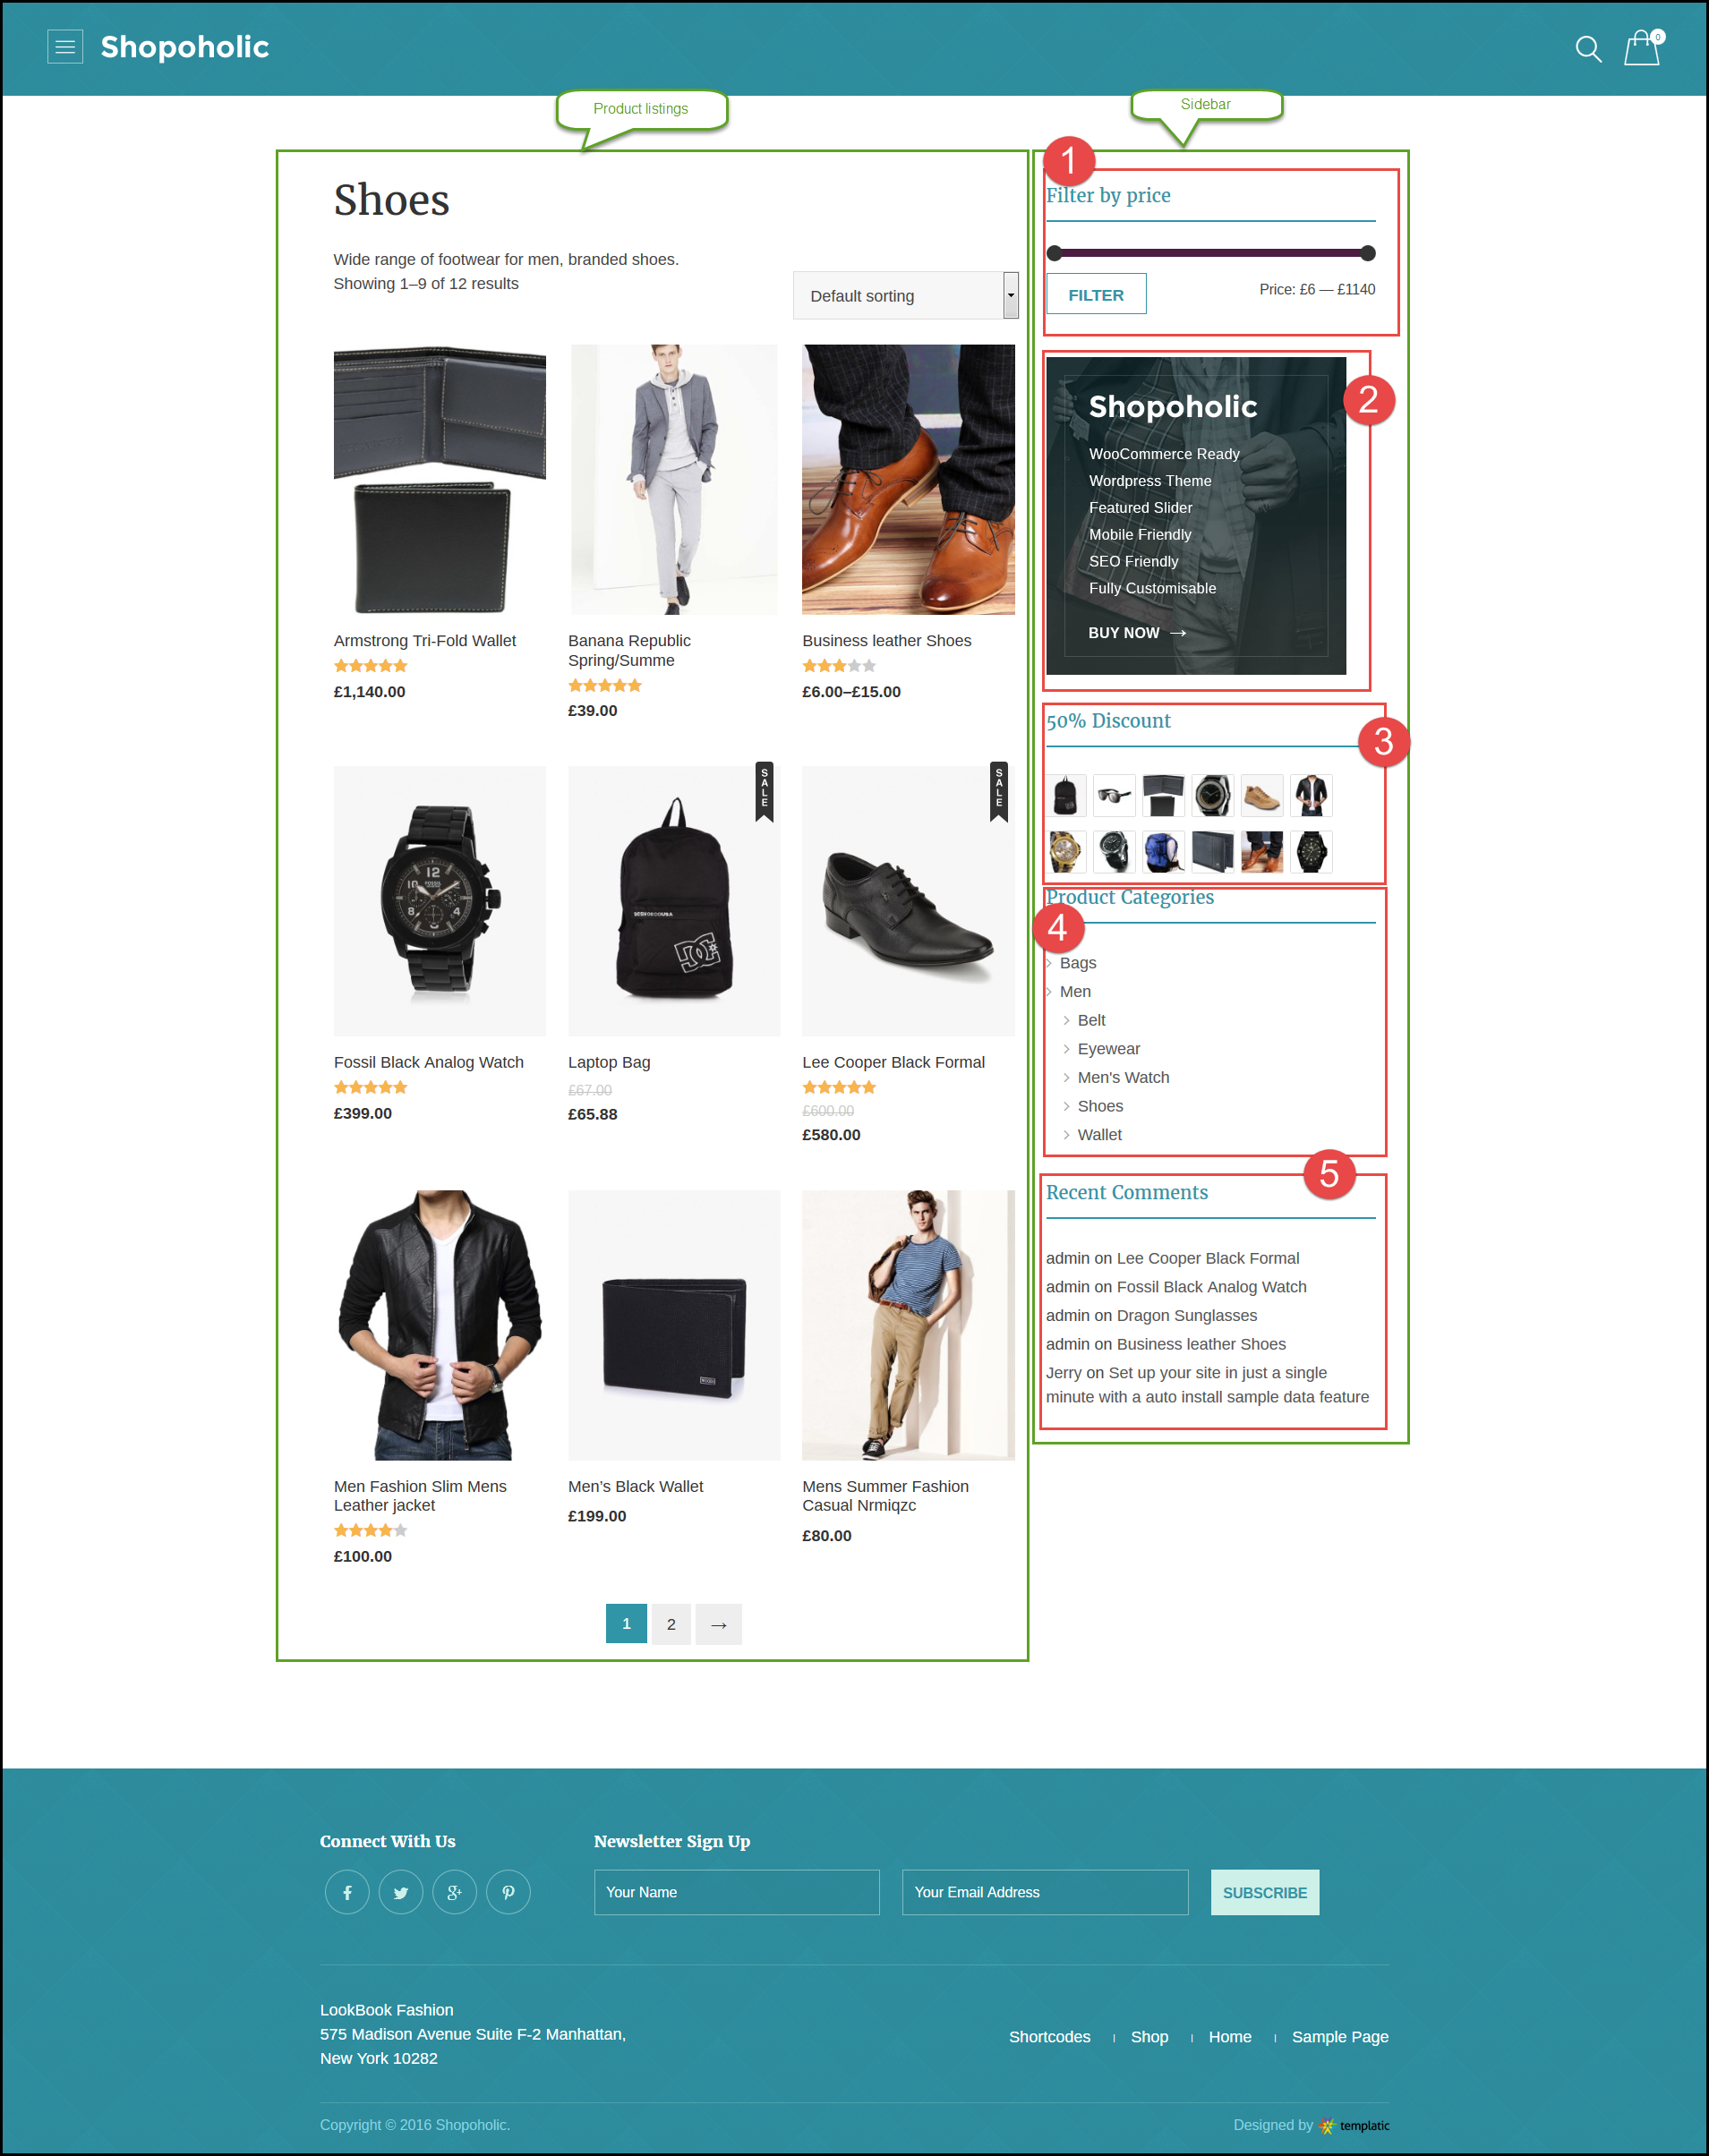
In the main content area of the category page the products of the pertaining categories will be shown. All the products will be listed on the category page with the pagination in the bottom. The products can be sorted using the sorting options available.
-
How to control the number of products shown on the category page?
The number of products shown in grid on the category page can be controlled by navigating to Dashboard >> Settings >> Reading settings >> and changing the number at “The blog page shows at most”. This number will determine how many products will be shown on a category page at once. For the remaining products, pagination will appear and they will be shown on the other page.
Category page Sidebar
-
The price filter:
The price filter will let your visitors set their price range using a price filter slider. This will allow them to set the highest as well as the lowest amount in their range. This is a widget and it can be moved or removed by Appearance >> Widget >> widget area “product listing sidebar” >> WooCommerce price filter. You can set its title and also move it from here.
-
Product categories advertisement :
This widget is also placed in the widget area “product listing sidebar” below the price filter.This area can contain advertisements or videos or any text that you want to show to the users.
-
Product categories :
This widget is also placed in the widget area “product listing sidebar”. It is very eminent on the category page as it enables the user to switch from one category to the another. Through this widget you can also manage how the categories will be displayed . This widget can be changed from Appearance >> Widget >> widget area “product listing sidebar” >> WooCommerce Product Categories.
-
Recent Posts:
This is a widget which will make the users aware of the posts and updates you make to your site. It also can be found at Appearance >> Widget >> widget area “product listing sidebar” >> Recent Posts.
Product detail page Setup:
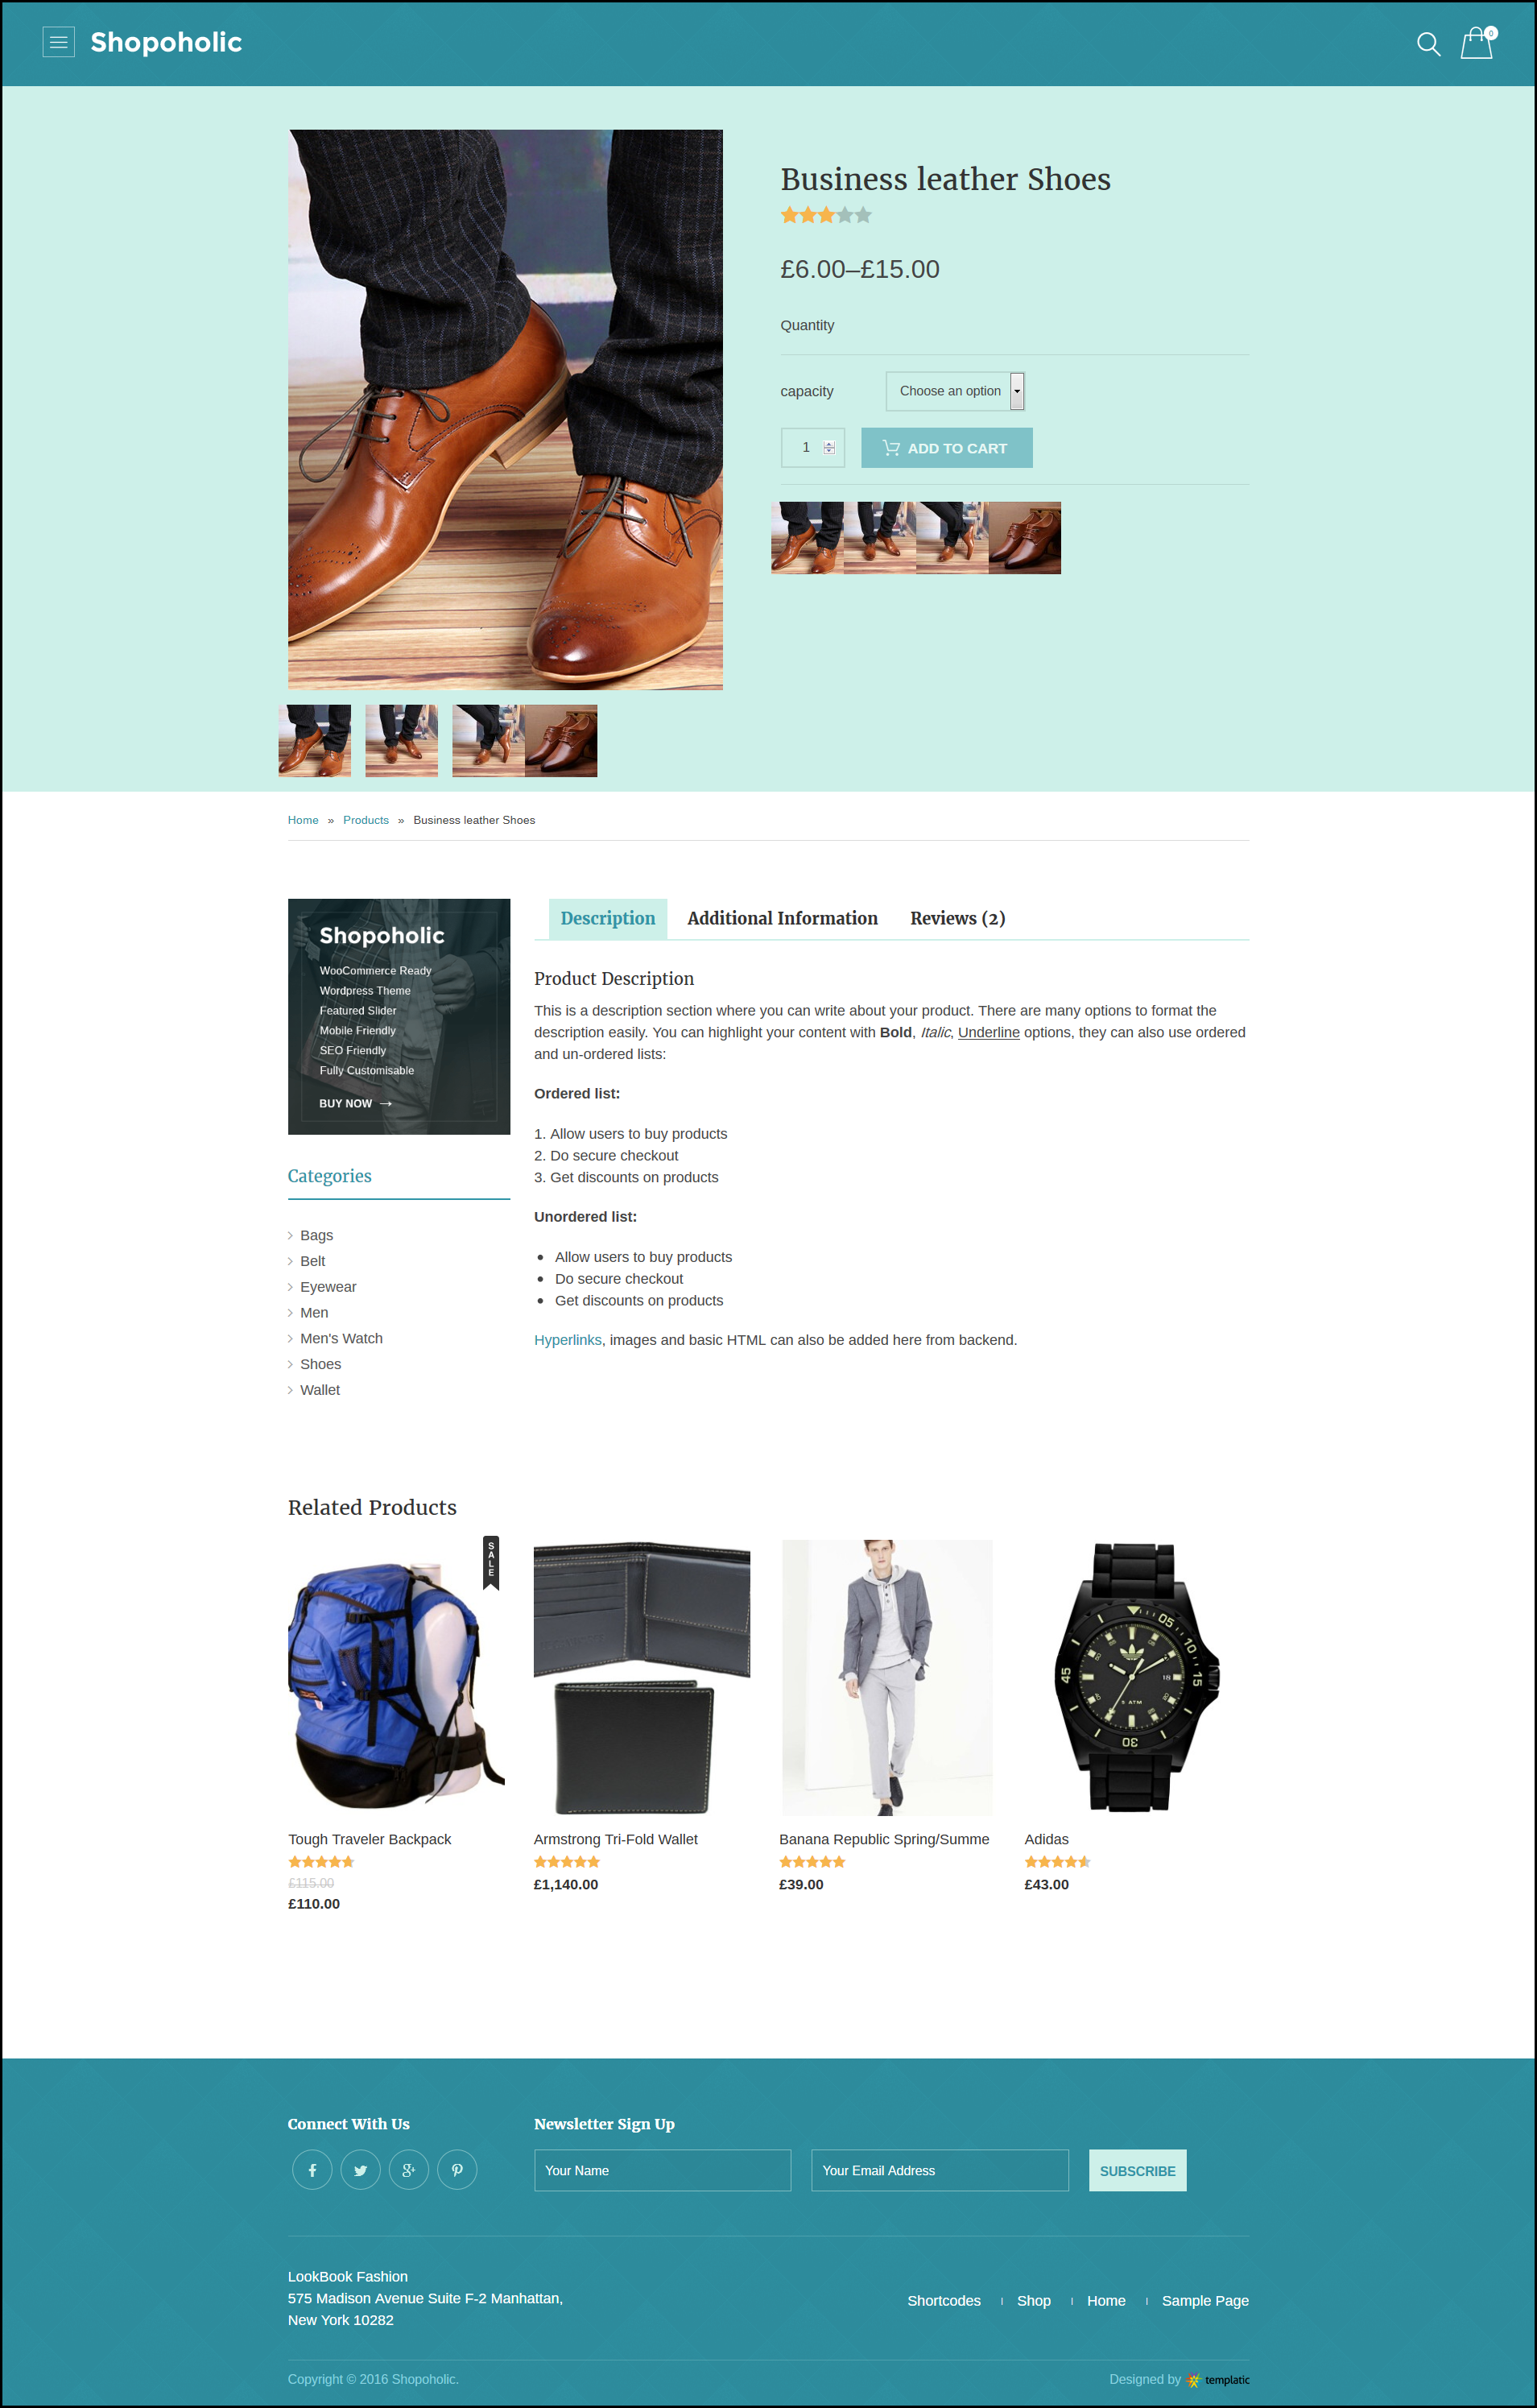
When you click on a product from the category page, you will be redirected to the product detail page. As the name suggests, the product detail page will display the details of the product. The details that you as an admin add regarding a product will be displayed on this page.
Detail page Sidebar
-
Text widget:
This is the text widegt to hold advertisement or text or video. You can navigate to Appearance >> Widget >> widget area “product detail sidebar” >> Text and tweak the coding to set content of the text widget.
-
Product categories:
The categories of the product will be shown in the side bar and you can choose how the categories are displayed. Go to the Appearance >> Widget >> widget area “product detail sidebar” >> WooCommerce Product Categories.
Note :
For WooCommerce settings, i.e. Setting related to the price, shipping, tax, currency etc. please refer the woo-commerce documentation. Templatic provides the theme flow and the page settings. For technical and e-commerce settings kindly follow the instructions of the WooCommerce user manual.
If the guide doesn’t help you solve your query regarding the theme settings, never hesitate to generate a support ticket. Our support team will answer you and help you troubleshoot in the best way possible.