Changing the category page banner
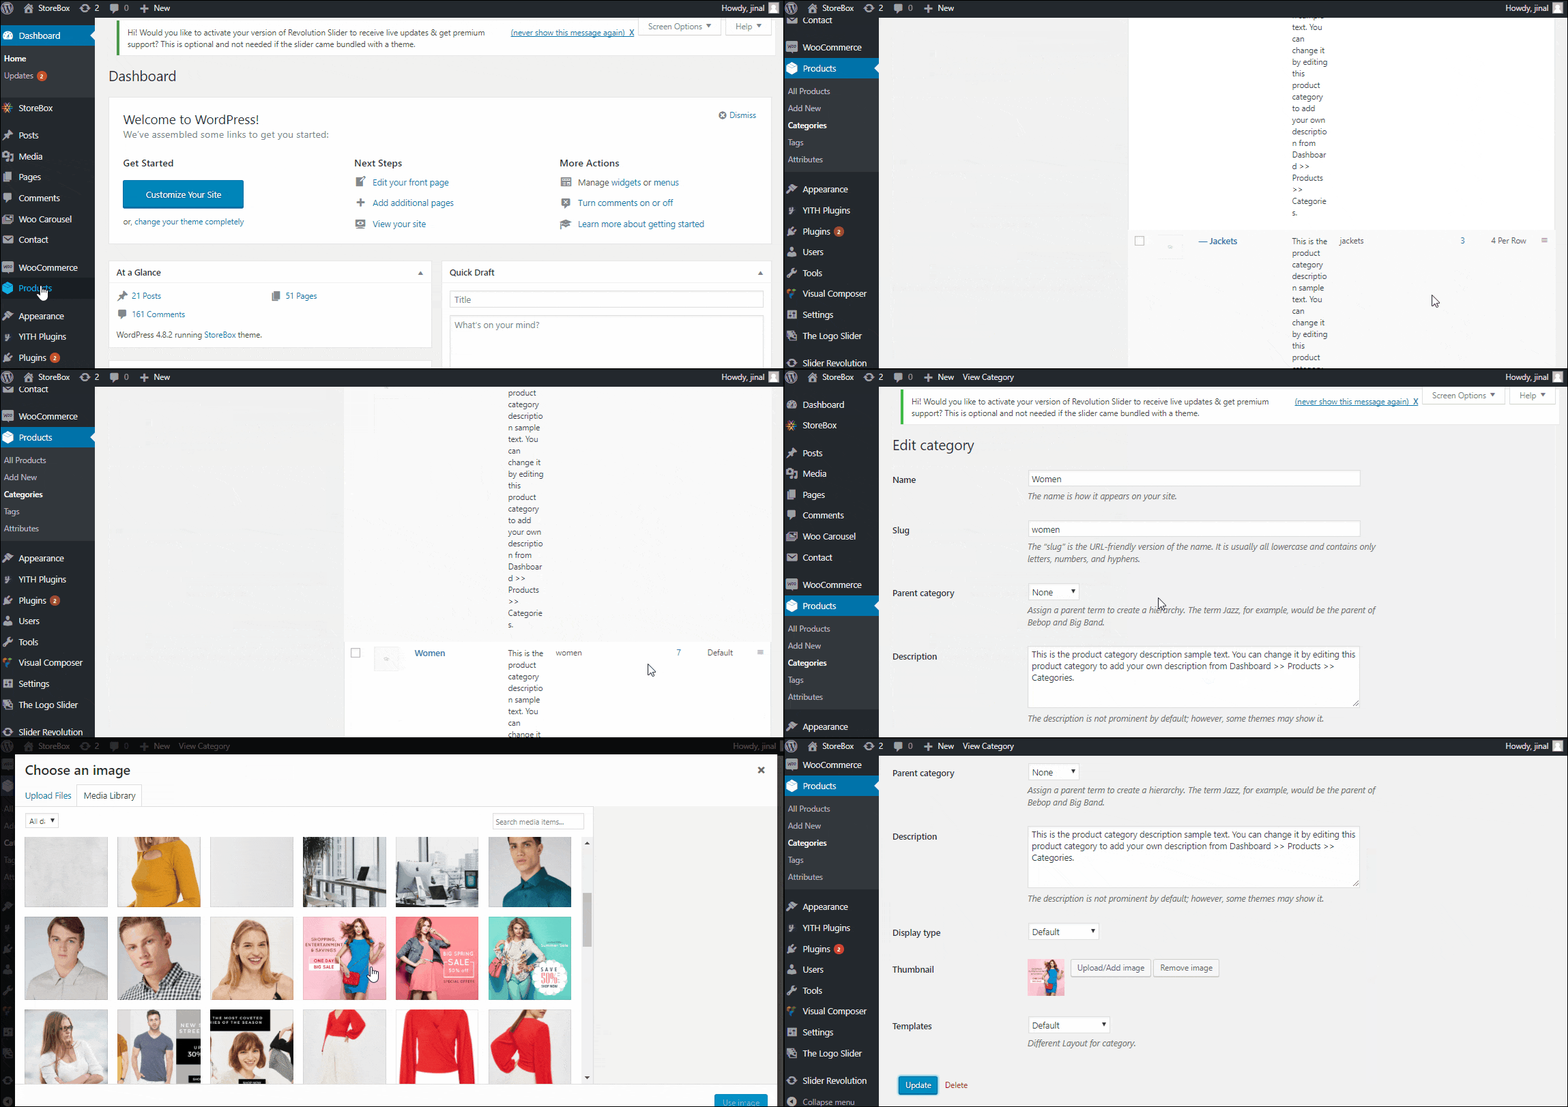
- To change the banner that you see on the category page, navigate to WooCommerce ⇒ Products ⇒ Categories.
- Look for the category that you want to edit. Hover over the category name, some options will appear.
- Choose to edit the category.
- On the category edit page, look for the thumbnail option. You can simply remove the image or upload a new one.
- Don’t forget to hit “Update” before you leave the category page.
Changing/Removing the banner text from the category page
- To change the banner that you see on the category page, navigate to WooCommerce ⇒ Products ⇒ Categories.
- Look for the category that you want to edit. Hover over the category name, some options will appear.
- Choose to edit the category.
- On the edit category page, find the description field. This is the text that you have on the category page banner.
- You can update the text here, or if you don’t want to display any text on the category page banner, just remove the category description.
- Hit “Update”.
Adding a new product category
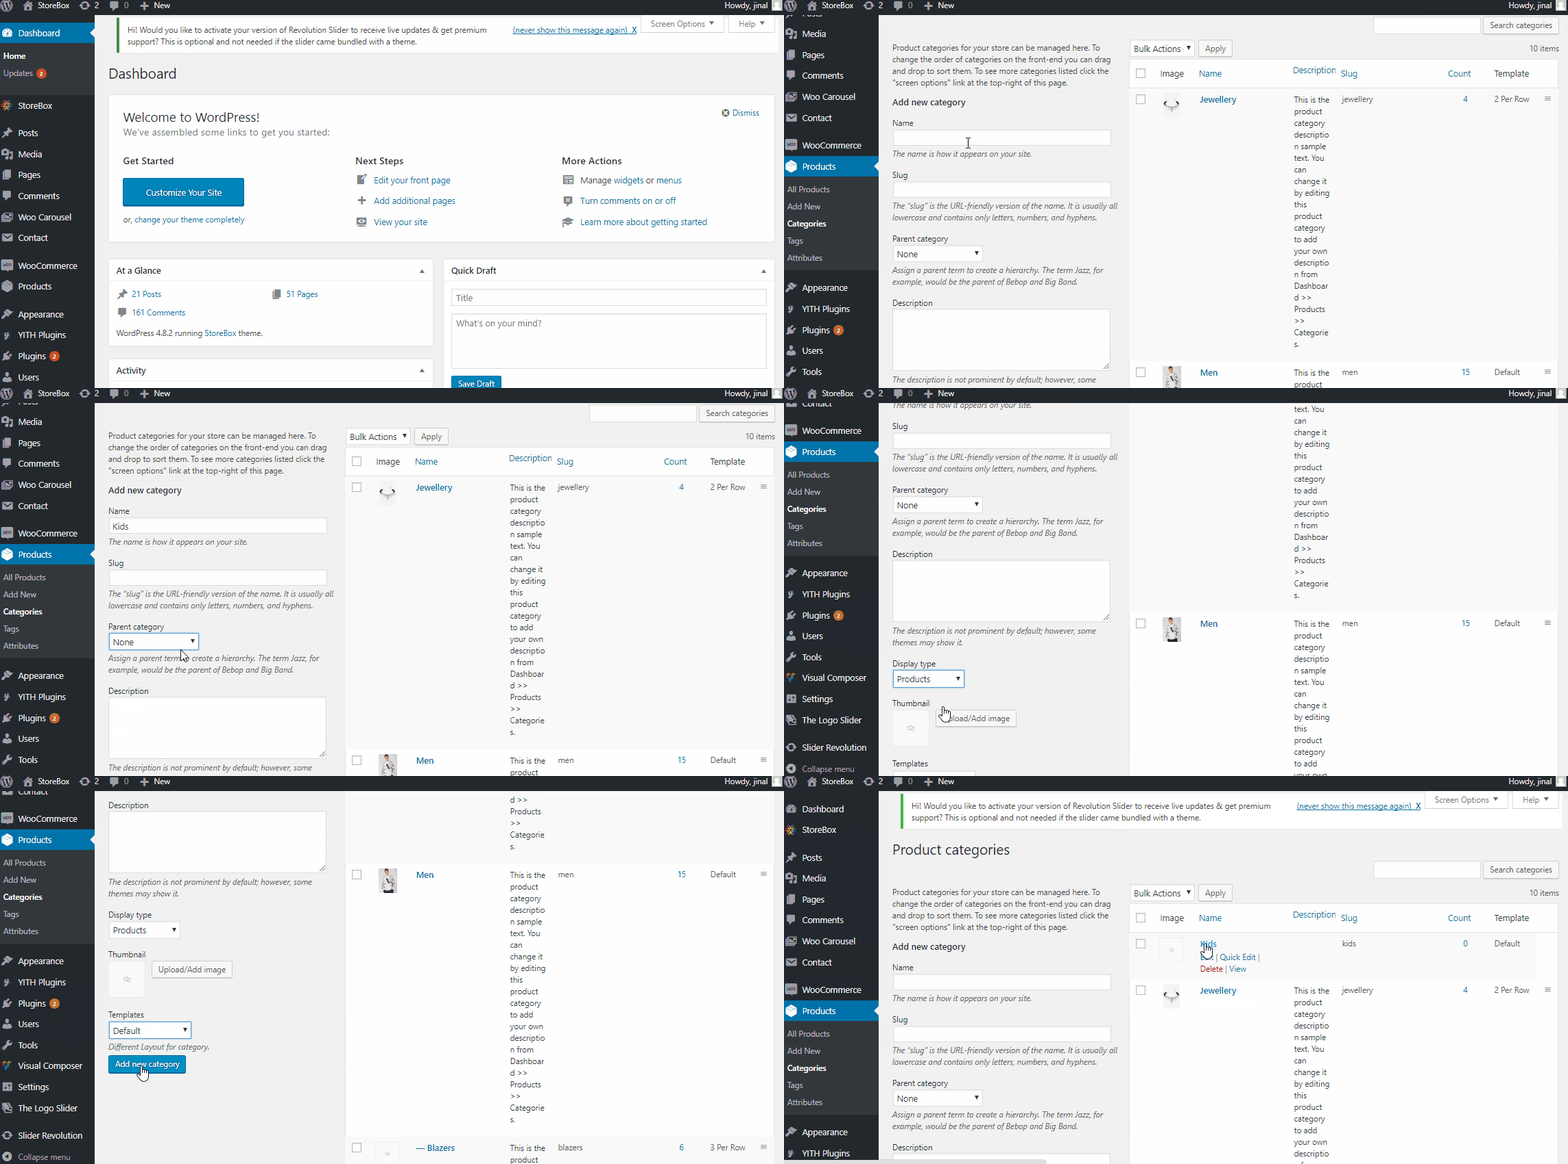
- To create product categories, navigate to WooCommerce ⇒ Products ⇒ Categories. This is where you can create new categories or update the existing ones.
- Fill up the information required to create the category.
- You can even set a parent category if you want.
- When all the information is entered, press “Add new category” button.
Updating existing product categories
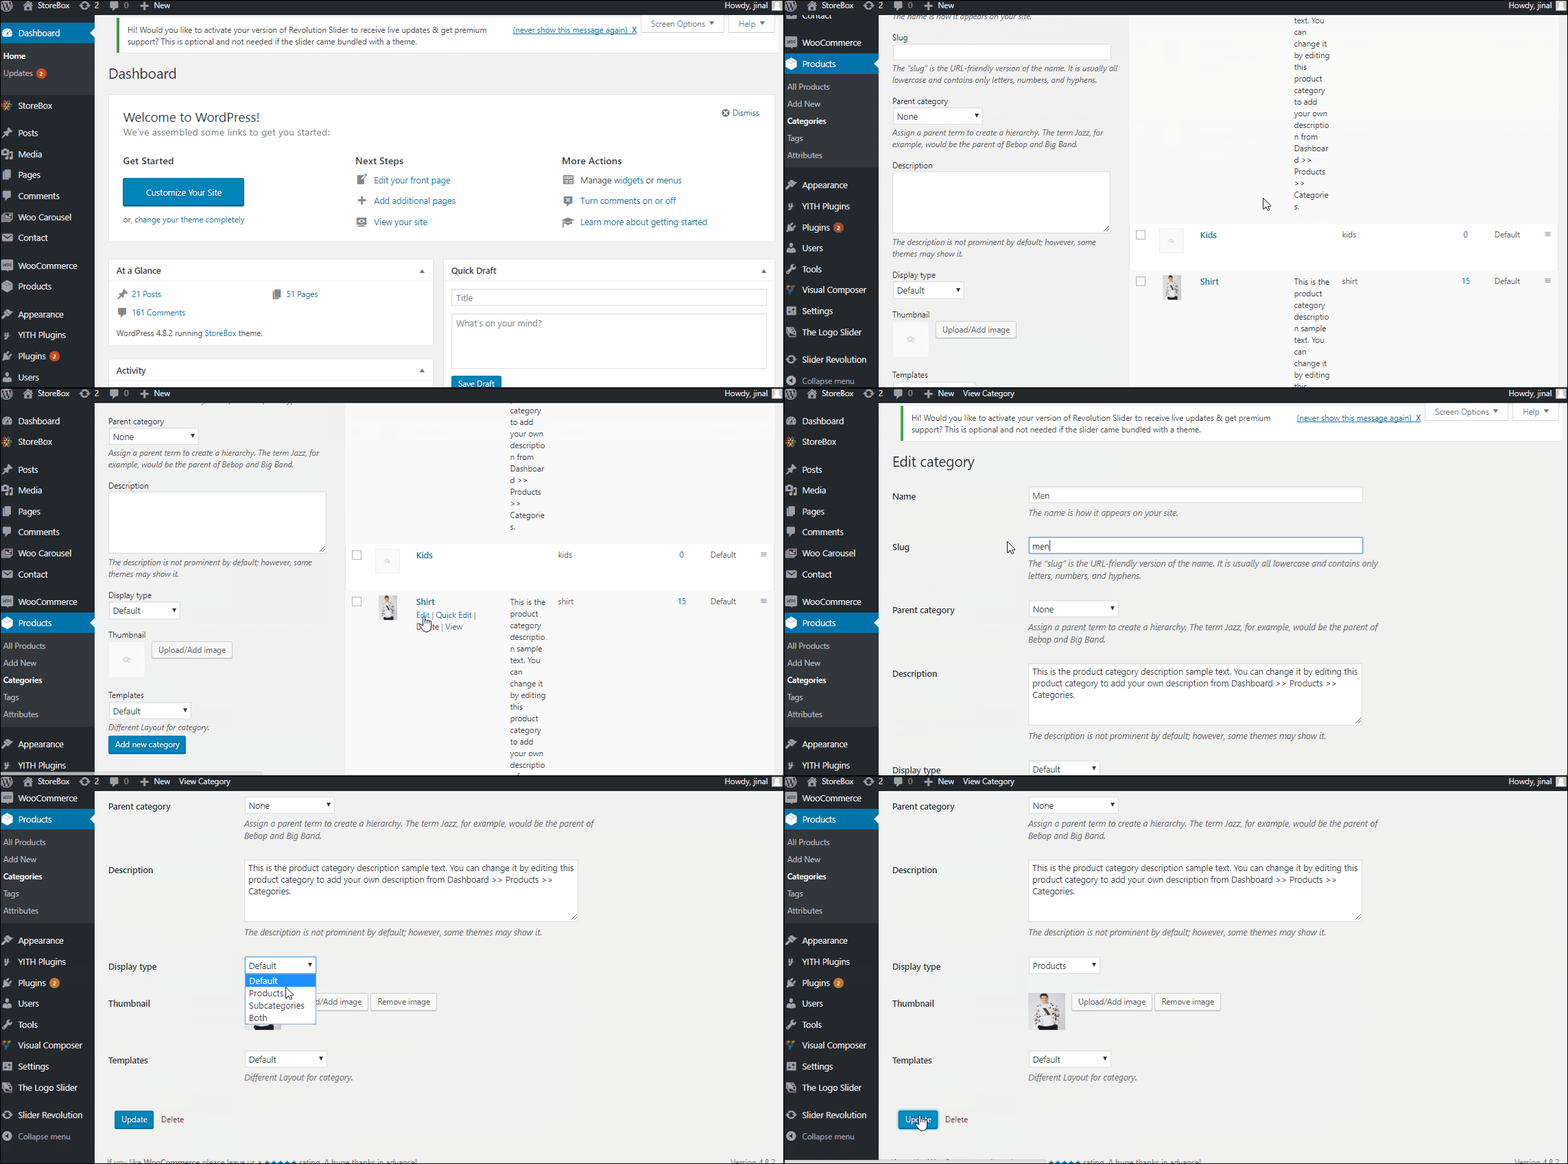
- To update a product category, you can navigate to WooCommerce ⇒ Products ⇒ Categories. Hovering over the category name will show some options to edit/update the category.
- Select edit for the category you want.
- You can change the category banner, or change the category title, or select a parent category.


