StoreBox is based on WooCommerce for its eCommerce features. Everything related to inventory, products as well as taxes can be managed by the easy options provided by WooCommerce.
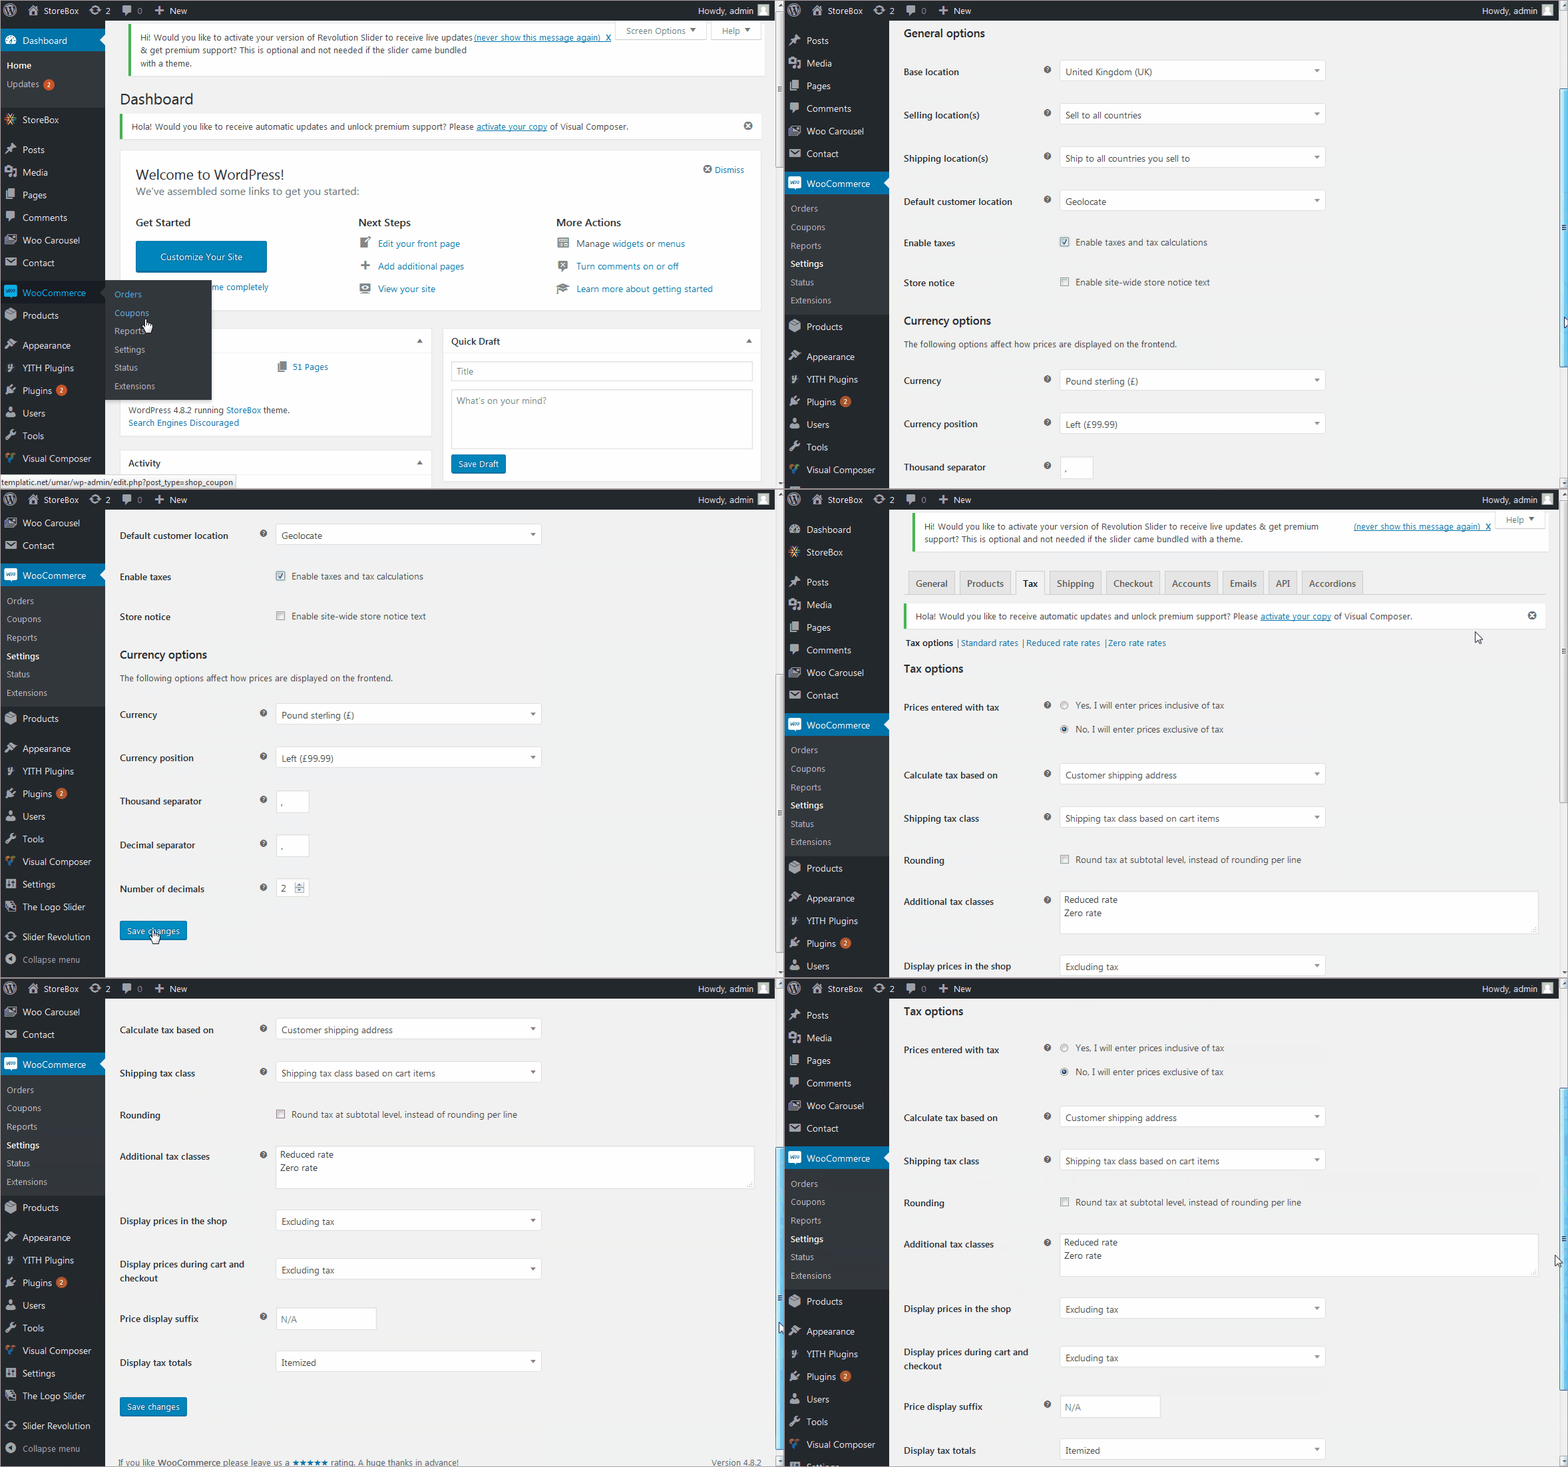
Before we get started with the tax settings, you’ll first have to enable tax and tax calculations
How to enable tax on your WooCommerce website?
- Login to your WordPress dashboard. Navigate to WooCommerce ⇒ Settings.
- Find the option “Enable taxes”, and check the box to enable it.
- Press “Save changes”.
With the steps followed, a new tab “Tax” will be added to WooCommerce ⇒ Settings. To manage your tax settings, you can now use this tab (WooCommerce ⇒ Settings ⇒ Tax).
Prices and taxes
How to specify if you want to enter the price inclusive/exclusive of taxes?
You can tell WooCommerce if you want to add prices inclusive of taxes or want the tax to be added separately. To manage this,
- Navigate to WooCommerce ⇒ Settings ⇒ Tax ⇒ Tax options.
- You can choose if you want to enter prices inclusive of taxes or exclusive tax.
- Also, there are other settings that are explained in detail by this video from WooCommerce.
The following video from WooCommerce explains how you can manage the taxes of your eCommerce website.

