General WooCommerce settings for getting started.
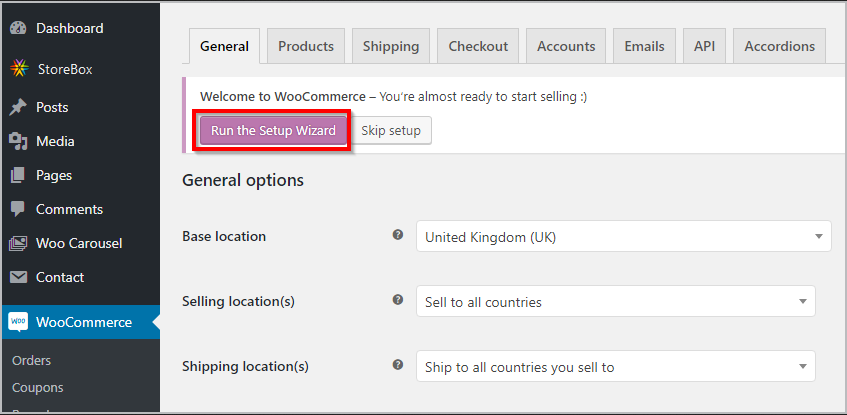
First of all, when you’re prompted to run the WooCommerce setup wizard, don’t skip it. The setup wizard will guide you through the basic settings to get started with your WooCommerce shop. It will ask you a few basic questions like your base location, currency, the unit of weight and dimension, etc.
Basic Store settings
To set the basic options like shop location and enabling tax calculations regarding your store, you can follow the steps given below.
- Head to WooCommerce ⇒ Settings.
- Under the general tab, the General options will let you set the location of your store.
- With the “selling locations” options, you can specify the countries for which the shop will be accessible.
- Also, you can specify the countries to which you are willing to ship the products to.
Currency Settings
To change the currency of your eCommerce website
- Navigate to WooCommerce ⇒ Settings.
- Choose the general tab you’ll find the “Currency options”.
- Expand the drop-down against “Currency” and choose the one you want.
- Click “Save changes”.
The position of the currency symbol
Once you choose the currency, you can decide the position of the currency symbol.
- Navigate to WooCommerce ⇒ Settings.
- In the general tab, under the “Currency” option, there’s the option to manage “Currency position”.
- This is where you can mention if you want the currency symbol to be placed before or after the price.
- Also, you have a few other options using which you can set the thousand separator, the decimal separator, and the number or decimal.
The WooCommerc’s video embedded below will help you figure out what are the basic steps and options that you need to set up before getting started with your eCommerce website.