Templatic has come up with yet another payment gateway that is simple, powerful payment option that delivers easy, scalable and secure online and mobile payments. It creates a seamless customer experience on your website by offering more payment options, impressive security features and easier integration.
Tip: Click here to know payeezy better before integrating it in your site.
Using Tevolution – Payeezy plugin can be as simple as using any other payment gateway. You will need to create an account with payeezy to use this extension on your site.
Prerequisites:
- Tevolution
- A merchant account with Payeezy.
Installation and Activatation
Here is how you can install and configure Payeezy gateway using Tevolution-payeezy plugin:
- Download the Tevolution-Payeezy.zip file from your member’s area (plugins tab) to your desktop.
- Now go to wp-admin >> Plugins >> Add new >> Upload.
- Browse for the zip file and click on “Install now”.
- When the installation is done, you will see a link to “activate the plugin” along with the message of successful installation. Click it. Or you can also go to Wp-admin → Plugins and activate the plugin.
- An alternate way to do is by directly uploading the Tevolution-Payeezy extracted folder to the “wp-content/plugins” folder directly to your server using FTP and then activating it through ‘wp-admin >> plugins’.
Back-end Configuration
The configuration process of payeezy is very simple. As mentioned in the prerequisite, having a merchant account with Payeezy is necessary.
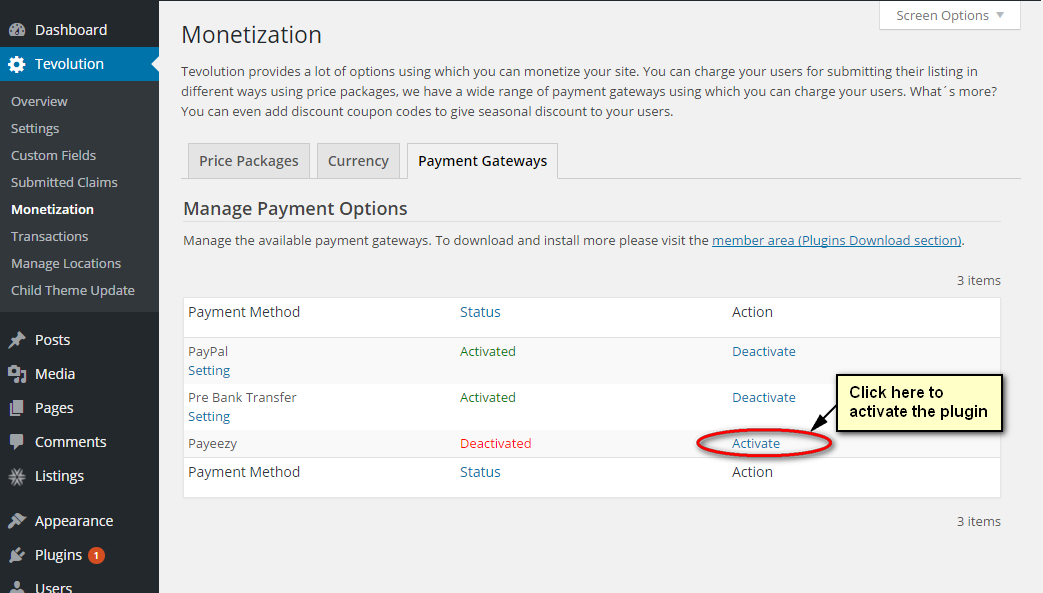
- To configure payeezy navigate to Wp-admin >> Tevolution >> Monetization >> Payment gateways.
- You will see payeezy Deactive at first. You can Activate Payeezy by clicking the link ‘activate’ under the column Actions. See the image.

- Next, Click on the ‘Settings’ link given below the payment gateway name (i.e. Payeezy) .It will take you to the Payeezy settings page of WordPress. Start editing the settings.
- Payment Method Name: This will be shown on the Checkout page. It will tell the user, which payment gateway is being used for the payment.
- Default Status: Activate will activate your payeezy on your site and enable the payment method on your site while Deactivate will obviously, deactivate the payment method.
- Position / Display order: This is related to the appearance and the location of the payment method in the list. It is a numeric value that used for ordering payment methods on front end.
- Use Payeezy in test mode? : This will determine whether payeezy is used for testing purpose on the admin side or for actually receiving payments. When you have check marked this it will run in the test mode and the payments made meanwhile, wouldn’t be received. So on finishing the testing, uncheck it to avoid any problem in payment receipt.
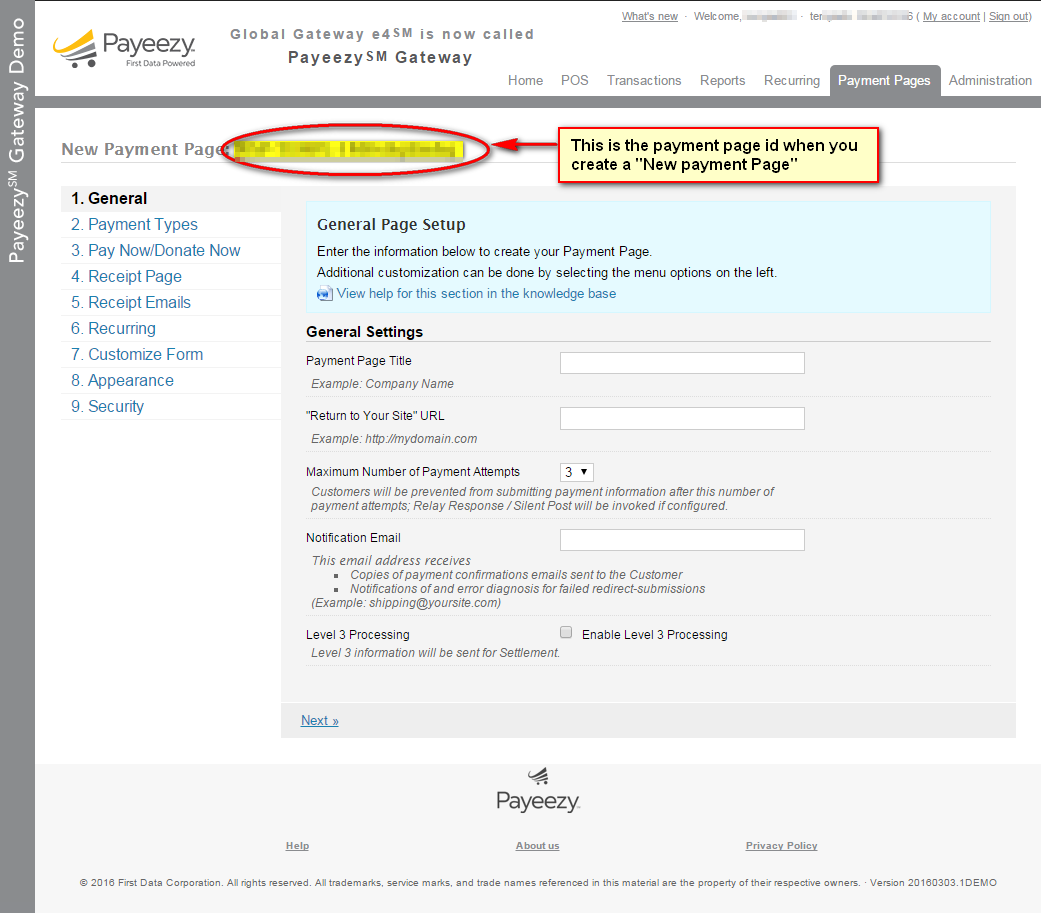
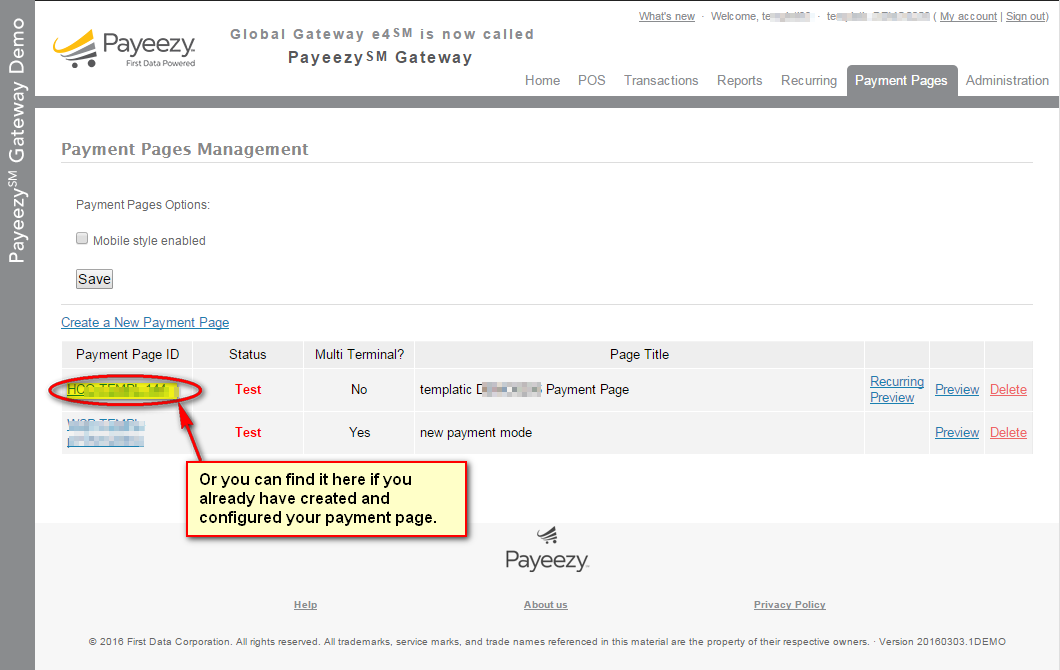
- Payment Page Id: When you make a payeezy account, you will get this id when you configure your payment page. It is required to run the live payment process.(Login to your payeezy merchant account and navigate to payment page tab and click on create new payment page and configure it or use the existing page if you have already created.)
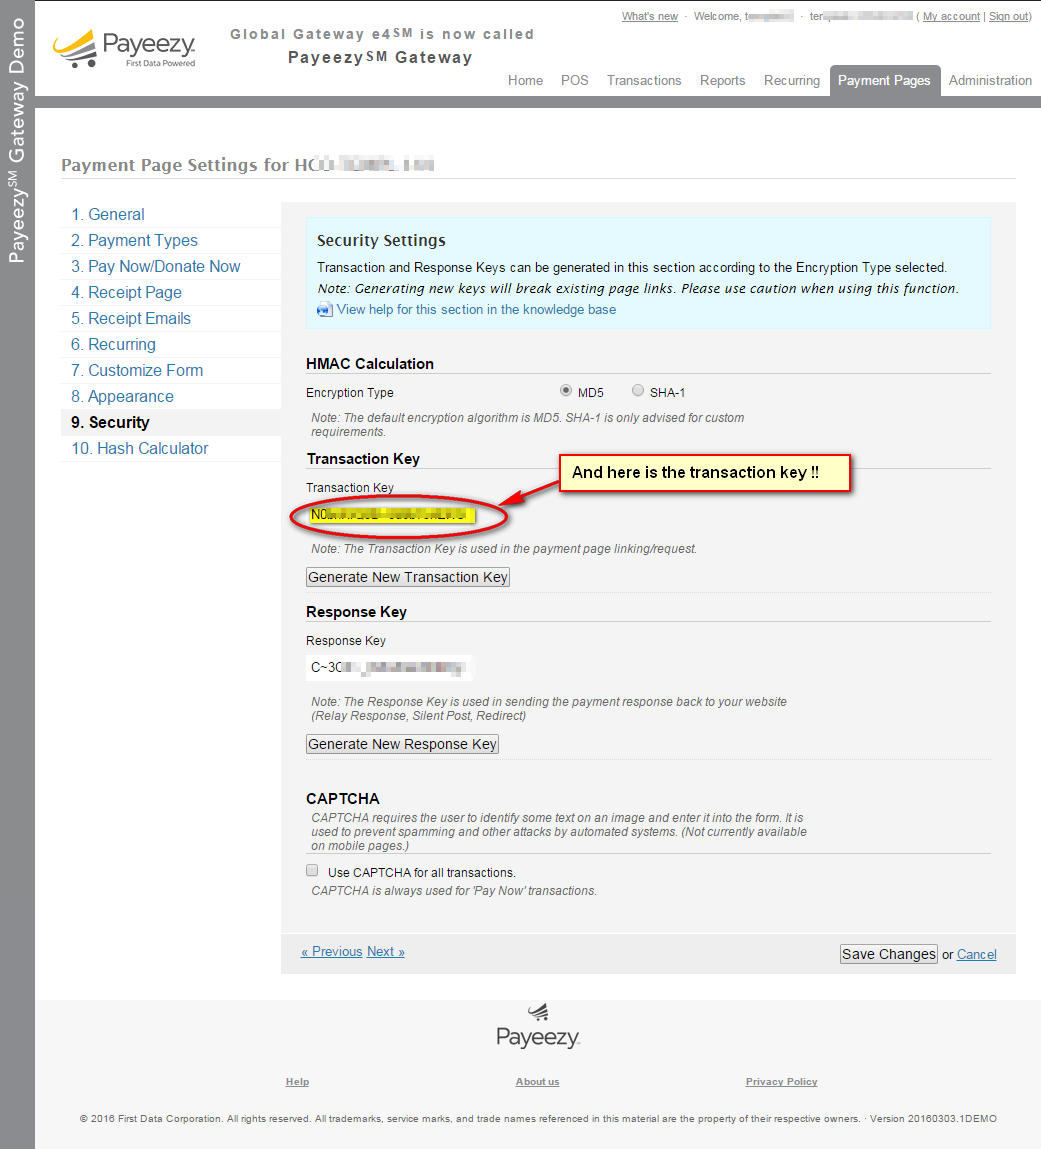
- Transaction Key: This key will also be provided after creating the payeezy account. It, also is required to run the live payment process.
- Currency code: The currency code is an ISO certified code that will represent the currency in which the payments will be received/accepted. For example: USD for US Dollar, CAD for Canadian Dollar and INR for Indian Rupee.
So, with this steps your Tevolution-Payeezy extension integration is done !!