Add Scripts
In case you want to insert additional Scripts for your Website, than you can make use of Add Scripts Function built in our Framework:
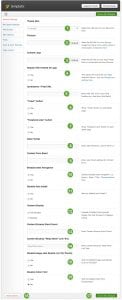
Header Scripts – Using this field, you can add additional Scripts at the top of your Website. Example: Mint tracking code, etc.
Footer Scripts – Using this field, you can add additional scripts at the bottom of your Website. Example: Google Analytics Code, statcounter Code, etc.
General Settings
Following is the screenshot of General Settings of the new Templatic Framework


Theme Skin – Using this option, you can select the CSS Skin for your Blog
Favicon – Using this option, you can upload Favicon for your Website. You can also create a Favicon using favicon.cc
Custom Logo – If you want to make use of a specific Image as logo for your Website, than you have to make use of Custom Logo field/option. Using this field/option, either you can paste the URL of your Image File or upload desired Image File from your Hard Disk to your Hosting Server
Display Title Instead of Logo – If this option is enabled, then your Blog Title will always be Text, irrespective of the setting you choose above i.e. in Custom Logo Field
Syndication/Feed URL – If you are using services like FeedBurner, Feedblitz for handling the RSS Feeds of your Website, than you can paste the original Feed Address in this Field
Tweet Button – This option when enabled will add a small Tweet Button at the Bottom of each post/article in your Website – Useful for sharing your content over Twitter
Facebook Like Button – This option when enabled will add a small Facebook Lke Button at the Bottom of each post/article in your Website – Useful for sharing your content over Facebook
Date Format – In case you want to set custom date format for your Blog, than you can make use of this option. Example: DD/MM/YY or MM/DD/YY
Contact Form Email – If you have used Contact Us page template in your Website, than the Email Address which you enter in this field will become the default contact Email Address for your Contact Form
Breadcrumb Navigation – This option Enables or Disables breadcrumb Navigation for your Blog. E.g. Blog > Category Name > Article Title
Disable Auto-Install – In case you don’t want to see the option to Install Dummy Content/Sample Data from Themes section, then you can disable it from here.
Content Display – Choose in between Excerpt and Full Content for Articles in Category Listing
Content Excerpt Word Count – If you choose to display only Excerpt for Articles in Category Listing, then you can set the Excerpt Length from here.
Content Excerpt Read More Link text – If the length of original Article is greater than the Excerpt Length, there will be a Read More Text Link. You can customize the text for Read More Link using this option
Disable Image Auto Resize (via Tim Thumb) – In case you are facing difficulties in rendering images in your website, and want to disable Tim thumb script, then you can disable it from here.
Disable Cufon – You can disable or enable cufon font replacement from here
Save All Changes – After making the changes, click on Save All Changes to save your settings.
Reset Options – This option can be used to reset all options to their default settings. This is useful when you think that you have made some unwanted changes in settings and now want to reset it to their default settings.
How to add Shortcodes to your existing Templatic themes ?
Note: If you are using WebHosting theme, then you don’t need to follow this guide. Shortcodes are already included in WebHosting theme. If you are using any other theme, then follow this tutorial.
Templatic offers a new feature called shortcodes whereby you can add different style and layout to your content. This quick tutorial will explain how you can add shortcode functionality to your existing Templatic theme.
First click here and download this ZIP file and extract its contents.
Place the ‘shortcodes-style.css’ file in the theme’s root directory (basically in the same folder where ‘style.css’ is.)
Open ‘style.css’ in a text-editor and add the following code at the top:
/* Import Shortcodes CSS */
@import url(‘shortcodes-style.css’);
Save the ‘style.css’ file.
Now place the shortcodes.php file in /library/functions/ directory (basically in the same folder where custom_functions.php is)
Open custom_functions.php in a text-editor and add the following code at the top, just after the ‘
Page Layout
With the options in Page Layout, you can easily customize the overall appearance of your Website:
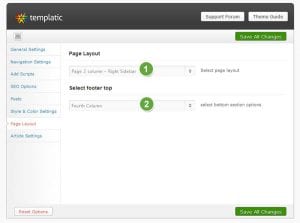

Page Layout – Using this option, you can customize the positions of various elements viz. sidebar, number of columns etc. present in the theme.
Select Footer Top – Using this option, you can easily customize the total number of columns to be used in the footer
Posts
From this section, you can control various settings:
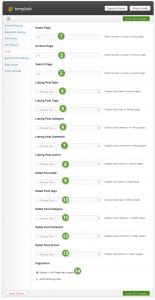

Homepage – Enter the total number of posts/articles that you want to show on the Homepage of your Website
Archive Page – Enter the total number of posts/articles that you want to show on the Archive Page of your Website
Search Page – Enter the total number of posts/articles that you want to show on the Search Page of your Website
Listing Post Date – This option when enabled displays post date in listing pages
Listing Post Tags – This option when enabled displays post tags in listing pages
Listing Post Category – This option when enabled displays post categories in listing pages
Listing Post Comment – This option when enabled displays post comment in listing pages
Listing Post Author – This option when enabled displays post authors in listing pages
Detail Post Date – This option when enabled displays post date in detail pages
Detail Post Tags – This option when enabled displays post tags in detail pages
Details Post Category – This option when enabled displays post categories in detail pages
Detail Post Comment – This option when enabled displays post comment in detail pages
Detail Post Author – This option when enabled displays post author in detail pages
Pagination – In this option you can select in between Default + WP Page-Navi support and AJAX fetching Posts, in order to select the Pagination Option for your Website
SEO Options
Search Engine Optimization (SEO) plays a very vital role in the overall ranking of your Website and it’s pages in Search Results. We have fully functional SEO Options in our Framework, using which you can highly optimize your Website for Search Results
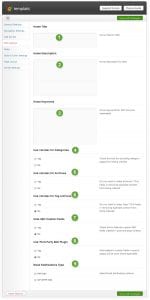

Home Title -Insert the Home/Website Title meant for SEO in this Field
Home Descriptions – Insert the Home/Website Description meant for SEO in this Field
Home Keywords -Insert the Home/Website Keywords meant for SEO in this Field
Use noindex for Categories – If you want that Search Engines don’t crawl the category pages of your site, then you should Enable this option, in order to insert noindex meta tag for Category Pages
Use noindex for Archives – If you want that Search Engines don’t crawl the Archive Page of your site, then you should Enable this option, in order to insert noindex meta tag for Archive Page
Use noindex for Tag Archives – If you want that Search Engines don’t crawl the Tag Archives pages of your site, then you should Enable this option, in order to insert noindex meta tag for Category Pages
Hide SEO Custom Fields – By enabling this option you can easily hide the custom SEO fields created in post and page screens
Use Third Party SEO Plugin -If this option is enabled the data added to custom fields in post & pages will be used where applicable
Email Notifications Type – Choose the type of Email Notification using this option. The option can be either PHP Mail or WP SMTP Mail
Style and Color Settings
From this section, various color and style settings can be configured:
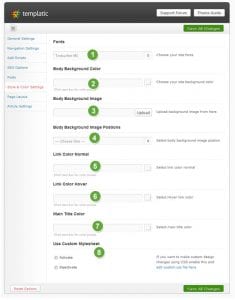

Fonts – Using this option you can set the default font for your theme
Body Background Color – In case you are interested in specific color for the background of your Blog, choose your preferred color using this option
Body Background Image – If you want to use a specific image for the background of your blog, then with this option you can upload and set the background image for your website very easily
Body Background Image Positions – After you have uploaded the Background Image for your website, you can align its position using this option
Link Color Normal – Here you can select the Normal Color of Hyperlinks in your Website
Link Color Hover – Here you can select the Color of Hyperlinks when they are hovered with Mouse Pointer
Main Title Color – Using this option, you can select the color of your Website’s main title
Use Custom Stylesheet – If you want to make custom design changes for your Website, than you should enable this option first and then edit the custom.css file. For editing the CSS file, you need to head over to Appearance >> Editor and make necessary editing in specific Cascading Style Sheets (CSS File)
