Installing the Theme
Start by downloading the zip file of the theme from your Templatic Member’s area.
Now, extract the file using an application like 7zip. The download tab in your members are will show you two compressed theme installers – Templatic V2 & Medical. Download them both and you can proceed to install the theme.
Templatic v2 is the parent theme and therefore you will install it first but not activate it (only activate the Medical child theme). To install the themes, navigate to Appearance ⇒ Themes.
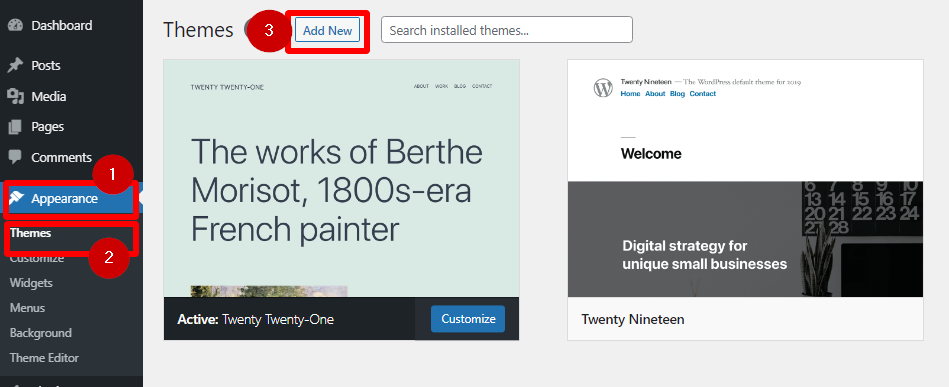
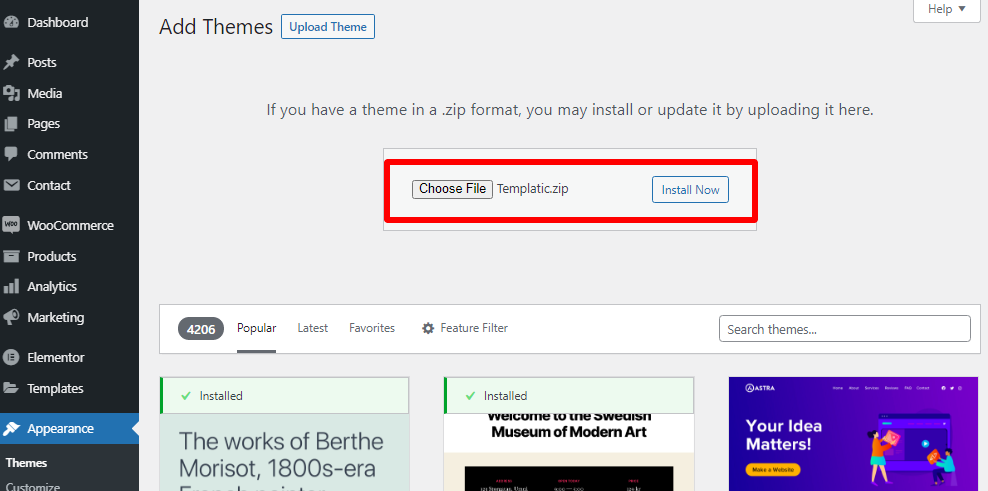
In the next step, you can upload the TemplaticV2.zip compressed file.
Once the theme is installed, you will see a screen like:
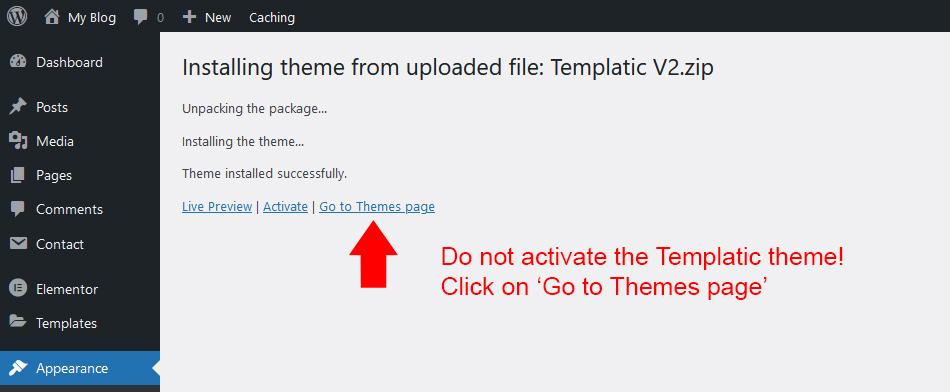
Next, we will proceed to install the Medical theme, which is the Templatic theme’s child theme
Now install the Medical theme while you are at Appearance ⇒ Themes.
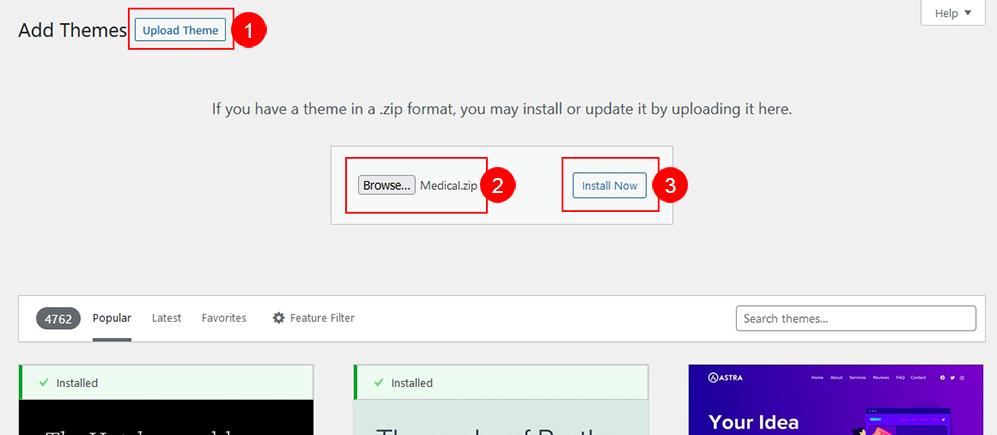
Upload and Install the theme.
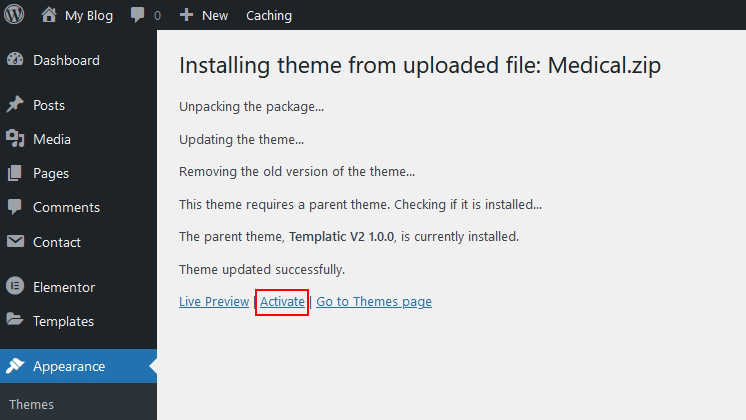
And activate when the theme is installed. The next step will to import the theme’s sample data.
Importing the Sample Data
As soon as the Medical Theme is installed, you will see a screen that will allow you to import the sample data.
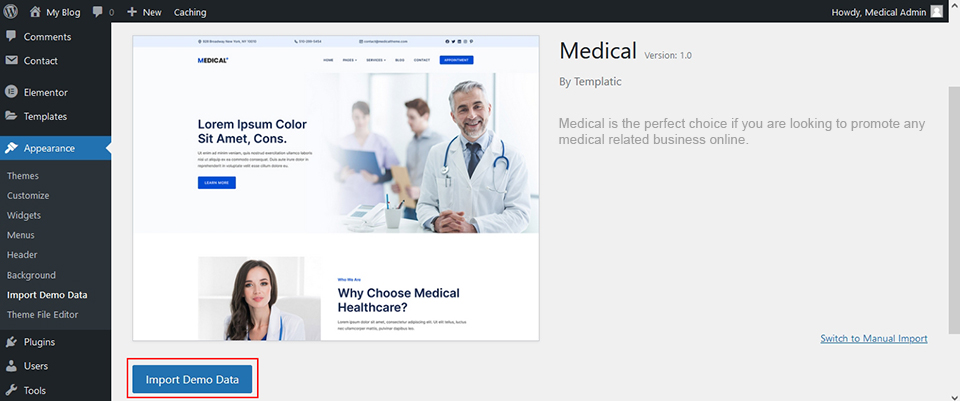
The sample data will populate your website with the page sections in their places, demo images and content so that you don’t have to start with a blank site. Click on the ‘Import Demo Data’ button to start the import.
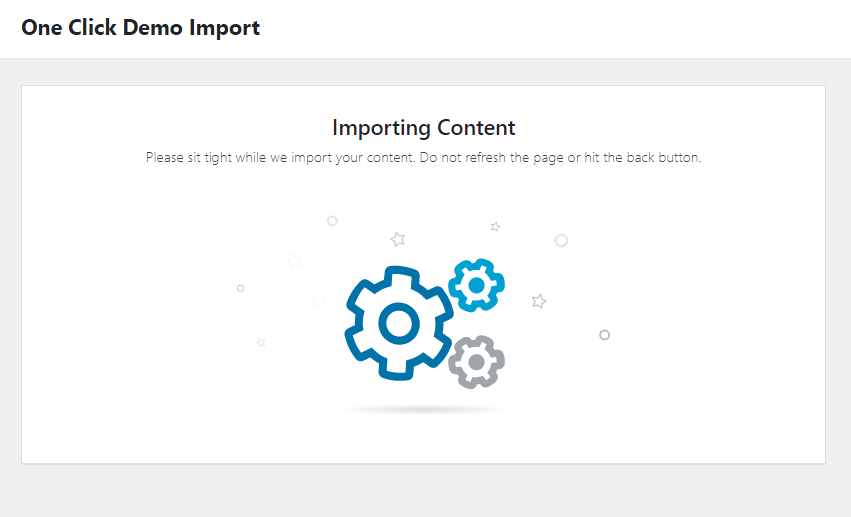
The install will take a while. Sit back and relax!
Once all the essential tools are installed, the next process of installing the sample content will start automatically, without requiring any action
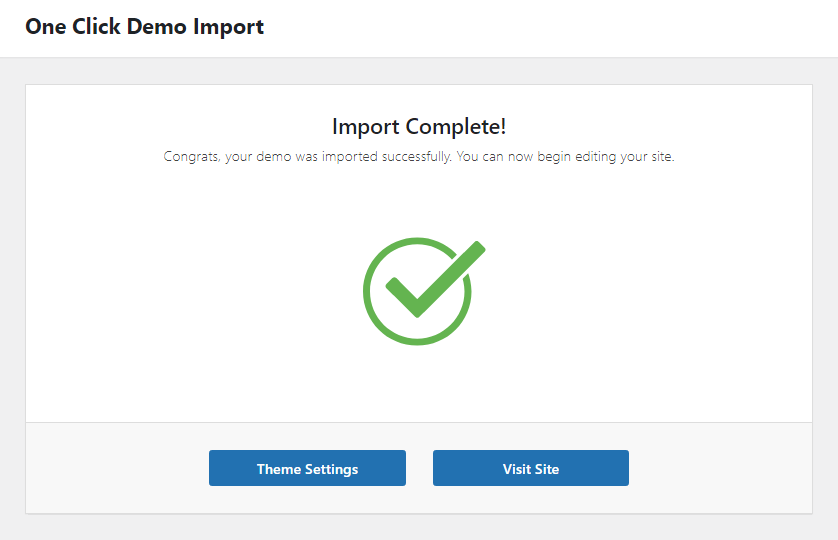
And once the sample data is installed, you are ready to experience your website. Choose to edit it or visit the site to see how your website will look.
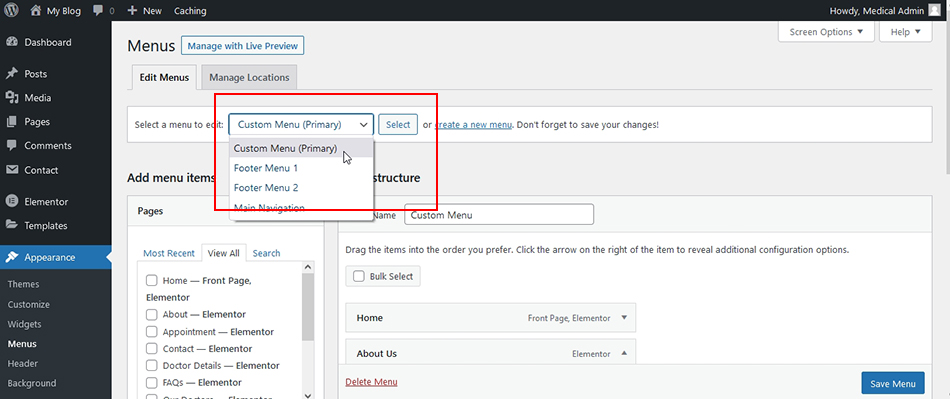
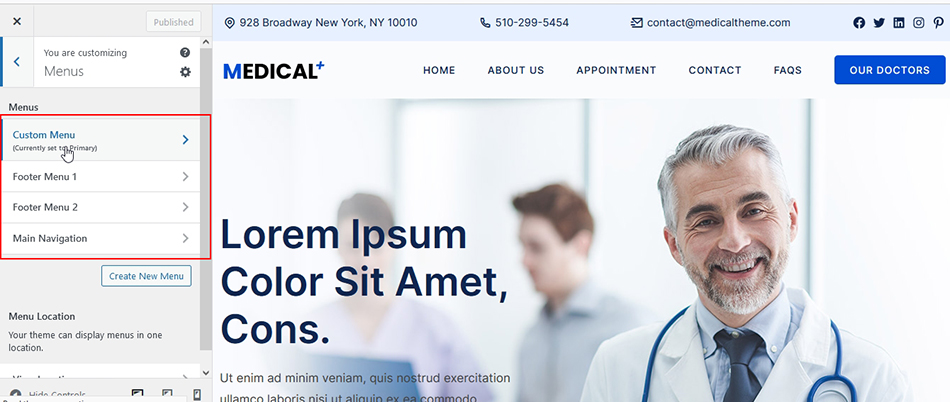
Managing Menus
To manage the existing menu or create a new one
1) Choose the menu to edit from the drop-down, press select.
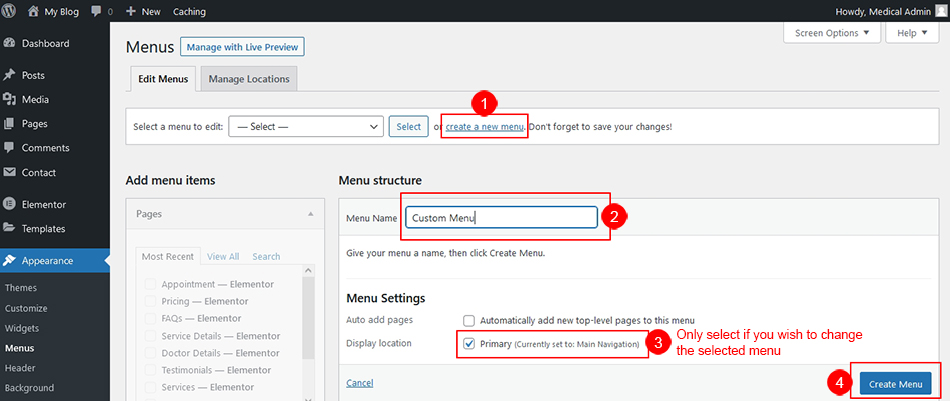
Or to create a custom menu:
If you want to build a menu of your own, select ‘Create a new menu’ in Appearance ⇒ Menus.
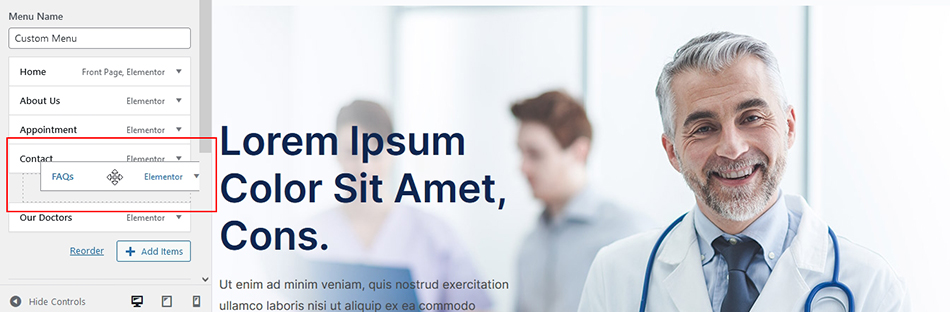
2) Managing the menu items
The left sidebar of the menu options screen will let you choose the menu items, you can choose from different post types, pages, categories, or even set a custom link as the menu item.
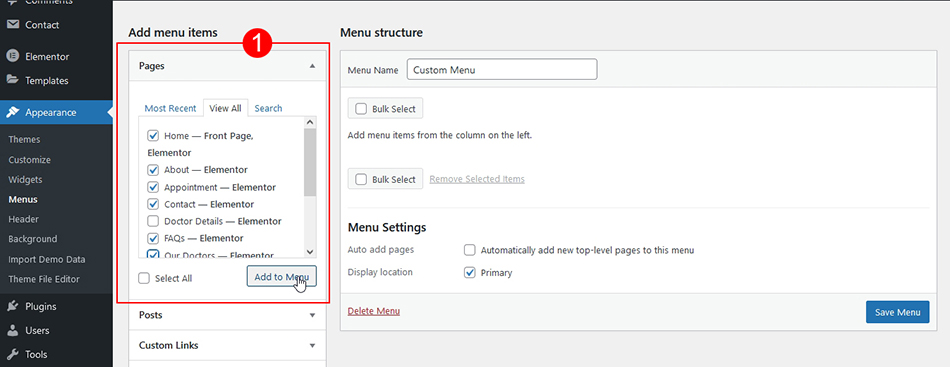
Now check the boxes of the menu items you wish to add to your new menu, and click ‘Add to Menu’.

You can now drag and drop if you wish to arrange the order of the menu items you’ve added. Once you’ve arranged the menu items, don’t forget to click on the ‘Save Menu’ button.
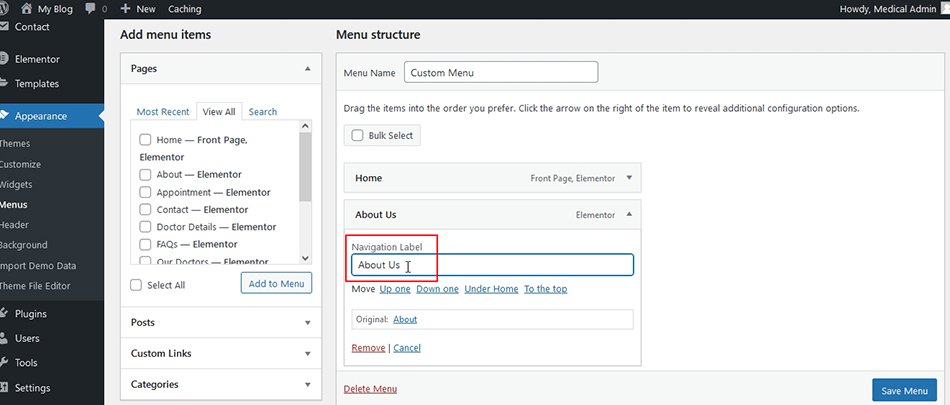
3) Managing menu structure
Changing the name of a menu item is done by simply typing the text you want to appear as the label for a menu item.
To set your custom menu as the main menu, you just have to:
1) Choose the menu
2) Set as primary
Scroll to the bottom of the page, behind the menu structure, to find the “Display location” option, and tick – primary.

Manage with Live Preview
You can also use the manage with the ‘Live Preview option to see changes you make on the go.
Once you’ve selected the menu you wish to edit, the ‘Live Preview’ option also allows you to use the drag and drop options to manage the menu structure.
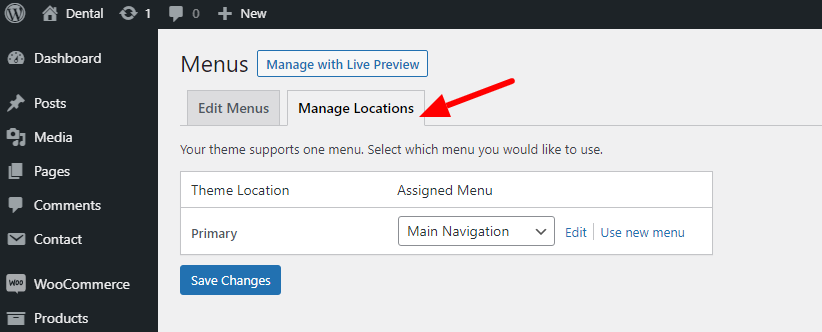
Menu: Manage Locations
The theme has only one location for setting the menu, with the dropdown available here, you can choose the menu that you want to show as the primary menu. Just choose the menu, and click save changes.
Elementor Basics
Almost all the pages of this WordPress theme are built with Elementor page builder. This means you can easily edit them with the drag and drop options of the Elementor page builder.
This page builder is really easy to use even for beginners. But to get started with the Elementor page builder to edit the pages of your website, here are some basic tips:
Editing a page with the Elementor Page builder
Elementor is a front-end page builder and you can use it to edit the pages of your site built with the Elementor builder.
Adding new sections
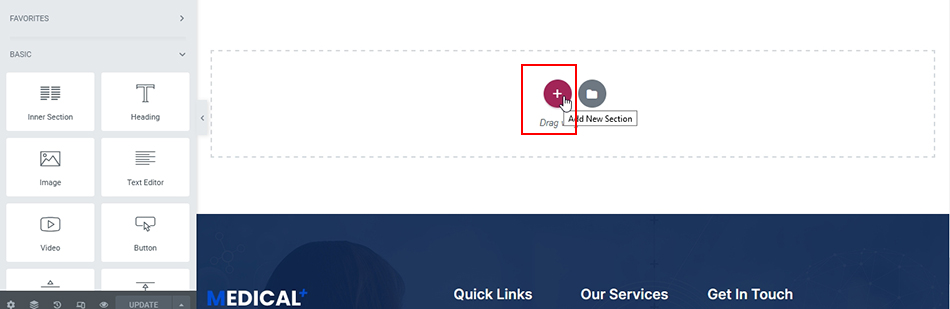
To add a new section to your page, scroll down to the end of the page and find the button with ‘+’ (plus) sign. This will add a section and you can drag an element from the sidebar to the section.
You can add unlimited new sections on any Elementor based page by using the available options. You can choose either to use a widget or choose from the available templates.
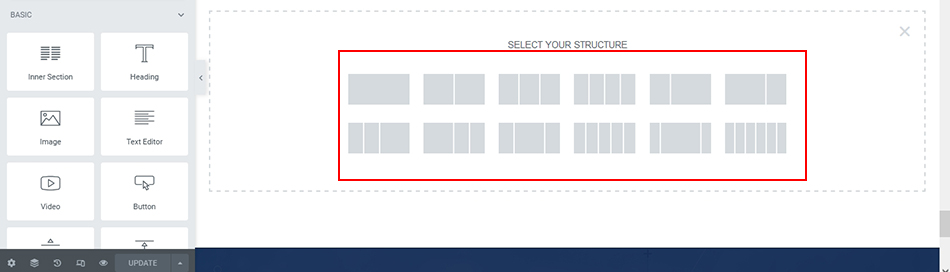
If you choose to add a section through widget, you will be asked to choose a layout for the section.
Columns and adding widgets to it
Elementor lets you choose the layout for each section. You can choose if you want a full width section, or a section with two or three columns, etc. After choosing the layout, you can easily drag and drop the content elements like text, widget, image, video from the left panel.
Moving sections
To move the section, you can use the simple drag and drop options to move it to the top or towards the bottom.

Deleting a section
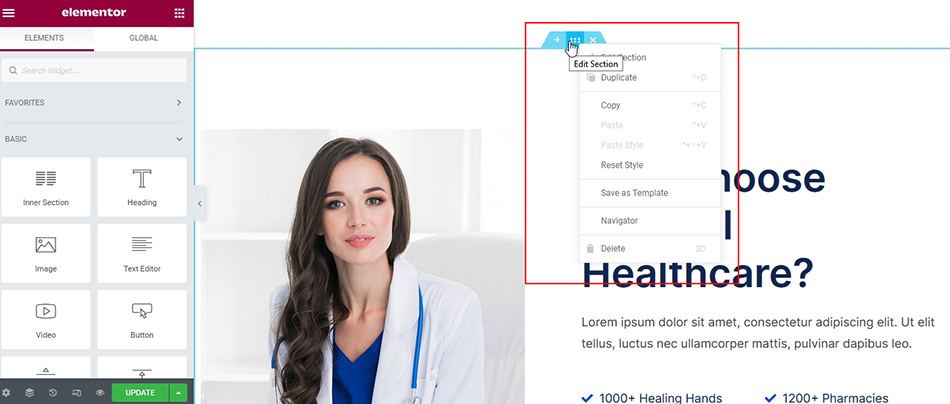
To delete any section on any page, you can right-click on the edit option of a section. The drop-down menu will display a few options and one of them is ‘Delete’. You can also delete a section by clicking on the ‘X’ in the top right corner of a section.
The Right click options
Discover all of the options the right-click on any section offers you. These are very useful and will save you time when you’re working on any page.
For more details on how to use the Elementor page builder, refer to this guide
Styling your sections
The instructions on how you can style your columns is available here.
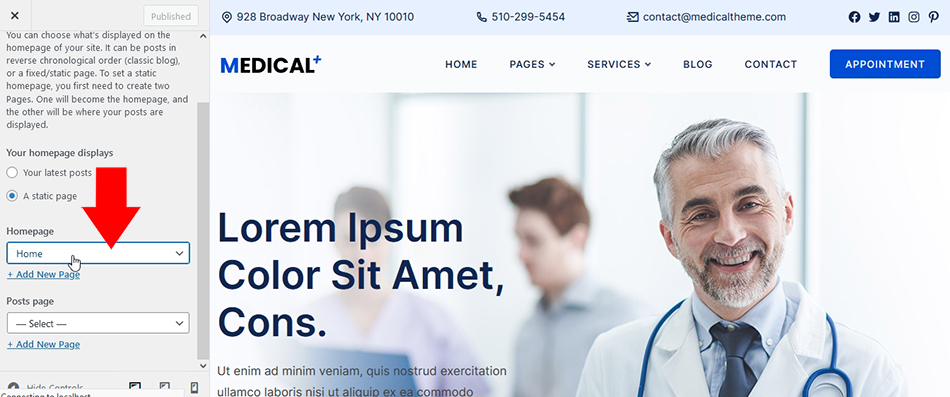
Homepage Management
Homepage selection
The Medical theme’s sample data comes with the homepage set to the theme’s homepage design by default. To set your site’s homepage to a different page, you can navigate to Appearance ⇒ Customize ⇒ Homepage and select the page from the list of the pages on your website. This is basically another path in the dashboard for Settings ⇒ Reading from where you can make the same changes.
Homepage Settings
The homepage of the Medical theme is built with Elementor. This means that the page can be easily tweaked with the Elementor page builder options.
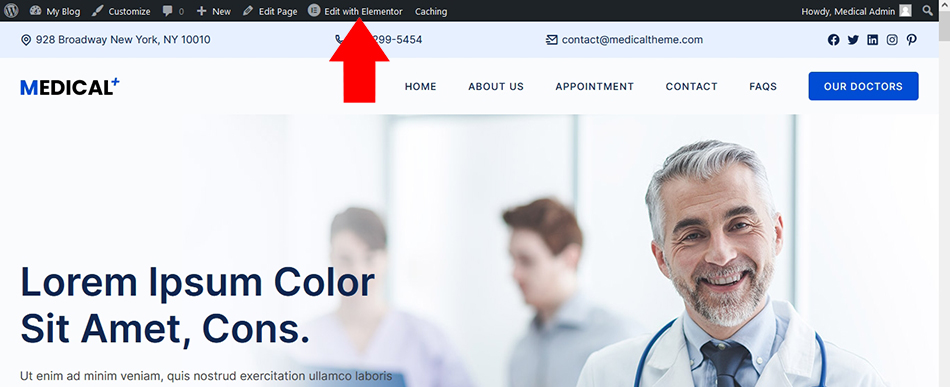
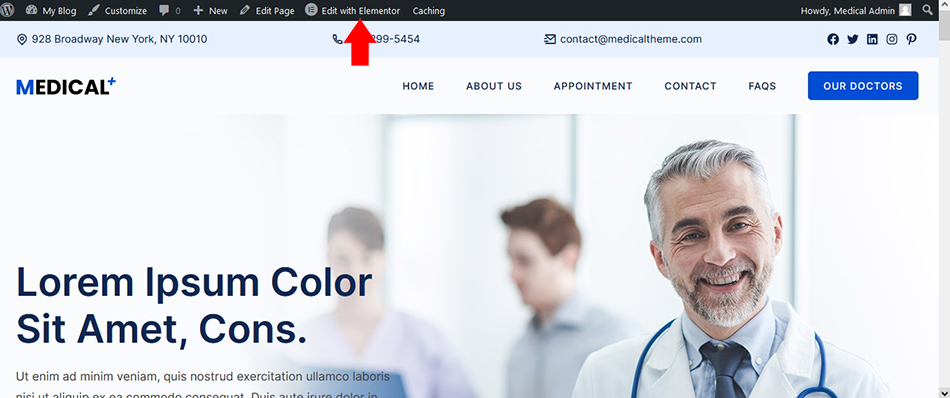
Editing the homepage with Elementor (front-end)
To be able to edit your page on the front-end with the Elementor page builder, you can follow these steps:
1) Log in as administrator.
2) Visit the homepage from the front-end of your website.
3) Click on the “Edit with Elementor” on the black admin strip at the top.
Editing the homepage with Elementor (back-end)
To be able to edit your page on the back-end with the Elementor page builder, you can follow these steps:
1) Log in as administrator.
2) Go to Pages ⇒ All Pages
3) Find the homepage and Click on the “Edit with Elementor” in the black admin strip at the top.
Editing the homepage
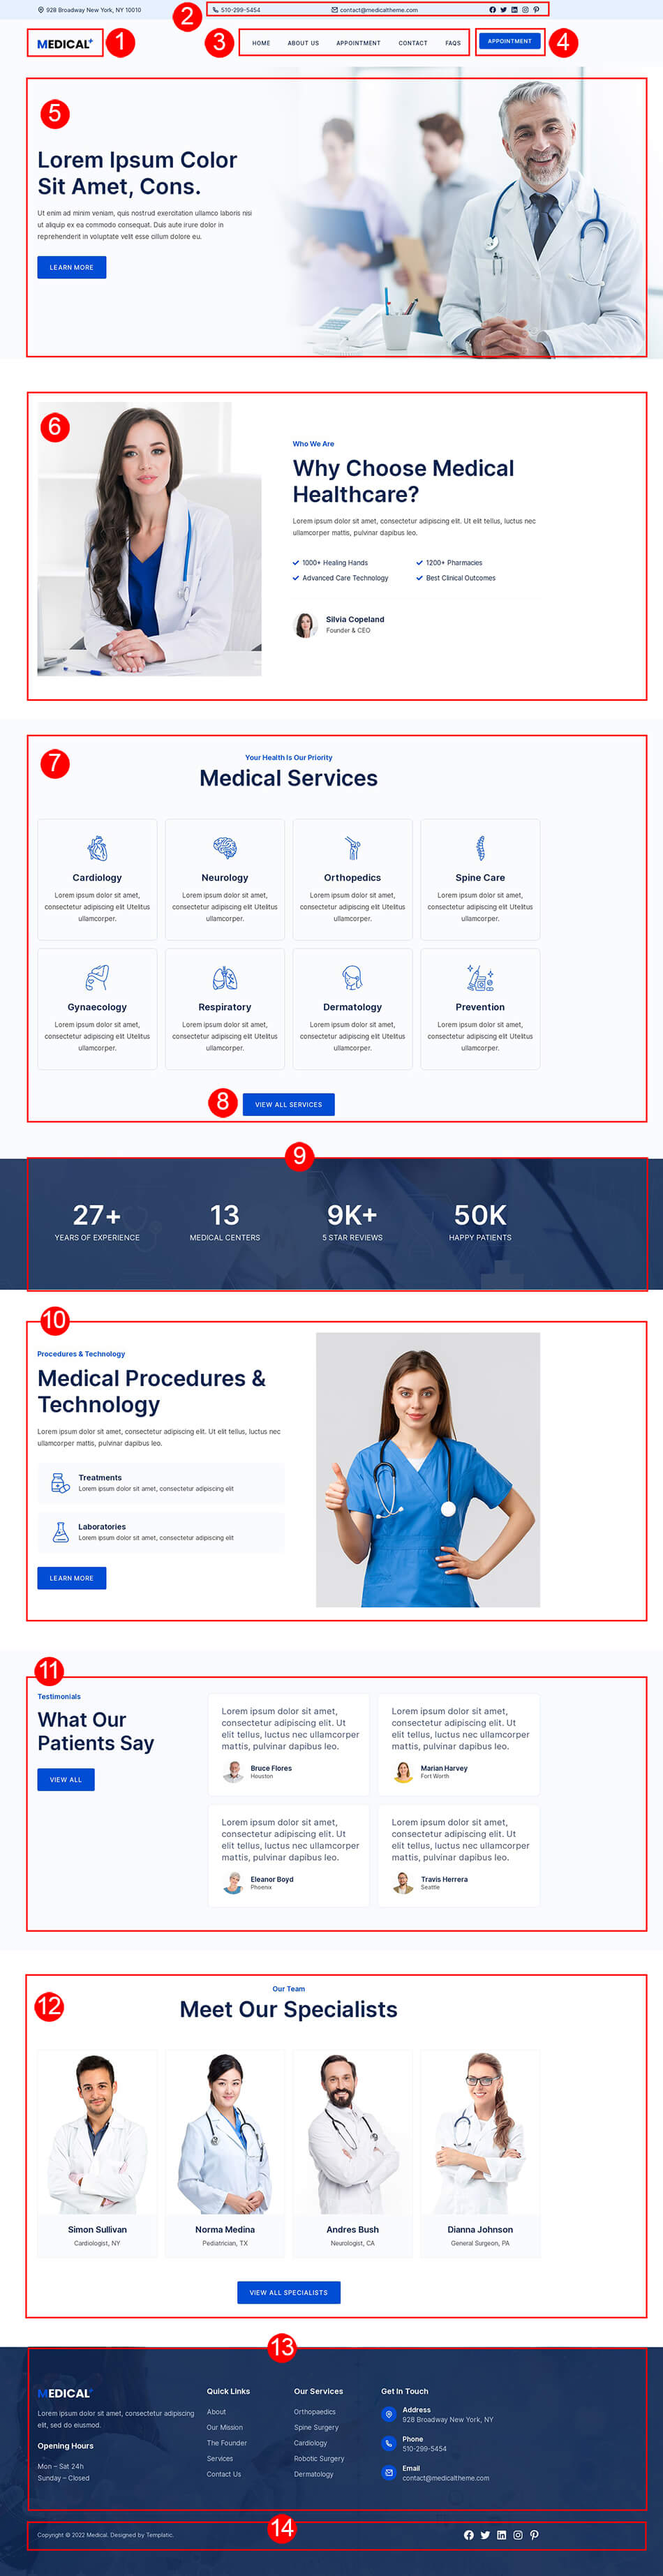
1) The logo, Site Title
This is the section that can display either the logo image or the site title. To change it you can use the backend options.
Navigate to your dashboard, go to Appearance ⇒ Customize ⇒ Site Identity
![]()
To set the site title, remove the logo image and set an appropriate title. And check the box against “Display site title and tagline”.
This is also the same place where you can set the site icon. You can change the favicon using ‘Site Icon’ uploader which is just below the ‘Logo’, ‘Site Tile’ and ‘Tagline’ settings.
2) The phone number, email address and social icons
This part of the header can be controlled in widgets. To be able to edit it, navigate to Appearance ⇒ Widgets.
The widget area that contains these items is called “Header Top Area”.
You can easily replace the phone number, phone number and social icons with your own.
3) The Menu
This is the ‘Main Navigation’ menu of the theme which gets created when you install the theme’s sample data.
You can manage this and all menus by navigating to Appearance ⇒ Menus.
4) Appointment button
Appears in the header area and it’s the last menu item on the theme’s ‘Main Navigation’ default menu. This menu is created and populated when you activate the theme and import its sample data and content. You can rename and re-link this button by editing the last menu item on the ‘Main Navigation’ default menu.
The button will also appear on the last menu item of any new custom menu you create.
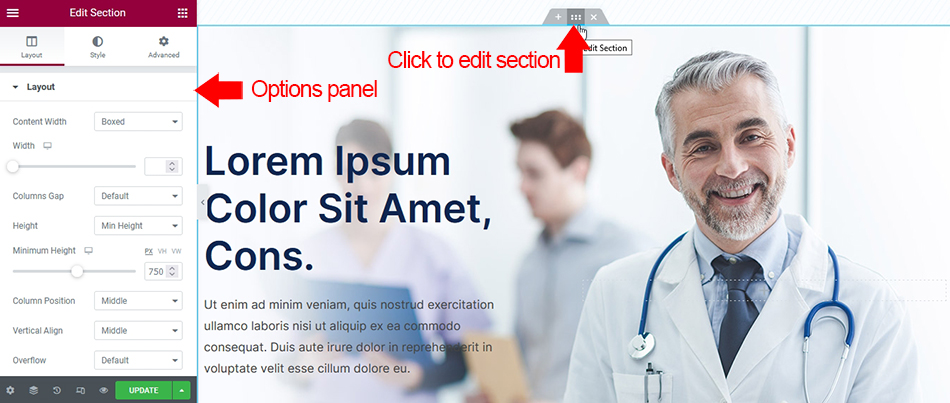
5) Banner Area
To edit the section, you have to use the Elementor options. Edit the page with Elementor, and click on the tiny Elementor edit section button at the top of the section.
The Background image
You can change the background image of the banner area, and replace it by uploading your own image by using the Elementor styling options. Click the style tab, and find the option to upload and manage the background image.
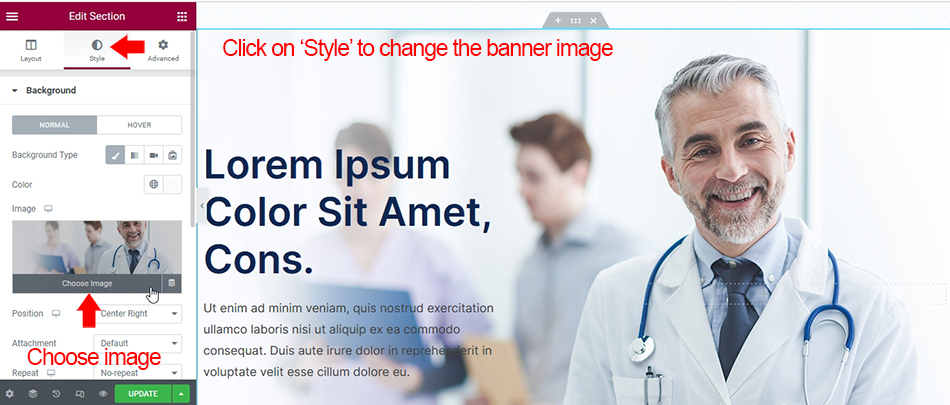
The recommended size of the banner image is 1920 X 850 pixels.
The Text and Subtext
You can change the text and sub-text by editing the section. To change the text, you can simply start typing over the sample text on the left panel that you are editing.
You also have the layout options, styling options, and advanced styling options that you can use to style the text.
All these options will give you enough flexibility to change the color, background, and borders. Font style, font color and much more.
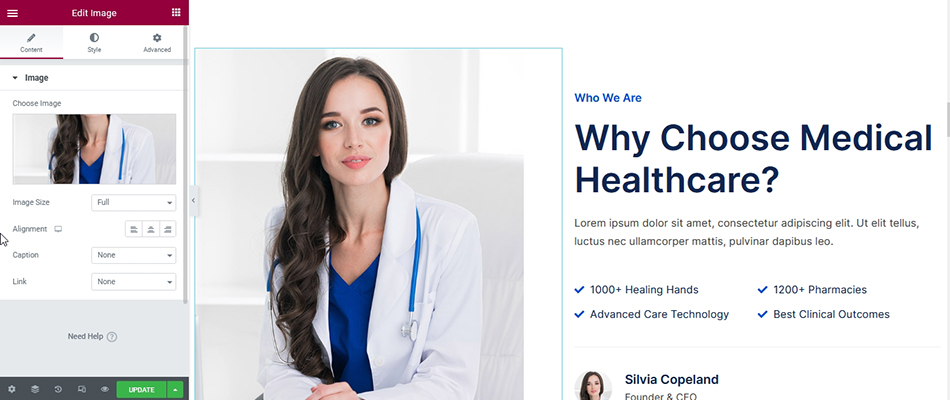
6) Why Choose Medical Healthcare Section
This section contains a few elements which can be edited individually. You can for example click on titles to edit them and on the main image and choose another image of your own. The other elements inside this section also have the editing option so you can click on each of them to start editing their content.
As with any section on a page, you can also delete, duplicate or drag and drop this section to change its position on the homepage.
7) Medical Services Section
This section is made up of different image boxes with titles. You can change the title of each service by selecting it and typing over the sample text. As well as this, you can also upload your own image for each service. Adding more services is possible by duplicating a service by right-clicking on its edit icon in the top right corner of its box.
8) Medical Services Section – Button
The button at the bottom of the box can be edited too. Changing the button’s label and its color, the background color and the URL the button goes to when clicked. To edit this button, you can right-click on its edit icon in the top right corner of its box
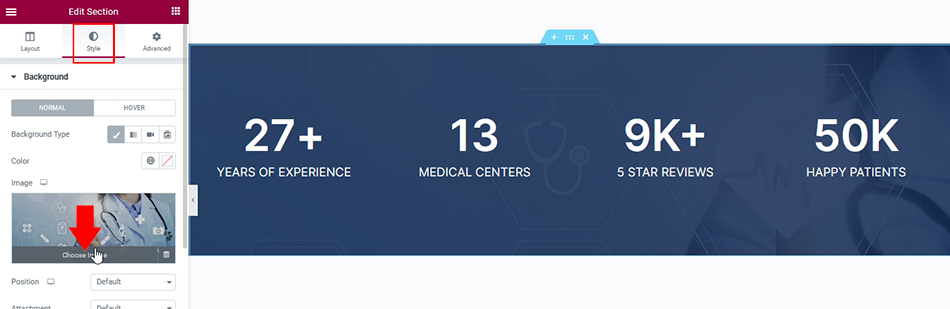
9) The Counters Section
This section is a combination of text as well as a background image. You can edit this section to change the text, values and the background image. Clicking on each element in the counter will open an option on the left for you to change the label and values for each counter.
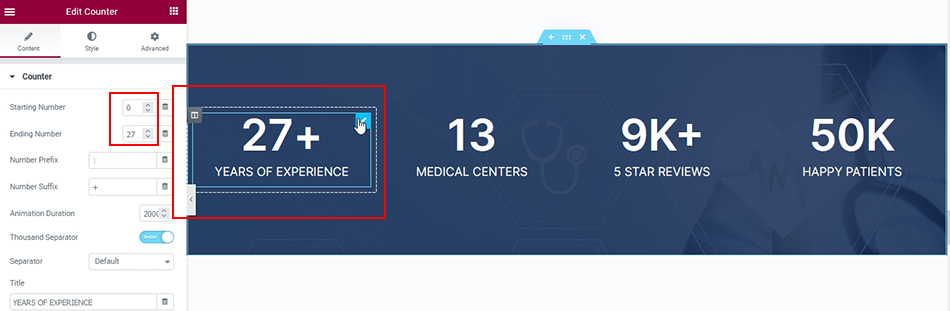
The counter background image can be changed from ‘Style’ while you’re editing this section.
10) Medical Procedures & Technology Section
As with previous sections, each element in this section can be individually changed by editing it.

11) Testimonials Section
This is the testimonials section which can easily be edited. Adding your client’s testimonials is done by editing the section and then each element inside the section.
12) Meet Our Specialists Section
The ‘Testimonials’ section is as easy to edit as all of the previous sections. To change the section’s title, simply click on its title and start typing your text to replace the sample title. Each image, name and bio can be edited by clicking on each element’s edit button in the top right corner of each card.
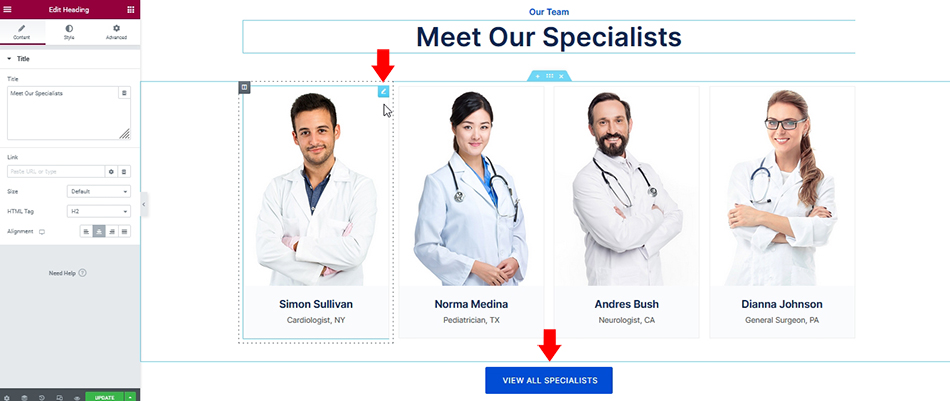
Changing the button at the bottom of this section is possible too. To change the button’s label or background color and the URL it goes to when clicked, click on it or its edit button.
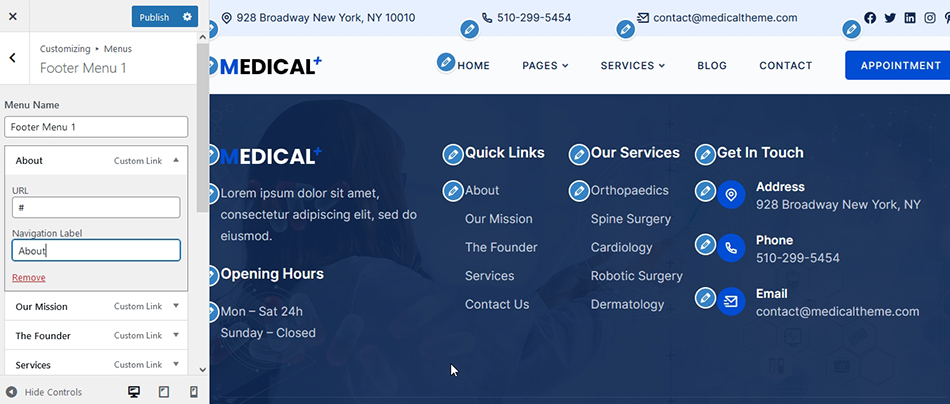
13) The Footer
The content of the footer can be changed in Appearance ⇒ Widgets ⇒ You will find several footer widget areas there.
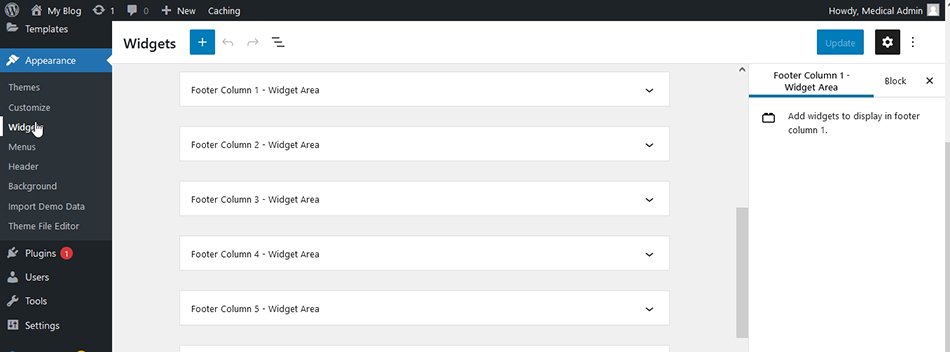
Another way to edit the footer content is by going to the frontpage for example and then Appearance ⇒ Customize. You should be able to scroll down to the footer area and see the edit icon for each widget area.
14) Footer Credits
You can change the footer credits by navigating to Appearance ⇒ Customize ⇒ Theme Options >> Footer Credit Text
Inside Pages
To edit any page on the theme, you can go to Pages ⇒ All Pages. To change the design and content of any page, choose ‘Edit with Elementor’. This option becomes available as you hover-over any page’s title in Pages ⇒ All Pages.
Once you edit a page with Elementor, you will find all design elements are inside Elementor sections. Editing any elements on a page is done in the same way as previously described above.
Contact Forms
With the setup wizard, all the necessary plugins will be installed automatically including the contact form. With this plugin, you can create all the contact forms you want by navigating to the wp-admin dashboard ⇒ Contact. To create a contact form, you can click on the “Add new contact form” button, while to view the existing form templates, you can click the first option – “contact forms”.
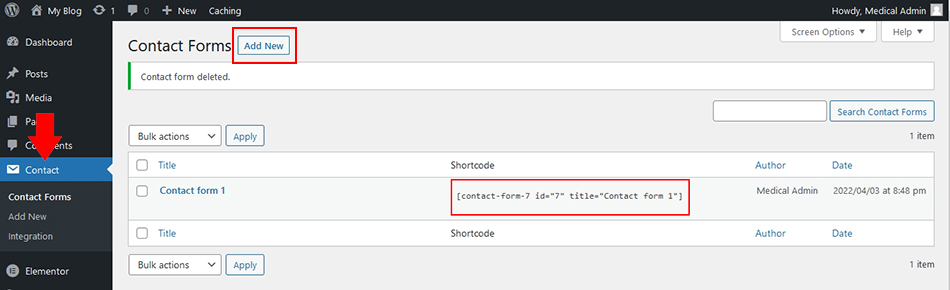
The above screenshot shows the default contact form that gets installed with the Medical theme. You can grab this form’s shortcode, manage the form, delete it or crate new ones from Contact ⇒ Contact Forms.
You can refer to the contact form 7 documentation to create a custom contact form for your website.
Creating a contact form
With the contact form 7 plugin, you can easily create a custom contact form to collect the data that you want from the users using the form. Here’s the contact form 7 guide on how to edit the form fields to create a contact form. Moreover, there are other tabs to set up the mail, and for advanced settings. Moreover, you can also change the messages to be displayed at certain events like successful form submission, validation errors, wrong email address, etc.
Contact form shortcode
Once you have created a contact form, you can use it on the different pages by pasting a form’s shortcode.
The shortcode will look something like:
[contact-form-7 id=”7″ title=”Contact form 1″]
You can create a text block wherever you want to insert the contact form. With that done, you can then paste the contact form’s shortcode in the block to insert the contact form on the page.
With the Medical theme, you can create different contact forms and use them on different pages, as per your website’s requirements.
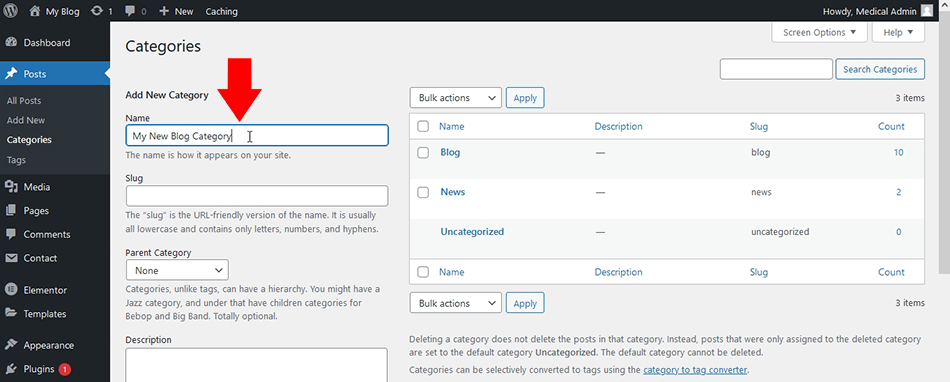
Using The Blog
To start your own blog on the Medical theme, head over to Posts ⇒ Categories and start creating new categories for your blog posts. This theme uses the native WordPress blog functions so it’s as simple as creating blog categories then assigning blog posts to the categories in the regular way.
Blog Page Sidebar
You can manage the widgets of the blog page in Appearance ⇒ Widgets ⇒ Sidebar.
Set colors and image background
You can change the color and background of individual sections with the Elementor editor. You can also change the colors of your site in Appearance ⇒ Customize ⇒ Theme colors.
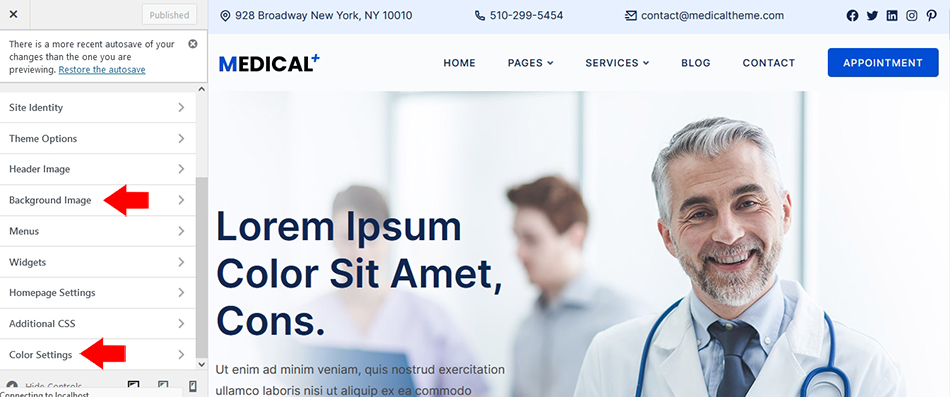
You can also set the background of your website using the image background option. To do so, navigate to Appearance ⇒ Customize ⇒ Background Image.
Mailchimp and Newsletter settings
Convert your traffic to your regular audience and subscribers by using the integrated MailChimp features. The mc4wp: Mailchimp for WordPress plugin
will be installed with the theme sample data.
Activating the MailChimp using the API key
You can connect your MailChimp services using the API key. For that, navigate to the Plugins section, and find the “setting” option under the MC4WP: MailChimp for WordPress plugin.
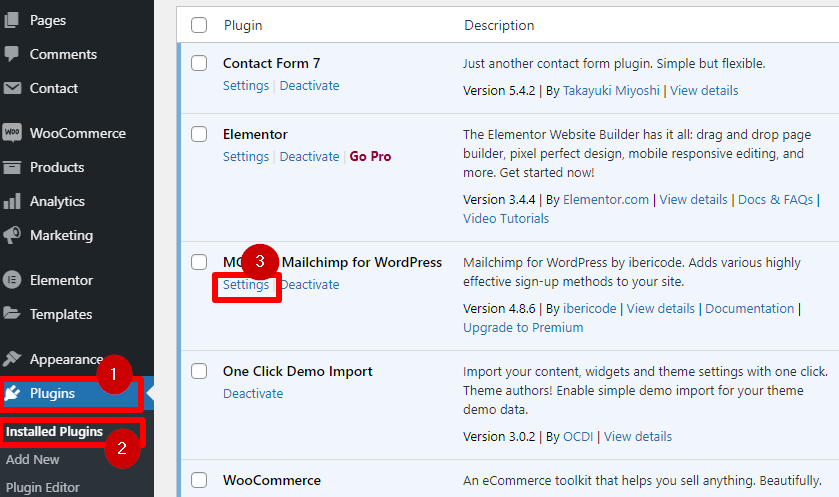
Clicking the settings will show you the current status of MailChimp on your website. You can obtain the API key by following this link, and paste it here to activate MailChimp.

Enter the API key and press “Save Changes”.
Adding the MailChimp widget to the footer/sidebar
To display MailChimp in a certain page or post, you can use the following shortcode:
[mc4wp_form]
Or you can use a widget that will be added when you install MC4WP: MailChimp for the WordPress plugin.
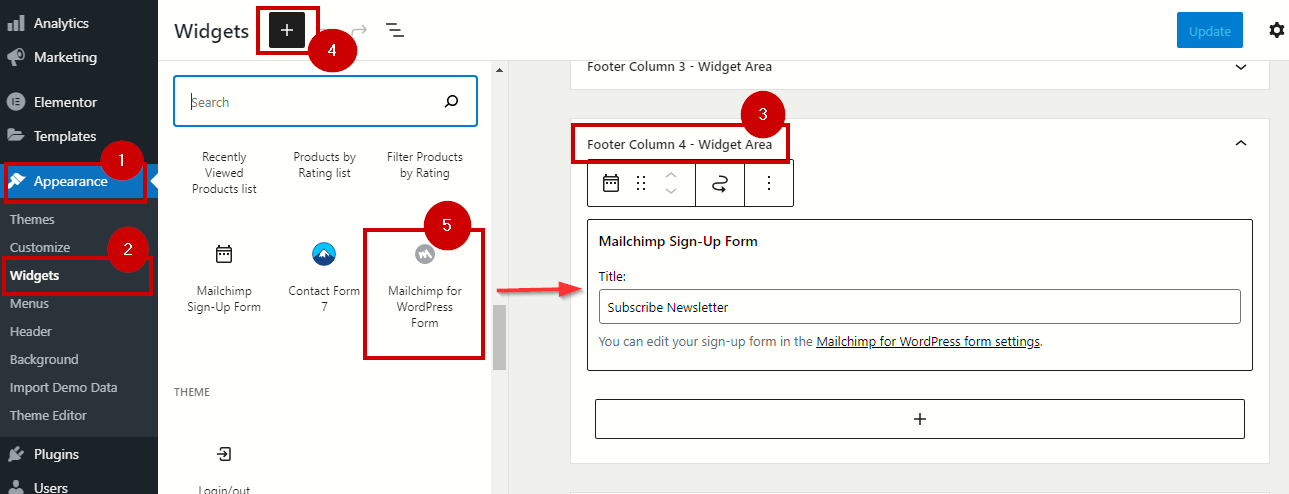
For example: If you want to add the newsletter subscription widget to the footer area, you can drag and drop the “MailChimp for WordPress form” widget into the footer widget area that you want to start displaying a small form.
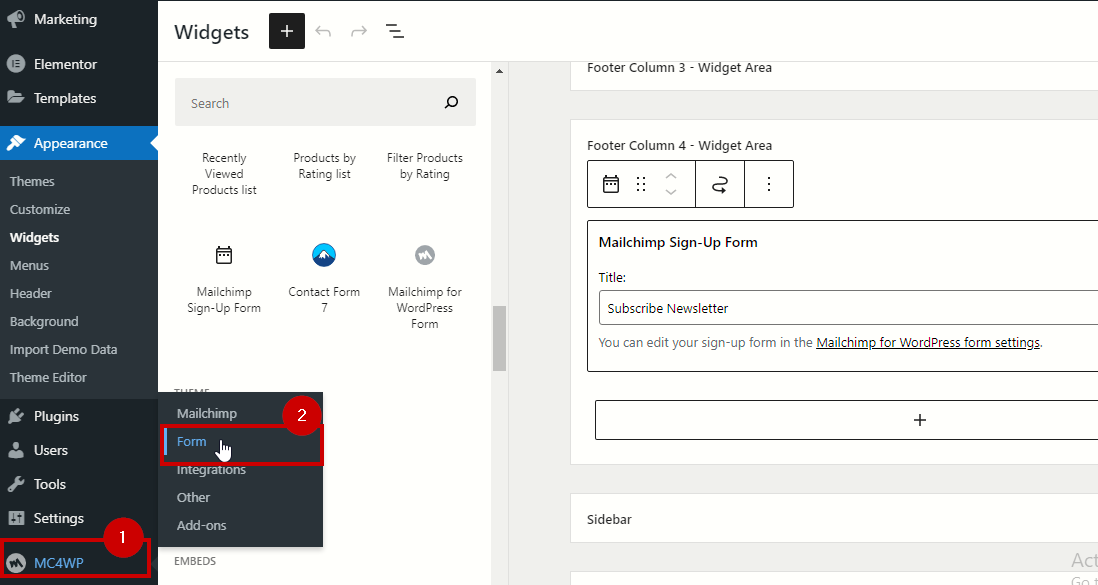
Customizing the MailChimp form
You can customize the form for the MailChimp newsletter by finding the form option at MC4WP in WordPress Dashboard’s side menu, and then choosing the “form” option.
WooCommerce Store Settings
The medical WordPress theme is fully compatible with WooCommerce. So you can easily start an online store on your website whenever you wish.
To get started with the eCommerce on your website, you first need to install WooCommerce. It is free and very easy to use. If WooCommerce is not already installed on your site, you can download WooCommerce
and install it in WP Admin ⇒ Plugins ⇒ Add New & by uploading the downloaded installation file.
To manage your shop with WooCommerce, you can refer to the WooCommerce documentation.