Installing the Theme
Start by downloading the zip file of the theme from your Templatic Member’s area.
Now, extract the file using an application like 7zip. The folder will yield two different folders – Templatic V2 & photographer. Zip them both, again using 7zip and then we can proceed to install the theme.
Templatic v2 is the parent theme and therefore we will install it first. To install it, navigate to Appearance ⇒ Themes.
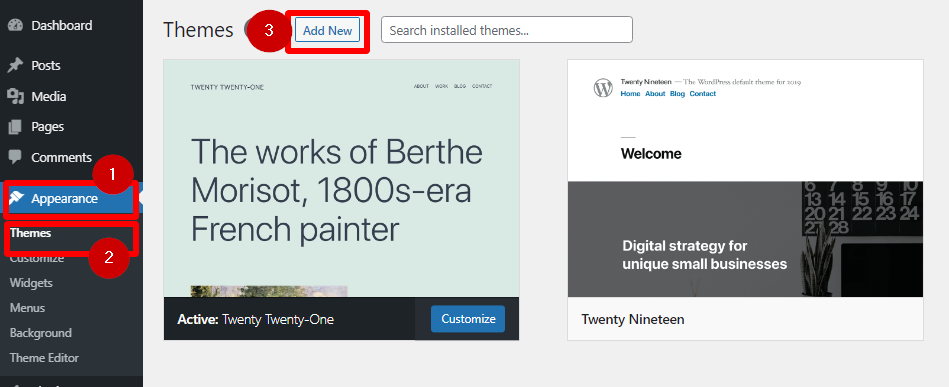
In the next step, you can upload the TemplaticV2.zip folder.
Once the theme is installed, you will see a screen like:
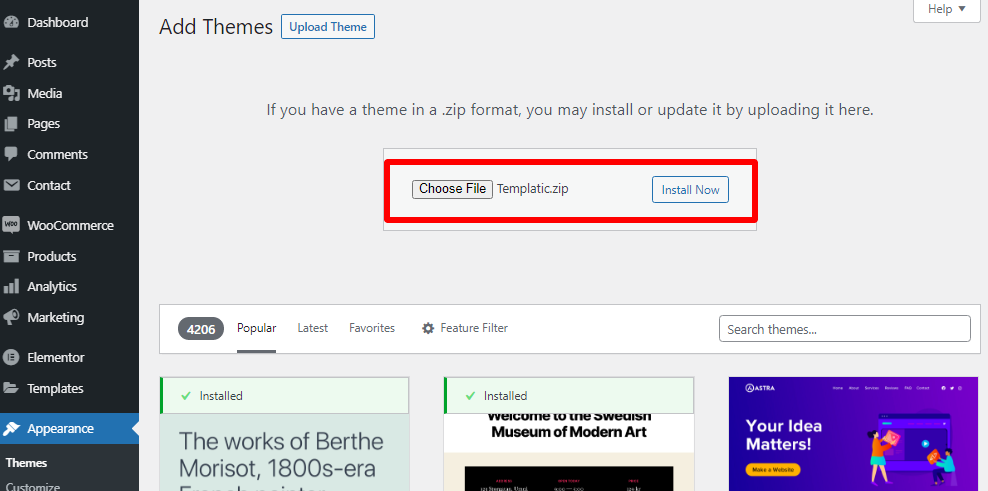
Next, we will proceed to install the photographer theme, which is Templatic theme’s child theme
Install the theme again by clicking add new, at Appearance ⇒ Themes.

Upload and Install the theme.
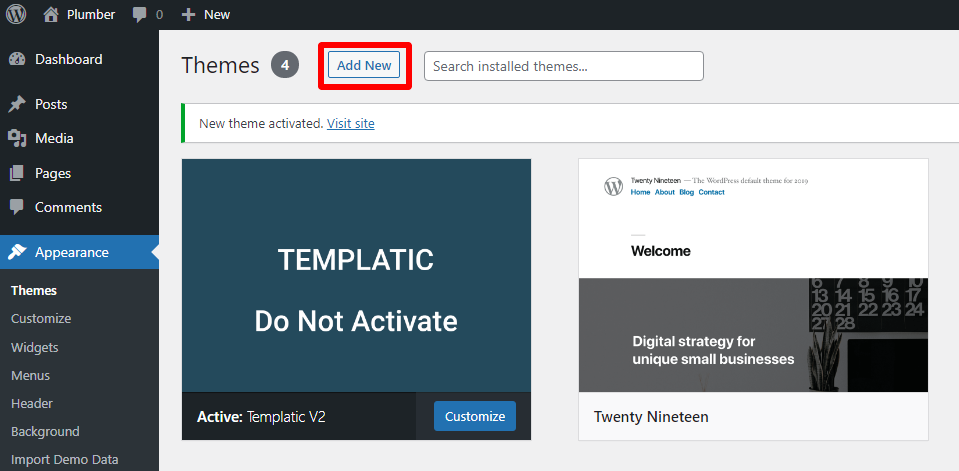
And activate when the theme is installed. The next step would be importing the sample data.
Importing the Sample Data
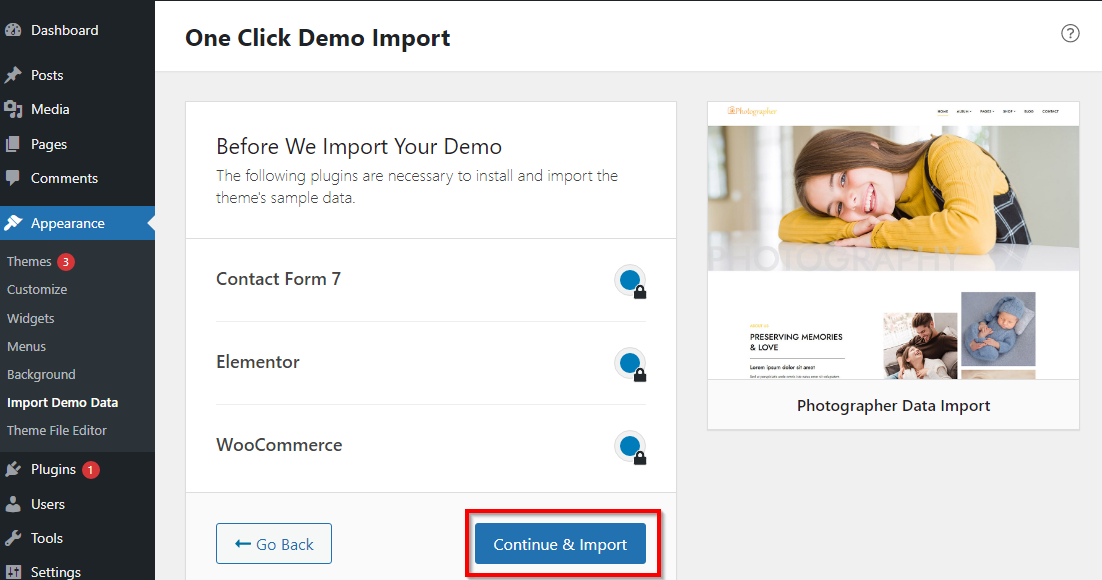
As soon as the photography theme is installed, you will see a screen that will allow you to import the sample data.
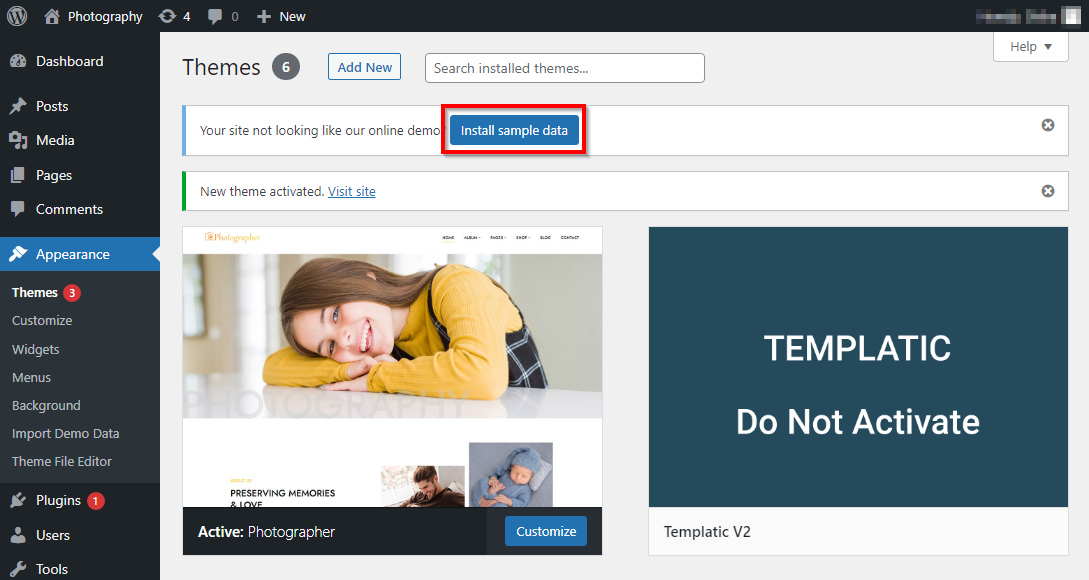
The sample data will populate your website with the page sections in place, demo images and content so that you don’t have to start with a blank site.

Choose to import the data.
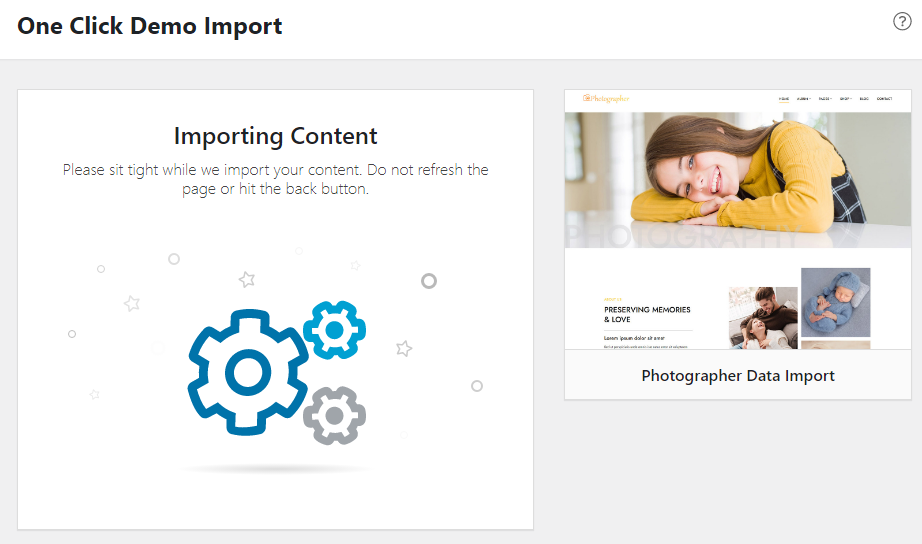
The install will take a while. Sit back and relax!
Once all the essential tools are imported, the next process of installing the sample content will start automatically, without requiring any action
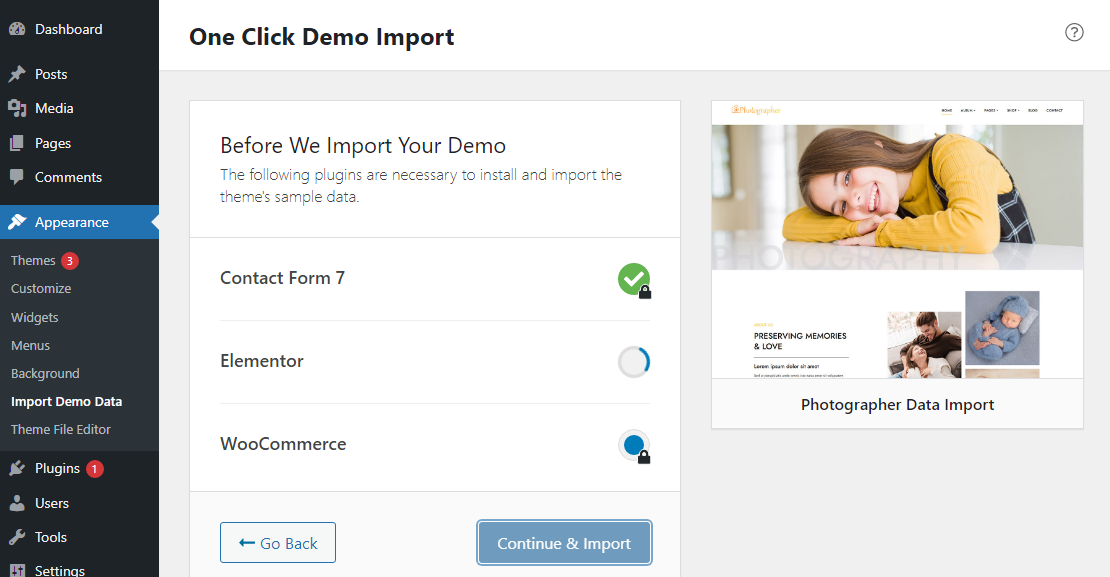
It will first import all the required plugins and then proceed to import the sample data to make your site look exactly like the theme demo.
And once the sample data is installed, you are ready to experience your website. Choose to edit it or visit the site to see how your website will look.

Elementor Basics
Mostly all the pages of this WordPress theme are built with Elementor page builder. This means you can easily edit them with the drag and drop options of the elementor page builder.
This page builder is really easy to use even for beginners. But to get started with the elementor page builder to edit the pages of your website, here are some basic tips:
Editing the pages
Mostly all the pages of this WordPress theme are built with Elementor page builder. This means you can easily edit them with the drag and drop options of the element or page builder.
This page builder is really easy to use even for beginners. But to get started with the elementor page builder to edit the pages of your website, here are some basic tips:
You should be logged in as an administrator of the site, to find the ‘edit with Elementor’ option at the top of your page.
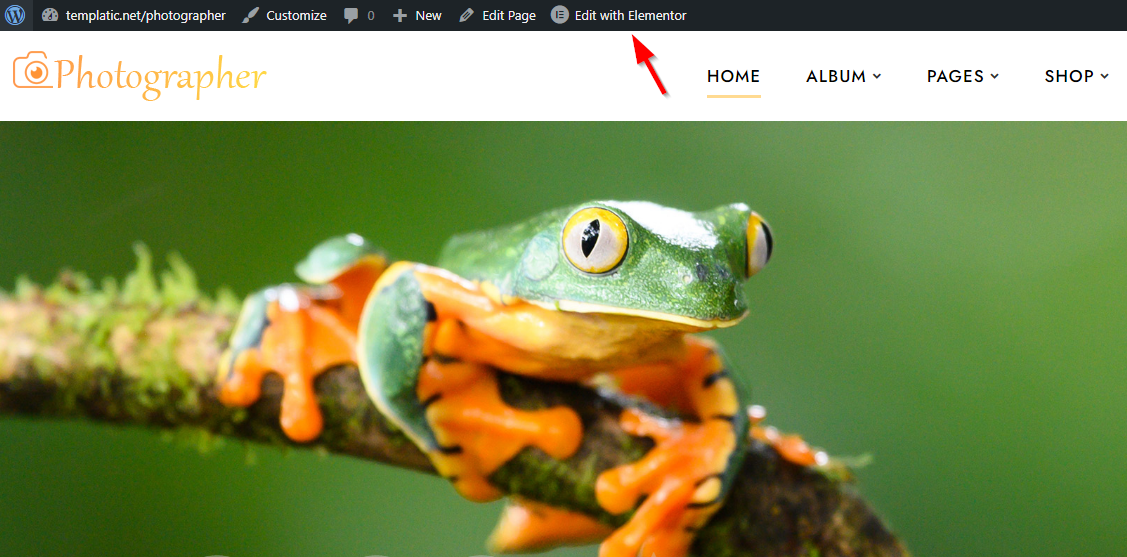
This will open the Elementor page builder panel to help you edit the theme.
Editing the sections built with Elementor
Find all the Elementor editing options by simply clicking on the section or pressing the middle blue icon at the top of the section. 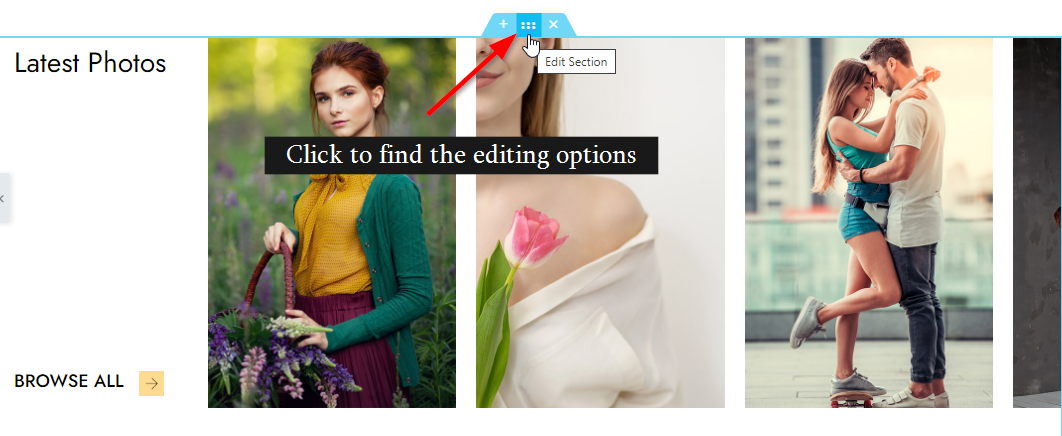
Pressing the preceding blue “+” button will add a new section before the section and the “X” will remove the section.
Adding new sections
To add a new section to your page, scroll down to the end of the page and find the button with ‘+’ (plus) sign. This will add a section and you can drag an element from the sidebar to the section.
You can add unlimited new sections on any Elementor based page by using the available options. You can choose either to use a widget or choose from the available templates.
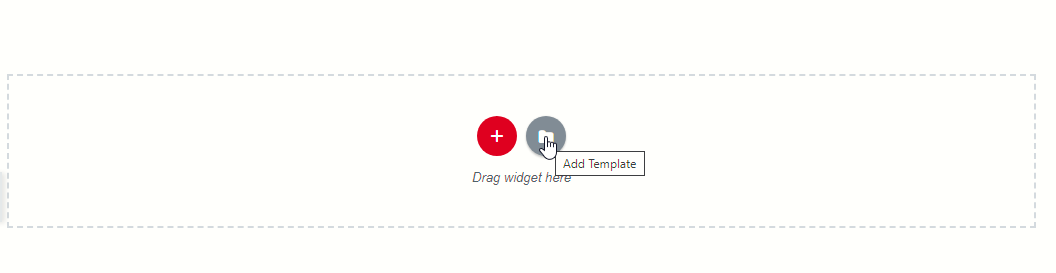
If you choose to add a section through the widget, you will be asked to choose a layout for the section.
Columns and adding widgets to it
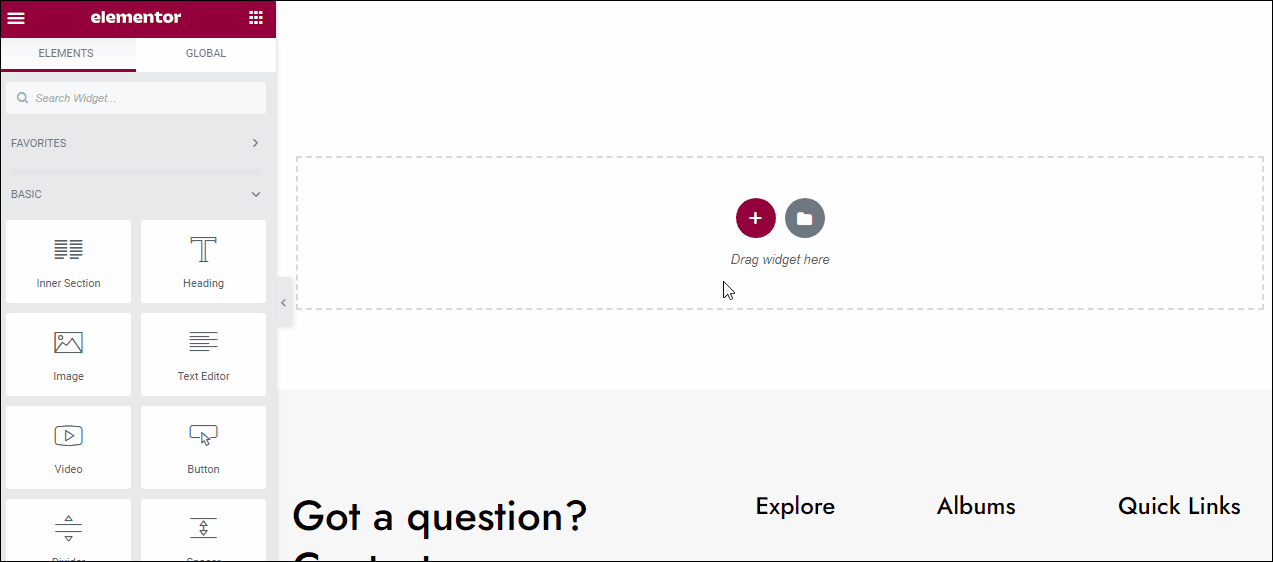
Elementor lets you choose the layout for each section. You can choose if you want a full-width section, or a section with two or three columns, etc. After choosing the layout, you can easily drag and drop the content elements like text, widget, image, video, etc.
Move the sections
To move the section, you can use the simple drag and drop options to move it to the top or towards the bottom.

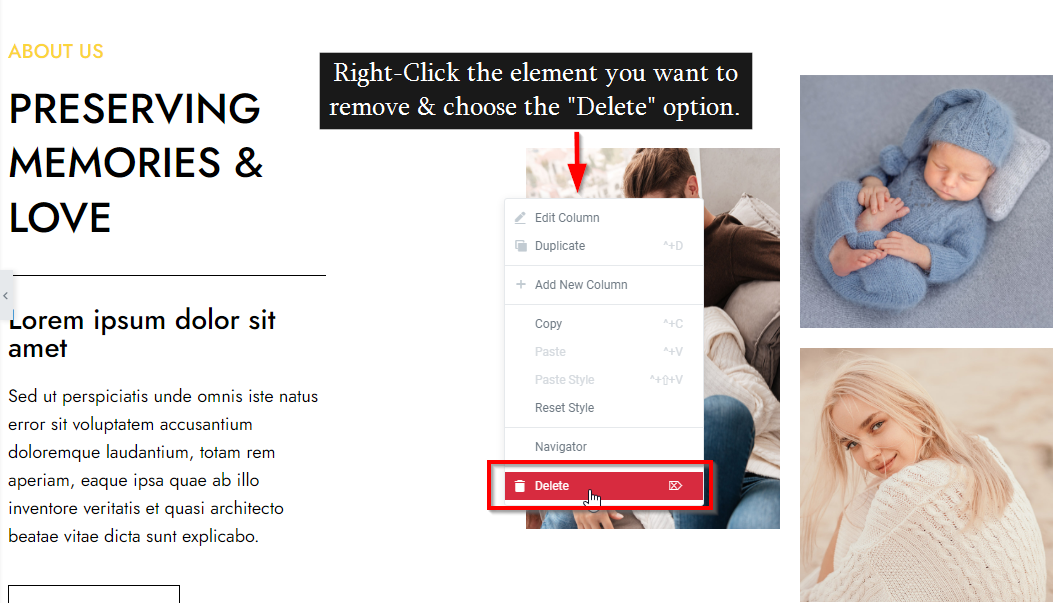
The Right click options
Each of the Elementor option will come with different editing options. You can discover these options by right-clicking the element or a section.
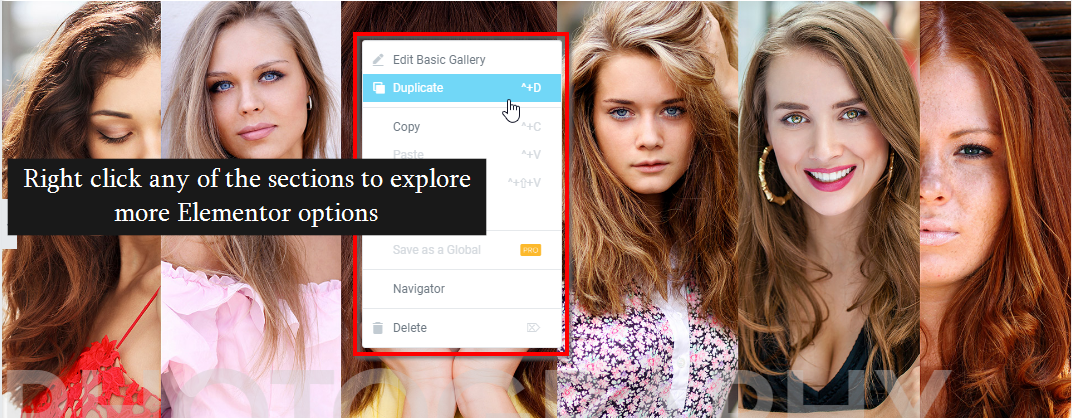
Deleting a section
The option to delete a section can be availed by right-clicking on the edit option.
For more details on how to use the Elementor page builder, refer to this guide
Styling your sections
The instructions on how you can style your columns are available here.
Homepage

1) Logo
This is the section that will display either – the logo image or the site title. To change it you can use the backend options.
Navigate to your dashboard, go to Appearance ⇒ Customize ⇒ Site Identity
![]()
To set the site title, remove the logo image and set an appropriate title. And check the box against “Display site title and tagline”.
You can even set the site icon from here, you can change the favicon using this option.
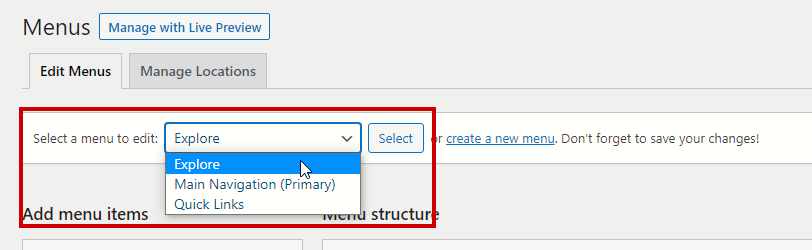
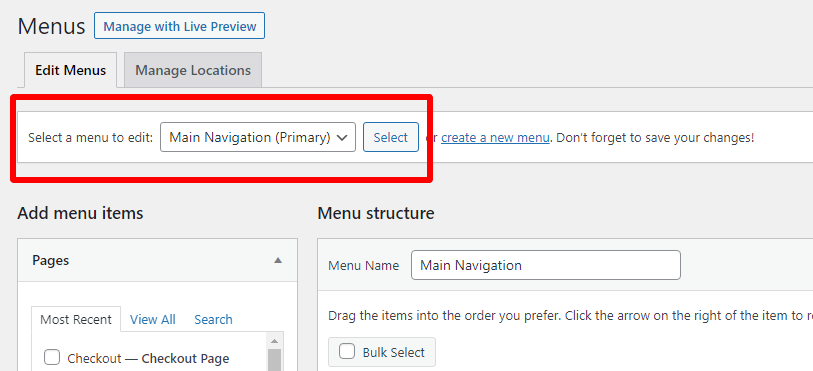
2) Menus
To manage the existing menu or create a new one
1) Choose the menu to edit from the drop-down, press select.
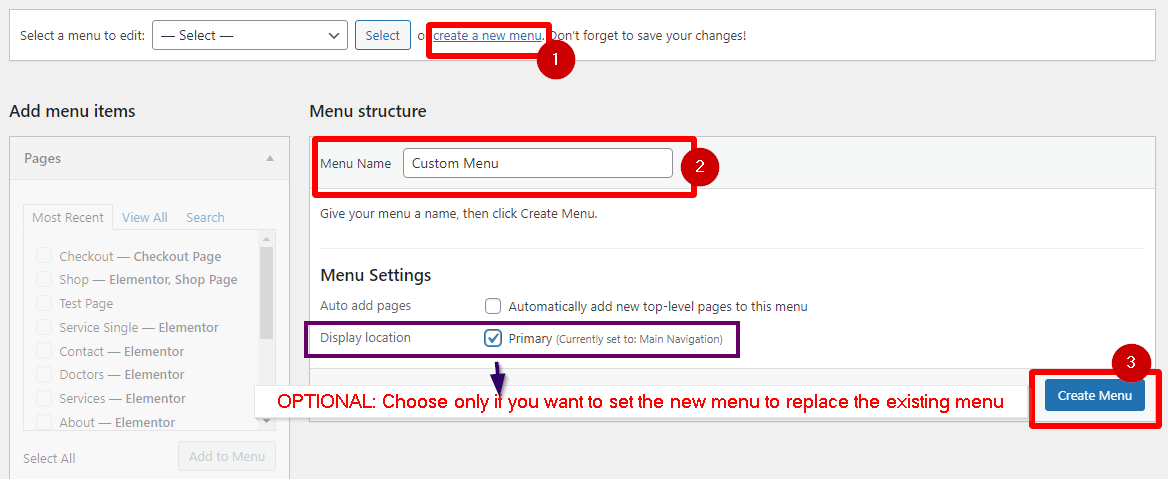
Or to create a custom menu:
If you want to build a menu of your own, you just have to go to Appearance ⇒ Menus ⇒ Create a new menu
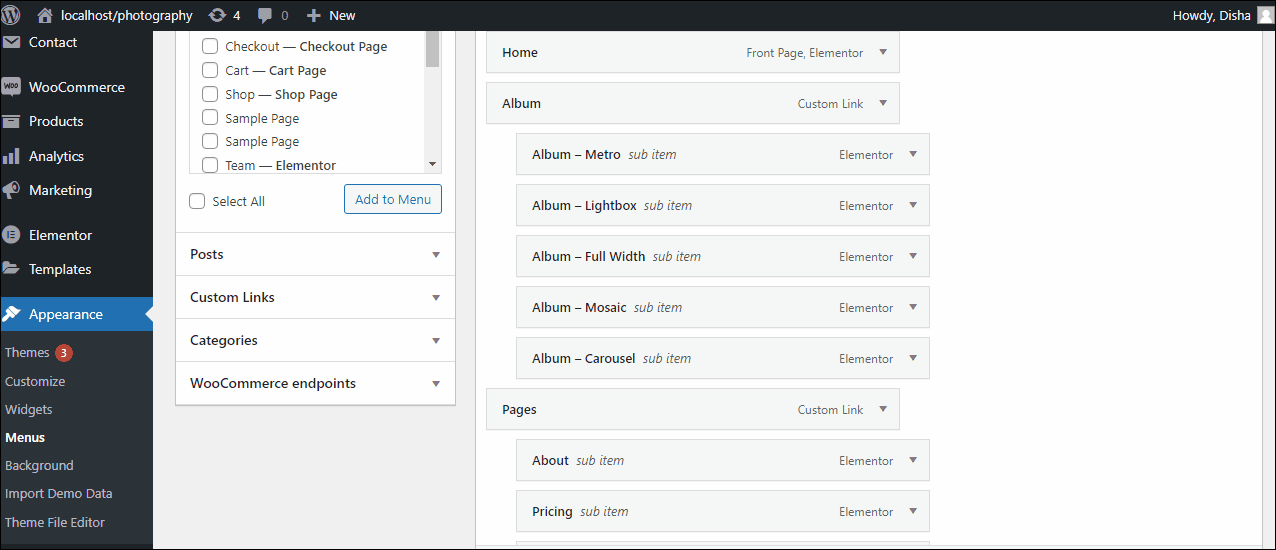
Managing the menu items
The left sidebar of the menu options screen will let you choose the menu items, you can choose from different post types, pages, categories, or even set a custom link as the menu item.

Just check the boxes, and click add to the menu.
Drag and drop menu management
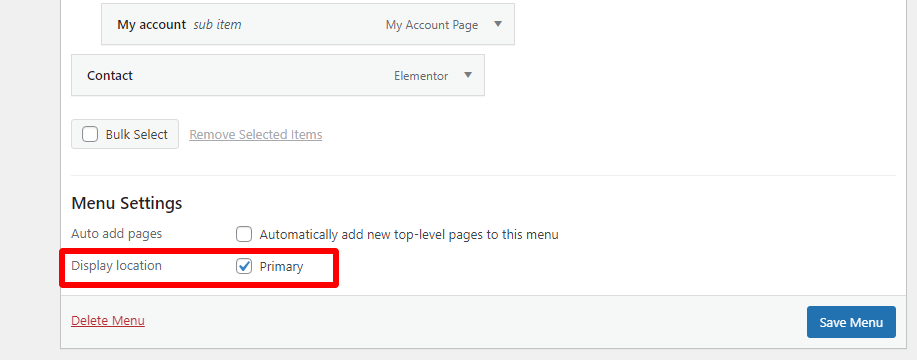
To set your custom menu as the main menu, you just have to:
1) Choose the menu
2) Set as primary
Scroll to the bottom of the page, behind the menu structure, to find the “Display location” option, and tick – primary.
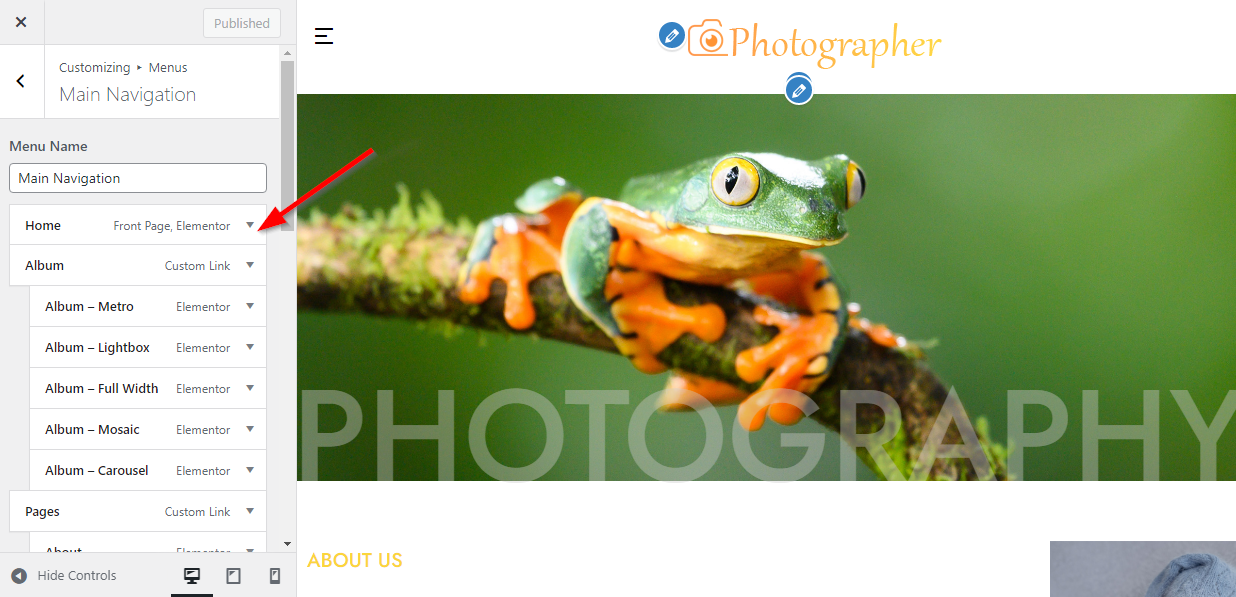
Manage with Live Preview
You can even use the manage with Live preview options to see the live changes you make on the go.
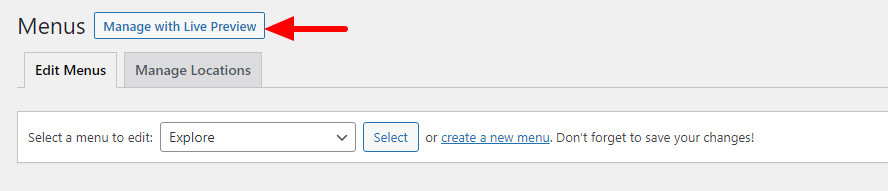
The Live preview option allows you to use the same drag and drop options to manage the menu structure, but with a live preview.
Re-order the menu with similar drag and drop options, and see the live preview as you make changes to it.
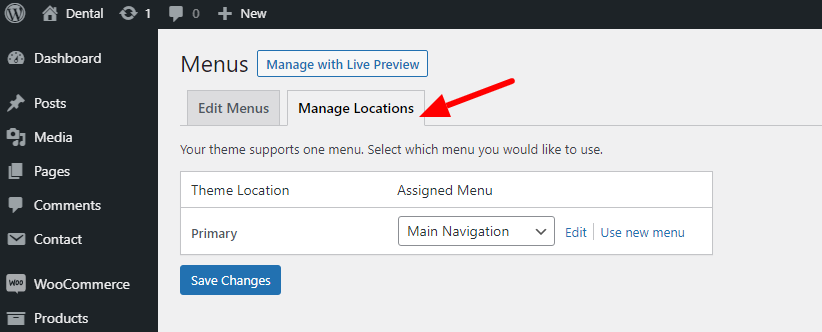
Menu: Manage Locations
The theme has only one location for setting the menu, with the dropdown available here, you can choose the menu that you want to show as the primary menu. Just choose the menu, and click save changes.
Enabling and Disabling the sticky menu
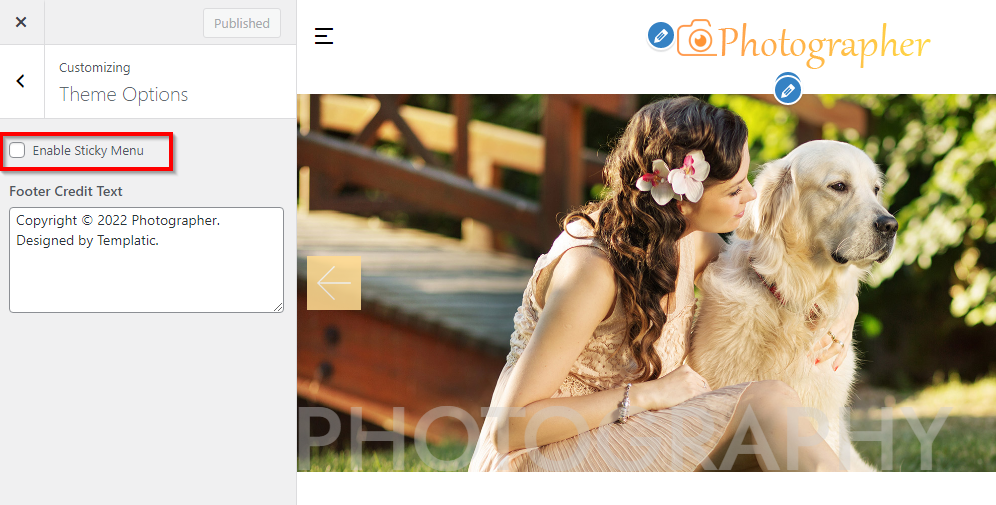
Appearance ⇒ Customize ⇒ Theme options ⇒ Check the box to enable sticky menu to enable or disable it.
3) The banner area
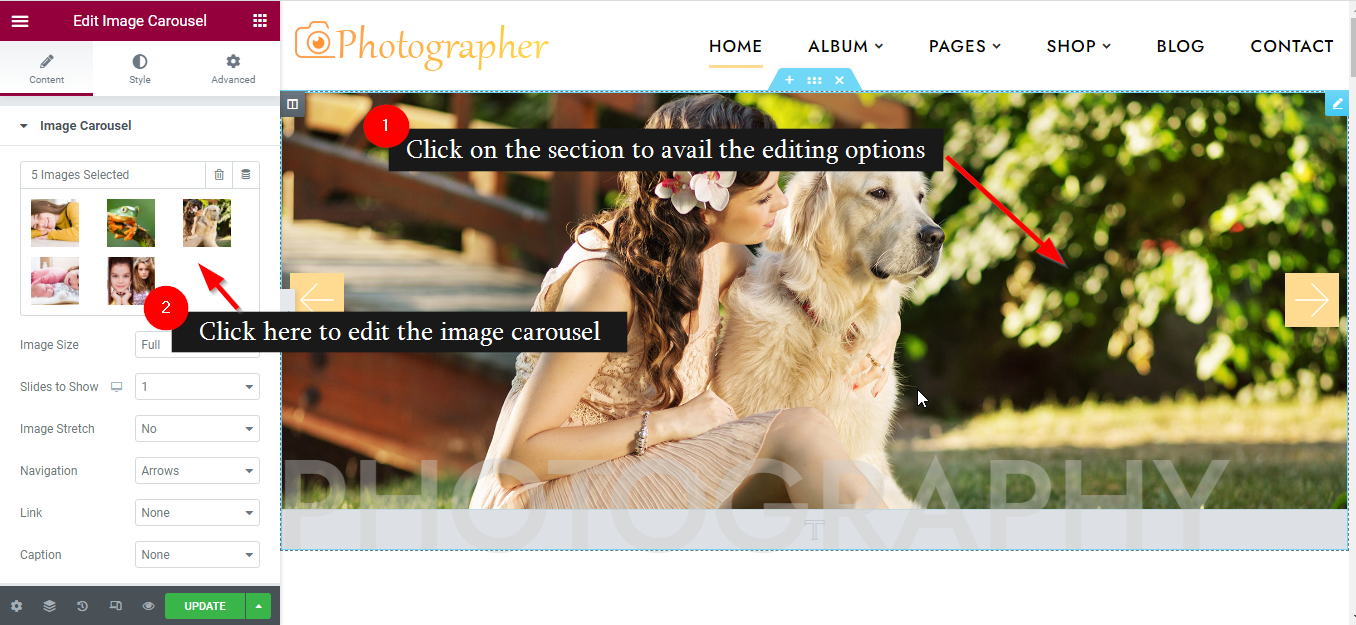
The header images are a part of the image carousel widget by Elementor page builder. Just open the homepage with the Elementor editor and click the section.

You can upload images to the carousel, remove them, caption them, order and re-order them, etc.
4) Below Banner Area
The second section of the homepage is a combination of text as well as image. It has a two-columned layout where you can change everything just by clicking over the section.

To change the text, click and start writing. While for the images, click and upload new! You can also change other particulars about the section with the left hand side Elementor panel.
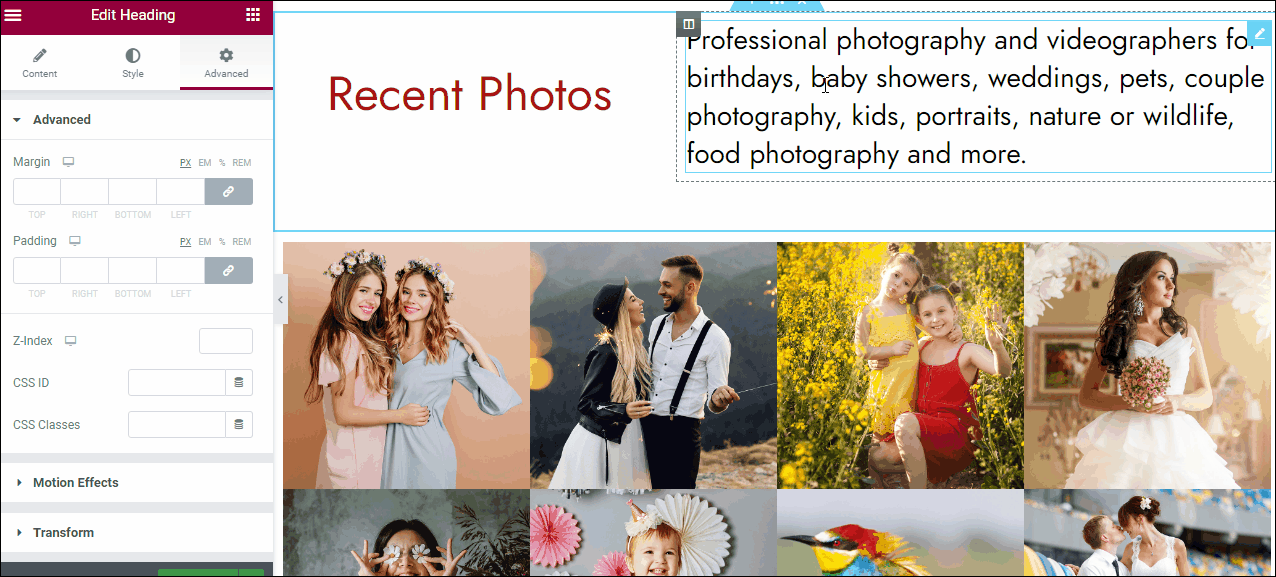
5) Recent photos section
This section is in fact a combination of two different sections. While the first one comprises of two textual columns, the following one is an album preview section.
1) The text section

Its a click and edit section, you can easily update the section with new text, change color, background and much more.
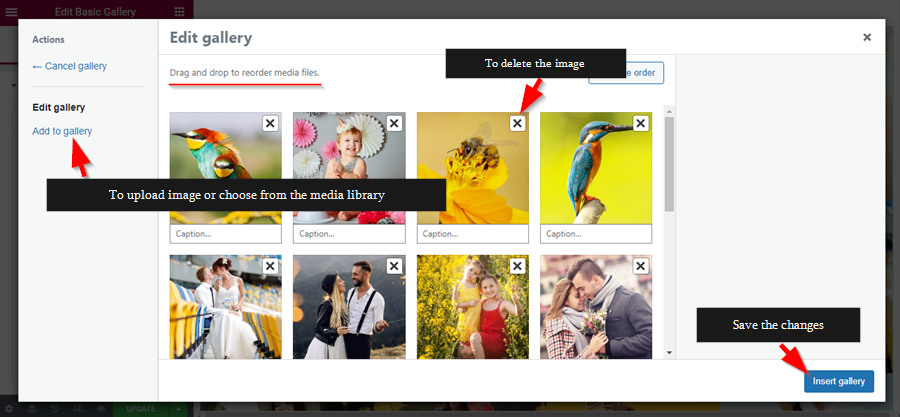
2) Album gallery
You can click on the edit icon on the upper right corner of the page to edit the gallery. You can add the images, remove images, add captions, and so on.
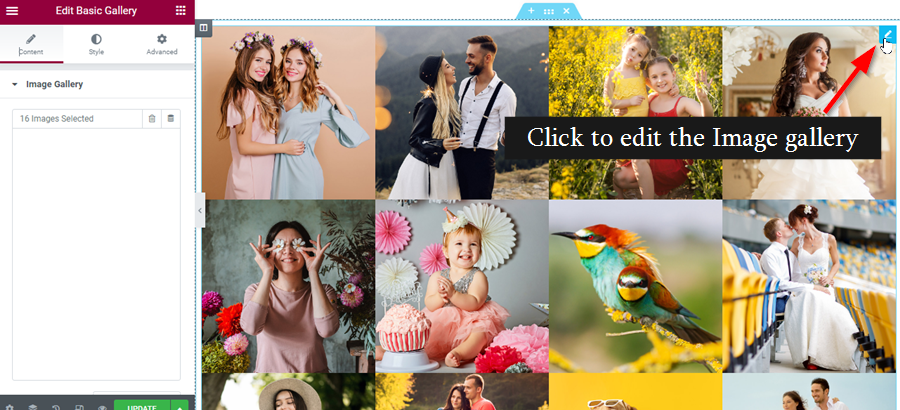
There are options to add images, sort them, and upload new images as well. The gallery can be edited in the same way as the carousel in step (1).
3) Button
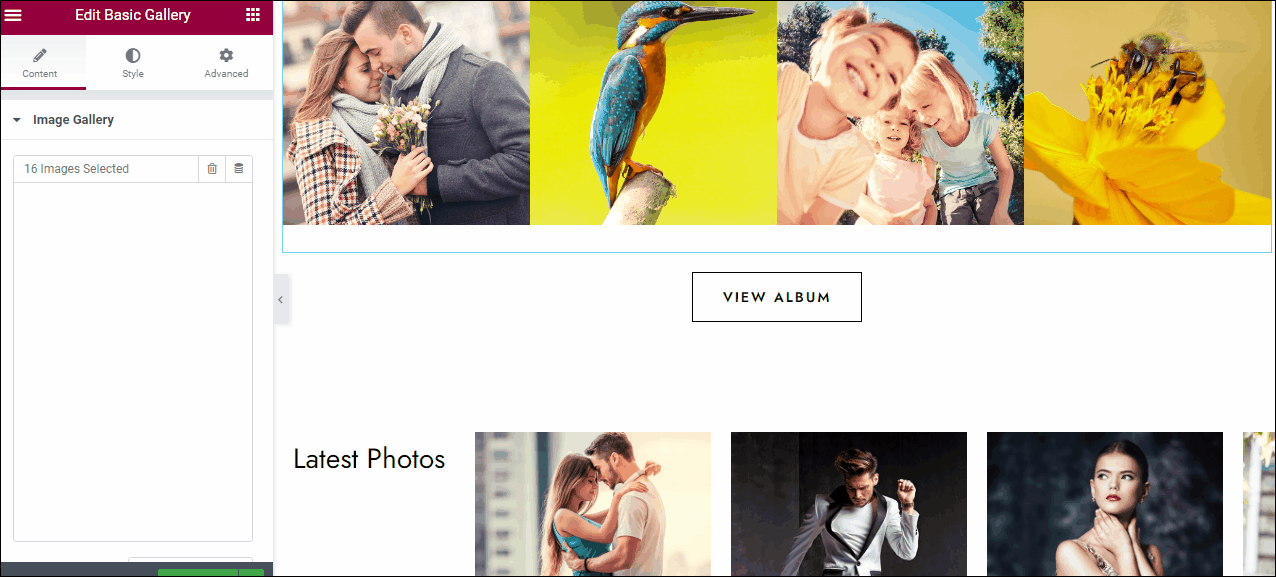
After showing a preview of the gallery, you can now redirect your viewers to the albums page. The button is a click and edit element.
6) Latest photos section

The latest photos section is again an image carousel, where you can set caption for individual images that will appear as an overlay for the image.
7) Text Section
A click and edit text section. You can always use this section to set title to the next section.
8) Text + Image section
This section is a combination of a images and text. It is an easy to edit text and image section that you can use to introduce the photographers on your team.

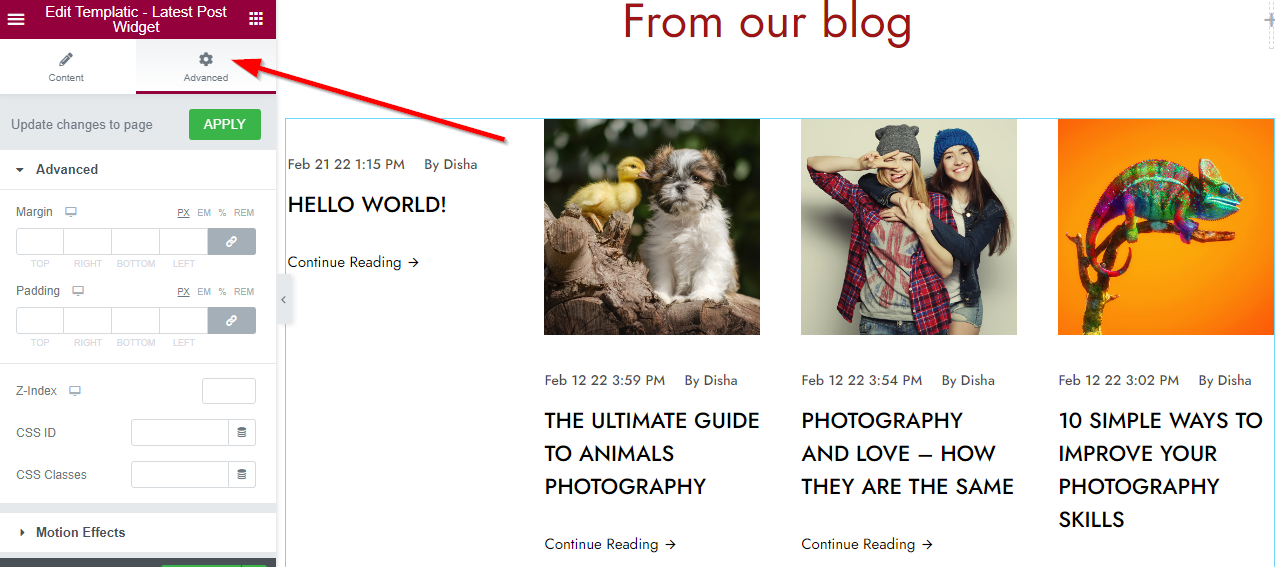
9) Blog Preview Section
This section will help you show a preview of the recent blogs. It is a section completely designed with the Elementor page builder.
a) Text title
A click and edit section that you can just re-write over and format as you wish.
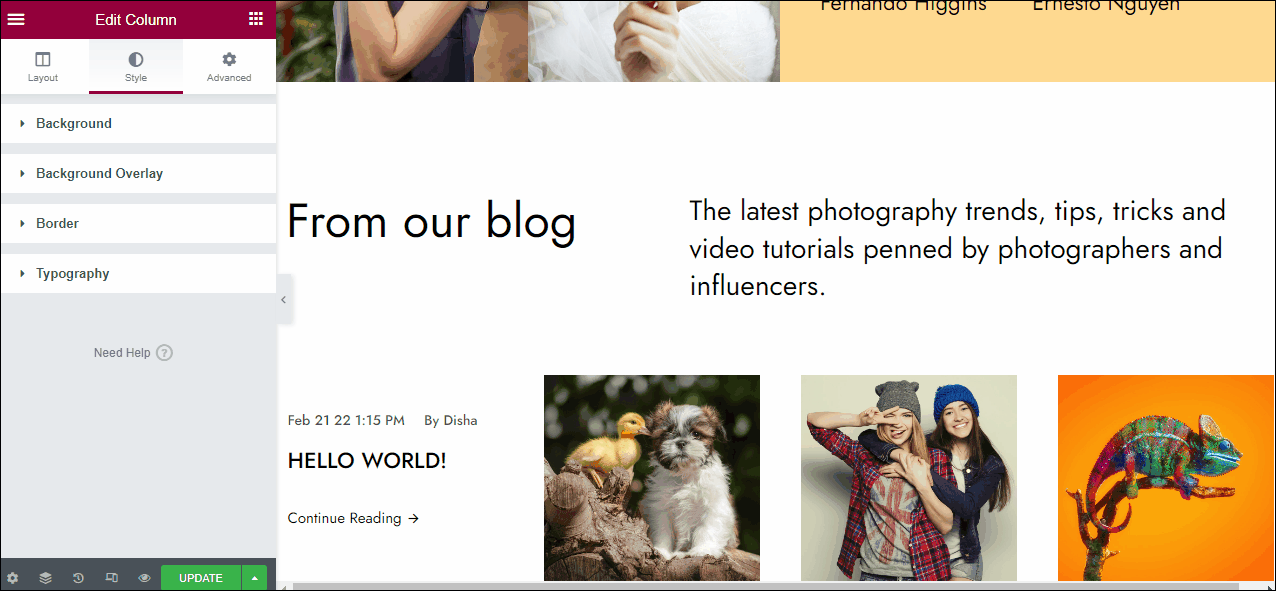
b) Blog preview
A blog widget to display the latest blogs. The content section will allow you to edit the content displayed by this section.
10) Text CTA
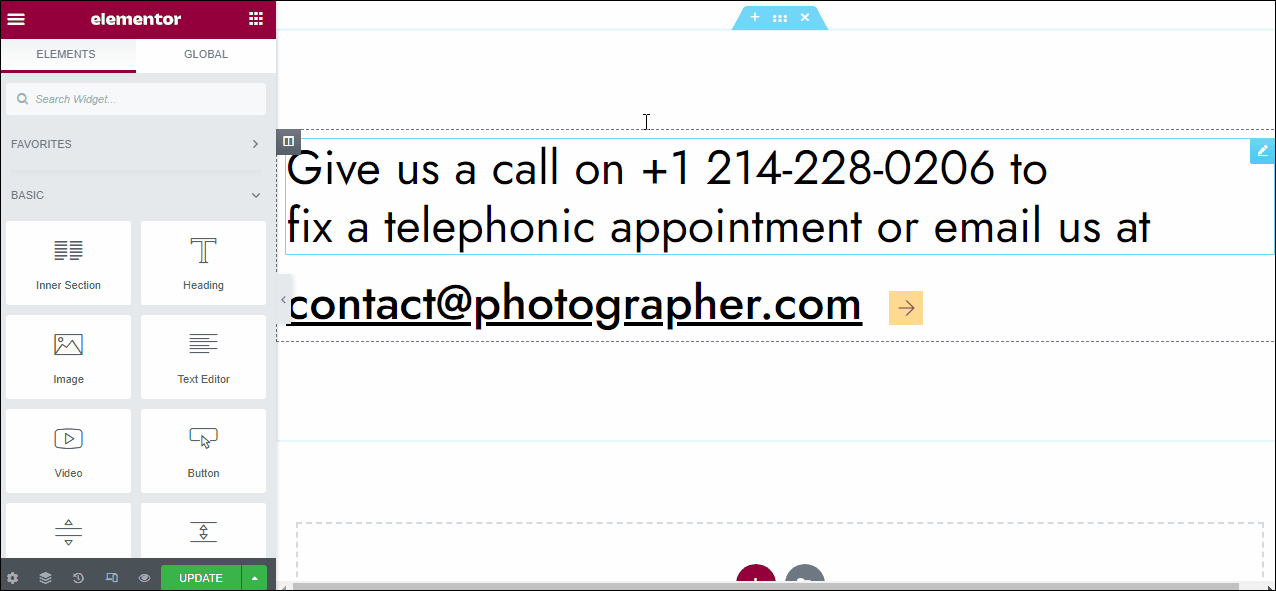
This is a click to edit text section. It is totally customizable, you can change the content of text, the color, background, add button and links, or even image if you wish using the Elementor options.
11) Footer
The footer is divided into 4 different columns and you can manage each one of them at Appearance ⇒ Customize ⇒ Widget and selecting the footer widget column number.
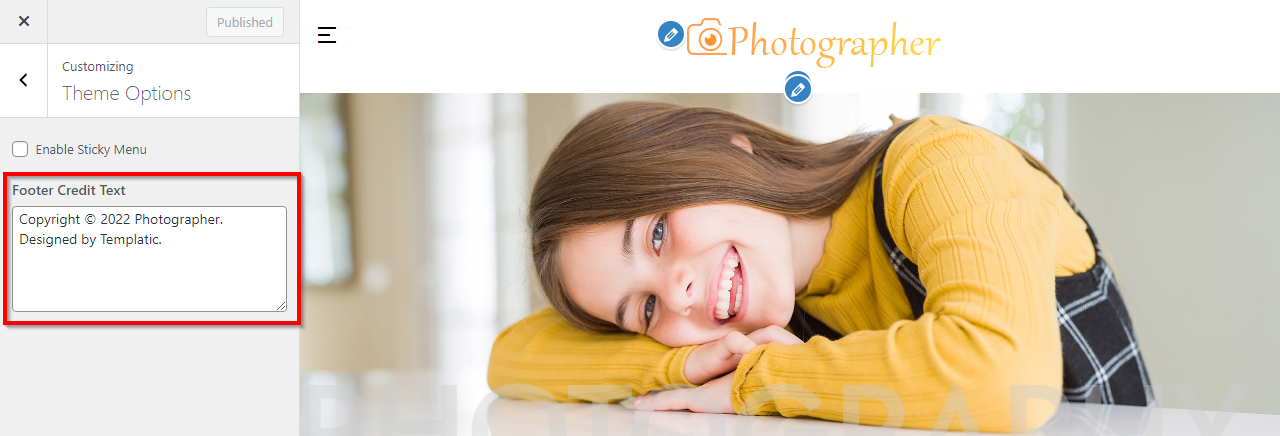
12) Footer credits & social media icons
This section cannot be edited through the Elementor option, but can be easily changed by navigating to Appearance ⇒ Customize ⇒ Theme Options ⇒ Footer Credit Text.
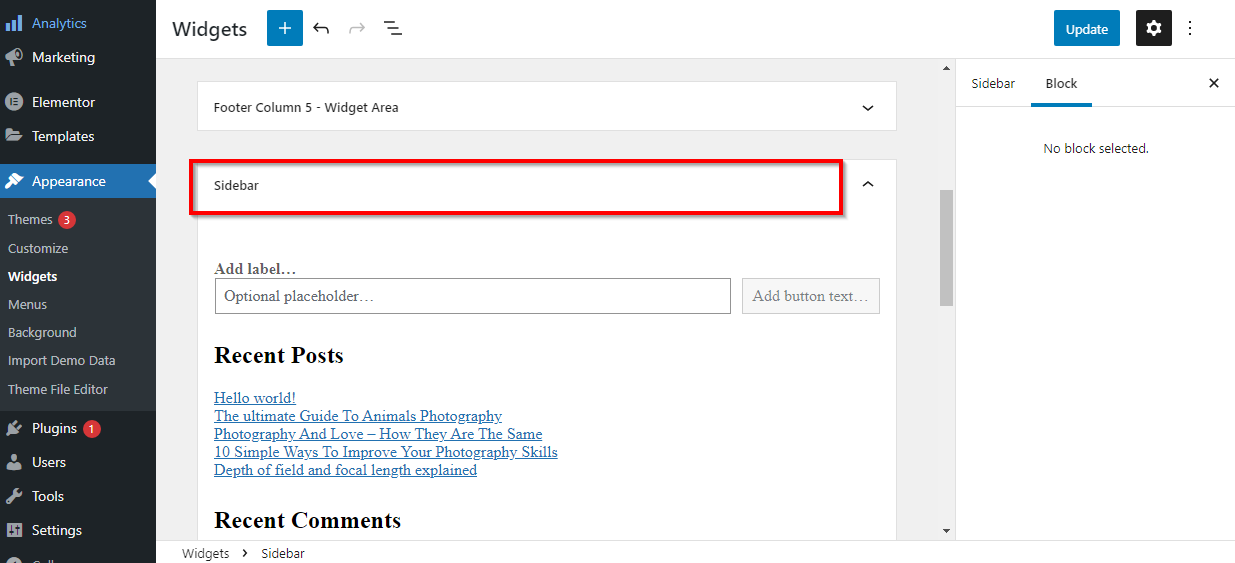
The social icons that you see on the right side of the footer credit can be managed at Appearance ⇒ Customize ⇒ Widgets ⇒ Footer Column 5 Widget area ⇒ Social icons widget. You can add or remove icons here and also add links to your social account.
About Us Page
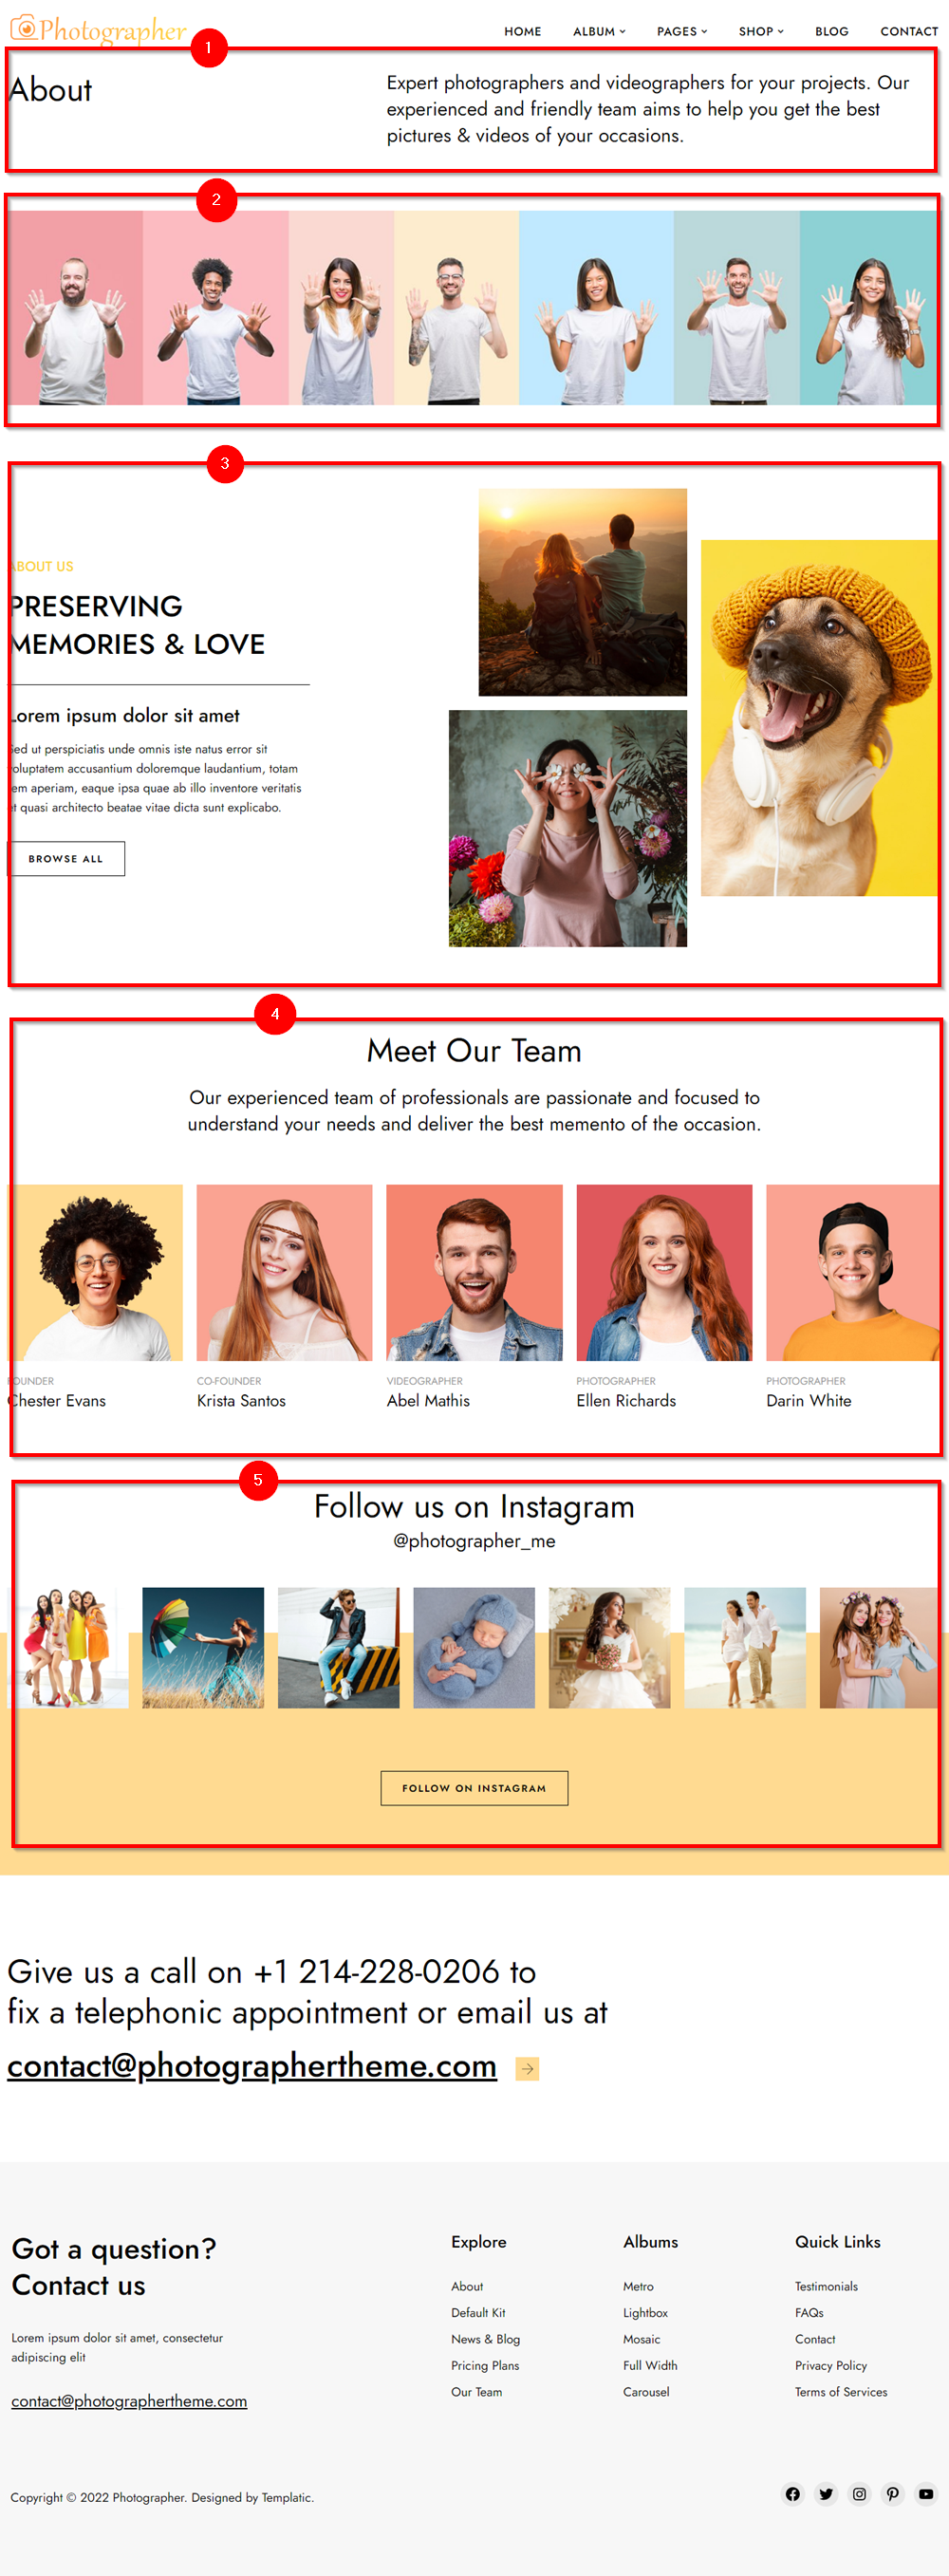
1) Text Introduction Section
A click and edit section that you can just re-write over and format as you wish.
2) Image section
A simple image section where you can click and upload an image. The dimension of image used here is 1920 by 400 pixels.
3) About Us Section
This is a section similar to the 4) Below Banner section on the homepage and can be edited the similar way
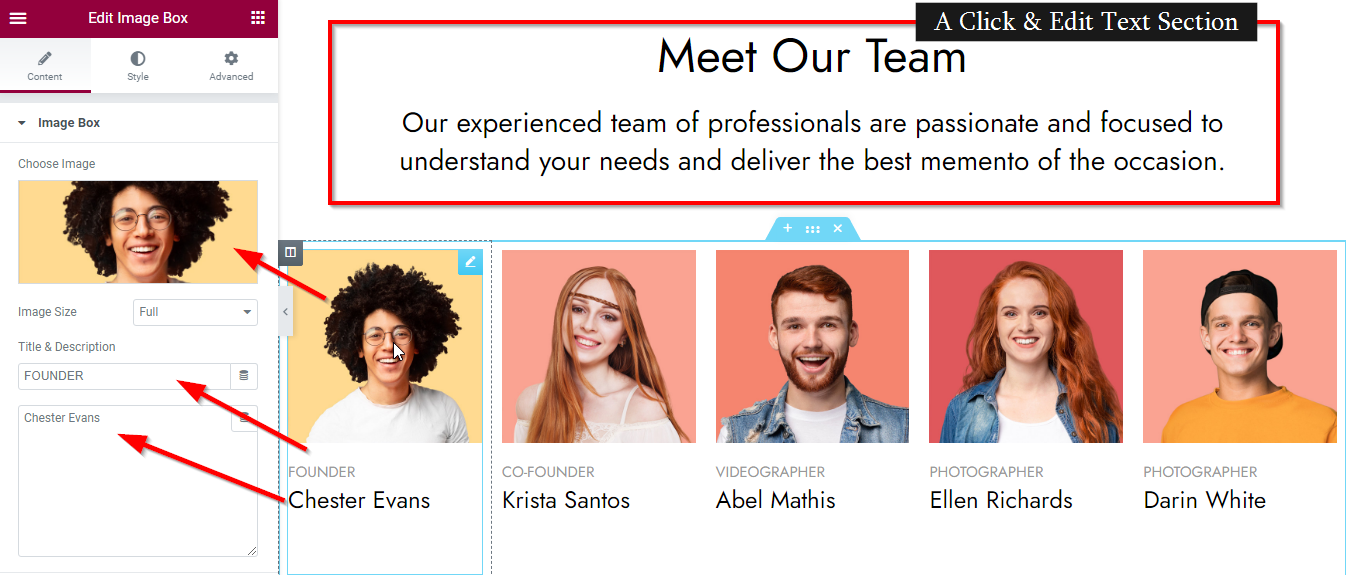
4) Team Introduction section
This is the section where you can actually list out all the employees with their images and positions within the company.
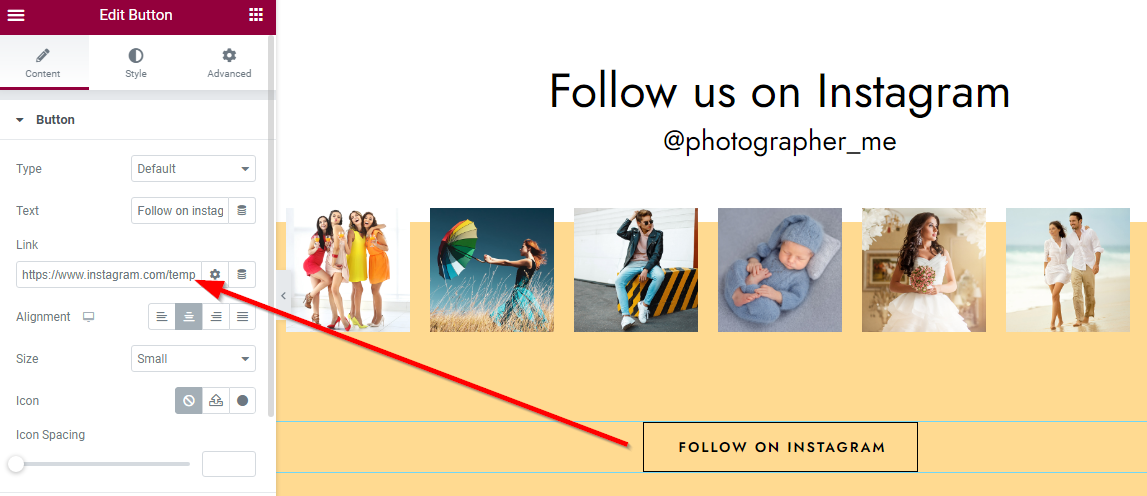
5) Instagram
This section will let you display a snippet of your Instagram profile. The first section is the text section that allows you to set an appropriate title for your section.
You can set an appropriate title and then edit it to set your Instagram profile.
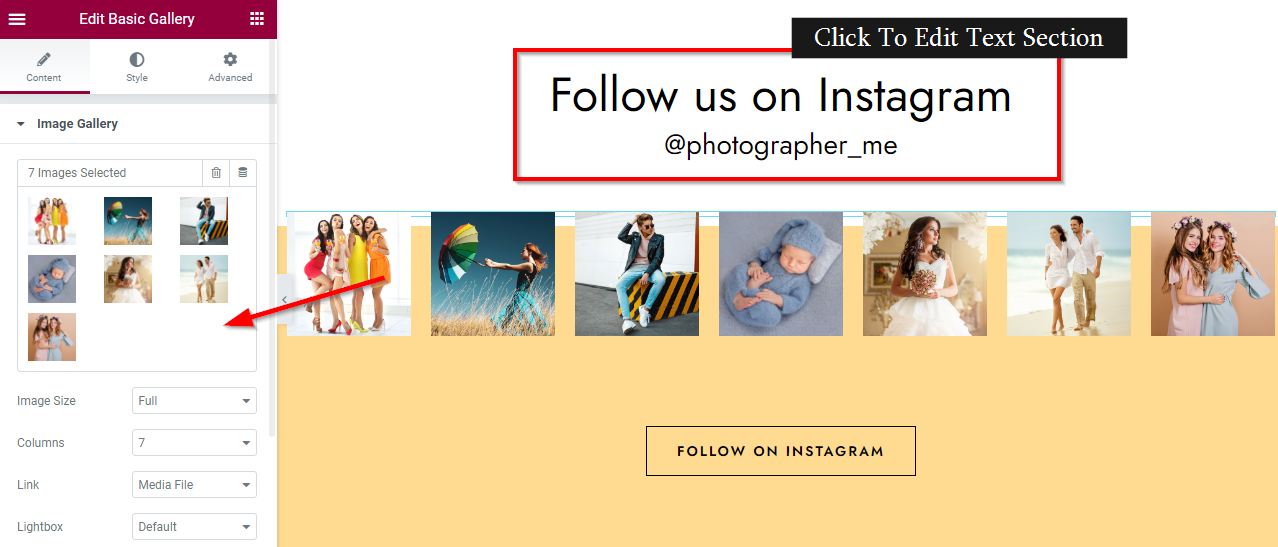
The following carousel of images is a structured gallery. You can easily change the images, and upload a new gallery to your website.
The next is a button and you can change the color of button, the link to it, to redirect it to your Instagram profile.
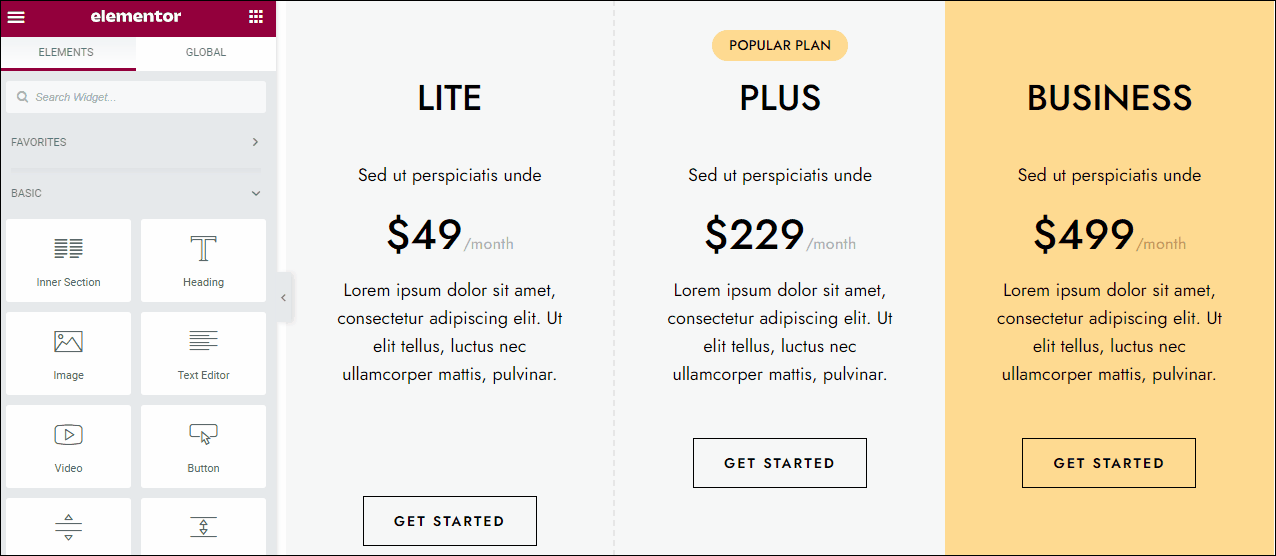
Pricing Page
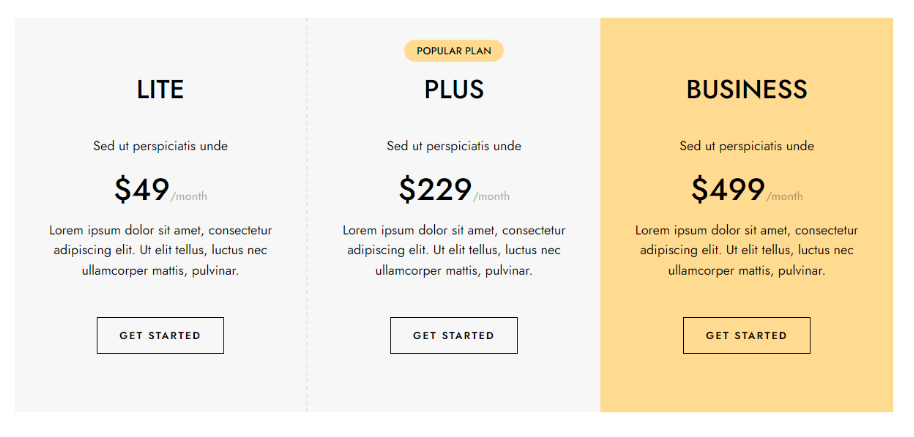
Editing the pricing table is all through drag and drop options. There are buttons, text, and the ability to add and manage the tables.
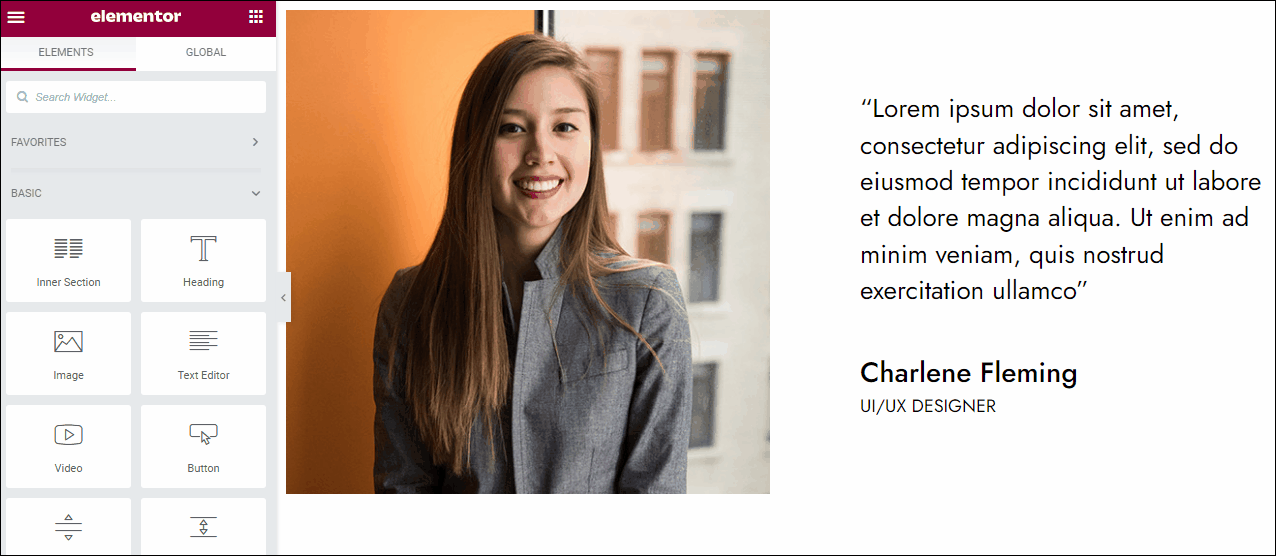
Testimonials
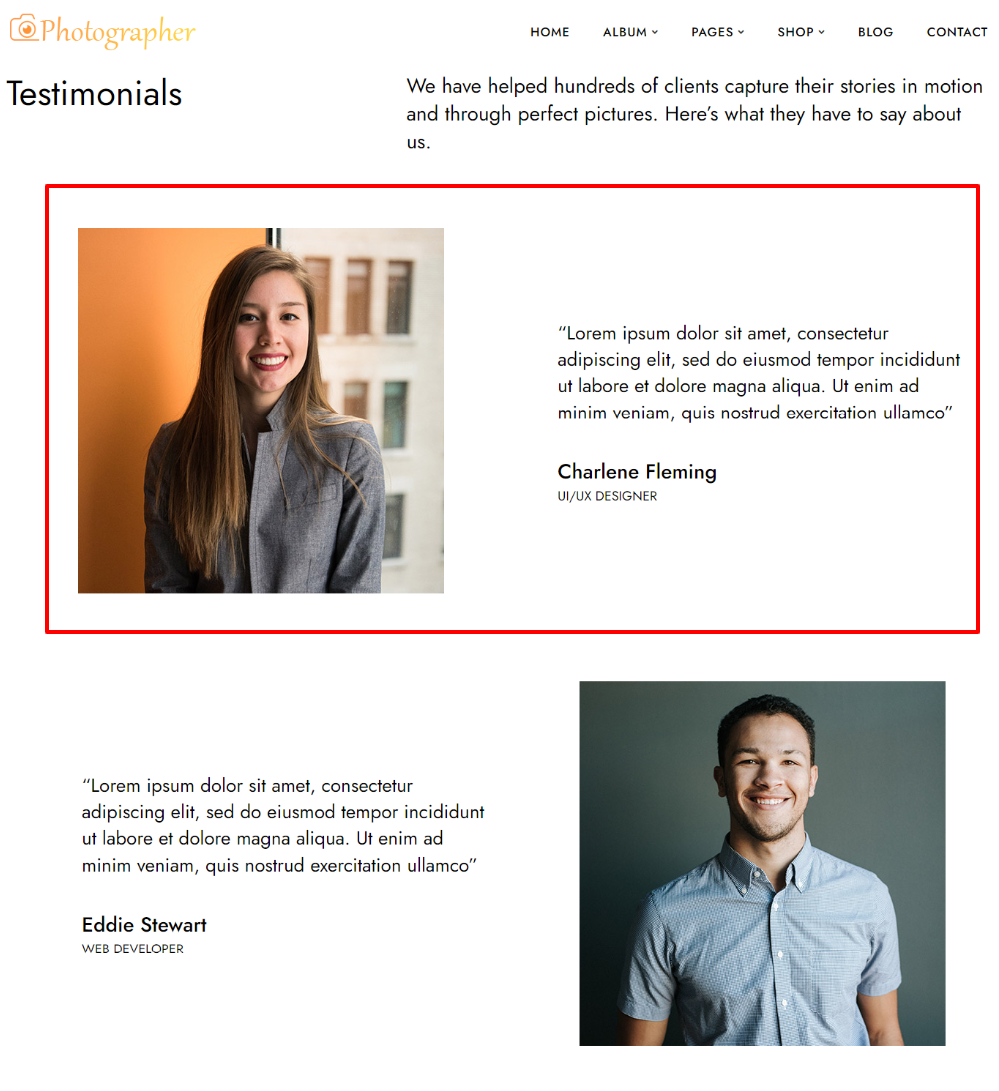
1) Text Section
A click and edit section that you can just re-write over and format as you wish.
2) Testimonials
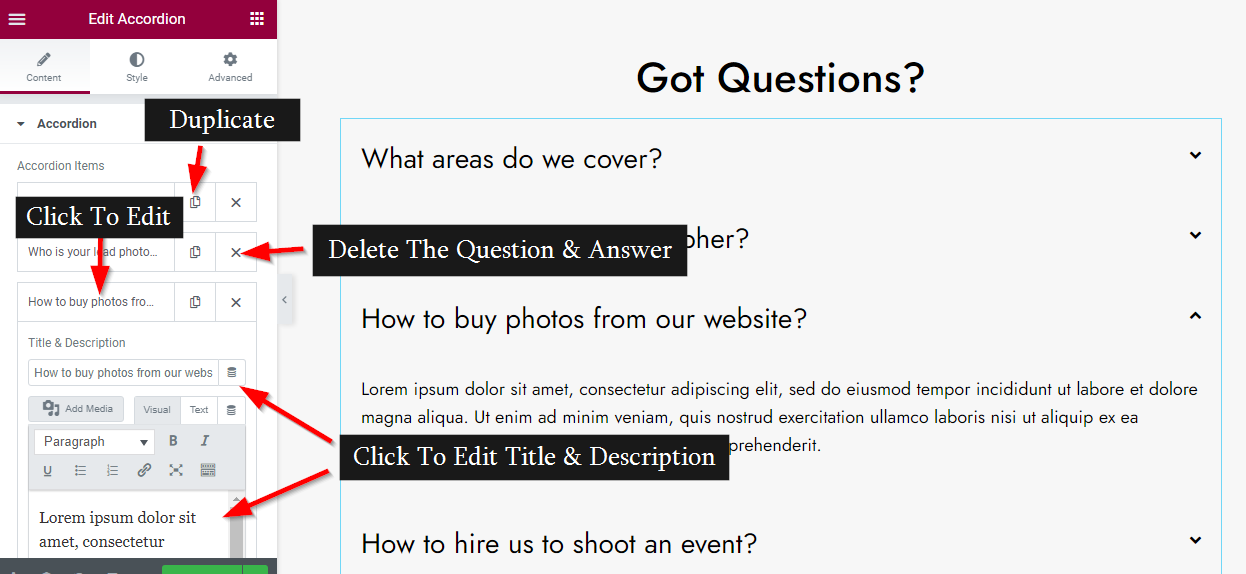
FAQ Page
This is a friendly page where you can help your visitors know more about you. You can definitely add new sections using the Elementor option or manage the existing sections through drag and drop options.
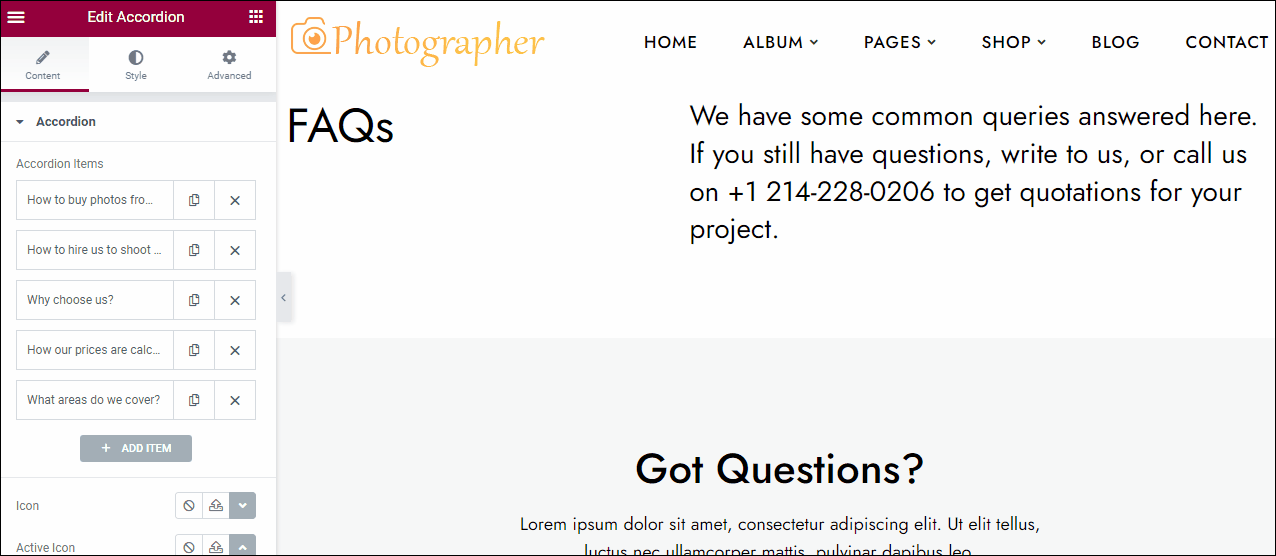
The accordion on the FAQs page are easily editable. Each section is a combination of title & description (answer) and each of these accordion element can be duplicated, removed and easily edited.
Team Page

The team page just has a grid of all the team members with their images, name and role.
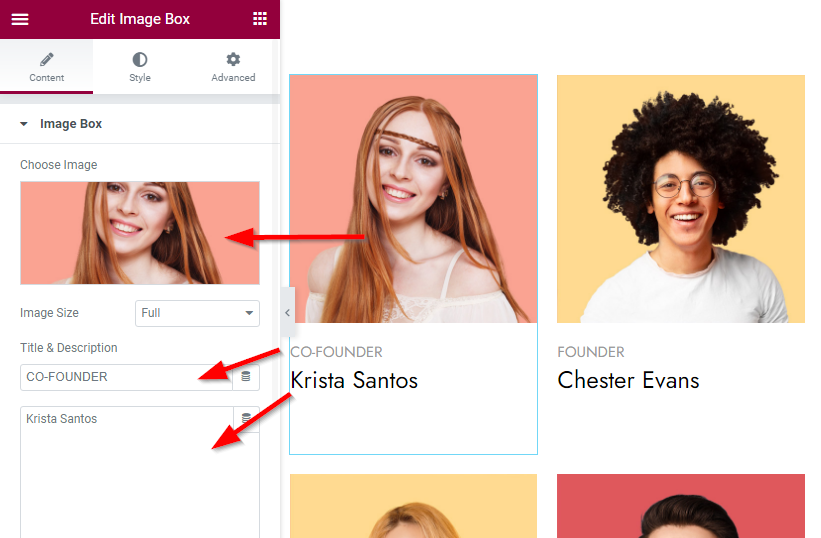
It is a simple team page design and you can edit it with the Elementor options.
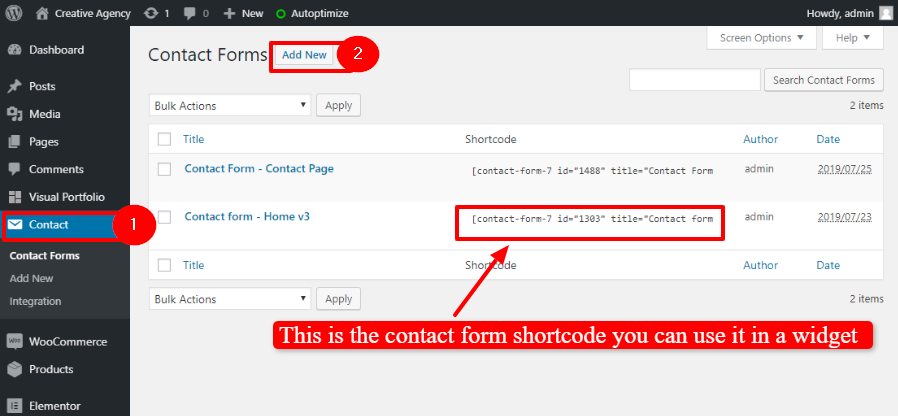
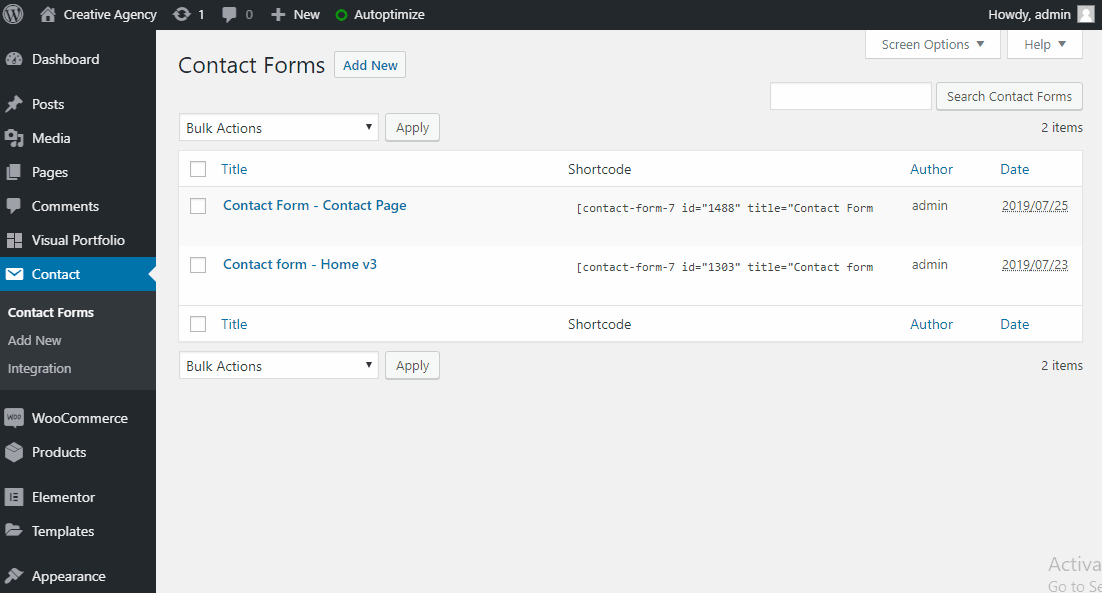
Contact Forms
For your photography website, the contact form will play a very important role.
With the setup wizard, all the necessary plugins will be installed automatically including the contact form. With this plugin, you can create all the contact forms you want by navigating to the wp-admin dashboard ⇒ Contact. To create a contact form, you can click on the “Add new contact form” button, while to view the existing form templates, you can click the first option – “contact forms”.
For photography site, you need a simple contact form with fields limited to name, email address, and message. So instead of creating a new contact form, you can browse the “contact forms” and use the example templates itself.
However, if you need more fields, you can refer to the contact form 7 documentation and create a custom contact form for your website.
Creating a contact form
With the contact form 7 plugin, you can easily create a custom contact form to collect the data that you want from the users using the form. Here’s the contact form 7 guide on how to edit the form fields to create a contact form. Moreover, there are other tabs to set up the mail, and for advanced settings. Moreover, you can also change the messages to be displayed at certain events like successful form submission, validation errors, wrong email address, etc.
Contact form shortcode
Once you have created a contact form, you can use it on the different pages through the shortcode.
The shortcode will look something like:
[contact-form-7 id=”234″ title=”contact form”]
You can create a text block wherever you want to insert the contact form and then paste the contact form shortcode there to insert the contact form.
With the consulting theme, you can create different contact forms and use them on different pages, as per your website’s requirements.
Using Blogs on your Photographer WordPress theme
You can use your medical website as your blogging platform. To start blogging, you can navigate to wp-admin ⇒ posts ⇒ Categories and set the categories for your blogs.
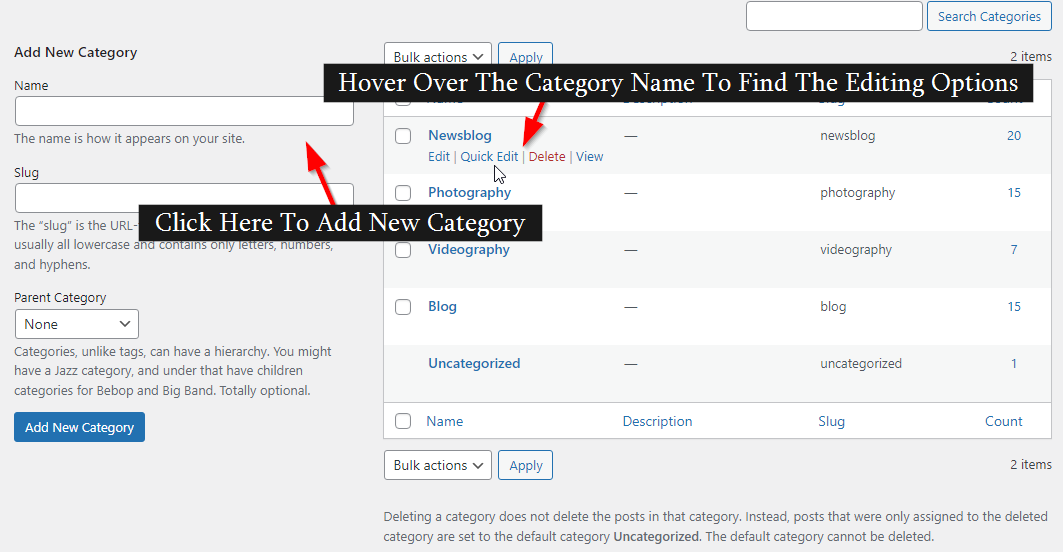
Categories can be anything related to photography services, etc.
Blog page sidebar
You can manage the widgets of the blog page at Appearance ⇒ Widgets ⇒ Sidebar.
There are many widgets placed by default in the sidebar, you can remove the ones you don’t like. Besides, you can rearrange them and also add new widgets too.
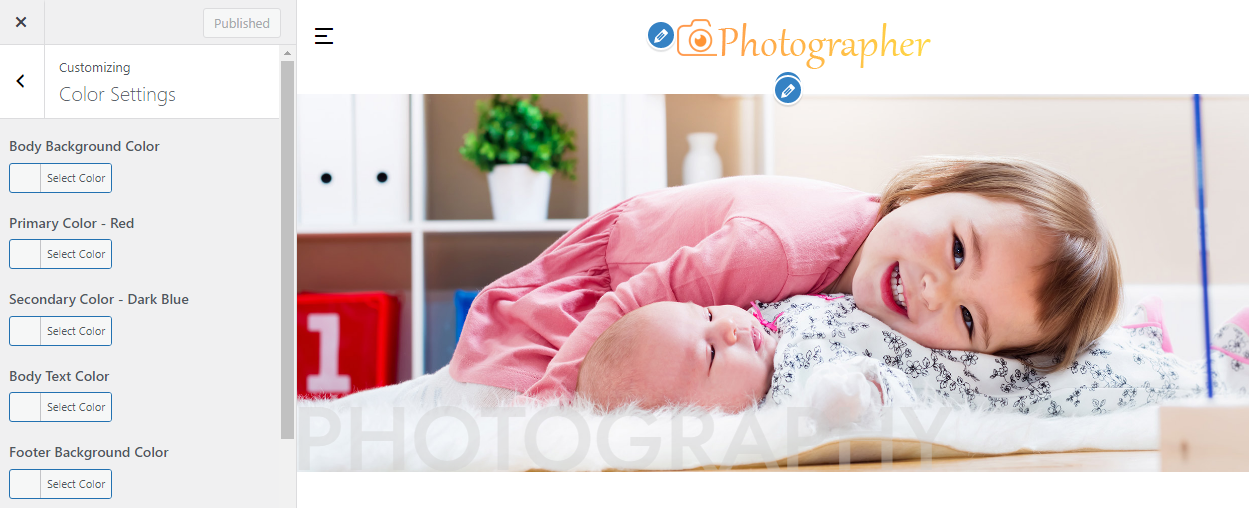
Set colors and image background
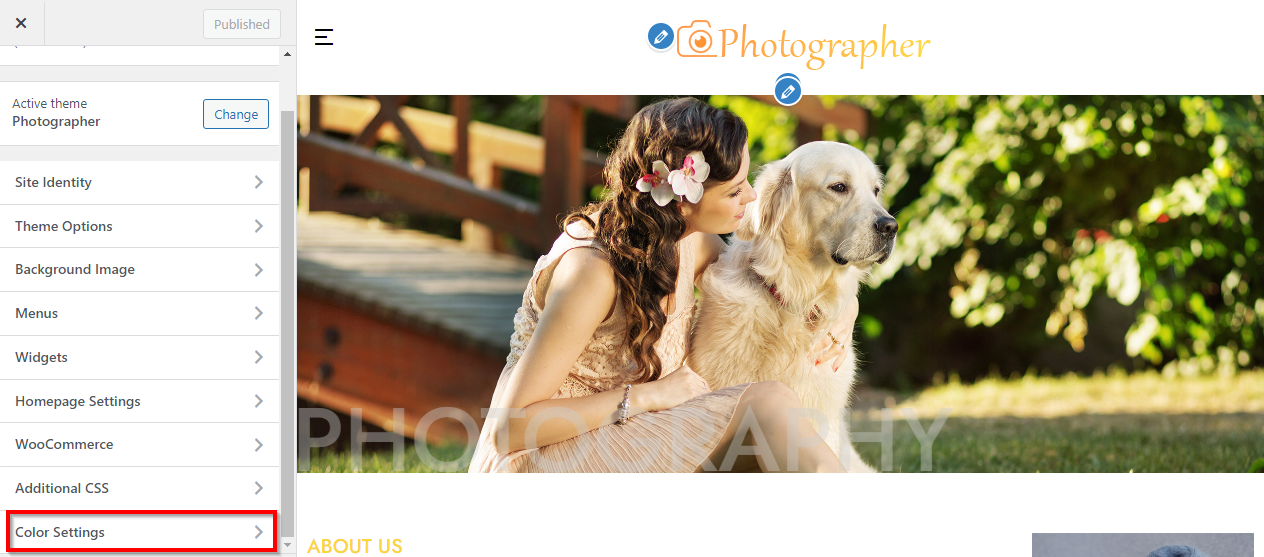
You can change the color and background of individual sections through the Elementor editor. However, you can also change the colors of your site at Appearance ⇒ Customize ⇒ Color Settings.
You can also set the background to your website using the image background option. To do so, navigate to Appearance ⇒ Customize ⇒ Background Image.
WooCommerce Store Settings
The medical WordPress theme is fully compatible with WooCommerce. So you can easily start an online store on your website whenever you wish.
To get started with the eCommerce on your website, you first need to install WooCommerce. It is free and very easy to use. If WooCommerce is not already installed on your site, you can download WooCommerce and install it at WP Admin ⇒ Plugins ⇒ Add New & by uploading the downloaded installation file.
To manage your shop with WooCommerce, you can refer to the WooCommerce documentation.