A feature that solves your problem of entering each post or custom post manually to your site & at the same time also facilitates you with the back ups using Export to CSV option!
Index
- With which Themes, this feature is available?
- How to use Bulk upload feature?
- General cautions while uploading CSV file to your site
1. This Feature is available with which Themes?
We provide you this feature in below mentioned themes and plugins only
Available with Themes
- All Tevolution (Templatic Plugin) based Themes
- Other Themes
- Geo Places 4
- Real Estate
- Realtr
- Events
- eCommerce Framework based Themes
- StoreBox
- Store
- Emporium
- eMarket
- eCommerce
- DigitalBox
- WP Store
- Kidz Store
- eShop
2. How to use Bulk upload Feature
There is a minor difference in using it with Tevolution Based Themes & other themes as mentioned above, so follow the steps accordingly.
a) Tevolution Based Themes
Go to WP-admin > Tevolution > Bulk Upload. Here you can upload and export your normal posts as well as custom posts.
Get the detailed description from the Tevolution Guide itself
b) Other than Tevolution based
- Go to wp-admin > Advance settings (E:g – Geo Places 4 > Advance settings) >Bulk upload
- In “Import” section, select the Post, Places or Events & choose your CSV file to upload & click the ‘Submit‘ button
- For your convenience you can download a sample CSV file from there only to get the thorough idea that what columns are used in it.
- Tip – Export the CSV of your required posts or custom posts to have a very clear view that what columns & data you should include in your CSV before uploading it to your site. This will help you to maintain the accuracy
- Similarly same process can be repeated for Exporting by choosing your CSV file & clicking ‘Export to CSV ‘ button
Note that custom fields added by you will not be exported with the custom posts in the non Tevolution based themes
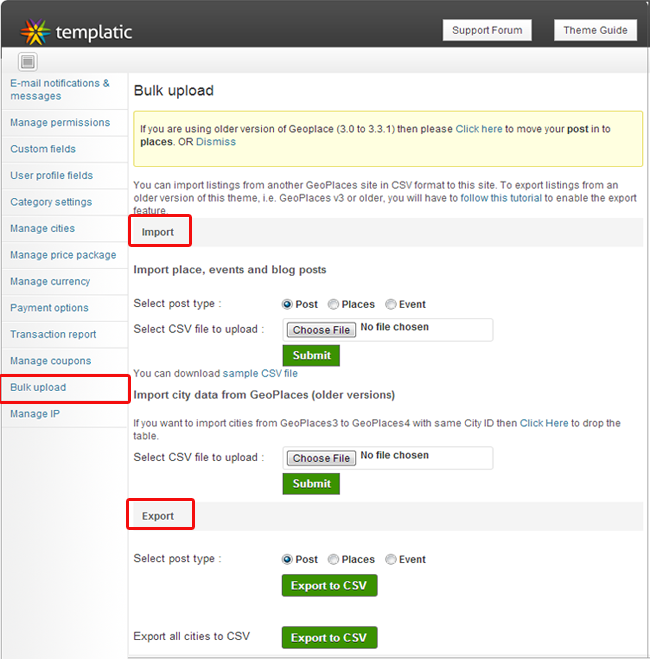
Bulk upload CSV
c) eComFramework based Themes
- Go to wp-admin > Theme options > Bulk Upload
- Select your CSV File & click submit button
- For downloading Sample CSV file, click in the “Sample CSV file” linked text in Note section (It will provide the actual idea that what columns are used in CSV & how it works)
- To know the meaning & purpose of each column used in CSV, you can also click on “CSV file field description Guide” to get the detailed description over there only!
- Whenever you upload your products (CSV File) to your site it will not replace your any existing product even though their name or other attributes are same. So, be careful there.
- Pleas note that If you are using a WooCommerce Plugin for your products than this feature will not be available.
- Also, you will be able to upload just the products & not the regular WP Posts or pages with this feature. For that you have to use wp-admin >Tools >Import/Export >WordPress (Free WP-Plugin)
In eComFrameworked theme, you can only upload CSV files but cannot export your products/posts in CSV file
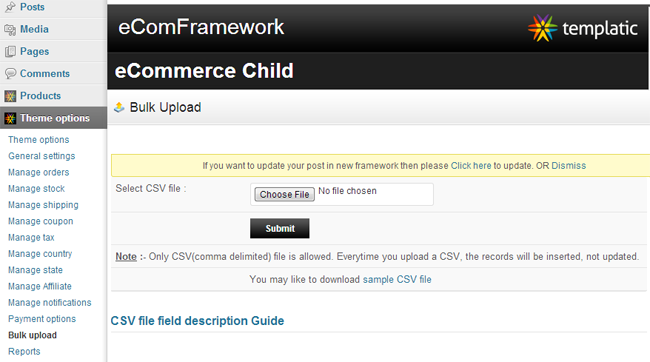
Bulk upload (CSV) in eComFramework Themes
3. General cautions while uploading your CSV file to your site
- If you are having a Geo Map field type, then two extra fields will be added in the CSV file i.e “geo_latitude & geo_longitude”. So you have to provide the correct latitude and longitude values in these fields along with the address field.
- The date entered in the CSV should be in yyyy-mm-dd format. Its okay if the Excel format is different but while you are entering a date from keyboard, make sure you enter it in yyyy-mm-dd format. Then excel will transfer that format automatically.
- If you have multiple images in the post gallery then in “templatic_img” column, you should mention multiple image names separated by ”semicolon“(“;”).
- All the images that have mentioned in CSV must be uploaded to uploads/bulk folder first. Then you can upload the CSV file.
- If you have multiple categories in a post then, in “templatic_post_category” column, mention multiple category names separated by ”comma“(“,”). Same for tags in “templatic_post_tags” column.
- Similarly, comments can be separated in “templatic_comments_data” column by “double hash“(“##”) and each field of comments can be separated by “Tield“(“~”).