Installation
- Download the plugin from Templatic member area. You’ll find it inside the “My Plugins” sub-section.
- Navigate to WP-admin ⇨ Plugins ⇨ Add New ⇨ Use the “Browse” button to load the previously downloaded .zip file. Click on “Install Now” to confirm.
- Once the plugin is finished installing, click on the “Activate” button.
Currently we are not providing the compatibility of “Deals” plugin with these mentioned plugins. You can install and activate the plugin but the functionality of these three plugin will not work with the “Deal” plugin.
- Directory-WYSIWYG-Submission
- Field Monetization
- Access Manager
And at this moment this plugin only works with the “Paypal” and “Pre Bank Transfer” payment gateways.
Load Sample Data
As soon as you active the Deals add-on a new post type will be created on your site – Deals. If you want to load a few sample properties, click on “install sample data” given at the top of the plugins page which comes after plugin activation.
Where to start adding content at your Deals Plugin?
You must be having so many things in your mind to do with your new set up site and most likely be confused which start would be good for you. By looking at our previous queries from you guys and difficulties, we suggest below flow to add content to your site. So that it will create less hassle for you if you want to edit something in future. To add new content at your site please go through this workflow.
- Add new Deals categories
- Add new Deals tags
- Add a Deal
Add new Deals categories
Traverse to WP-admin >> Deals >> Deals categories >> Fill up the fields like Name, Slug, Parent option, Description >> Add new Deals categories.
Add new Deals Tags
Traverse to WP-admin >> Deals >> Deals Tags>> Fill up the fields like Name, Slug, Description >> Add new Deals Tags.
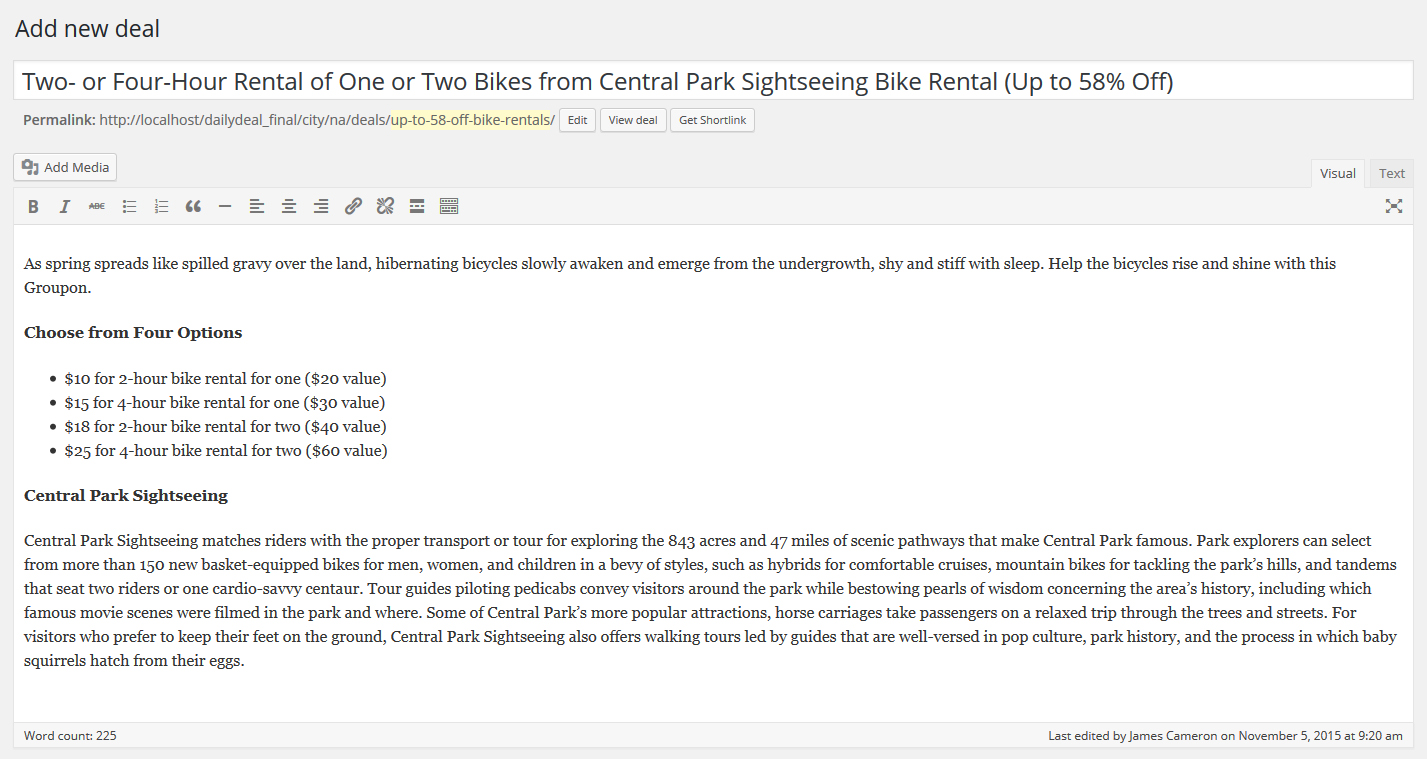
Add new Deal
Traverse to WP-admin >> Deals >> Add a Deals >> Fill Appropriate data >> Click on “Publish” button
From here you can fill up the related information of the Deal like, Add information of Seller, Product, Deal and Purchase Limit. Once you fill up the appropriate information in this fields you can assign the categories and tags, Gallery Image, Featured Image to this deal from the sidebar and click on “Publish” Button.
Seller Information
In Seller Information you need to add the Information about the seller like “Name”, “Email”, “Phone”, “Website” and “Seller Description” as shown in this image.

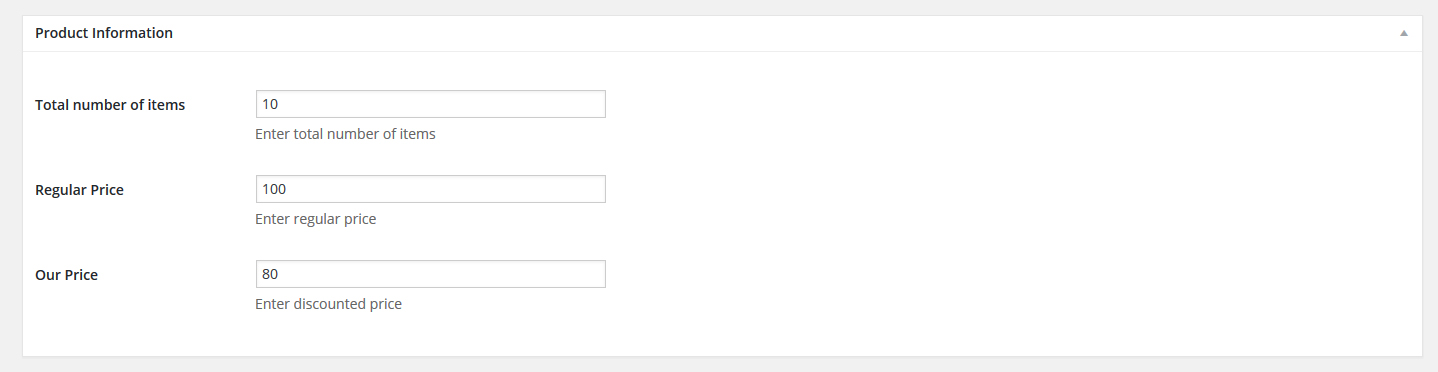
Product Information
In this section you need to provide the information about the product like, “Total no of items”, “Regular Price”, “Our Price” as shown in this image.
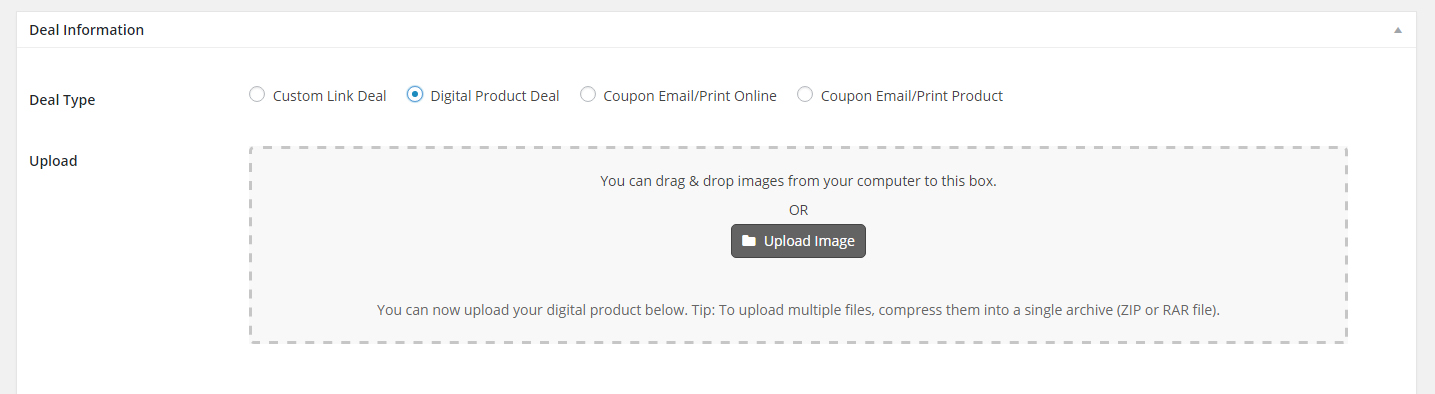
Deal Information
In this section you need to provide the information about the Deal like, “Deal type”, “Start date”, “Start time”, “Disable deal Expiration date”, “End date”, “End time” as shown in this image.
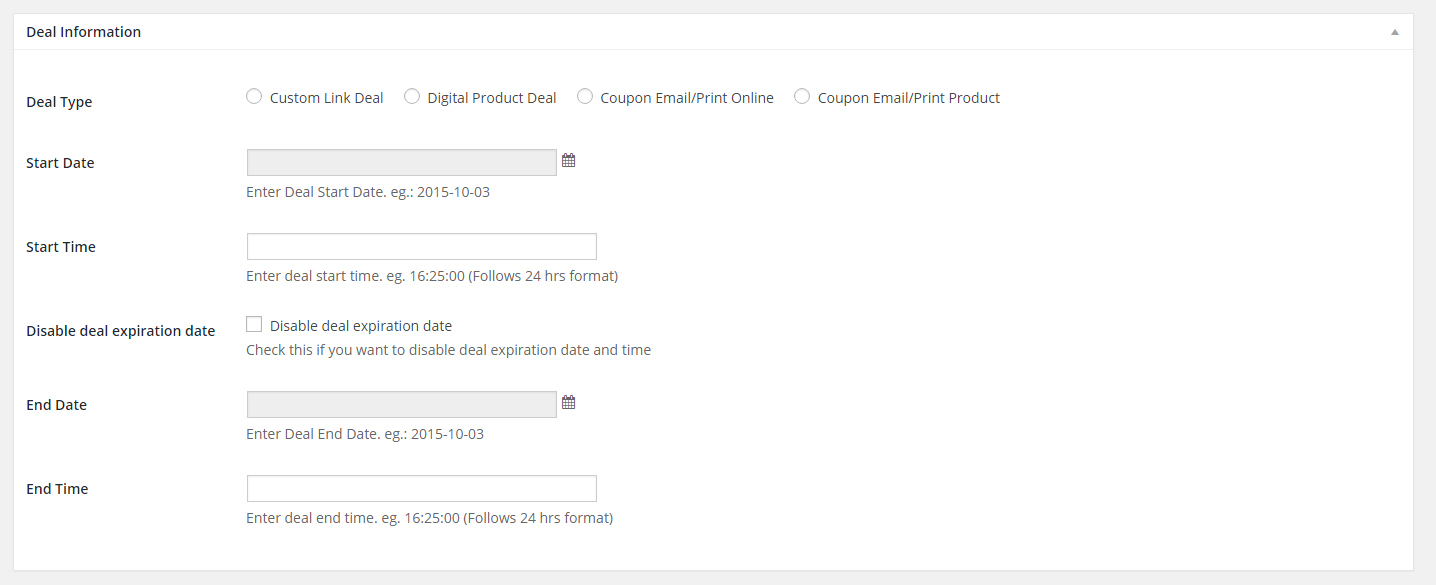
There are four types of deal.
- Custom link Deal
- Digital Product Deal
- Coupon Email/Print Online
- Coupon Email/Print Product
Custom link Deal
In this deal type you can set the affiliate link , so whenever user click on that deal from the front page it will redirect the user to that given affiliate link.

Digital Product Deal
In this Deal type you can upload the product. So that user can download that product from here. You can set the products like and docs file, audio file etc..
So user can easily download that products.
Coupon Email/Print Online
In this deal type you can set some coupons to this deal. You have the option here to set the single coupon or multiple coupons . If you select the single coupons then this coupons code will apply to all of your products listed here. And if you select multiple coupons code then you need to insert multiple coupons code with (,) separator. Suppose in last section you have set “Total number of items” to “10”. Then here you need to add 10 coupons code with (,) separator if you have select the multiple coupon option.

Coupon Email/Print Product
You can include the shipping cost in this deal type so it will charge extra shipping charge to that purchased deal.
Also you have an option to set the address of the deal, So when User is in particular city it will show the deals which are listed it this city. Suppose you have set the location of London here, so it will show this deal to those users who are in London city.

Purchase Limit
In this section you need to provide the range of the purchase, minimum number of deal and maximum number of deal which user can purchase.

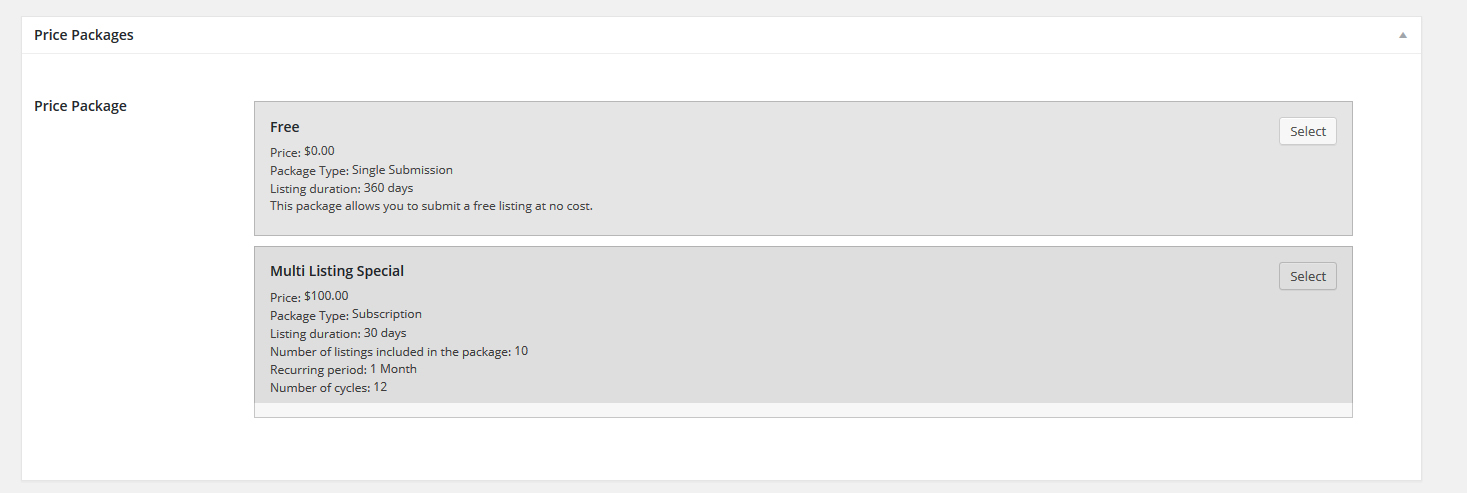
Price Packages
Select your price package for this deal from the list of the available packages.
Deal categories
You can assign the related deal categories from the right sidebar area, which you have already add in your deal categories.
You can also create a new categories from here by clicking on “Add new deal categories”. So you can add new categories in this deal from here.
Deal Tags
You can tag the related deal from the right sidebar area, which you have already add in your deal tags or you can add new tags from here.
Add Image gallery
From here you can add multiple images of deal in gallery by clicking on “Add images gallery”. To select multiple images from the media library press ctrl + click and select the images.
Submit Deals
Once you activate the plugin at your site and install sample data it will automatically create a page named “Submit deal” at your site. So you can submit a deal from the front end of your site. If you will not able to find this page then you can also create it manually by your own.
How to create submit page
Create a new page named “Submit deal” and add this given shortcode. So this will allow you to submit a deal from the front end. You can also add a menu tab of this page, for that you can refer this link for more information about how to set up menu.
Submit page can be created by using this shortcode:
| [submit_form post_type=’deals’] |
Submit a deal from the front end site.
To submit a deal from the front end site please open this mentioned URL “www.yourdominname.com/submit-deal/” so you will able to see the Price package here as shown in this screenshot.
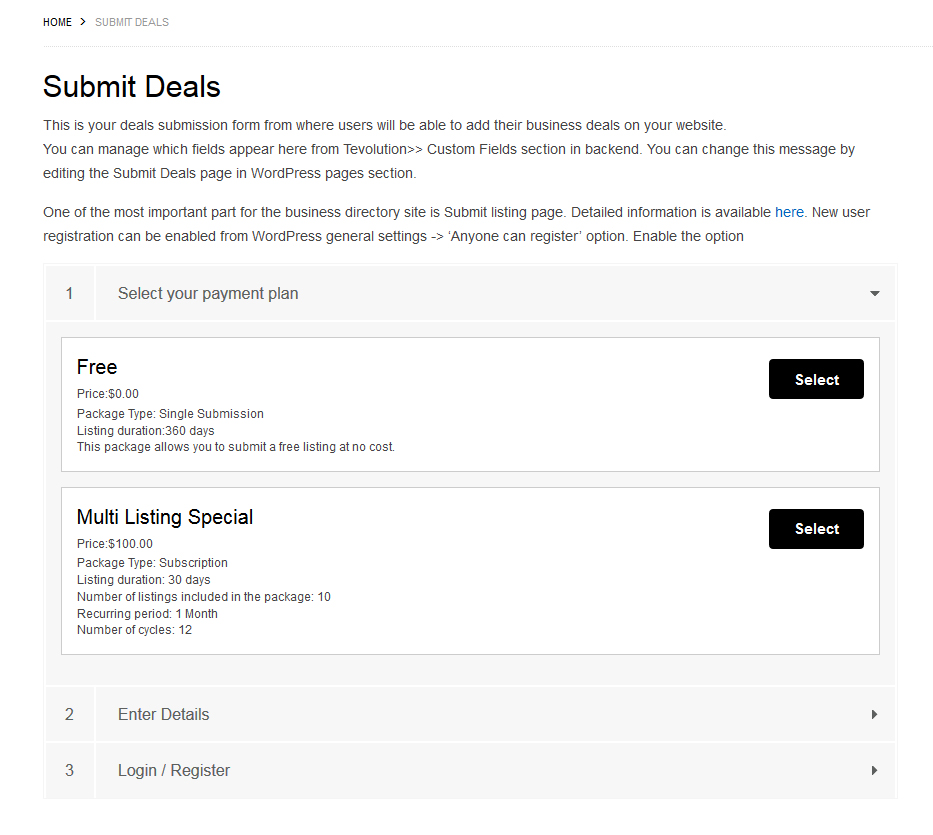
Once you select the Price Package, please take a look to this video which shows you how to submit a deal from the front End.
How to Add/Remove different type of new custom fields?
To add/edit/remove different options, go to WP-admin > Tevolution > Custom Fields. Here you can add/edit/delete different fields. Please read more here.
Manage Pages
Home Page
Featured Deal
To show the featured deal at your home page, you need to add the widget named “T – Featured deals” at “Homepage main Content” area.
First you need to set a deal as a featured deal, you will get the detail information of how to set the deal as a featured deal from this link now scroll down you will get the section named “Featured options”.
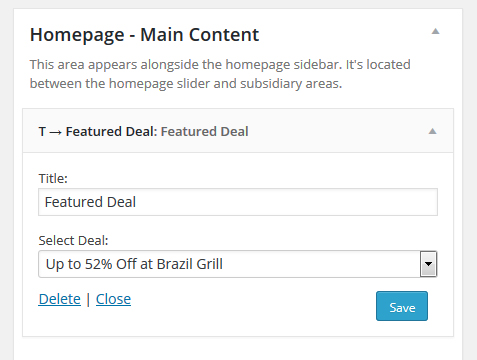
Traverse to wp-admin >> Appearance >> Widget >> Place the “T – Featured deals” widget >> at “Homepage main Content” area >> Select the deal which you want to show you at homepage. and save the settings. Now take a look at your homepage.

Show deals on Homepage.
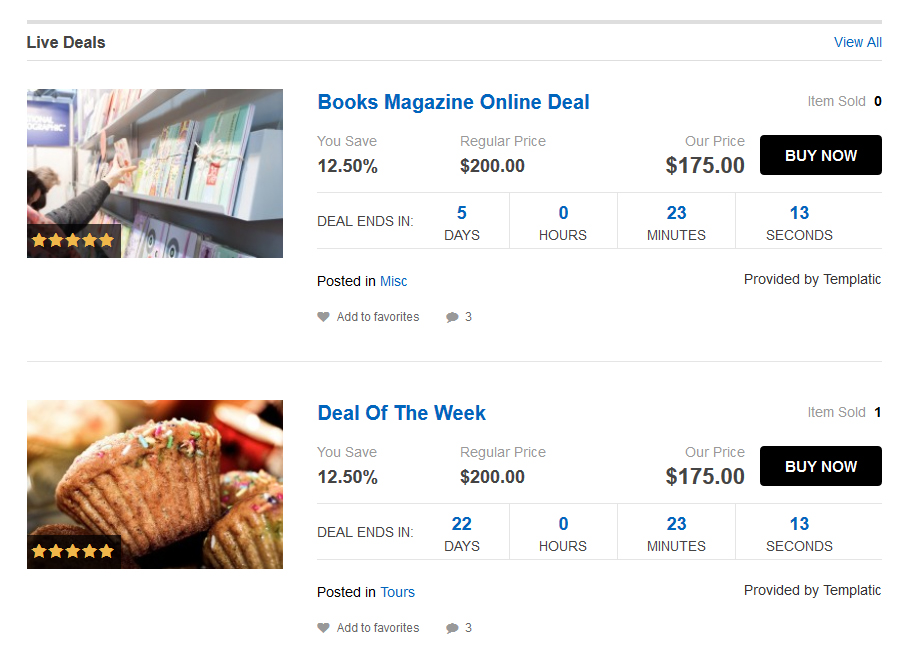
To display the deals on homepage traverse to wp-admin >> Appearance >> Widget >> Place the “T – Homepage Display deals” widget >> at “Homepage main Content” area.
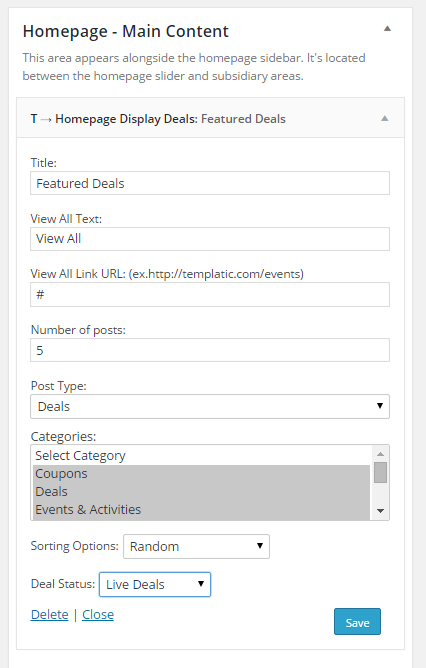
In this widget you can show categories wise deals, to show the deals as per their status like Live, future, Expired. Also you have different type of sorting option to show the deals. do all the settings as per your needs and save it.
Category Page/Archive Page
In the category page we have distribute the deals as per its status. You can see in the above screenshot the deals are distributed as per its deal status like All, Live, Expired, Upcomming. And also there is a sorting option through which you can sort the deals.
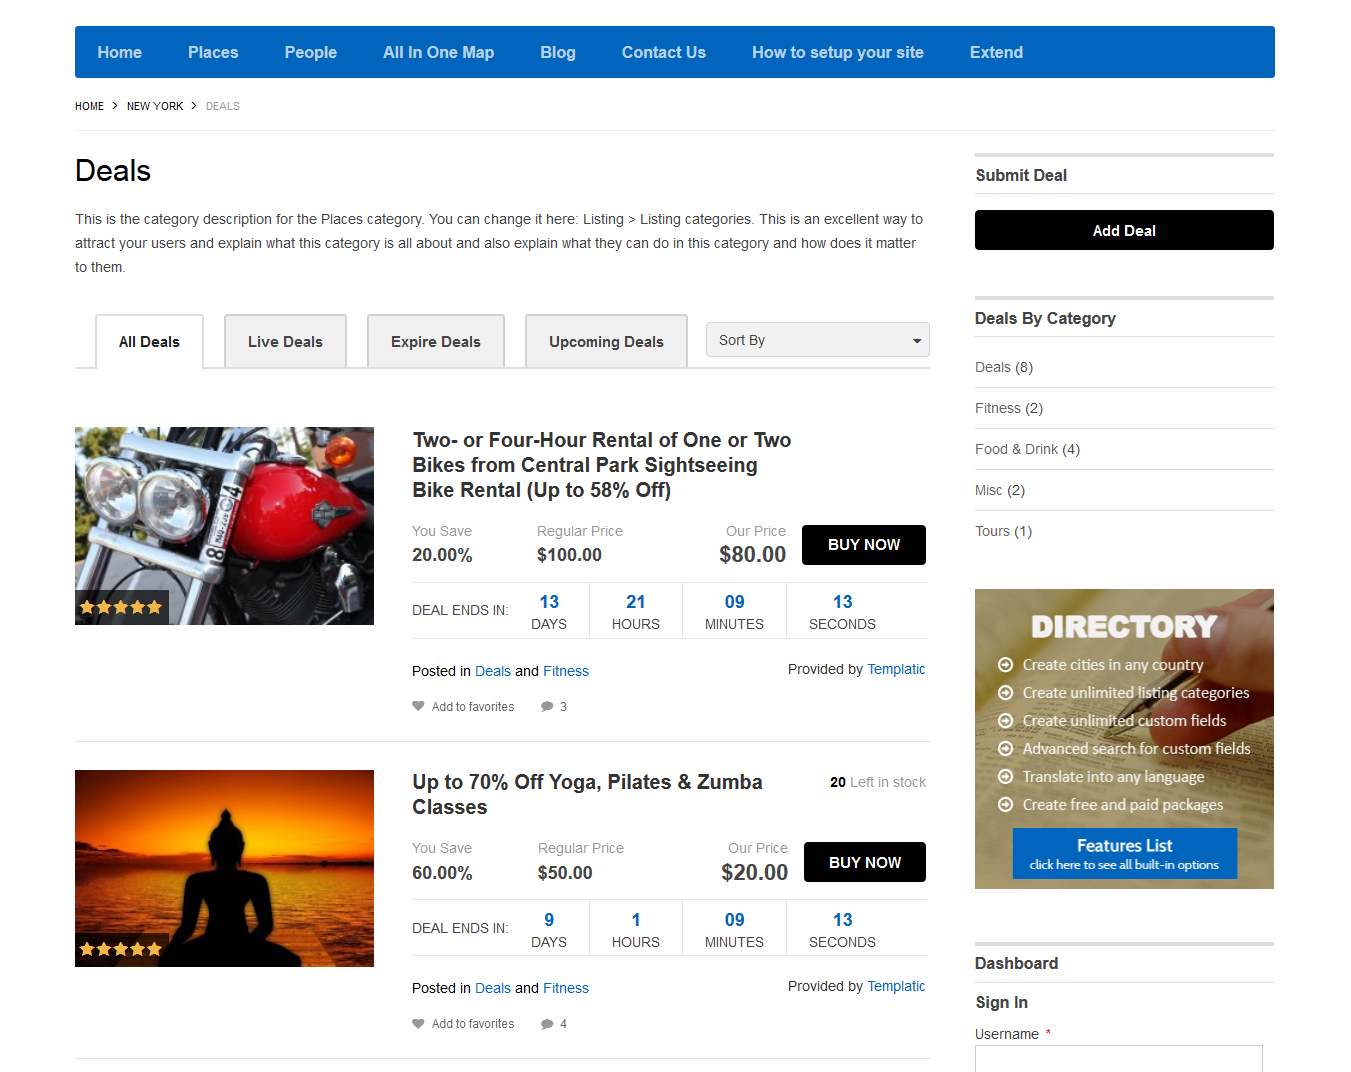
We have distributed deals as per status as Live, Expired, Upcomming.
How to show different deal categories in the category sidebar area?
To show the different deals category in sidebar area, traverse to wp-admin >> Appearance >> Widget >> Place “T – Browse by category” widget at “Category Page sidebar” area >> Now select the “deal” option in “Select Post type” option and save the settings.
Like this way you can show the deals category in sidebar area.
Detail Page
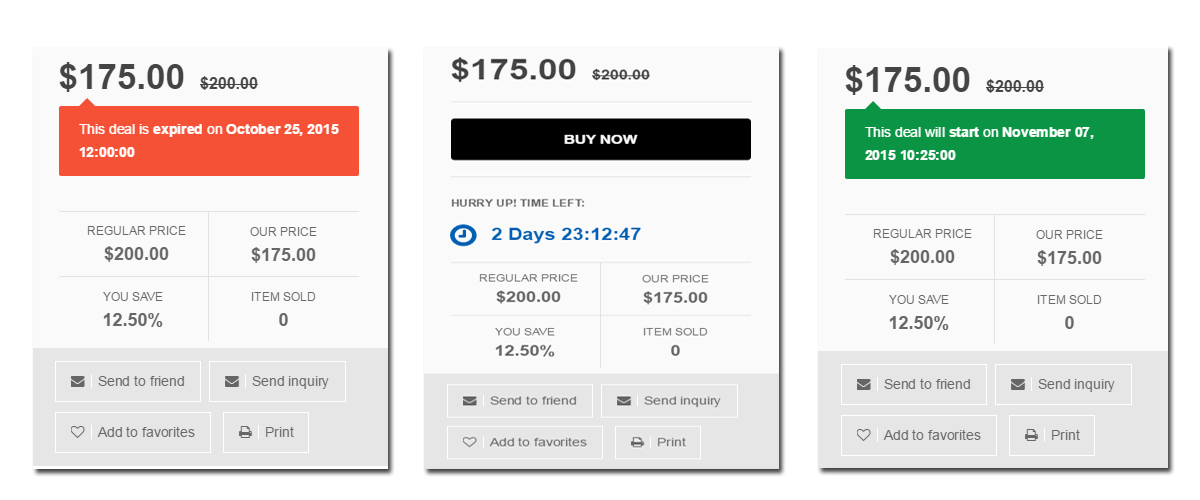
You can see the deal details near by the deal image. In which you can see all the detail information of the deals. If you want to purchase the deal then simply click on the “Buy Now” button.
Once you click on Buy now button it will ask you to fill up the billing address and Shipment Address. Fill up those details and then it will take you to further steps like login and payment.

How to add/remove social media sharing buttons and “Send to friend” ,“Send Inquiry” from detail page?
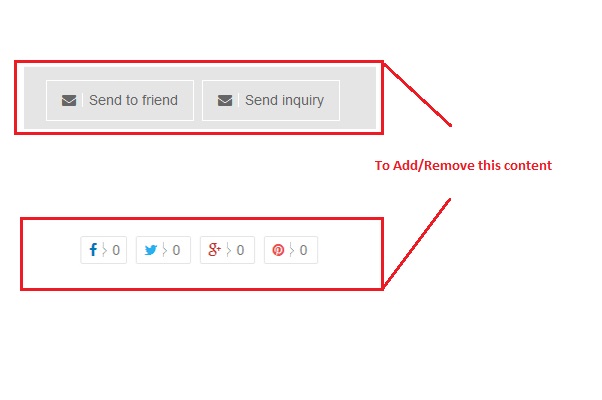
- For Social Sharing buttons
Please traverse to WP-admin >> Tevolution >> Settings >> General Settings >>Detail Page settings >> Show sharing Buttons >> To remove those buttons from front end, disable this all options and save the settings.
- For “Send to friend” and “Send Inquiry”.
- Please traverse to WP-admin >> Tevolution >> Settings >> Email settings and notification >>Detail page Forms >> to remove this options disable this options and save the settings.
How to enable/disable the comments/review section in detail page?
Please traverse to WP-admin >> Settings >> Discussion >> From here you can change the settings to enable the comment section as shown in screenshot.
If still you are not able to enable the comments/review section, make sure that this given options are enable.
For Individual listing:
Please traverse to WP-admin >> Products >> edit product >>Screen option at top-right corner >> Enable author options >> Now scroll down to the page and go to “Review Settings” >> Enable options “Allow review” >> Save the settings.
For Pages and Post:
If you want to enable comments on Page/Post then,
Please traverse to WP-admin >> Appearance >> Customize >> Detail Page setting >> Enable comments on page/post >> Save and published.
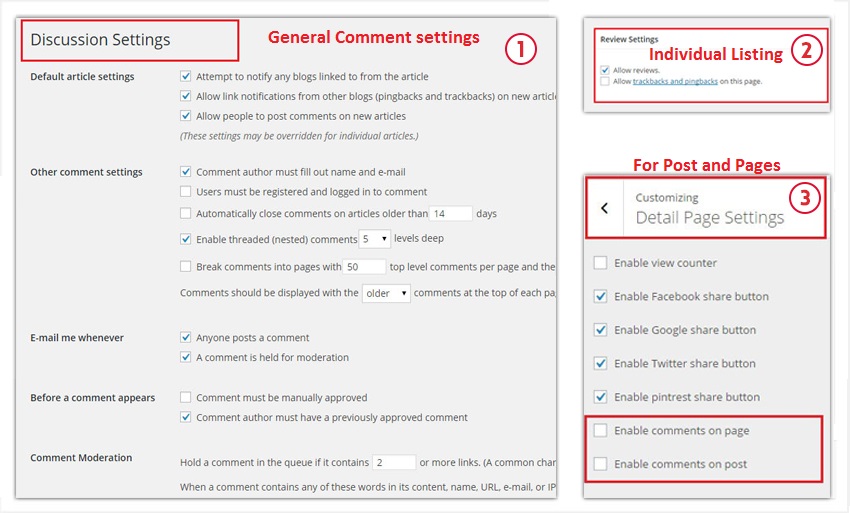
You can also enable the “View Counter” from third settings.
Author Page
Through the Author page you can track the deals. From here can get the details about the deals which you have purchased as well which you have submit.
The deals which you have submit are given as “Deals” in Author Page.
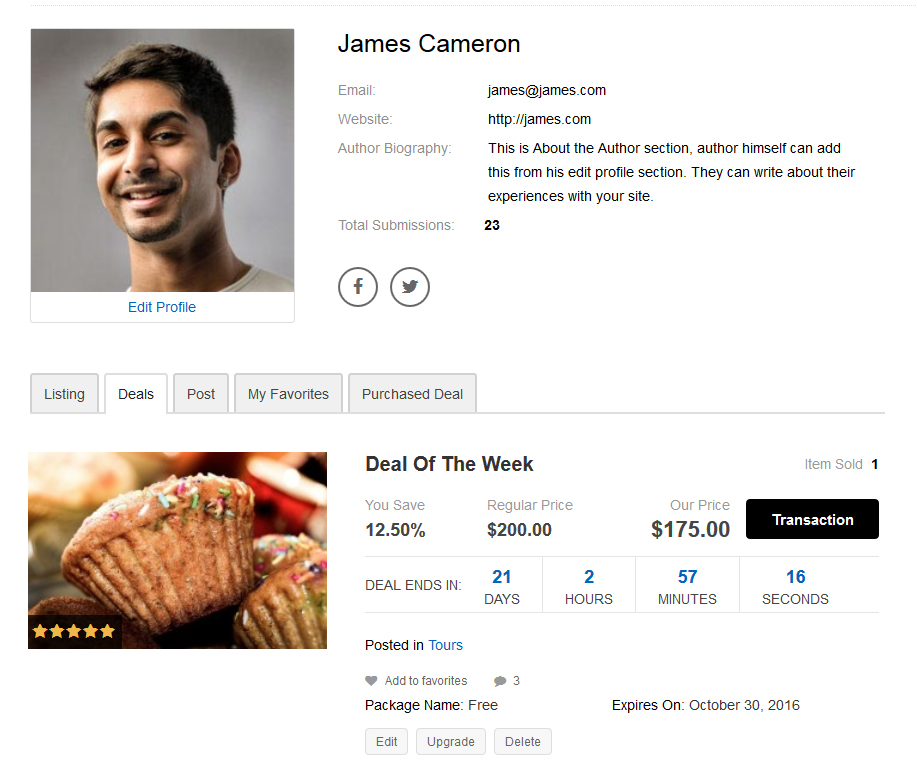
So you can track all the deals which you have submitted. You can also Edit/Upgrade/Delete the deal from here. You can get the Transaction of individual deal by clicking on “Transaction” button.
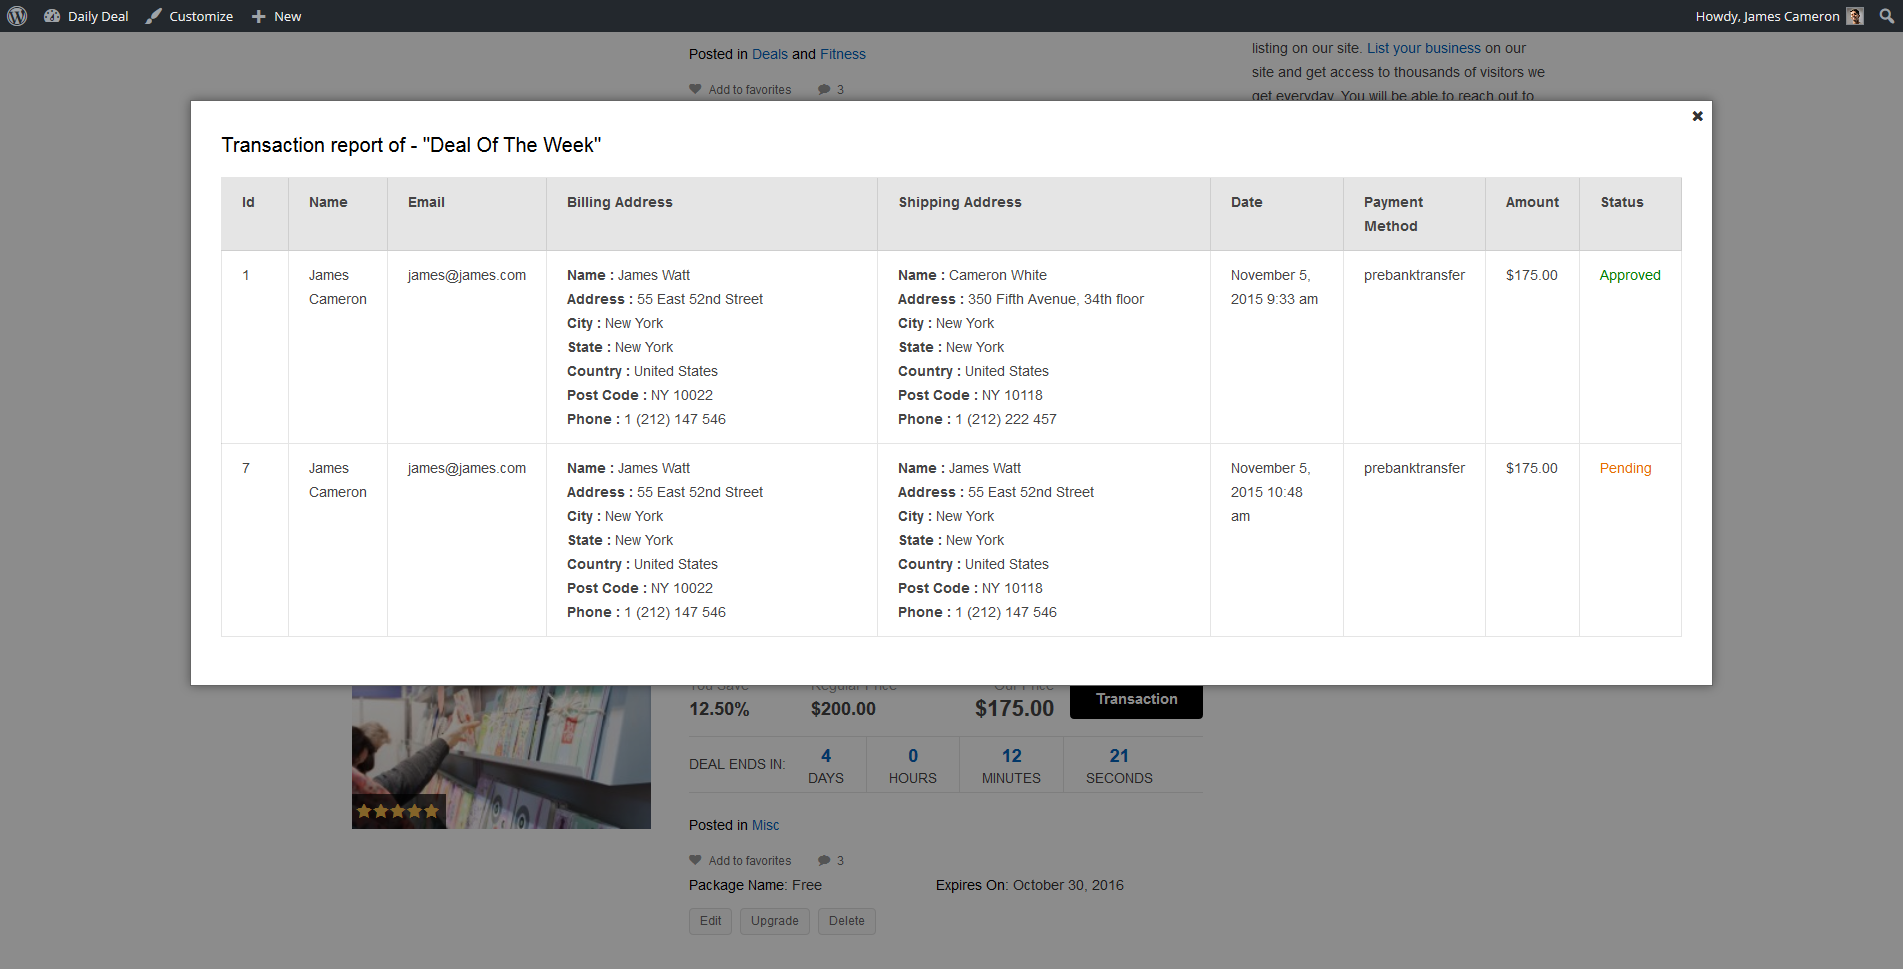
If you want to approved the pending deals you can do it from the wp-admin >> Tevolution >> deal Transaction >> Here you can see the list of pending and approved deals. So you can approved from here. From the same section you can generate a report of your deal transaction from here.
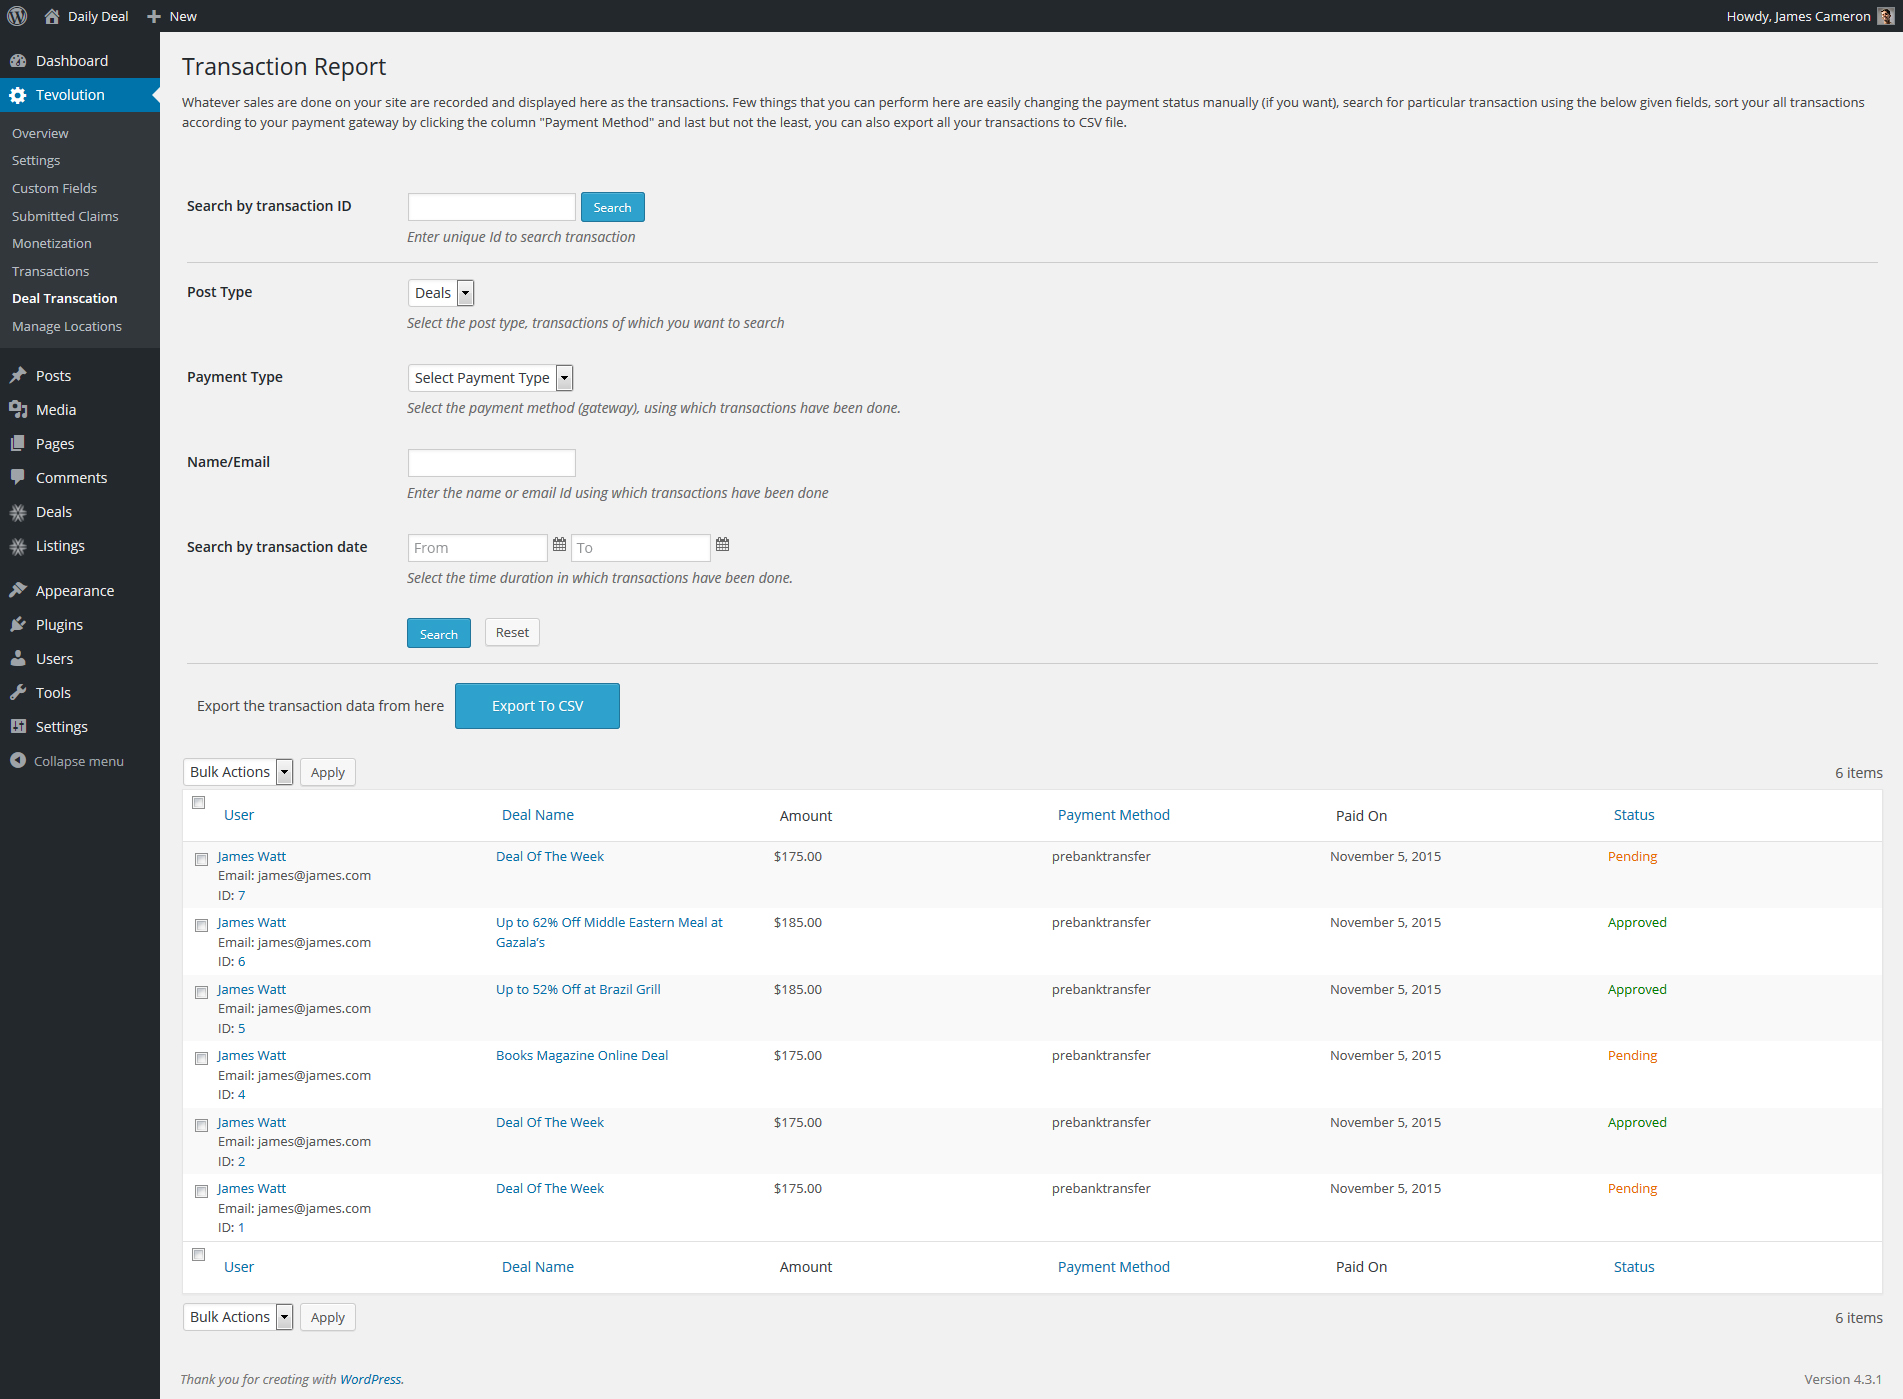
For that traverse to wp-admin >> Tevolution >> Deal Transaction >> You can able to generate the report from here. And also you can approved the pending deals from here.
And the deals which you have purchased are given as “Purchased deals”.
In the purchased deals you can get the information like Deal Name, Coupons, Expires Status, Print/Download status of the individual deal.
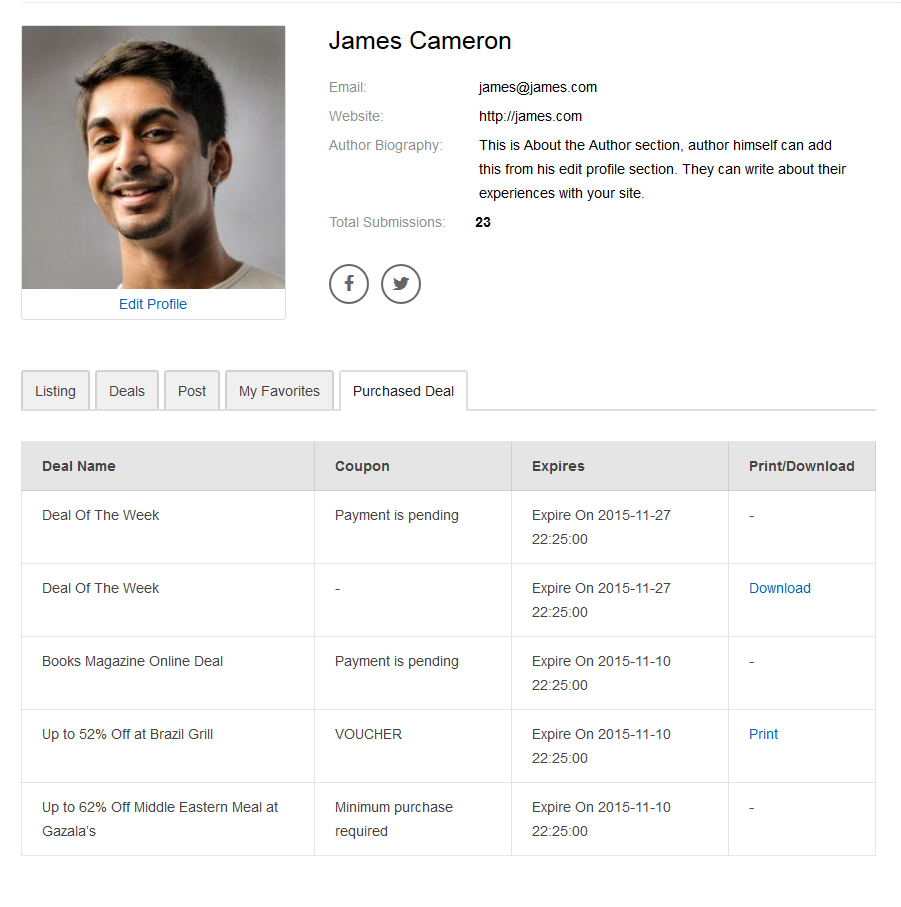
If you want to print the coupon then simply click on the print link. So you will able to print the coupon which are available to print.
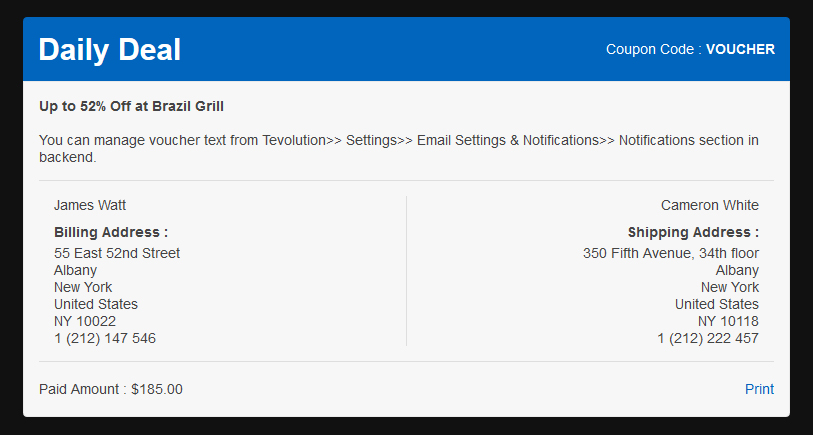
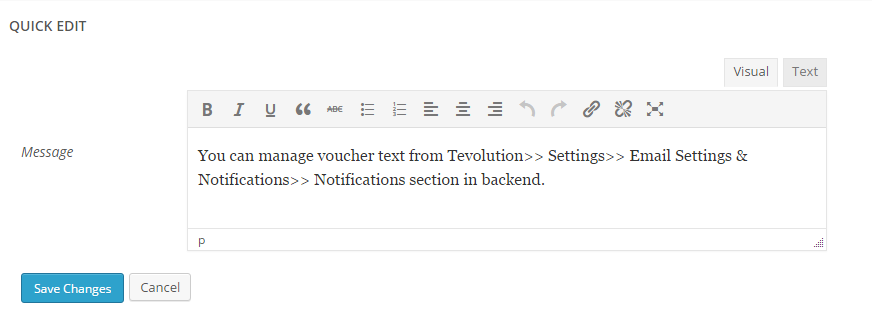
You can also change the text which is given in the Print voucher. For that please traverse to wp-admin >> Tevolution >> Settings >> Email and Notification >> Print voucher text >> Quick Edit. You can Edit the print message from here. You can refer this screenshot here.
If the submission will be set-up as paid then it won’t be possible without payment. However, you as an admin of the site can approve the submission(s) from the back-end anytime for any particular entry. Hope you are aware of the transaction entries as its getting listed at WP-admin –> Tevolution>> Transactions. Otherwise, you can setup the free submissions to get it done as a second option.