Installing the Theme
Start by downloading the zip file of the theme from your Templatic Member’s area.
Now, extract the file using an application like 7zip. The folder will yield two different folders – Templatic V2 & fitnessplus. Zip them both, again using 7zip and then we can proceed to install the theme.
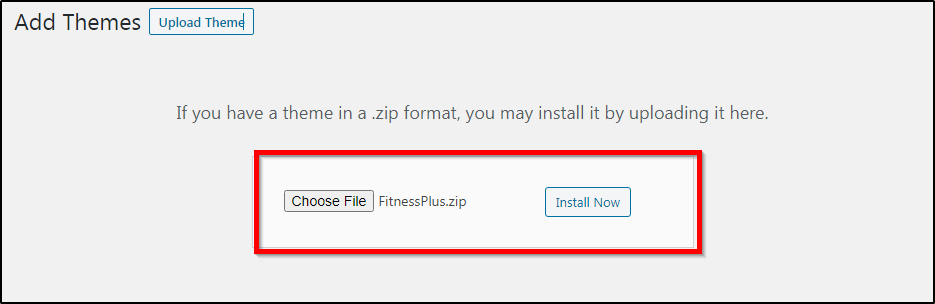
Templatic v2 is the parent theme and therefore we will install it first. To install it, navigate to Appearance ⇒ Themes.
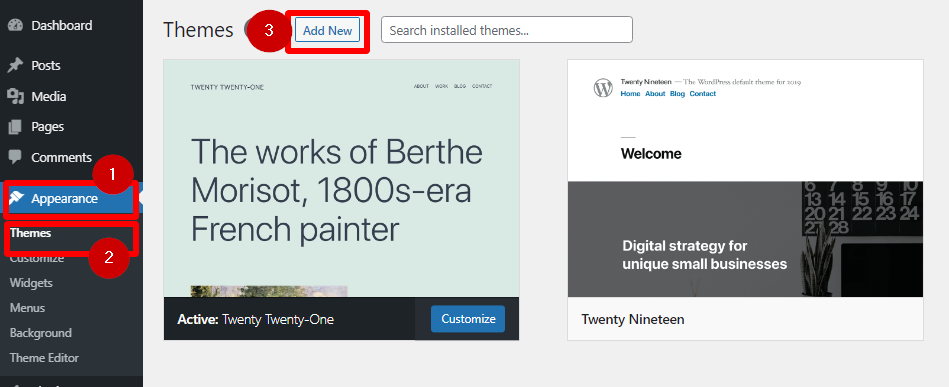
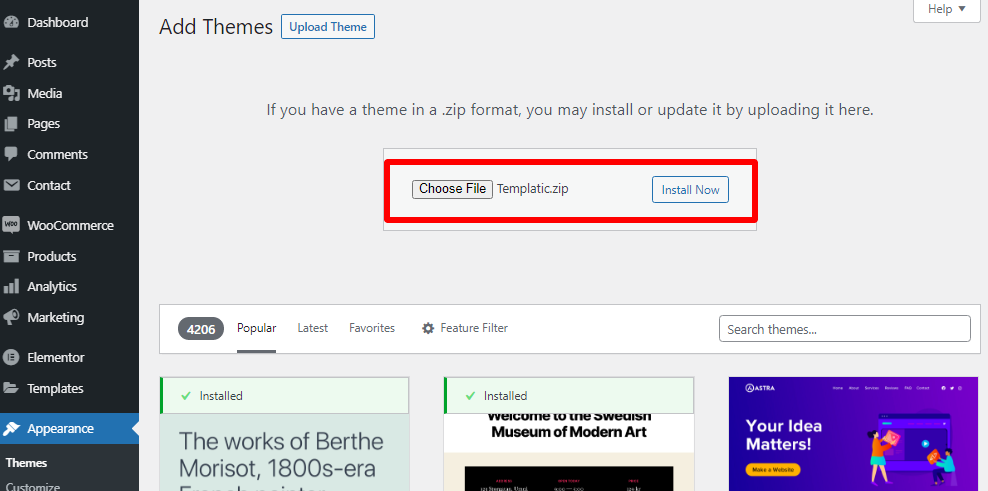
In the next step, you can upload the TemplaticV2.zip folder.
Once the theme is installed, you will see a screen like:
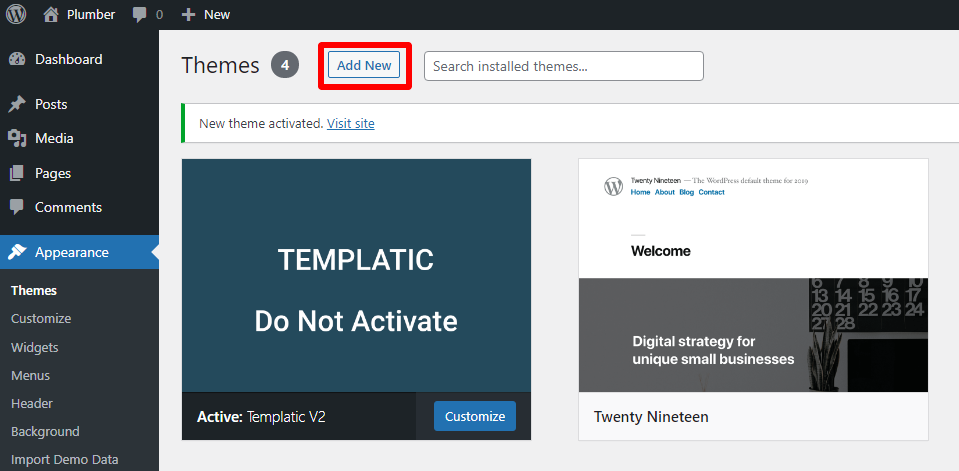
Next, we will proceed to install the Fitnessplus theme, which is Templatic theme’s child theme
Install the theme again by clicking add new, at Appearance ⇒ Themes.
Upload and Install the theme.
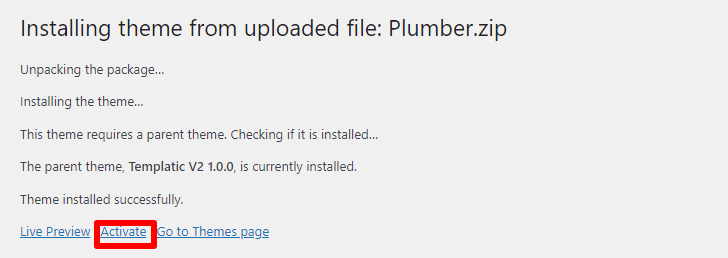
And activate when the theme is installed. The next step would be importing the sample data.
Importing the Sample Data
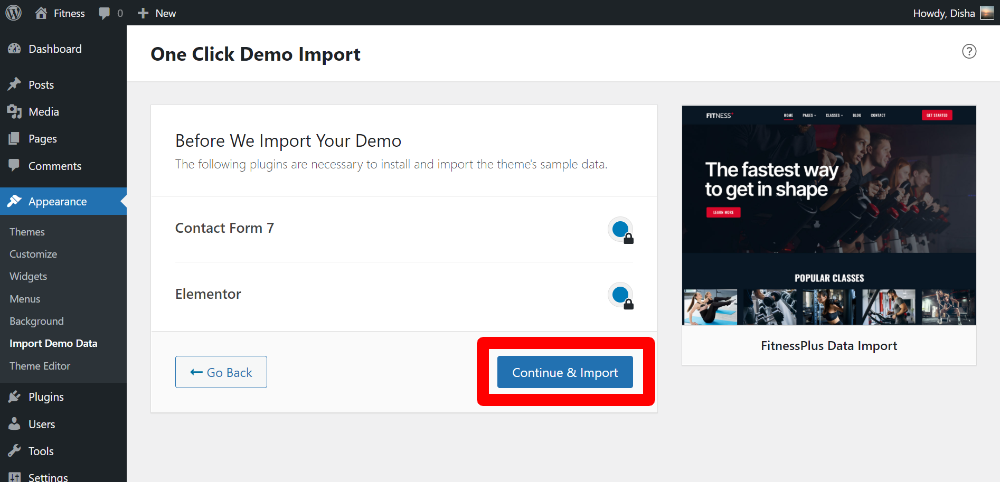
As soon as the Fitnessplus Theme is installed, you will see a screen that will allow you to import the sample data.
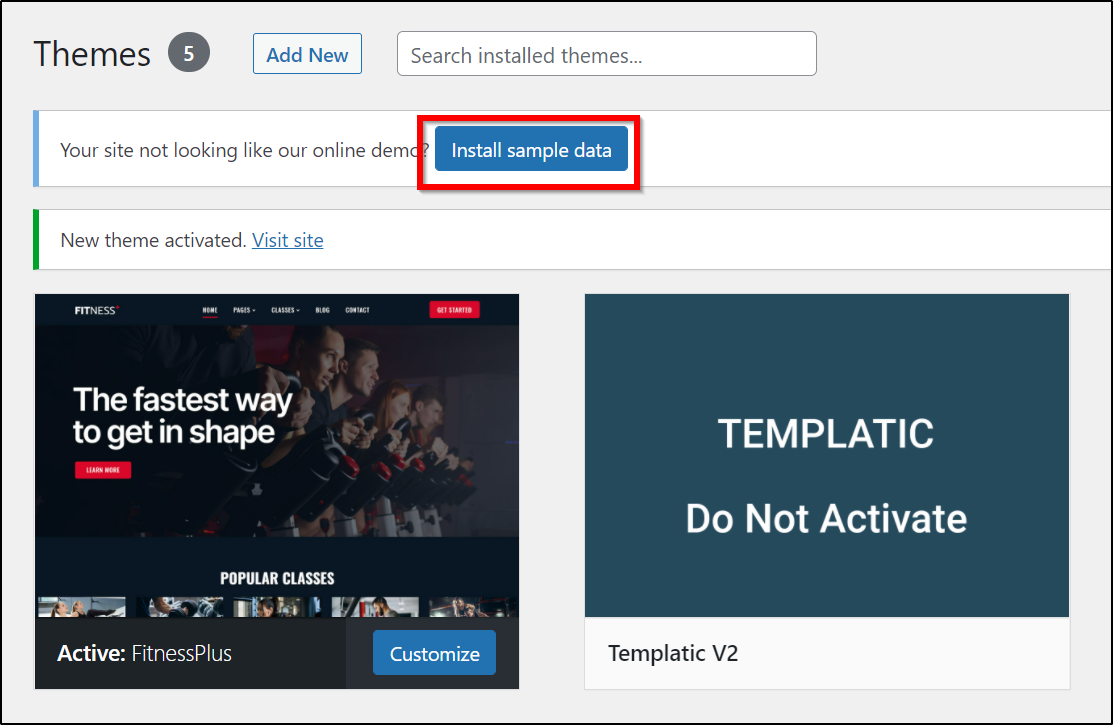
The sample data will populate your website with the page sections in place, demo images and content so that you don’t have to start with a blank site.
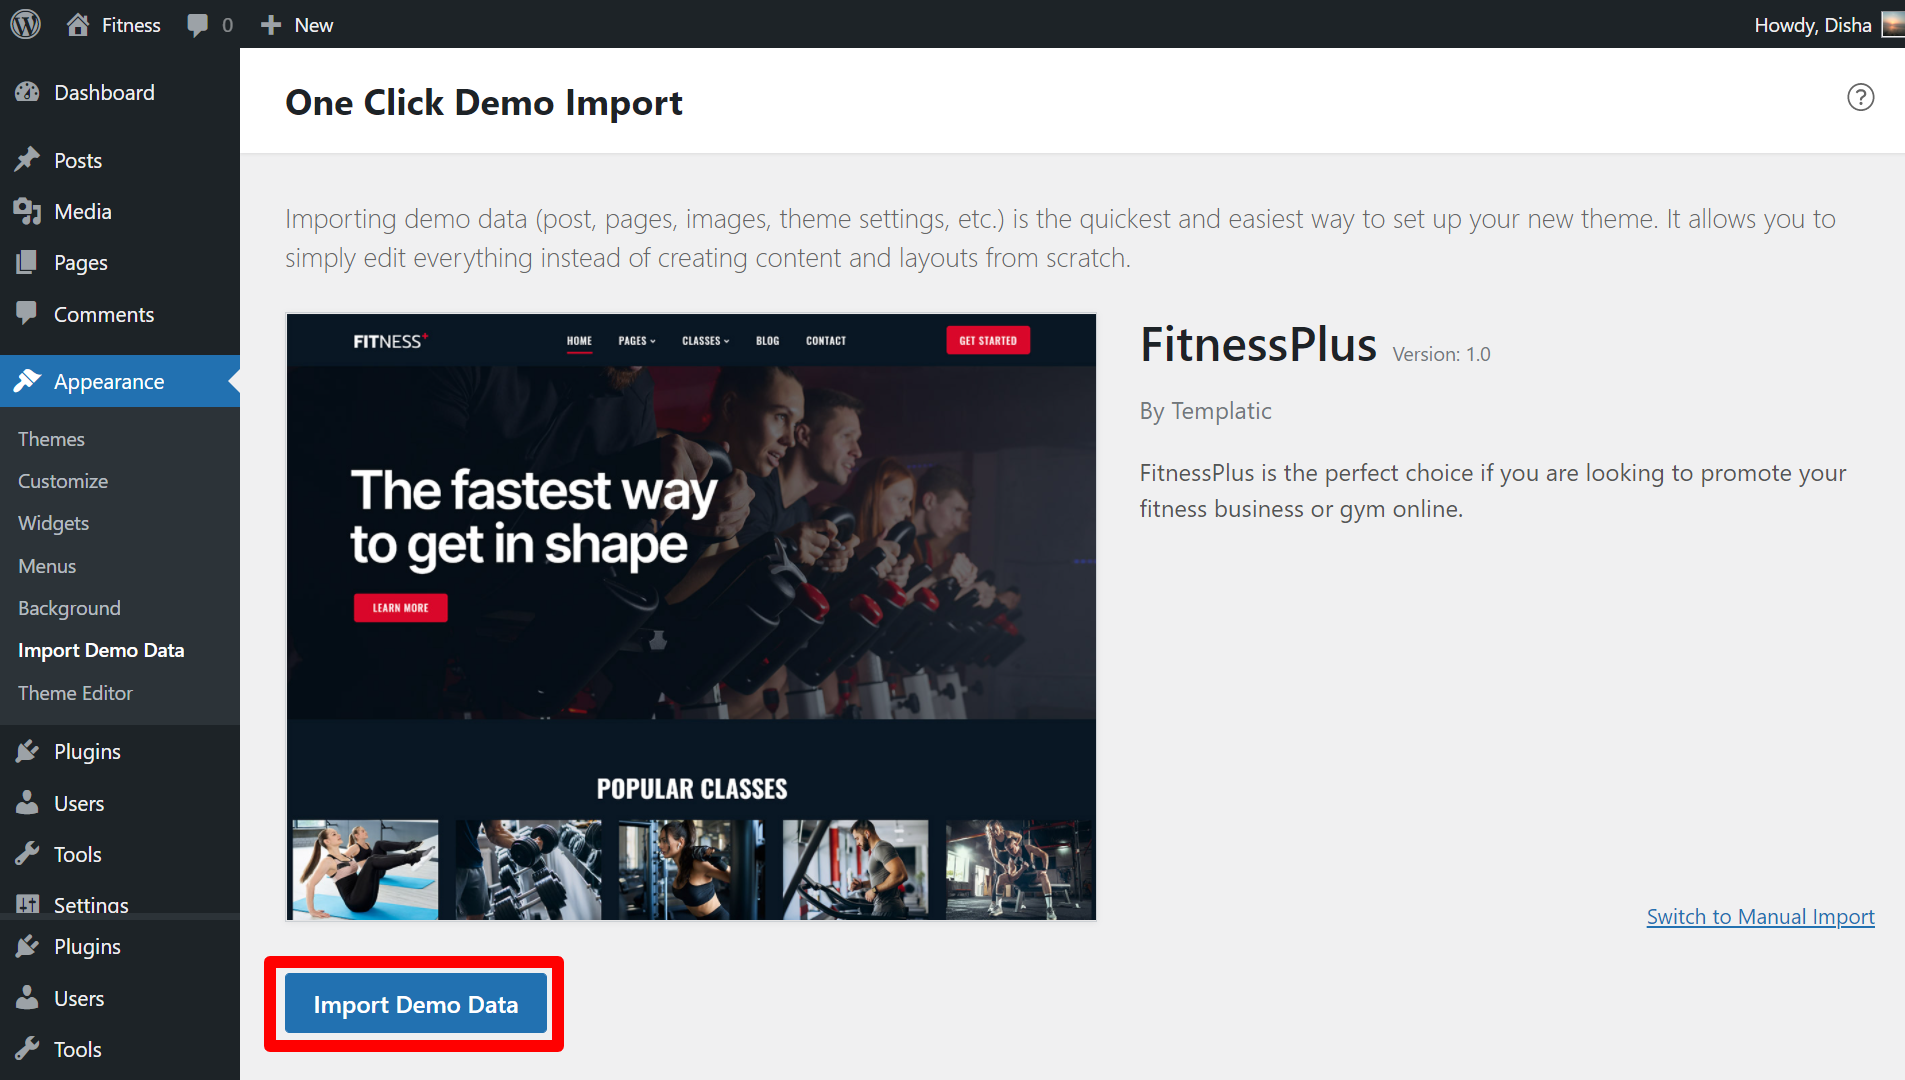
Choose to import the data.
The install will take a while. Sit back and relax!
Once all the essential tools are imported, the next process of installing the sample content will start automatically, without requiring any action

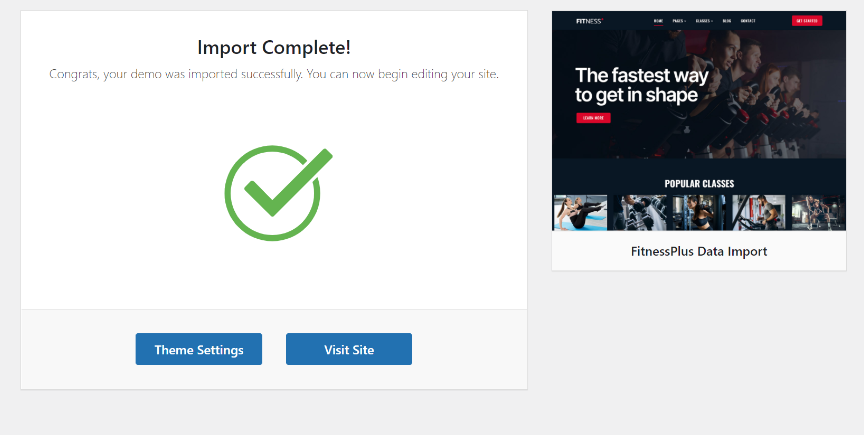
And once the sample data is installed, you are ready to experience your website. Choose to edit it or visit the site to see how your website will look.
Elementor Basics
Mostly all the pages of this WordPress theme are built with Elementor page builder. This means you can easily edit them with the drag and drop options of the elementor page builder.
This page builder is really easy to use even for beginners. But to get started with the elementor page builder to edit the pages of your website, here are some basic tips:
Editing the pages
Mostly all the pages of this WordPress theme are built with Elementor page builder. This means you can easily edit them with the drag and drop options of the element or page builder.
This page builder is really easy to use even for beginners. But to get started with the elementor page builder to edit the pages of your website, here are some basic tips:
You should be logged in as an administrator of the site, to find the ‘edit with Elementor’ option at the top of your page.

This will open the Elementor page builder panel to help you edit the theme.
Adding new sections
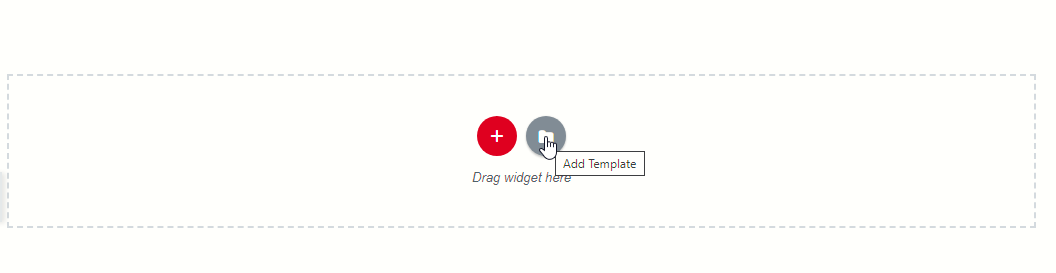
To add a new section to your page, scroll down to the end of the page and find the button with ‘+’ (plus) sign. This will add a section and you can drag an element from the sidebar to the section.
You can add unlimited new sections on any Elementor based page by using the available options. You can choose either to use a widget or choose from the available templates.
If you choose to add a section through the widget, you will be asked to choose a layout for the section.
Columns and adding widgets to it
Elementor lets you choose the layout for each section. You can choose if you want a full-width section, or a section with two or three columns, etc. After choosing the layout, you can easily drag and drop the content elements like text, widget, image, video, etc.
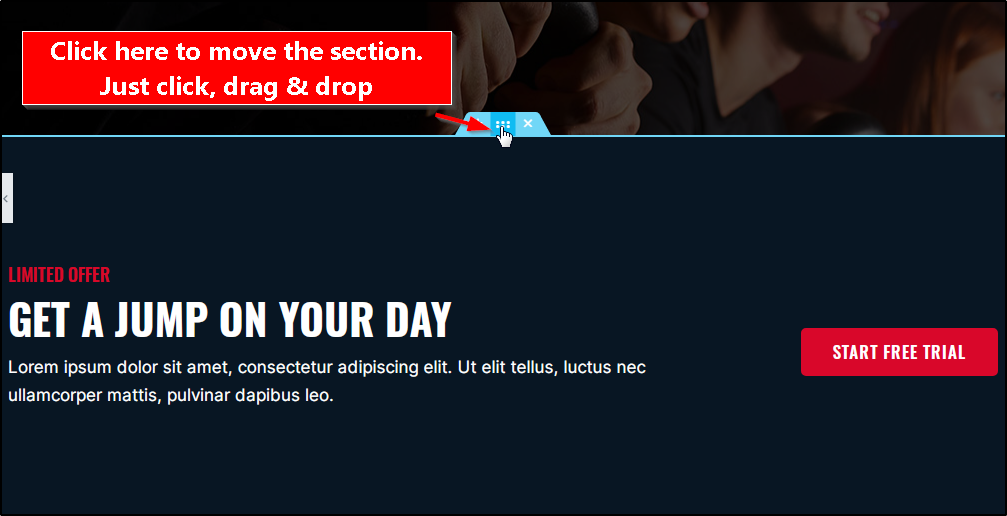
Move the sections
To move the section, you can use the simple drag and drop options to move it to the top or towards the bottom.
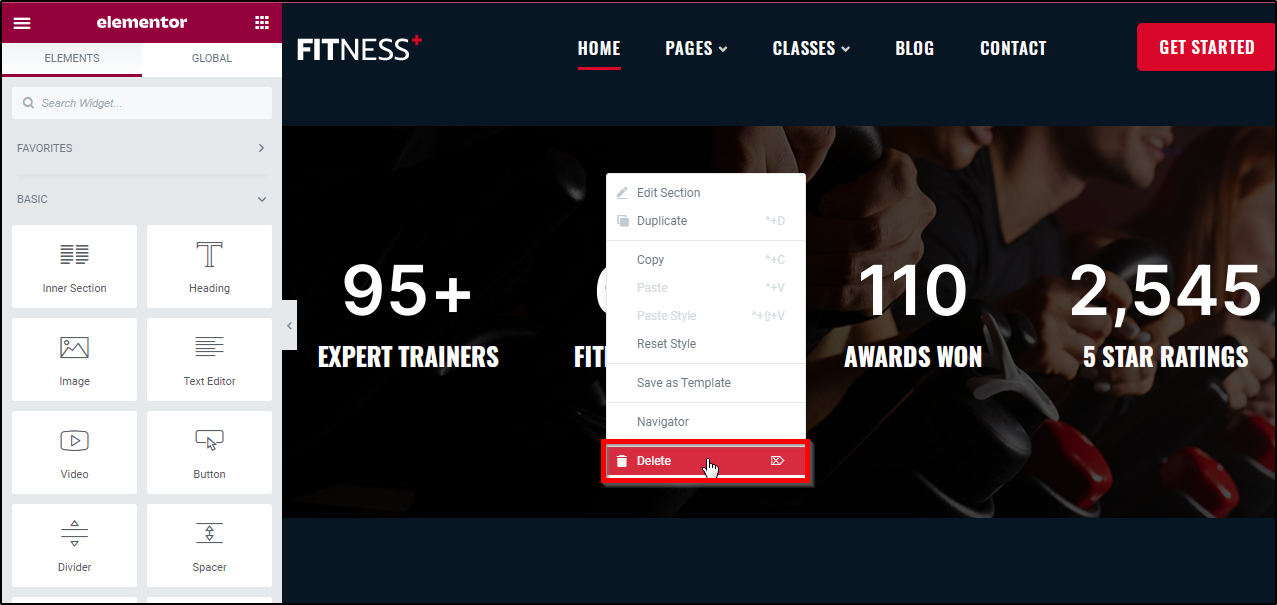
The Right click options
Discover the options by right-clicking the element or a section.

Deleting a section
The option to delete a section can be availed by right-clicking on the edit option.
For more details on how to use the Elementor page builder, refer to this guide
Styling your sections
The instructions on how you can style your columns are available here.
Homepage
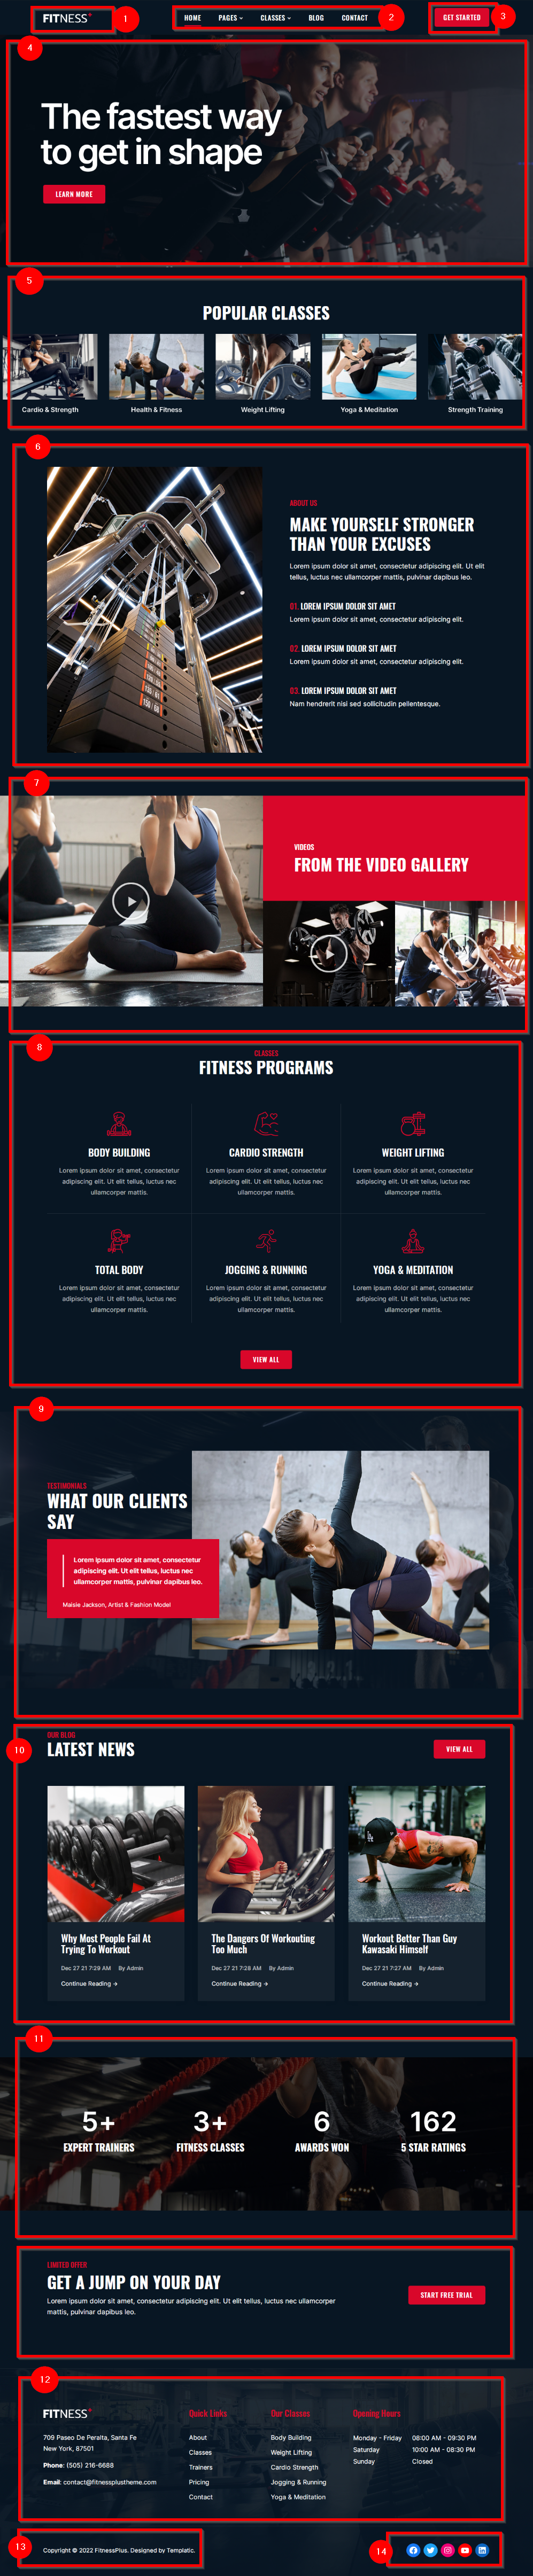
The homepage of the fitness plus theme is built on the drag and drop Elementor page builder. You can easily change it using the front end editor.
1) Logo (Also, site title and site icon)
This is the section that will display either – the logo image or the site title. To change it you can use the backend options.
Navigate to your dashboard, go to Appearance ⇒ Customize ⇒ Site Identity
![]()
To set the site title, remove the logo image and set an appropriate title. And check the box against “Display site title and tagline”.
You can even set the site icon from here, you can change the favicon using this option.
2) Menus
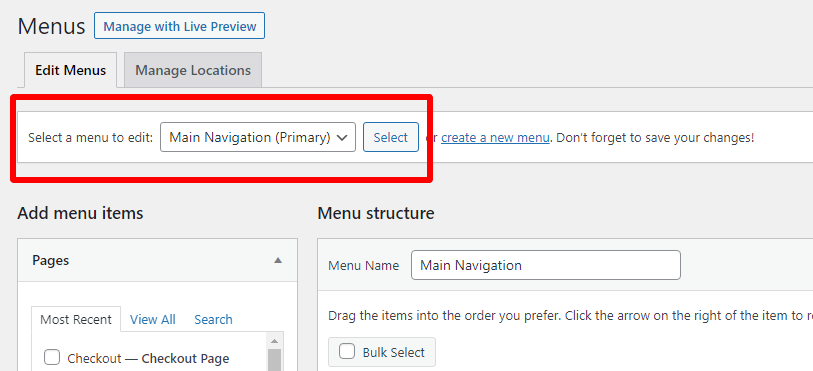
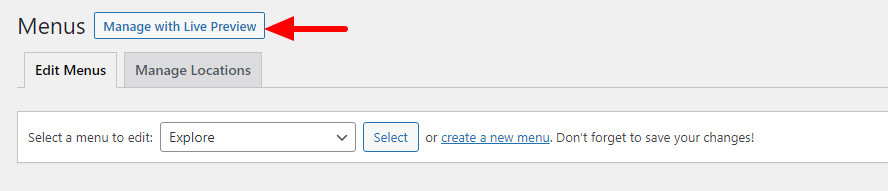
To manage the existing menu or create a new one
1) Choose the menu to edit from the drop-down, press select.
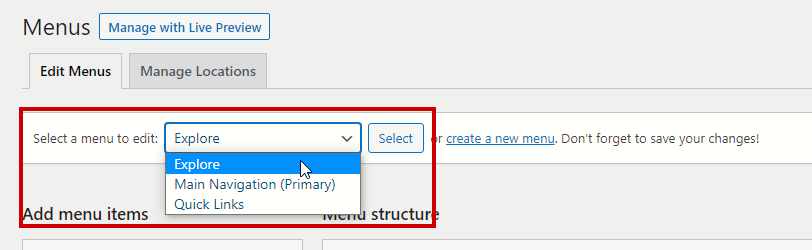
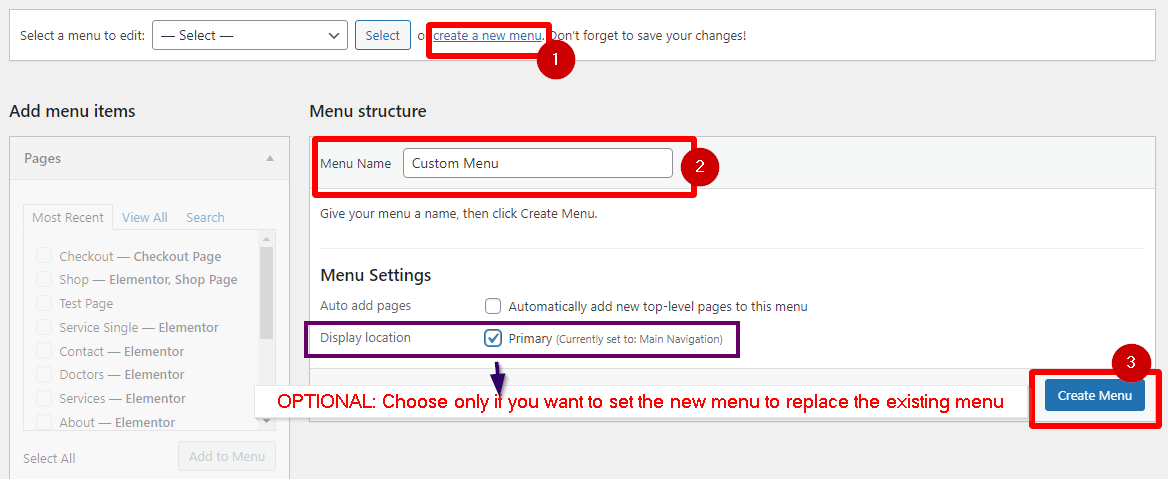
Or to create a custom menu:
If you want to build a menu of your own, you just have to go to Appearance ⇒ Menus ⇒ Create a new menu
Managing the menu items
The left sidebar of the menu options screen will let you choose the menu items, you can choose from different post types, pages, categories, or even set a custom link as the menu item.
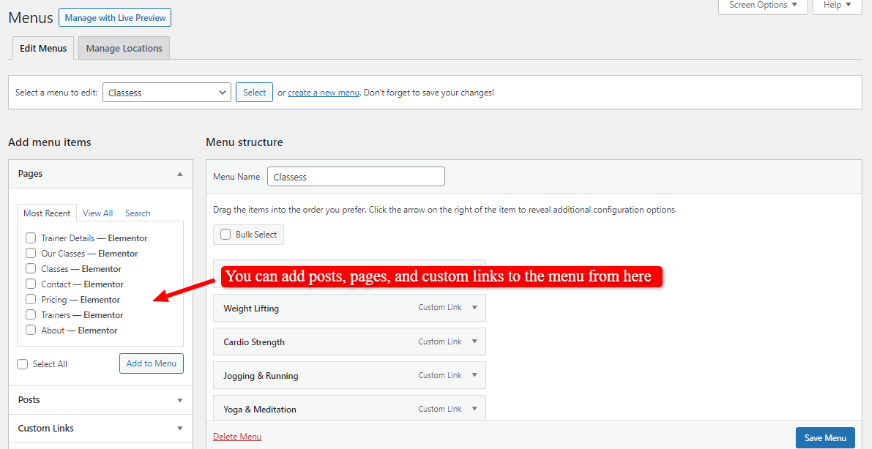
Just check the boxes, and click add to the menu.
Drag and drop menu management
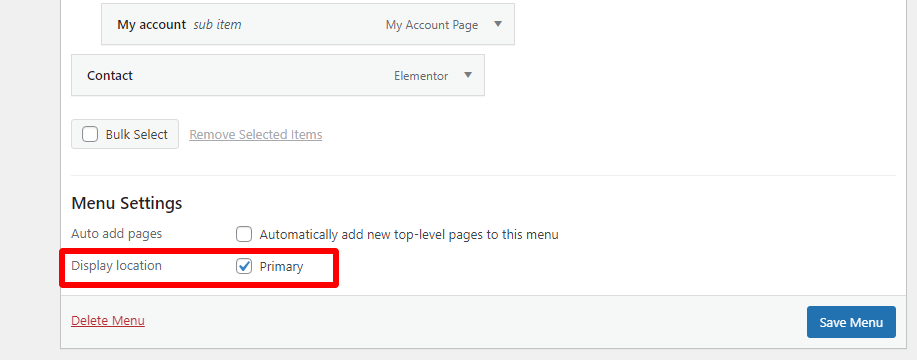
To set your custom menu as the main menu, you just have to:
1) Choose the menu
2) Set as primary
Scroll to the bottom of the page, behind the menu structure, to find the “Display location” option, and tick – primary.
Manage with Live Preview
You can even use the manage with Live preview options to see the live changes you make on the go.
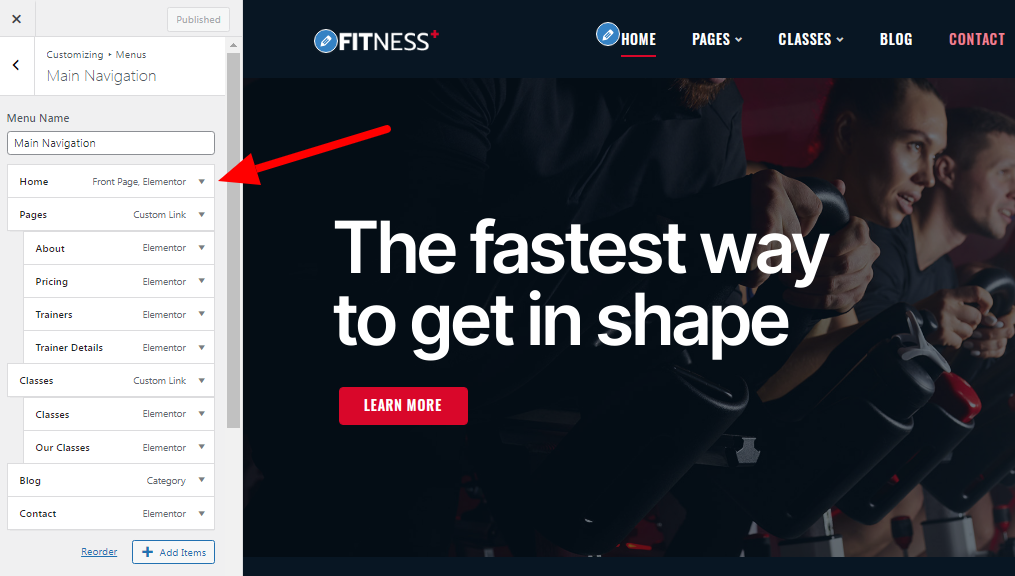
The Live preview option allows you to use the same drag and drop options to manage the menu structure, but with a live preview.
Re-order the menu with similar drag and drop options, and see the live preview as you make changes to it.
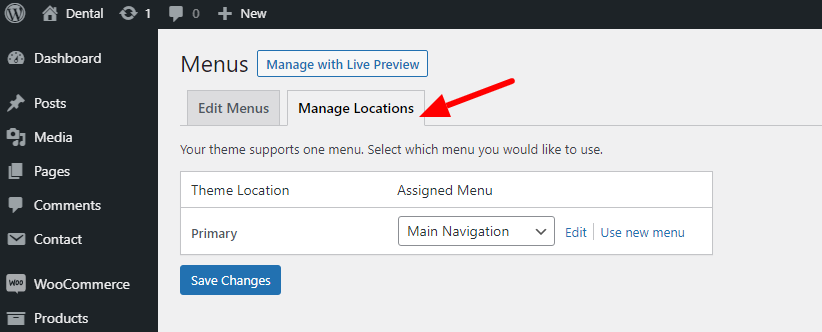
Menu: Manage Locations
The theme has only one location for setting the menu, with the dropdown available here, you can choose the menu that you want to show as the primary menu. Just choose the menu, and click save changes.
3) CTA – Get started
This is a ‘custom HTML’ widget in the widget area at Appearance >> Widgets >> Header Right Widget area.
The HTML code for the button is placed in the widget area, which is
<p><a href="#" class="button">Get Started</a></p>

4) The banner area
The banner has an image which should be ideally be 2000X900 pixels. You can change this image easily as shown in below.

You can provide a link for the button, change its background color, text, and typography using the Elementor options
5) The Below Banner Area
The whole section is built using two different Elementor Elements. The First is a heading element for setting the header and the another one is the Image carousel.
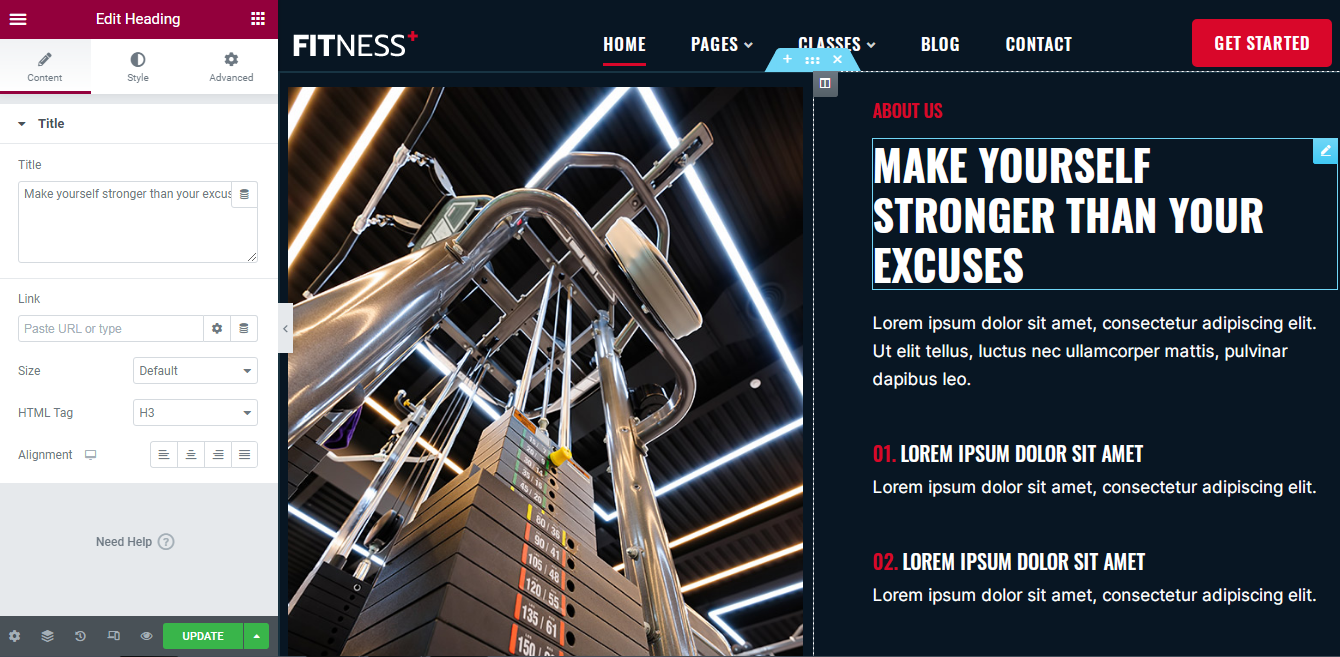
The Heading
You can click and edit this section.

Not just you can change the text, the text color, size, style, but you can also set custom background and apply other decorations like text shadow, set a link to text, and so on.
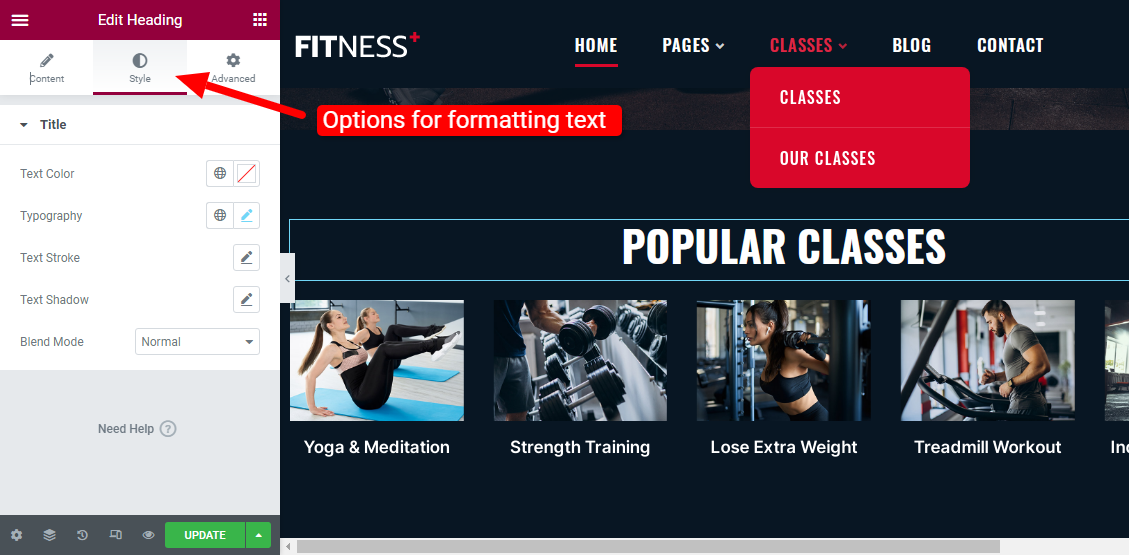
Image Carousel
Edit the image carousel easily through Elementor editor.
With the Elementor page builder options, you can:
- Upload new image to the carousel
- Select from the existing images
- Remove an image from the carousel
- Set caption for each image
- Re-arrange the images in the carousel
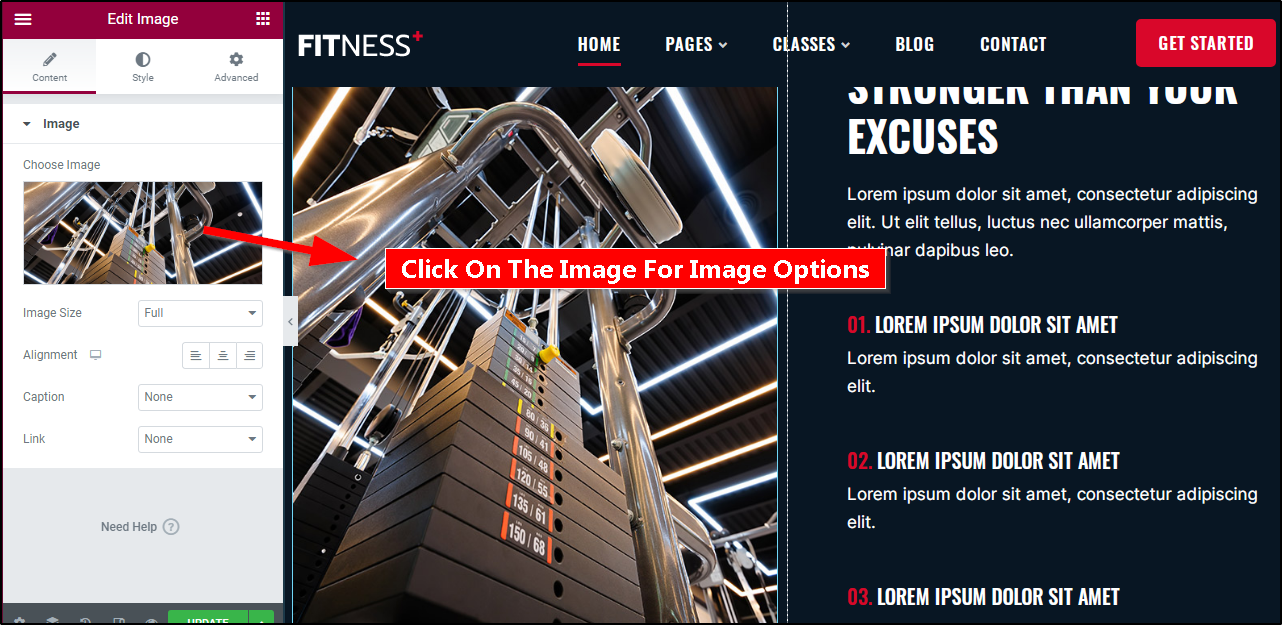
6) Image and text section
The Image: There are several image options to change the appearance of this section. You can upload your own image, or choose one from the gallery, adjust its height and width, set border, and so on.
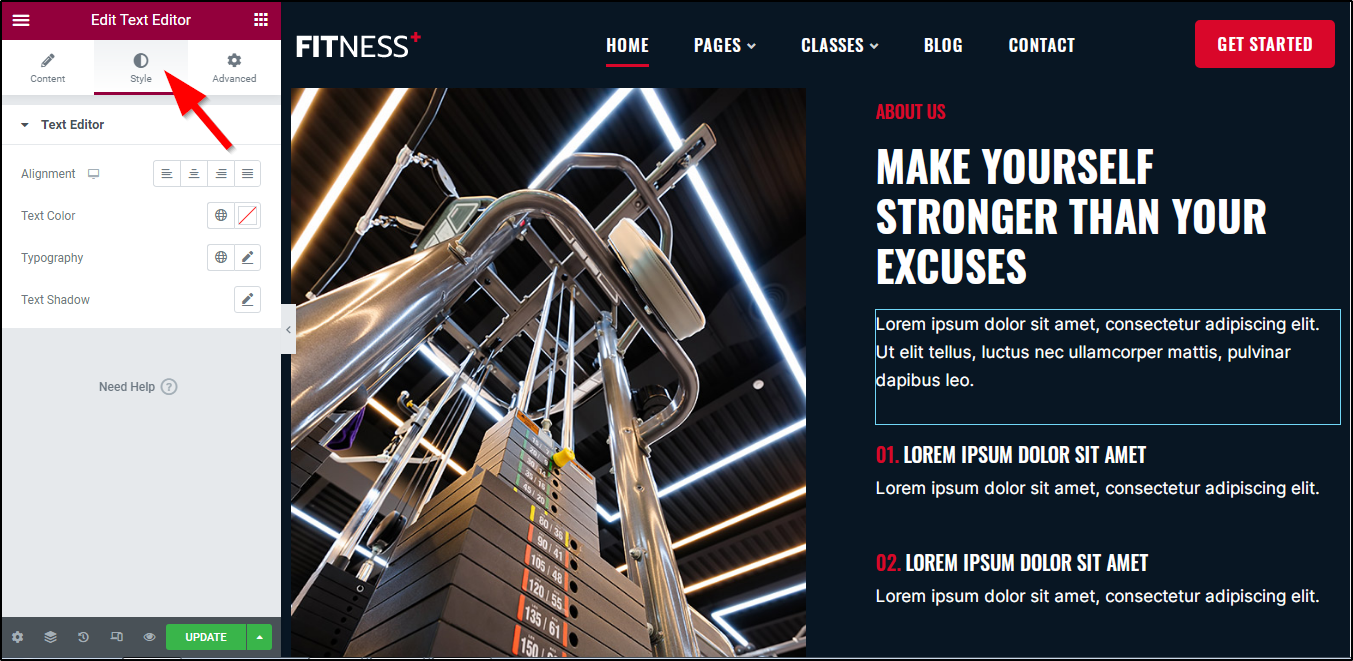
Text on the right: This text can be edited just by clicking on it, there are so many text editing options that you can use to change the style and appearance of this section.
You can change the text, the text color, size, style, but you can also set custom background and apply other decorations like text shadow, set a link to text, and so on.
Resizing the two columned layout: Individual columns can be managed with on-screen options to change the layout style.
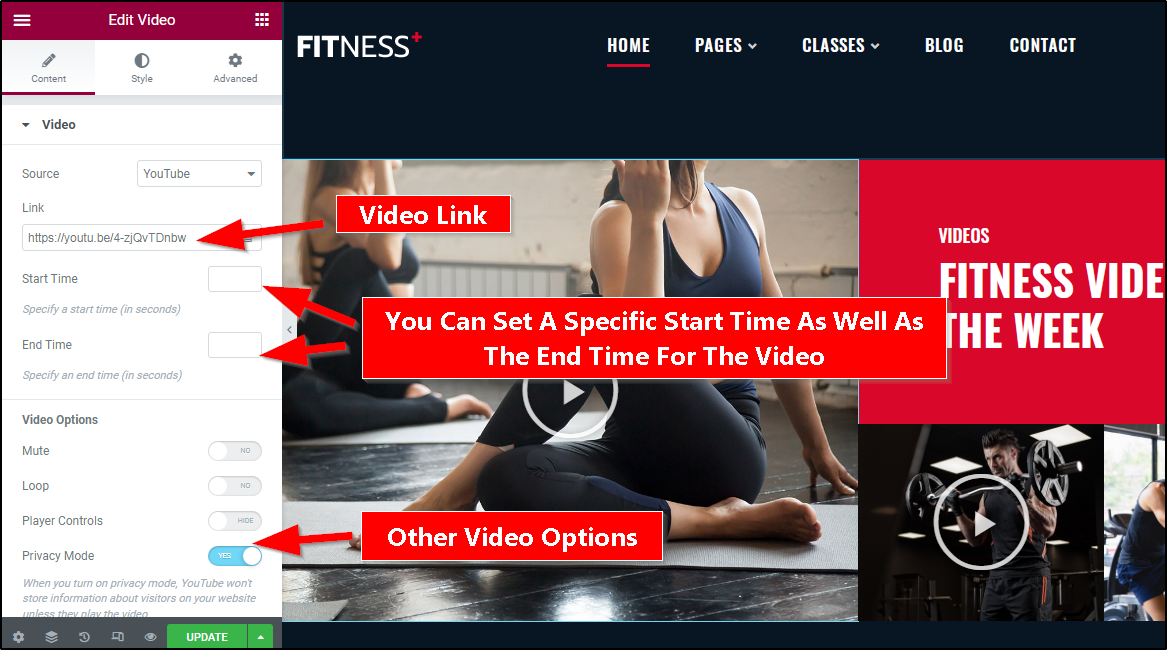
7) Video Gallery Section
This section displays a collection of videos. You can easily edit it using the Elementor Options.
Video Options
There are other video options, as well as video styling options in the style tab.
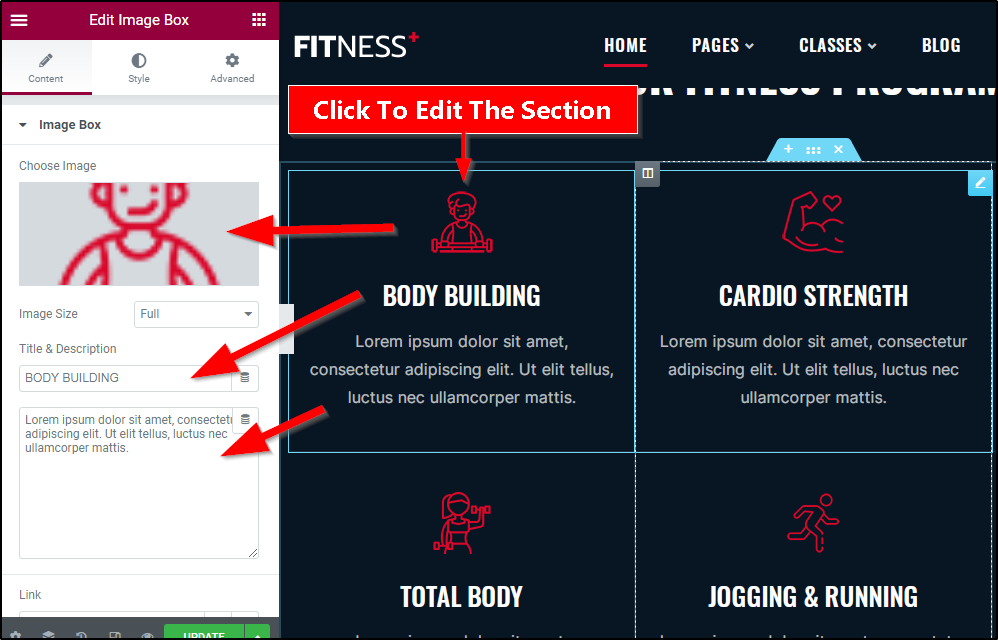
8) Classes Sections
This section allows you to display a list of all the classes and training that you offer.
The Fitness classes section can be edited just by clicking them. You can change the title, the image or the description. You can also link the section to the class page.
The button
You can change the link and appearance of button by just clicking the button.

9) Testimonials section
This beautiful testimonial section allows you to strengthen the EAT signal.
10) Recent blogs
The text and view all button
You can set the text as you want and the button link too.
The recent blogs
The latest blogs will be displayed here. You can also remove this section completely.
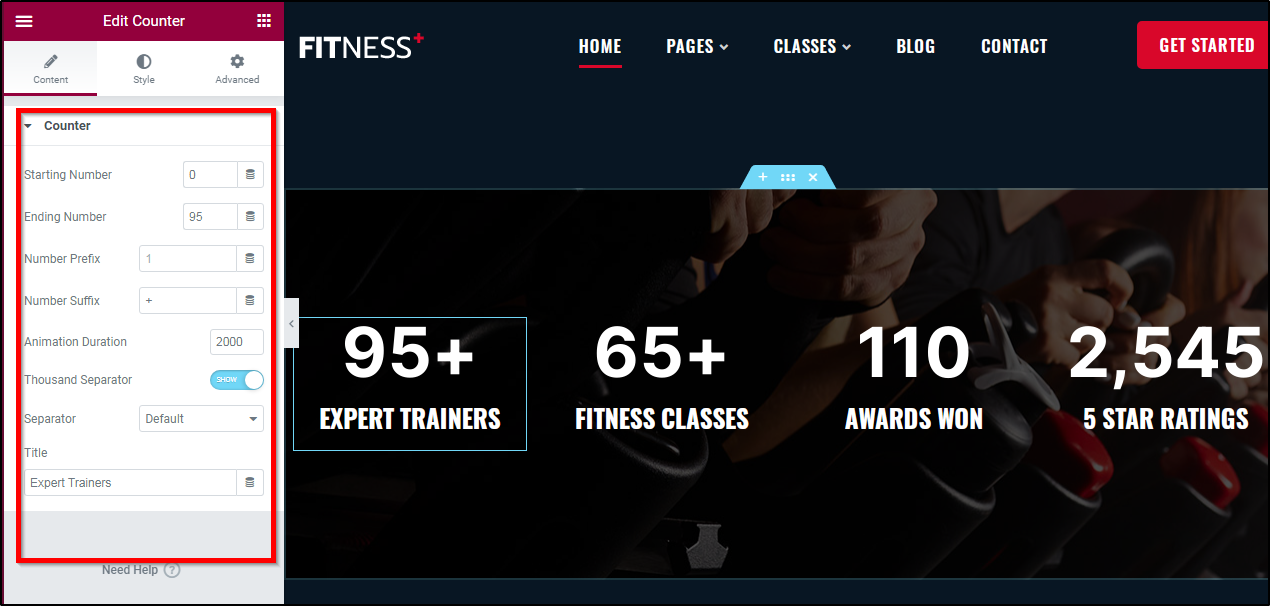
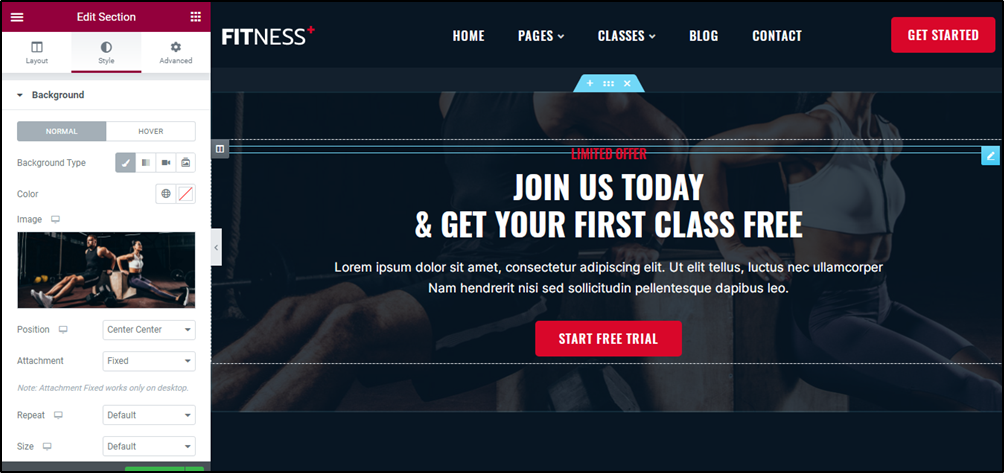
11) The counter & CTA
The counter can be edited to show different statistics, the banner image can be changed.
You can also change the number, set the starting and ending number, the title for the counter, and so on.
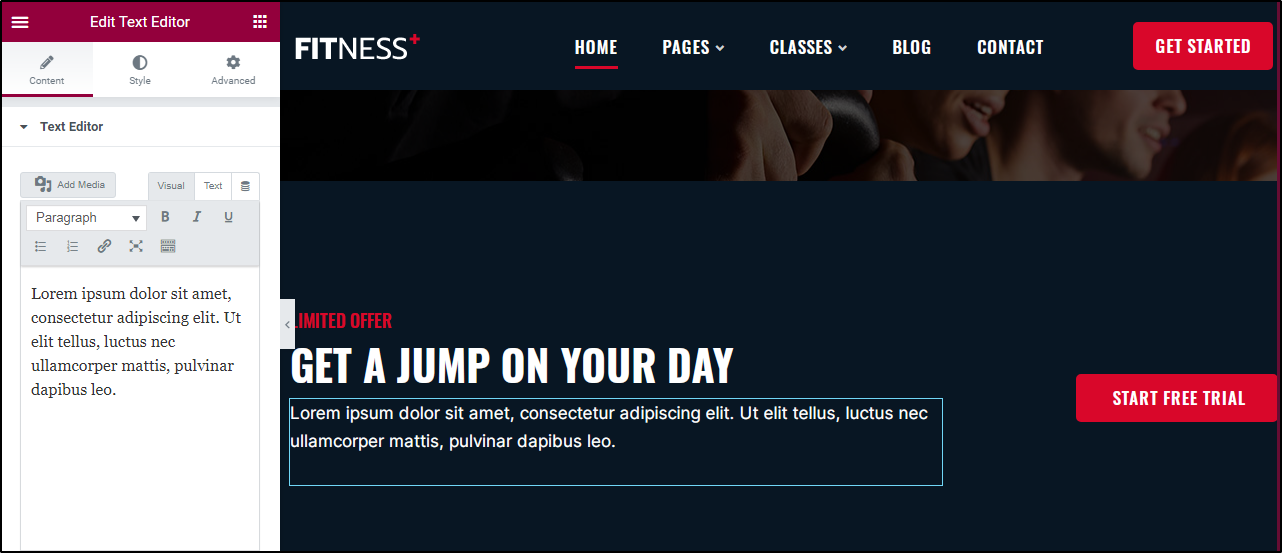
The next section is the Call to action section with text and button. You can simply change it with the click and edit options.
12) The Footer
The content of the footer can be changed at Appearance ⇒ Widgets ⇒ and the footer widget areas.
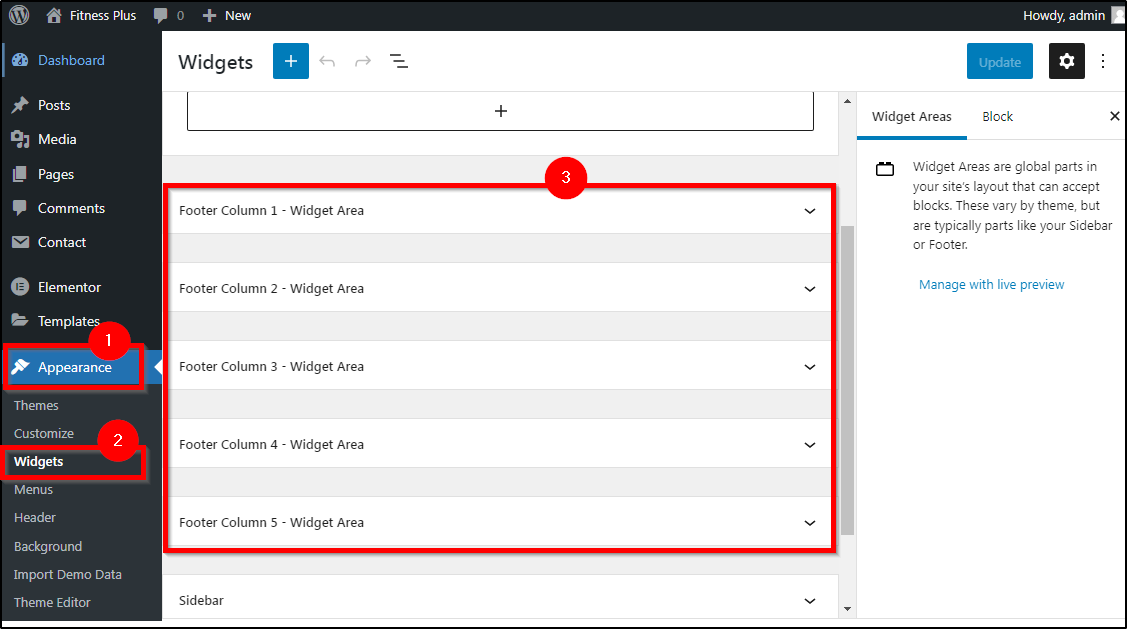
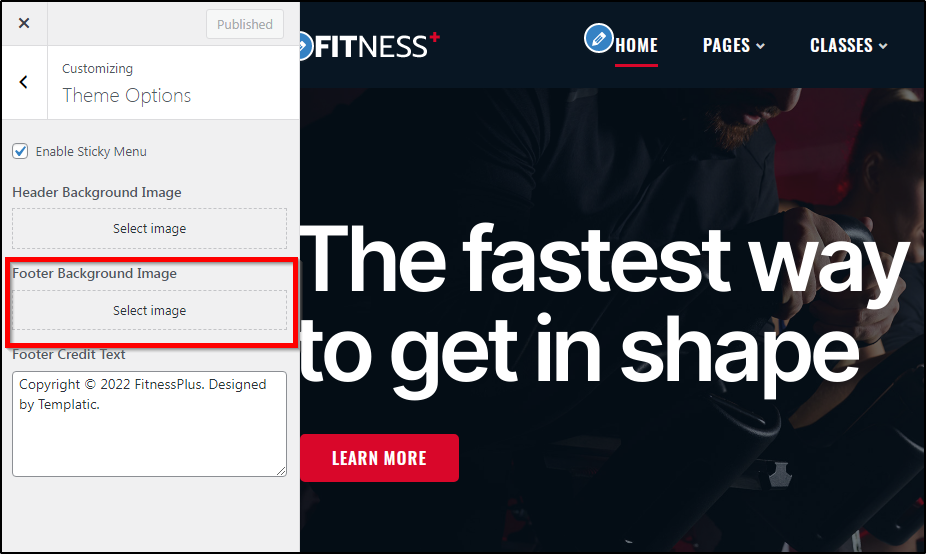
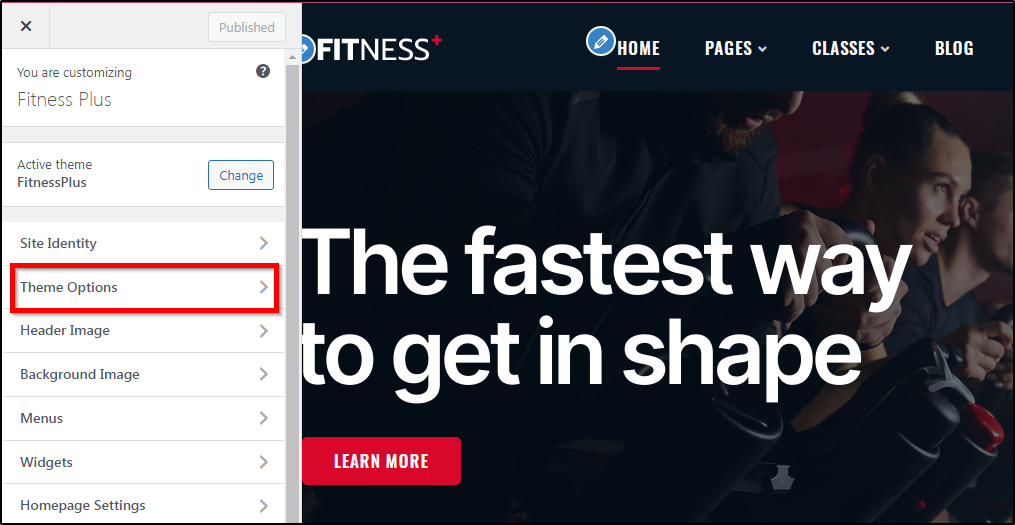
You can set an image for the footer’s background if you wish. Navigate to Appearance >> Customize >> Theme Options.
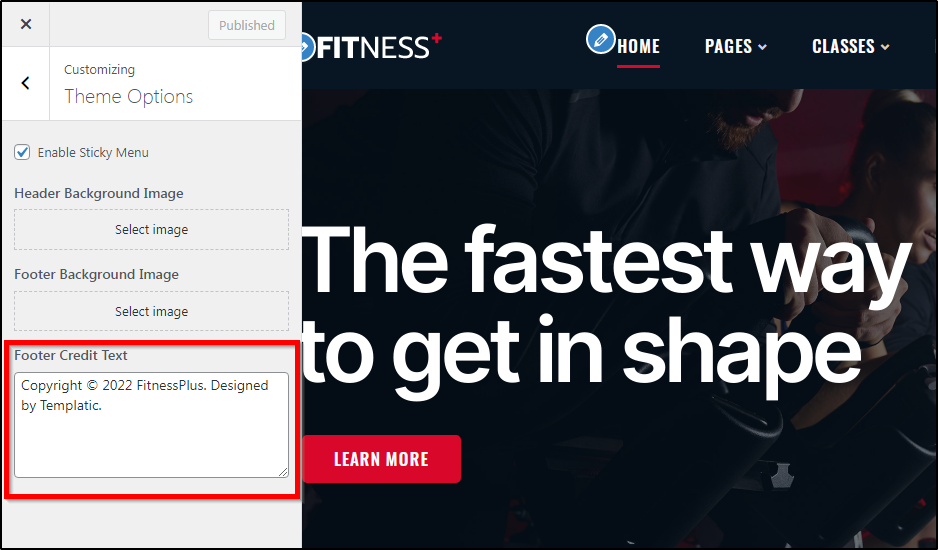
13) Footer Credits
You can change the footer credits by navigating to Appearance >> Customize >> Theme Options >> Footer Credit Text
You can set the footer credits to whatever you want.
14) Social Icons
The social icons in the deep footer can be managed by navigating to
The content of the footer can be changed at Appearance ⇒ Widgets ⇒ Footer Column 5 – Widget Area.
Classes Page
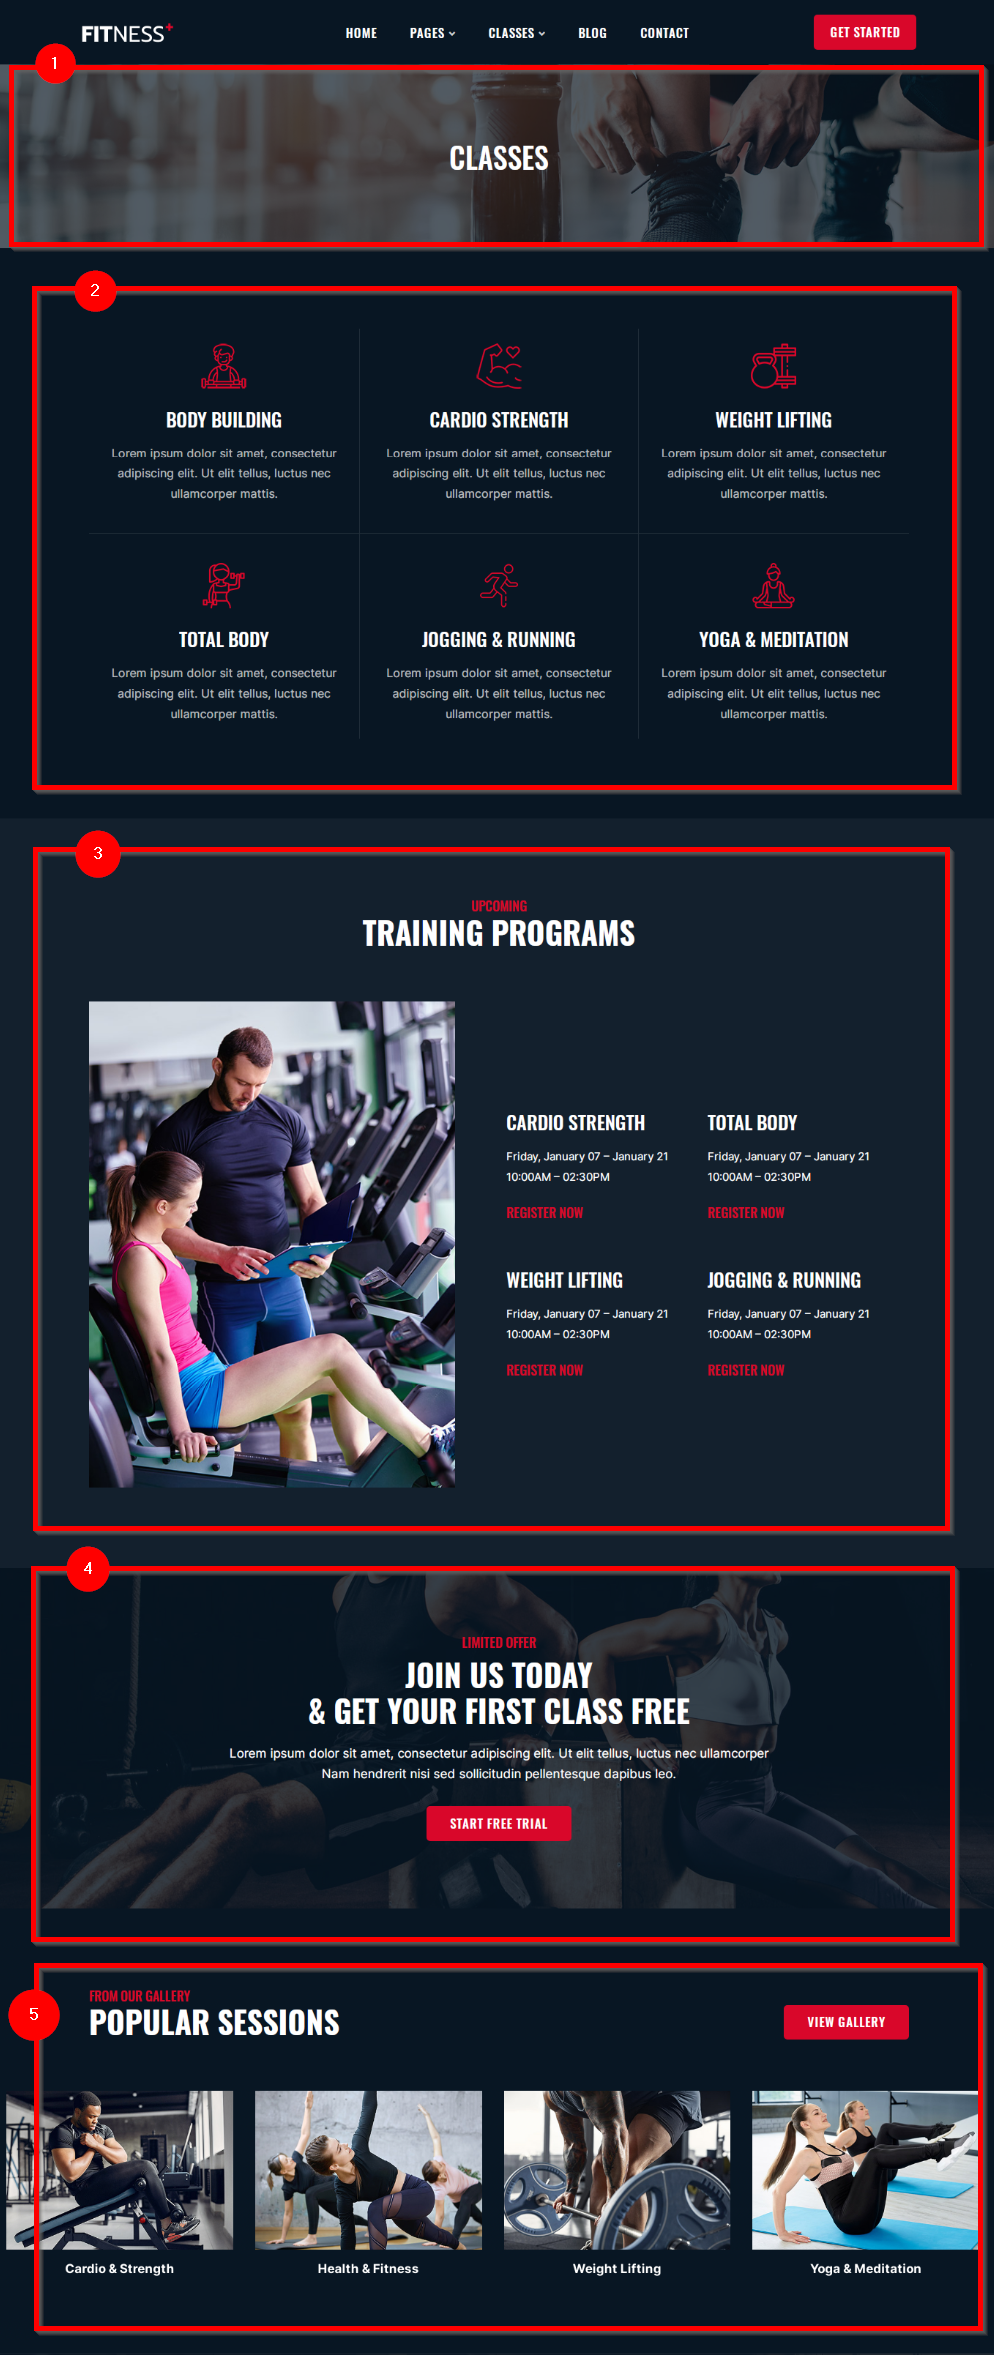
1)The Header
First of all, you can edit the header and change the header image.

The text can be changed simply by clicking it. There are plenty of options to style the text.
2) Classes Grid
This section allows you to display a list of all the classes and training that you offer.
The Fitness classes section can be edited just by clicking them. You can change the title, the image or the description. You can also link the section to the class page.
3) Upcoming Programs
This whole section built with the Elementor editor is just a group of text and edit options.
You can set links, change colors, change images, set a background and edit it as much as you want.
4) Parallax section
The parallax section too can be edited just like you edit any other section of this theme.
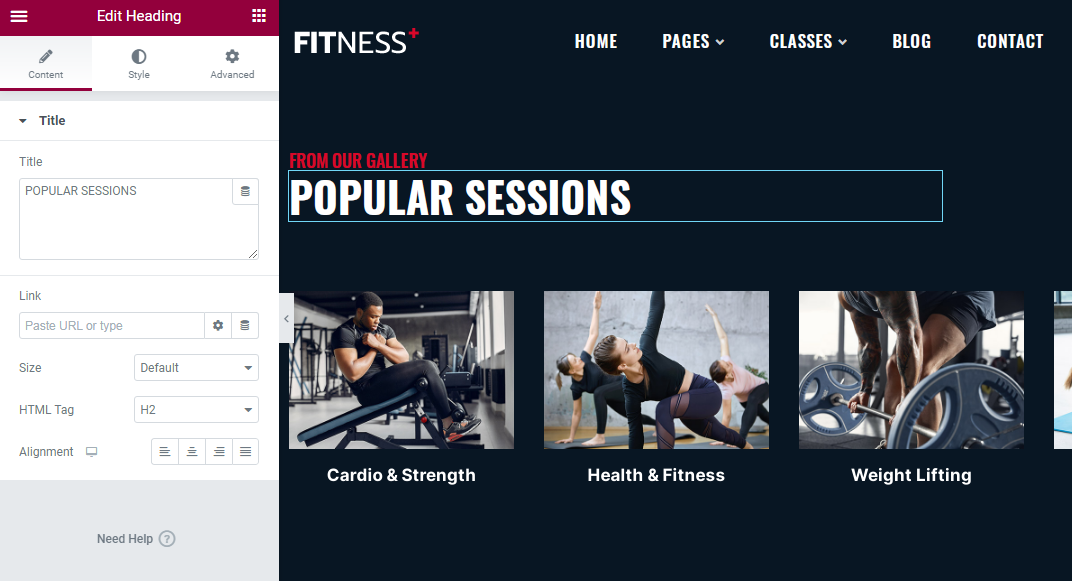
5) Popular Sessions
Text Heading
This is just another click and edit text section. You can also style your text, colors, fonts, padding, spacing, and more.
Button
Click the button, and you can change its size, text, color and the link using the elementor options.
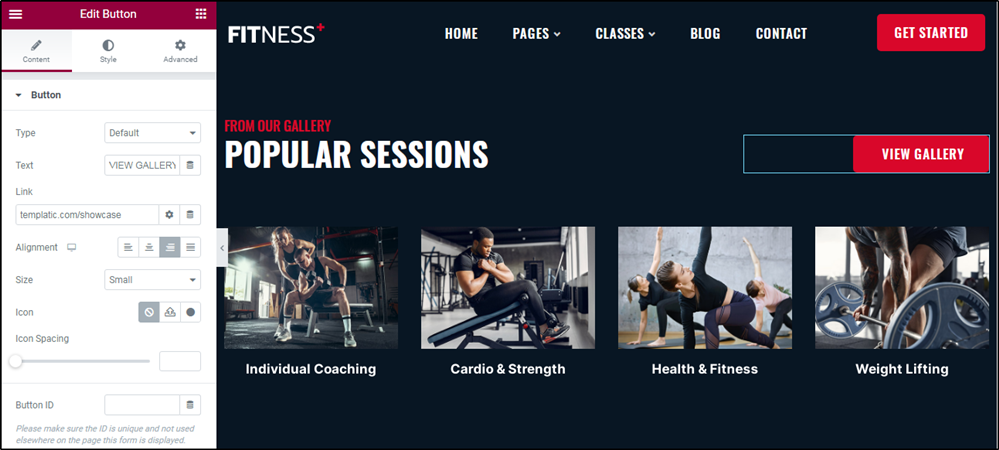
Image Carousel
Edit the image carousel easily through Elementor editor.
With the Elementor page builder options, you can:
- Upload new image to the carousel
- Select from the existing images
- Remove an image from the carousel
- Set caption for each image
- Re-arrange the images in the carousel
Our Classes Page
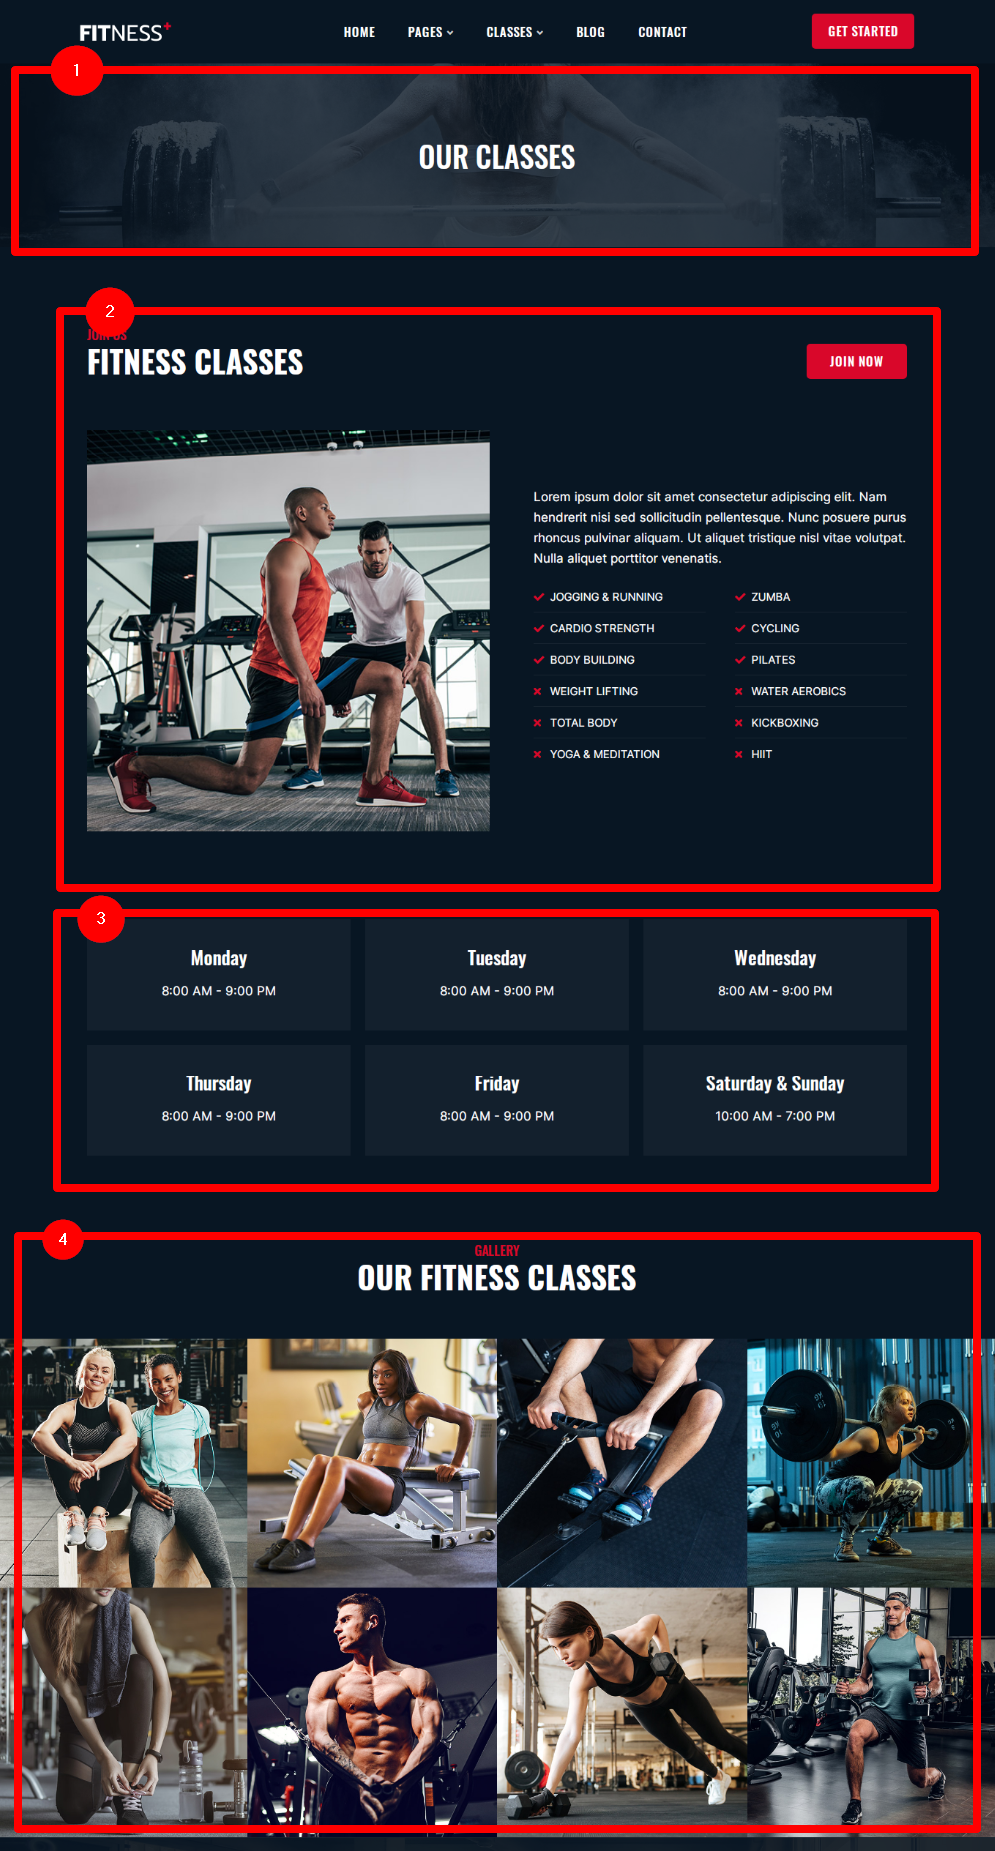
1)Header
The header image and the text can be changed in the same way as you change it for the classes page
2) Fitness Class details
This is the section that you can use to display the complete detail of the fitness class.

You can use image, text and format it the way you want.
3) Time table
The time table section is simple to edit.

You can duplicate a section, remove them, edit it.
4) Gallery
Set the title you want with the text heading section.
Image Gallery

A great way to display the images related to the particular class. You can remove this section or use it to display interesting image gallery. The images will look great in lightbox when clicked.
Trainers Page
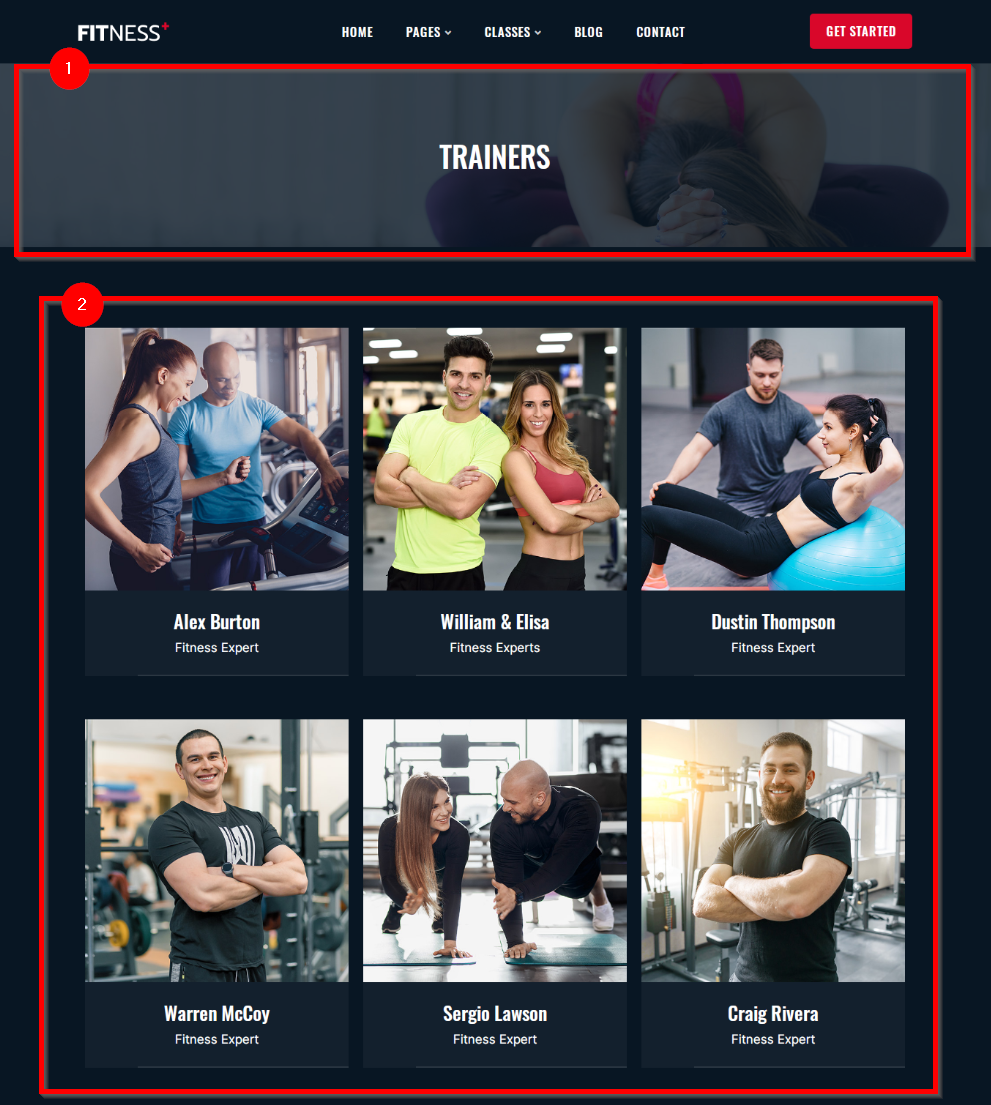
1) Header
The header image and the text can be changed in the same way as you change it for the classes page
2) Trainers in Grid
This is a simple grid where you can list all your trainers and experts. The grid can be altered by adding new sections, deleting, dragging and dropping the image box to rearrange the experts, and so on.
Trainer’s Detail Page
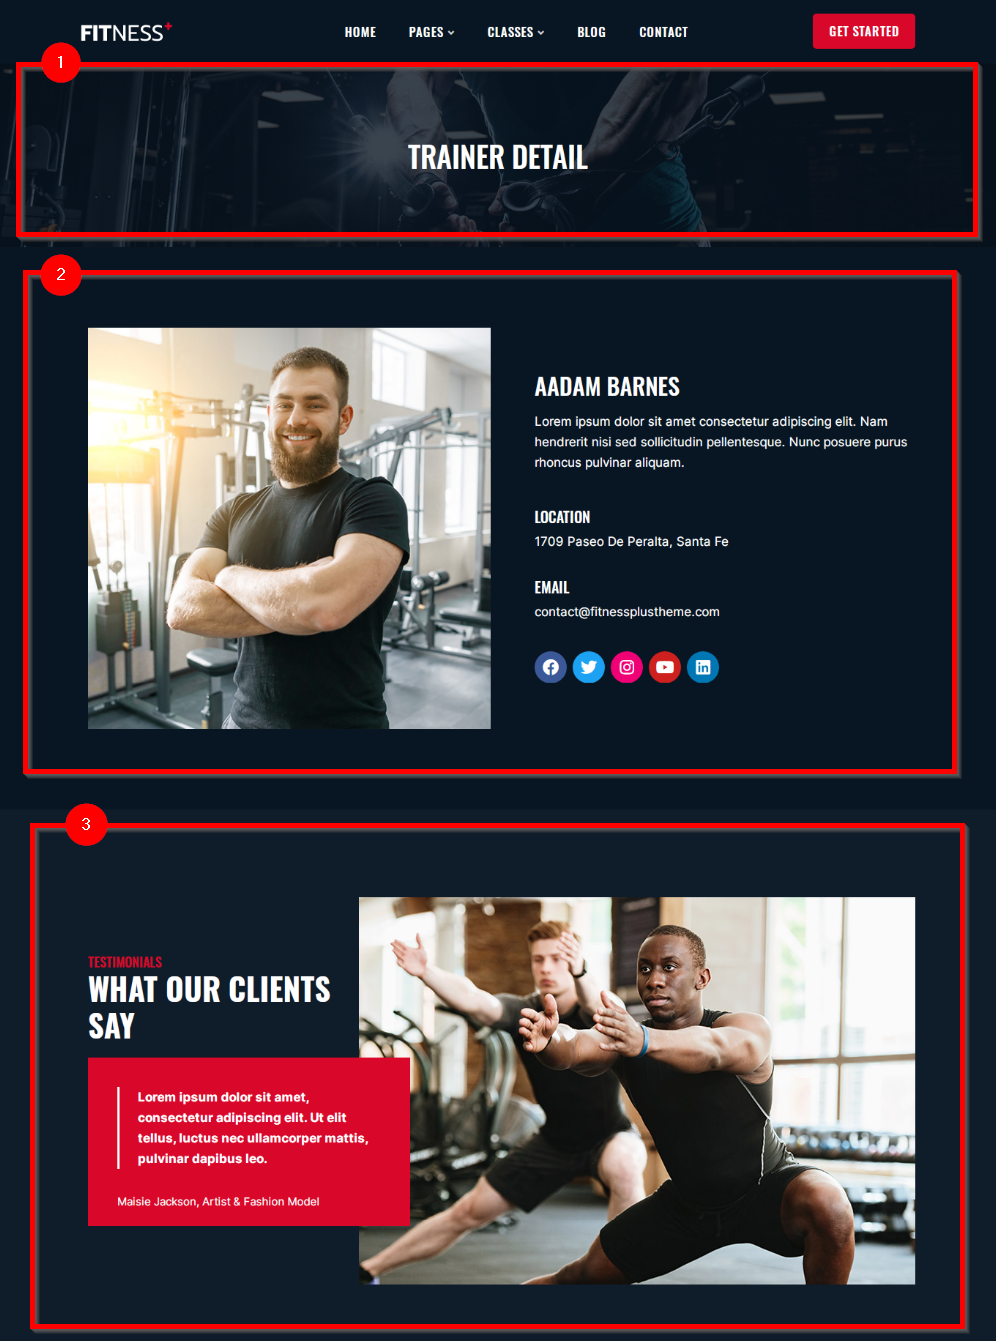
1) Header
The header image and the text can be changed in the same way as you change it for the classes page
2) Trainer Introduction
Here, a two columned section with image and text is used and they can be edited as follows:
3) The testimonial section
This section is similar to the testimonial section on the homepage and can be edited the same way.
Contact Forms
For your medical website, the contact form will play a very important role.
With the setup wizard, all the necessary plugins will be installed automatically including the contact form. With this plugin, you can create all the contact forms you want by navigating to the wp-admin dashboard ⇒ Contact. To create a contact form, you can click on the “Add new contact form” button, while to view the existing form templates, you can click the first option – “contact forms”.
For a fitness website can go for a simple contact form with fields limited to name, email address, and message or a complex one. So instead of creating a new contact form, you can browse the “contact forms” and use the example template itself or build one for yourself using the Contact form 7 plugin.
However, if you need more fields, you can refer to the contact form 7 documentation and create a custom contact form for your website.
Creating a contact form
With the contact form 7 plugin, you can easily create a custom contact form to collect the data that you want from the users using the form. Here’s the contact form 7 guide on how to edit the form fields to create a contact form. Moreover, there are other tabs to set up the mail, and for advanced settings. Moreover, you can also change the messages to be displayed at certain events like successful form submission, validation errors, wrong email address, etc.
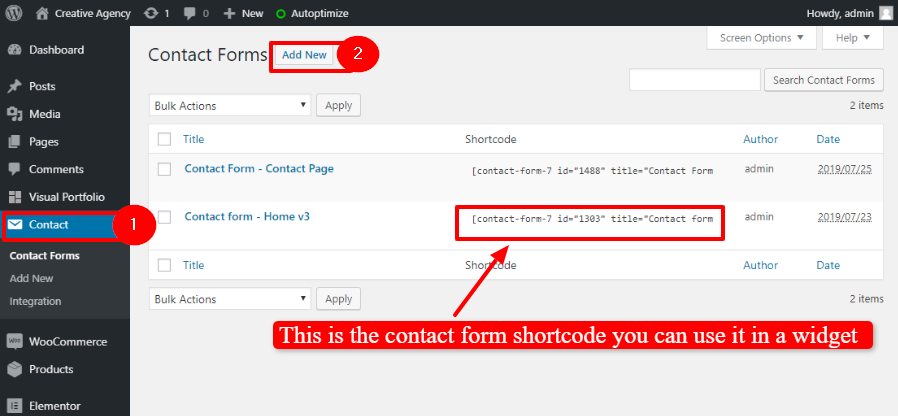
Contact form shortcode
Once you have created a contact form, you can use it on the different pages through the shortcode.
The shortcode will look something like:
[contact-form-7 id=”234″ title=”contact form”]
You can create a text block wherever you want to insert the contact form and then paste the contact form shortcode there to insert the contact form.
With the consulting theme, you can create different contact forms and use them on different pages, as per your website’s requirements.
Using Blogs on your Fitness Plus theme
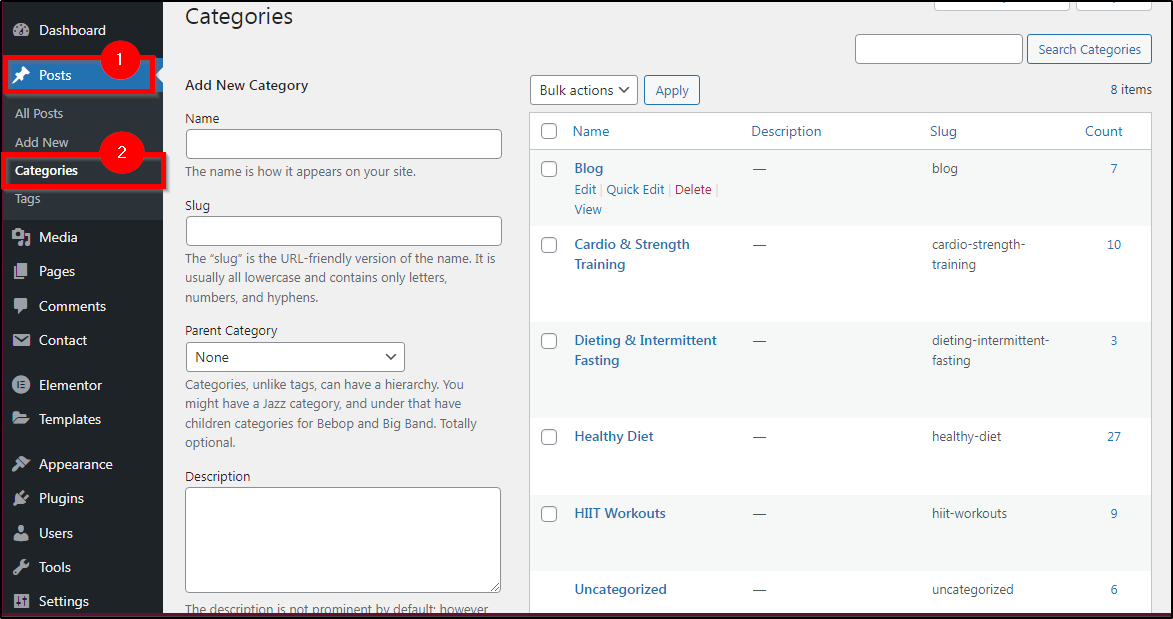
You can use your medical website as your blogging platform. To start blogging, you can navigate to wp-admin ⇒ posts ⇒ Categories and set the categories for your blogs.
Blog page settings
You can change the number of blogs that are being displayed on the blog page by navigating to Settings >> Reading >> Blog Page shows at most

Set colors and image background
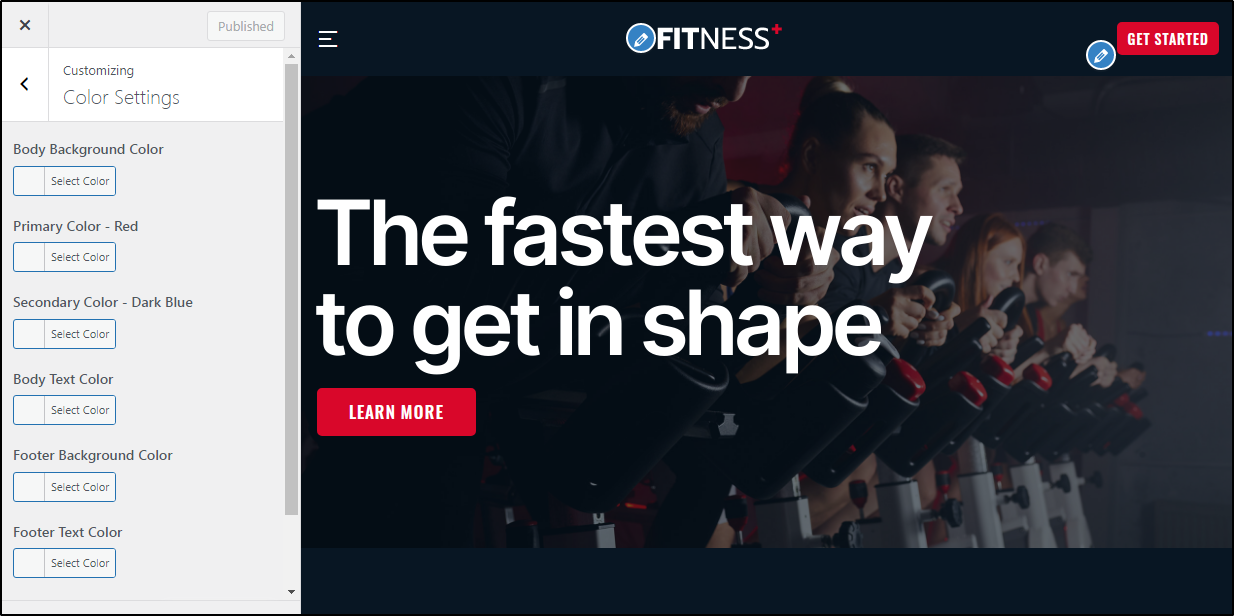
To change the colors of your theme you can go to Appearance ⇒ Customize ⇒ Color Options.

It allows you to change background color, foreground colors, and much more.
You can change the color and background of individual sections through the Elementor editor. However, you can also change the colors of your site at Appearance ⇒ Customize ⇒ Theme colors.
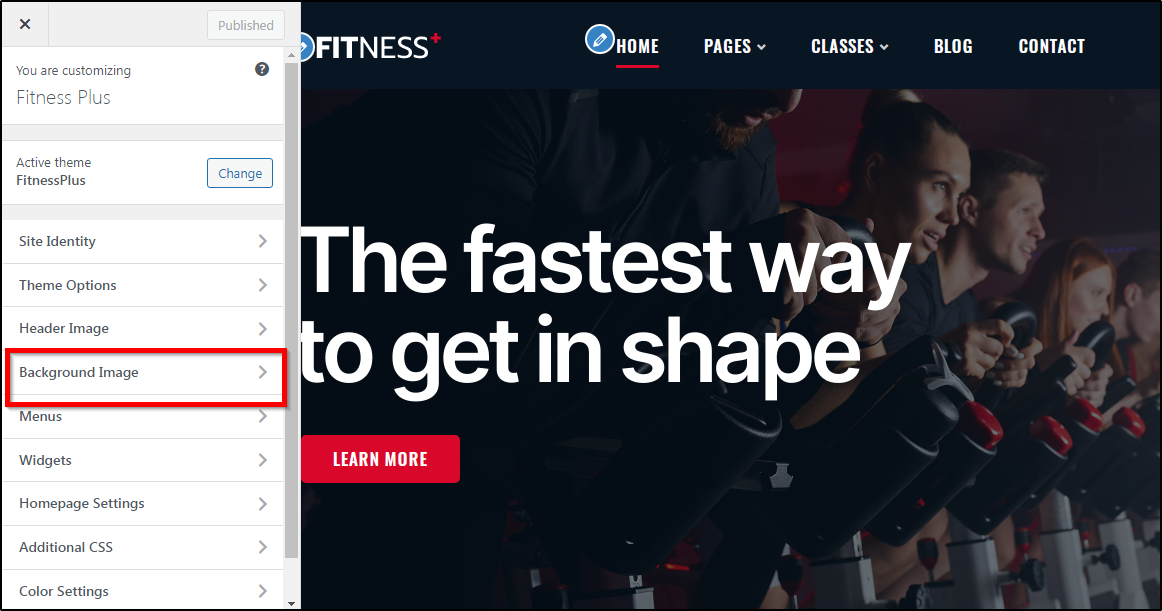
You can also set the background to your website using the image background option. To do so, navigate to Appearance ⇒ Customize ⇒ Background Image.
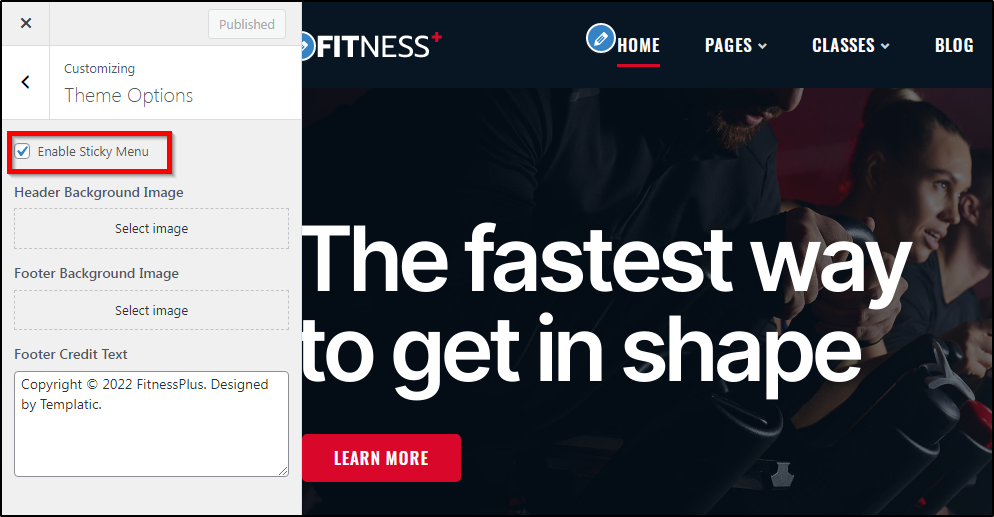
Enabling or Disabling Sticky Menu
You can enable or disable the sticky menus by navigating to Appearance >> Customize >> Theme Options.
Managing Pricing Table
The theme comes with a page dedicated to the pricing table. You can simply drag and drop and edit to create awesome pricing tables with all the details you wish to include.