E-Junkie lets you deliver your digital products like eBooks, icons, pictures, etc to your customers.
Advantages of using E-Junkie:
- E-Junkie works in such a way that it prevents your files from being shared by many people.
- Cost efficient – The monthly plan starts from just $5 and mostly it would suffice to many people as you can upload upto 10 files totaling 50 MB in size.
- Saves you from the hassles of hiring a professional programmer to integrate Ecommerce features.
However, E-Junkie is not a payment gateway or processor, you’ll need something like paypal to handle all your payments stuff. So you’ll just link E-Junkie to your paypal account and voila, you’re good to go.
Getting started with E-Junkie:
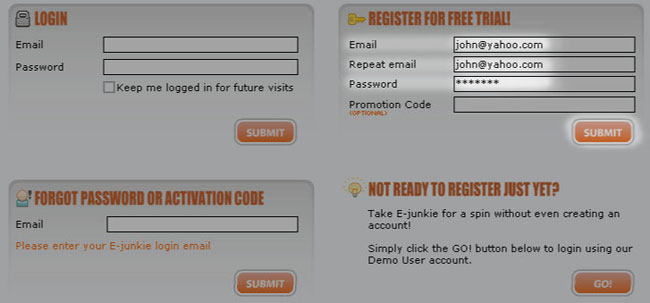
- Head over to e-junkie.com and click on “register”.
- Now you’ll see different forms, so fill out the form that says “Register for free trial”. E-Junkie offers a free trial for 7 days to try out their system.
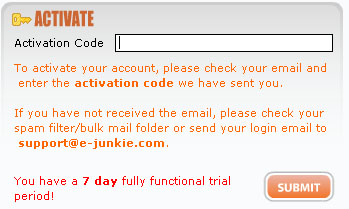
The next screen will ask for a “Activation code”. Check your Email and copy and paste that activation code here. And then click on Submit.
Configuring the Payment Settings:
Configure the basic settings in this screen.
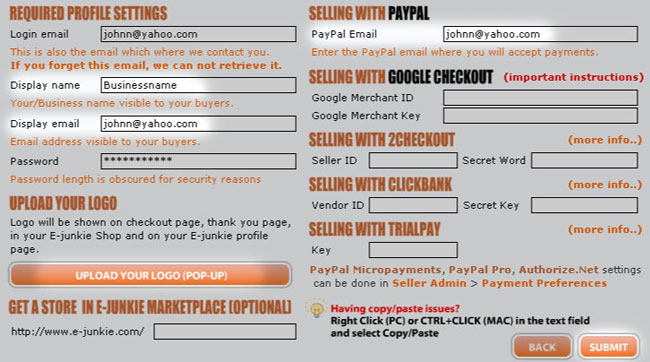
- In the field, “Paypal Email”, enter your Paypal email address.
- In the “Display name” field enter your Business name or website’s name, as per your wish.
- In “Display Email”, enter the Email which your customers will view.
- If you wish then you can upload your logo by clicking on “Upload your logo”.
- And now click on “Submit”.
Adding a new product:
You can add a new product from this screen.
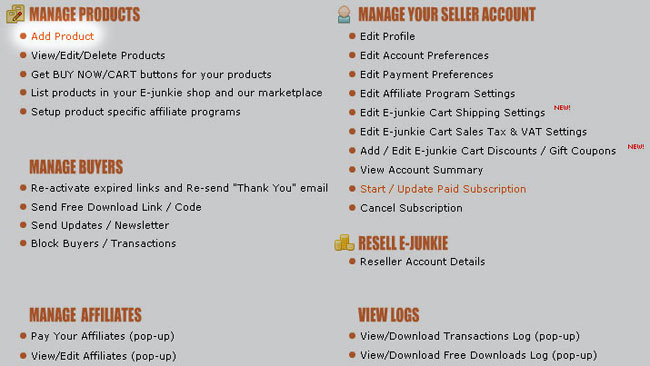
- Click on “Add Product” to add a new product.
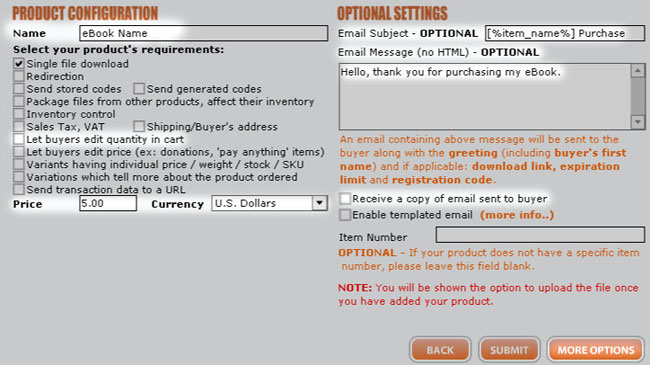
- Enter the name of the product.
- You can uncheck the option of “Let buyers edit quantity in cart”. As it’s a digital product, the buyer would purchase a product one time only.
- Enter the price of the product and currency.
- Check out other options like Email subject and Email message.
- If you want to receive a copy of the email which is sent to the buyer when he purchases, then click on “Receive a copy of email sent to buyer”.
- If you wish then you can click on “More Options”.
Download Link Validity:

The download link validity attempt field will place a limit to your customer’s attempt to download a file. Of course the customer would not be able to share the download link, but he can re download the file in case of deletion or corruption of the file.
The Hours field means that a particular file will expire in x hours. Normally its better to just write “0” to lift hour limit because sometimes the customer may purchase the file immediately, but may forget to download it until a week later. If you set it to 120 hours then the file will be downloadable for 5 days only.
Thank you page settings:
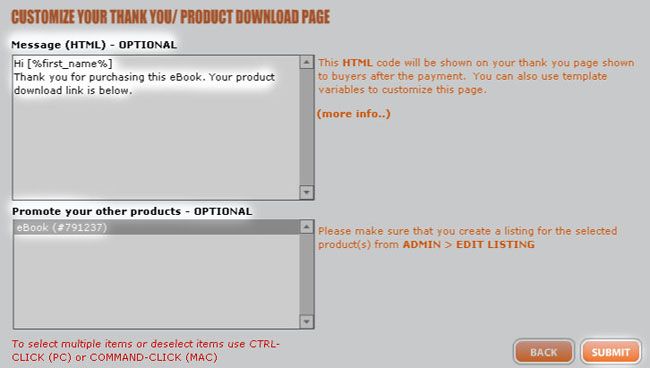
A “thank you” page is the page which the customer sees after successful payment. If you want to write a personalized message then you can do so here. You can also use template variables, like in this example, [%first_name%] is used. This variable will insert the first name of the customer. To use different template variables, click on (more info..)
You can also promote your other products from the thank you page. For that you should first make a listing of that product. In this example, we have made another product named as “eBook”. Now select the product name which you wish to promote on the thank you page.
After configuring these settings, click on “Submit”.
Uploading the product file:
Now upload the file which you wish to sell. If you want then you can also zip the file and then upload it.
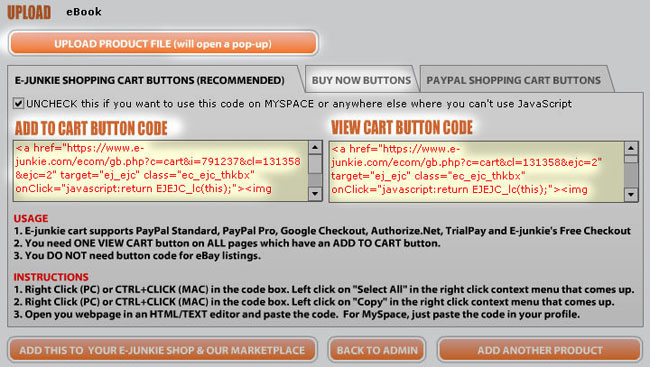
- To upload the file, click on “Upload product file”.
- Select the file/product to upload.
- A separate window will open and click on “Browse” to select the file and then click on “Upload”.

- After the file has been successfully uploaded, close that window.
Getting Add to Cart, View Cart, and Buy Now button code:
- Copy the code from “Add to cart button” or “View cart button” field and paste it anywhere you wish.
- If you also want a “Buy Now” button then click on “Buy Now Buttons” and you’ll get the code for that also.
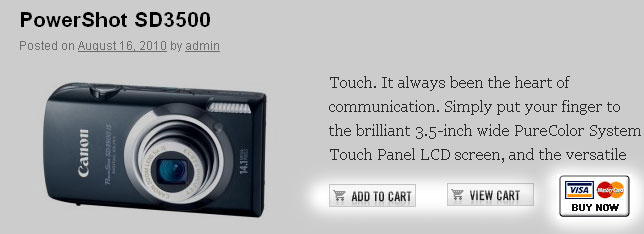
- Below is an example showing all three buttons:
Else, if you just want the “Buy Now” link then copy the code which starts from “https” till that link ends. In the below screenshot, we have shown which code to select.
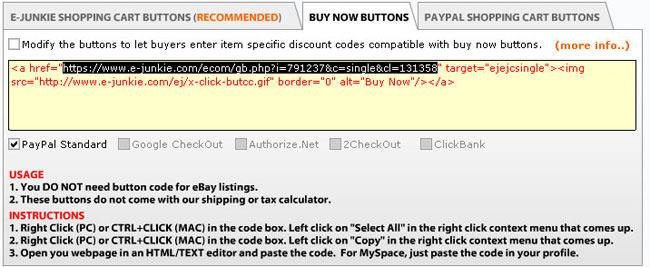
You just need to select this code and paste it as a link anywhere you want or you can also paste it to any ready made buy now button or any other button you wish.
Now let’s see this in action. When your customer clicks on “Buy Now”, he’ll be able to see the below screen.
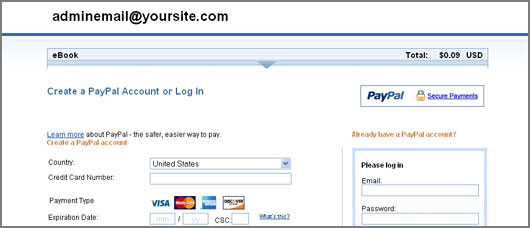
Now your customer needs to pay through Paypal and after the successful completion of the payment process he’ll get an Email which will contain the download link.

Simply click on the download link to download the file. This is how the process goes at customer’s side.
So that’s it, try out E-Junkie, its so easy and simple to use.

