- Installing
- Setting Up Menus
- Elementor Basics
- Managing the Homepages
- Managing the service Pages
- How to use the Contact Forms
- Blogs on Agency website
- Color & Background Settings
- WooCommerce
- Other Settings
You can either install the theme using the easy install(setup wizard) or use FTP to upload theme files manually. The easy install method is highly recommended for effortless installation of the Agency theme.
Easy Install
You can either install the theme using the easy install(setup wizard) or use FTP to upload theme files manually. The easy install method is highly recommended for effortless installation of the Agency theme.
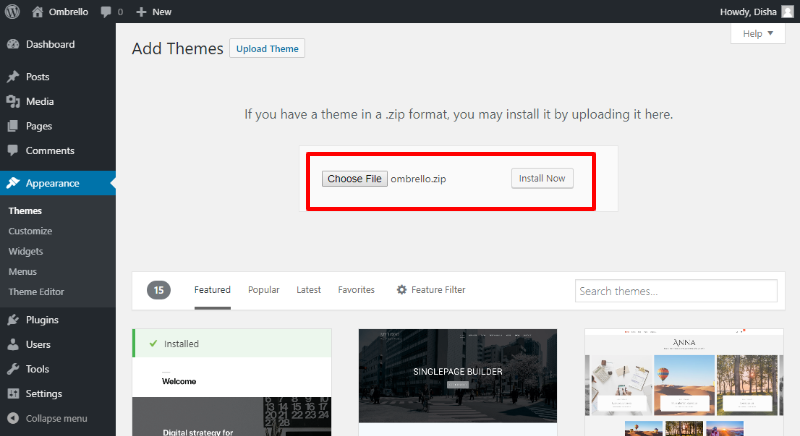
- To install the theme, login to your WordPress dashboard and navigate to Appearance ⇒ Themes.
- Click add new ⇒ Upload Theme.
- Using the file upload dialog, upload the Zip file you have downloaded from and click install now.
- When the theme installation is complete, click activate to activate the theme
When the theme is activated you may now click on “Begin installing plugins”. This step will automatically install all the required plugins for Ombrello theme.

It might take a few minutes for the plugin installation wizard to install all the plugins but no manual intervention is required during the process.
Now you can activate the plugins using the bulk activate option as shown in the image below.
Importing sample data
With the theme and plugins active, you can now proceed to import the sample data which will make your website look exactly like the the Ombrello theme demo. To import the sample data, Navigate to Appearance ⇒ Import Demo Data
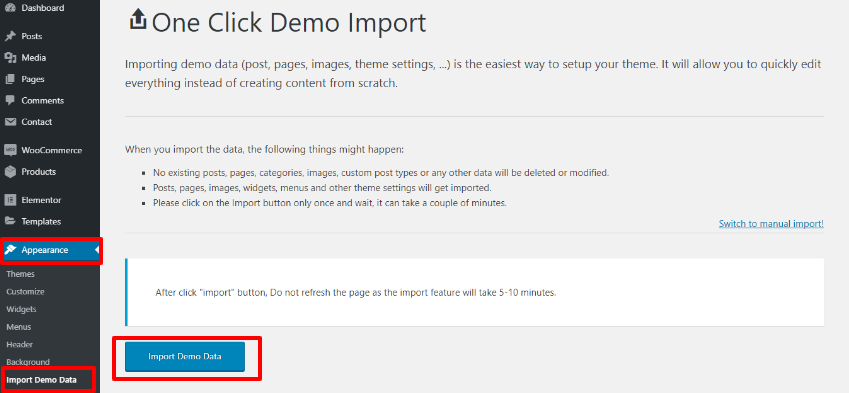
To start the import, you can simply click on the import demo data button. Before it starts importing the demo data, it may prompt you to install some more plugins that are essential for your demo site import.
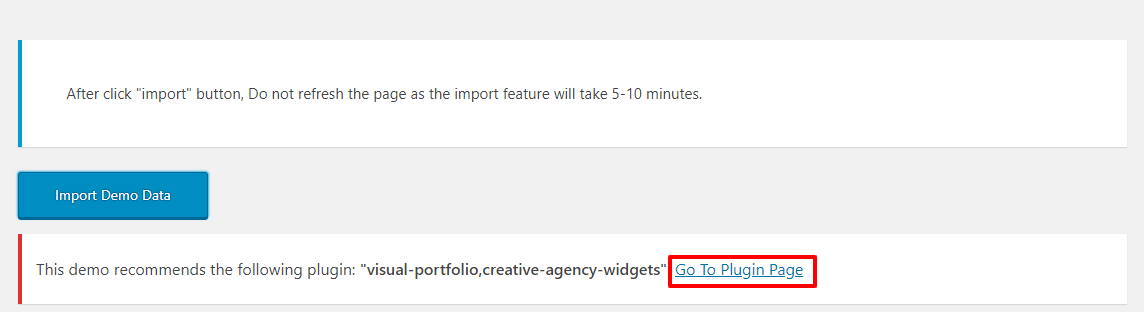
So click on “Go to the plugin page” and click the “begin installing plugins” again. When installed, you can activate them using the Bulk edit function as shown in the image below.

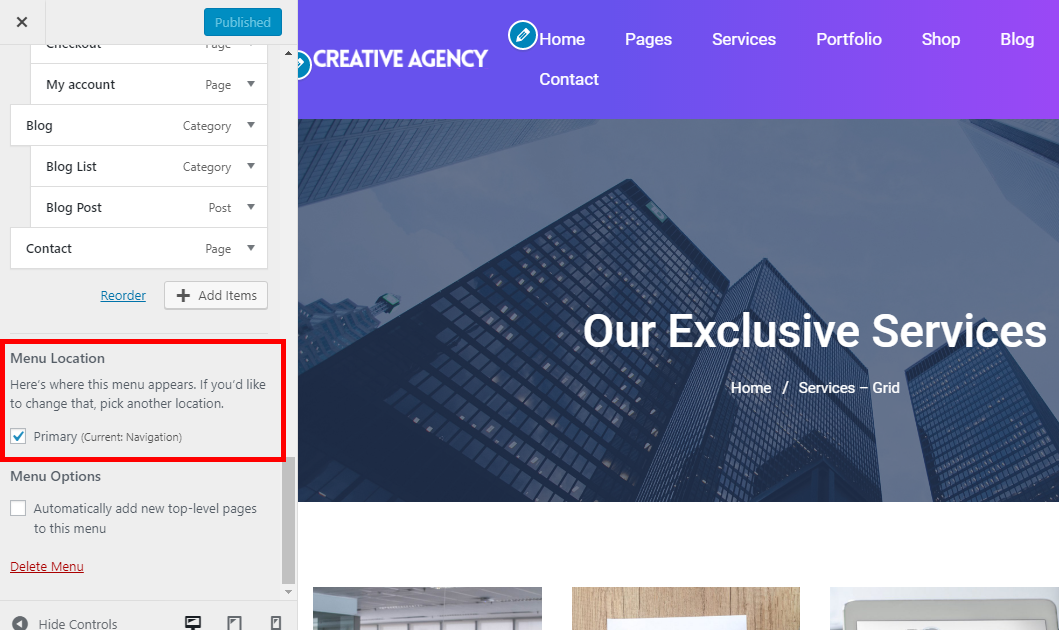
Setting Up Menu
To create a primary menu go to Appearance ⇨ Menus. Create a menu and assign it to the “Primary” location (under Menu Settings). For more details on how the menus actually work, check out this video.
Search bar besides the menu
You can remove the search bar beside the menu and replace it with simple text. To change this, navigate to Appearance >> Widgets >> Header right. You can remove the ‘search’ widget and place a ‘text’ widget.

Elementor basics for the Agency theme
Mostly all the pages of this WordPress theme are built with Elementor page builder. This means, you can easily edit them with the drag and drop options of the elementor page builder.
This page builder is really easy to use even for the beginners. But to get started with the elementor page builder to edit the pages of your website, here are some basic tips:
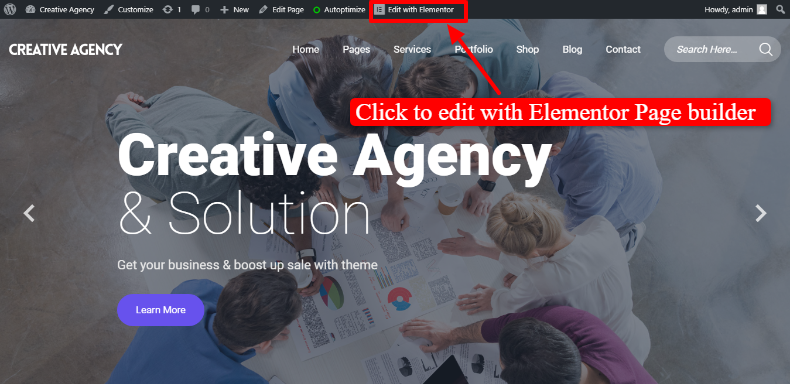
Editing a page with the Elementor Page builder
Elementor is a front end page builder
Adding a new sections
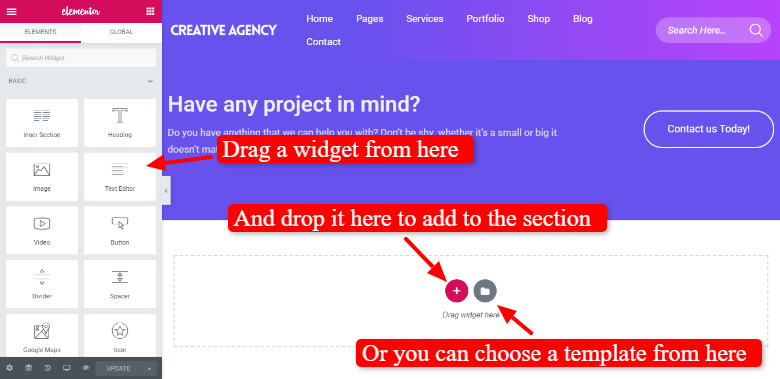
To add a new section to your page, scroll down to the end of the page and find the button with ‘+’ (plus) sign. This will add a section and you can drag an element from the sidebar to the section.
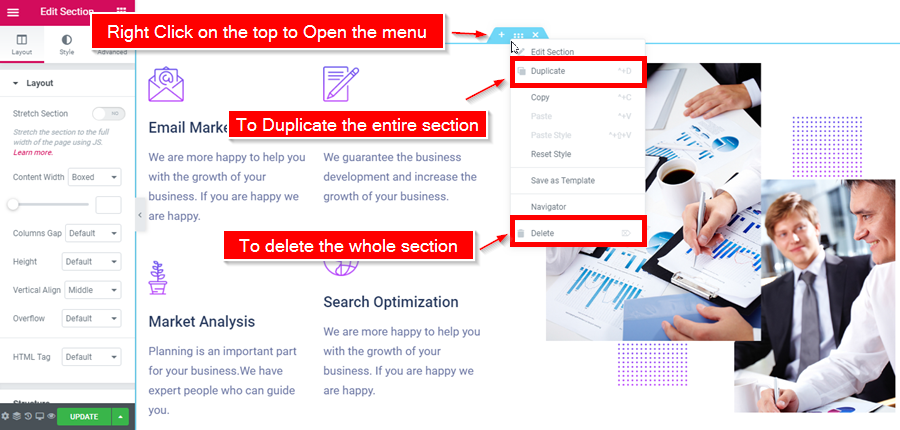
Deleting a section
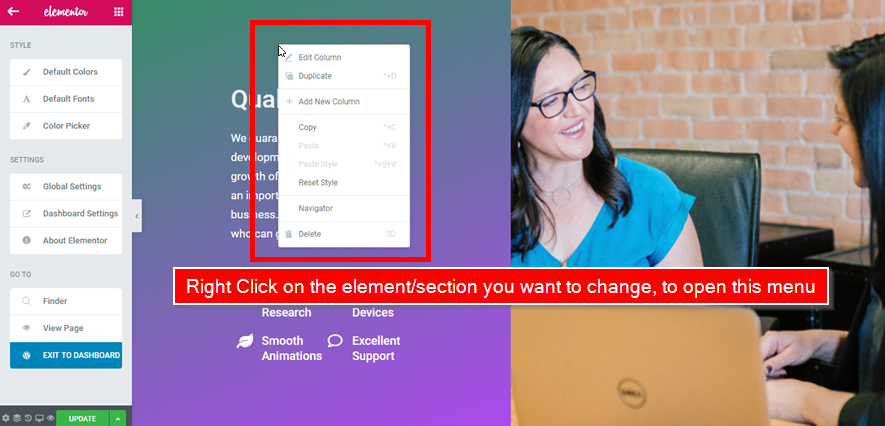
You can right click on the section you want to delete and it will open a menu with the ‘delete option’.
Columns and adding widgets to it
Elementor lets you choose the layout for each section. You can choose if you want a full width section, or a section with two or three columns, etc. After choosing the layout, you can easily drag and drop the content elements like text, widget, image, video, etc.
Managing animations of your sections
The animation can be managed through the “Motion Effect” options, on the ‘Advanced’ tab when editing an element of your design.

Using the right click option
Right click on any section will open a menu with some very useful options like edit and delete.
Homepage Management
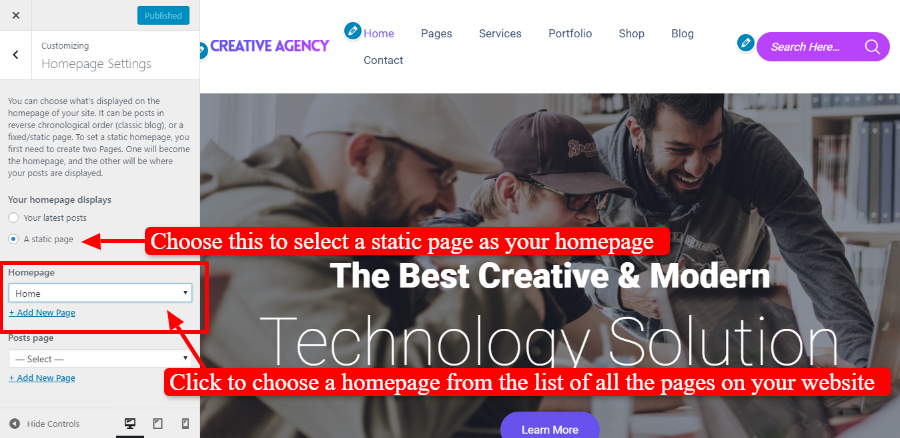
How to set a homepage?
There are 3 different versions of homepage. You can choose the page that you want to be the homepage, the first page your visitors will land on. To change this, navigate to Appearance ⇒ Customize ⇒ Homepage & select the page from the list of the pages on your website.
Homepage Version 1
1.Changing the Logo
To change the logo of your website, navigate to Appearance ⇒ Customize ⇒ Site Identity ⇒ Logo. Click the change logo button and upload your logo. The suggested image dimension is 250 by 250 pixels.
![]()
Editing your homepage with Elementor

2. Banner
The banner can be updated for your website in 3 simple steps:
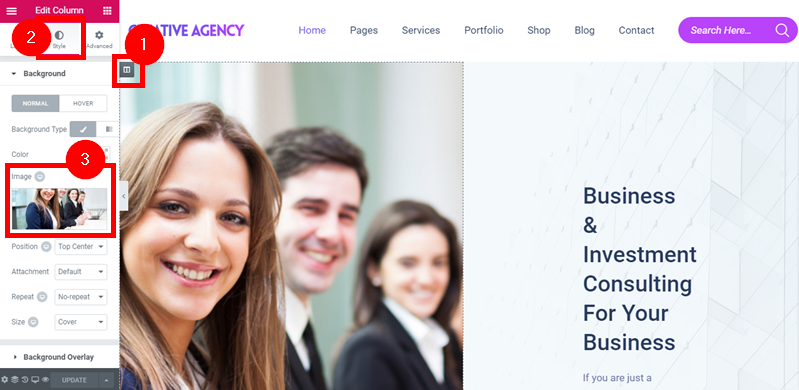
1. Banner Image
You can update the banner image using the elementor page builder. Just click anywhere on the banner and use the sidebar option to change/edit/remove or change the order of the images on the banner.
2. Banner Text
This is the text on the banner. It is infact a subtle Call-To-Action presented at the very first sight to the visitors. You can change the text here simply with the Elementor options.

The easiest way to do so is by clicking on the text, and start typing. The text can also be updated through the sidebar menu that will change into a text area when you click on the Banner text, through Elementor editor.
3. Button Text & Settings
Click on the button and you can change the text right away. For changing the link for the button – you can click the edit icon at the top of the text in the visual editor, and easily change the link.
3. Our Services section
This is a simple text section, where you can place introductory text about your agency/business. You can simply edit this section by clicking it and then using the editor.
4 & 5) Below Service section 1 & 2
This section, as you see is the partition of the screen in two sections. One is image and another one is text. It can be edited simply by clicking and overwriting or using editor to change the image text. The following GIF shows how you can do it.
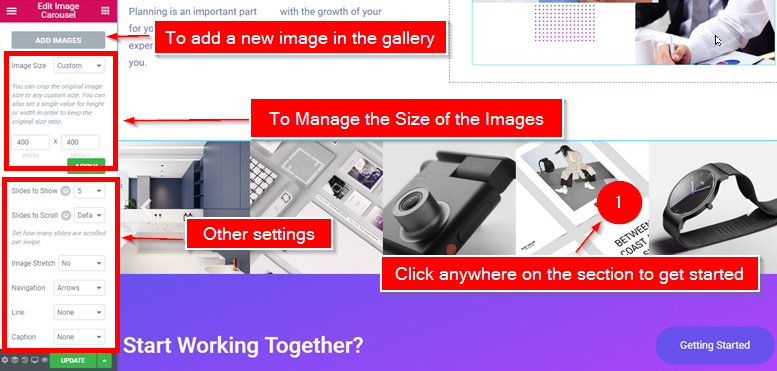
6) The Gallery Section
This section consists of some text and an image carousel. It can be changed, just like all other elements of the homepage. Just click on the text, or the image carousel and upload the images and create an image gallery easily.
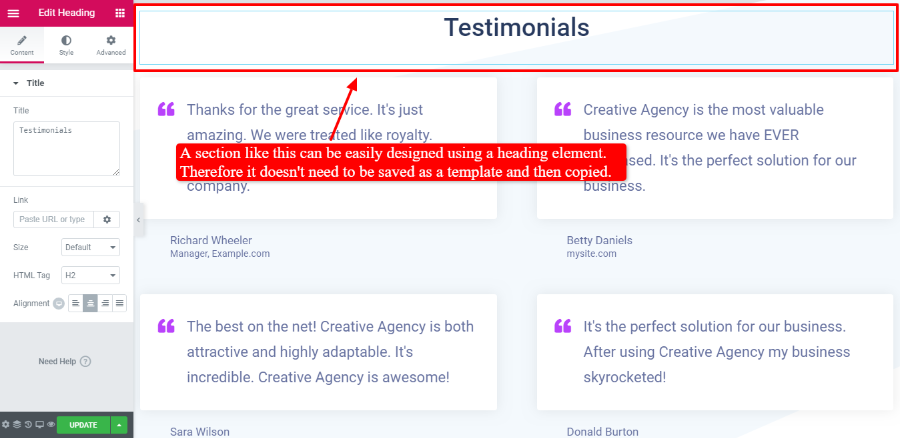
7) Testimonial Section
The testimonial section is just another text based section. You can easily change the text as shown in the image below.
8) Message from the Owner Section
This is a simple section that you as the owner of the website can use to send your message to the visitors. It can be used for other purposes too with a little bit of editing.
9) Recent Posts
This is a widget to show the latest blog posts on your agency website. Manage what content to show here and how you want to be displayed by click on one of the recent posts.
You can easily remove it by editing the section.
10) Call to Action Section
11) Footer
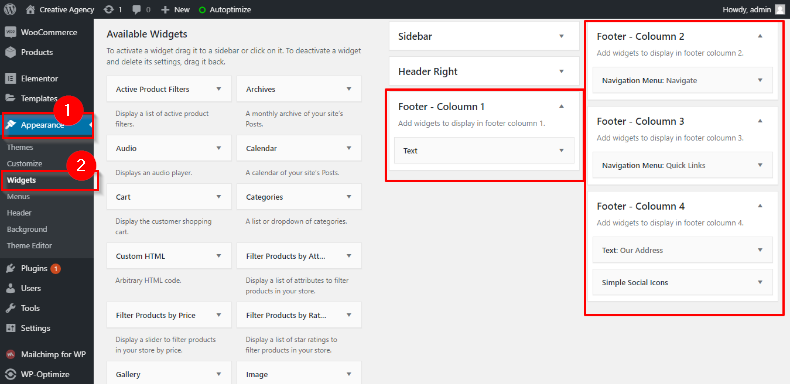
The footer can be edited through widgets. To change this section, navigate to Appearance >> Widgets >> Footer Section 1/Section 2/Section 3.
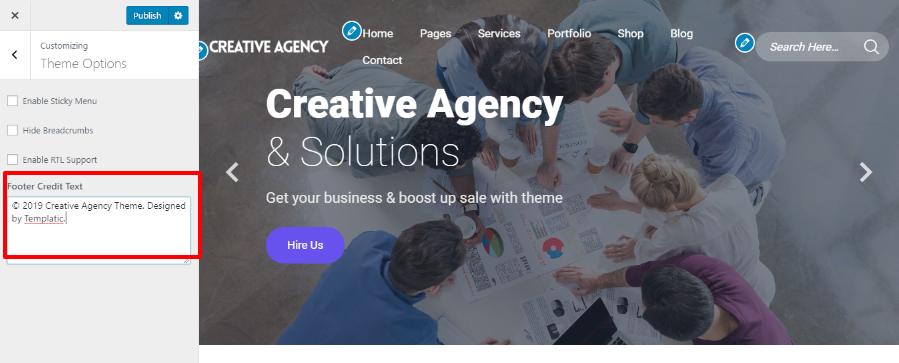
12) Footer Credits
You can change the footer credits by navigating to Appearance >> Customize >> Theme Options >> Footer Credit Text
Homepage Version 2

1) The banner image
The text on the banner can be changed by clicking and editing it. See the image for changing the banner text on Homepage v1.
2) Below Banner Area
This whole section is a combination of different text styles. All you have to do is click and edit. You can change the content, style of the individual elements and even the animation easily.
3) Business description
This is a general section on your homepage that you can use for different purposes. The business description section helps you describe details like “Why choose us?”,”About Us”, “Message from the director”, “What we do”, etc.
You can completely change the look and feel of this section using the Elementor page builder.
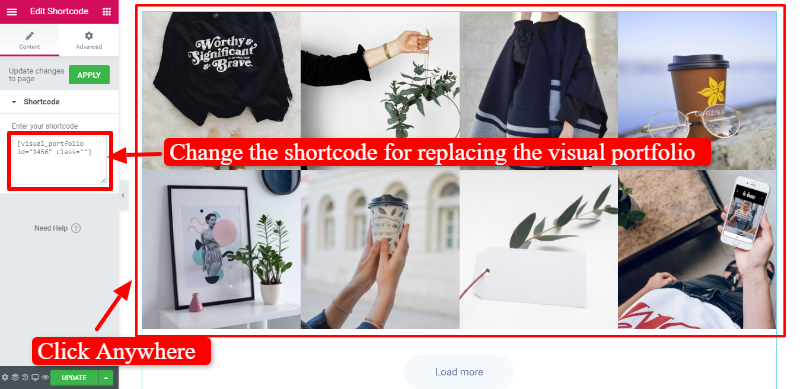
4) Portfolio section
You can choose to display one of the visual portfolios on the homepage of your website. The portfolio appears through a shortcode. To change what portfolio layout is displayed here, you have to 1) get the shortcode for the portfolio and 2) Paste in Elementor editor.
To access the shortcode navigate to Appearance ⇒ Visual Portfolio ⇒ Portfolio Layout, and copy the shortcode for the layout you need. You can even create a portfolio layout of your own.
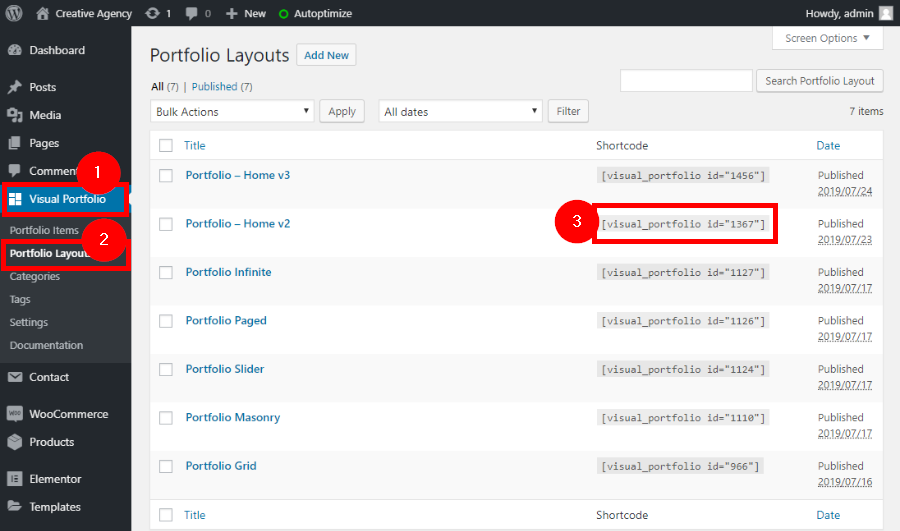
After copying the portfolio shortcode, open the homepage with the Elementor editor and click on the portfolio section. All you have to do is replace the shortcode in the sidebar.
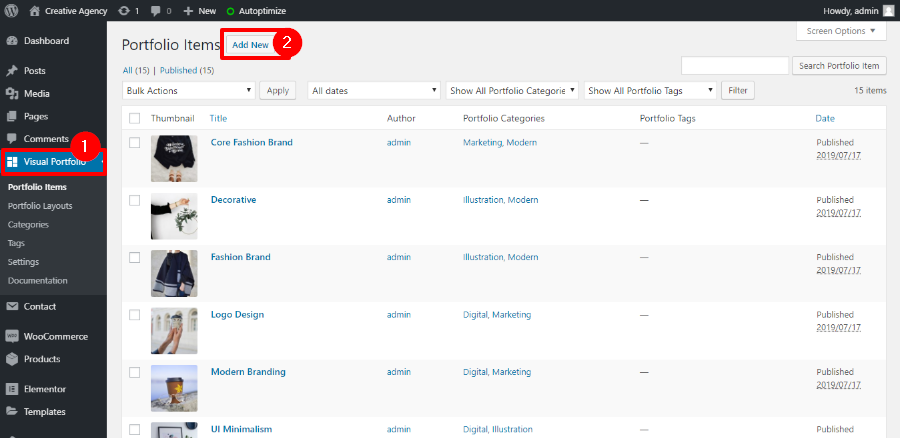
How to create visual Portfolios?
You can create a new portfolio just like you create a new post/page, i.e. by using the “add new” button.
5) The section below portfolio
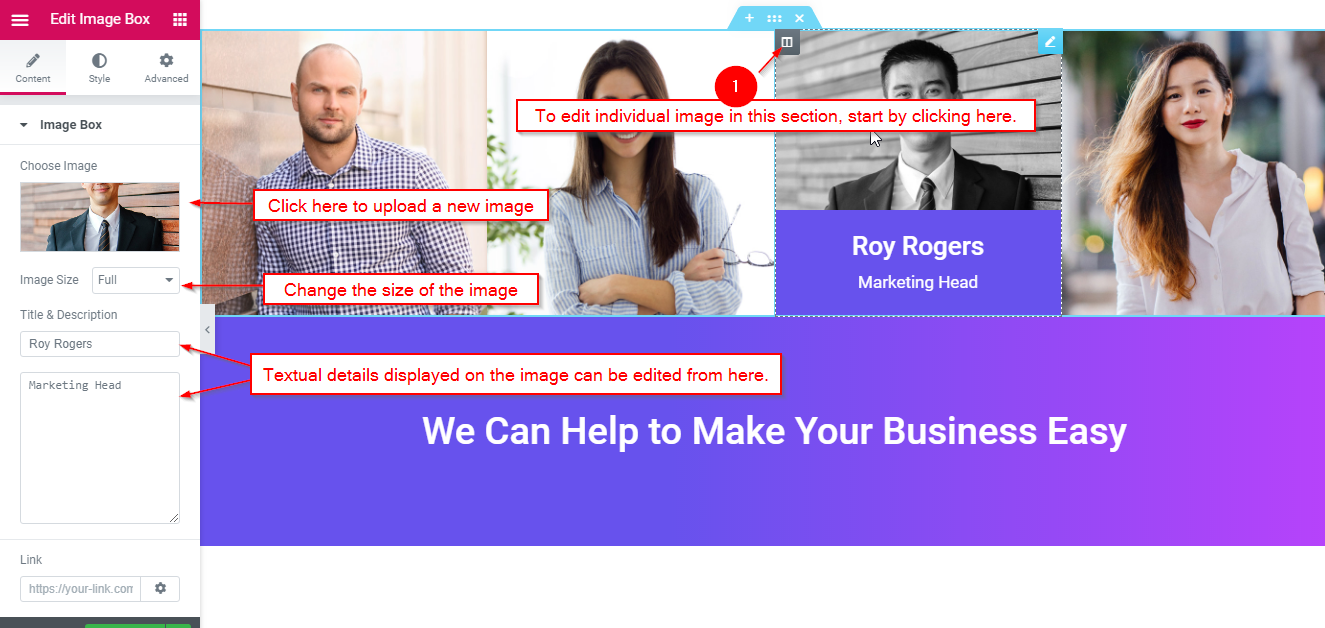
The settings related to the appearance and layout of this section can be changed using the Elementor layout options.

The directions to change the individual images you can click on the icon at the top of the image.
6) Features Section
This is a simple text section with images and you can easily change it with the drag and drop options of the Elementor editor. To change the text, simply click the section and start writing.

7) Below Features section
This section has a parallax background image and some text and an signature as an image on it. Everything can be changed with the visual options.
To change the background image, right click on the image, select ‘edit section’, from the sidebar panel, choose “Style” tab and find the option to upload a new image for background.

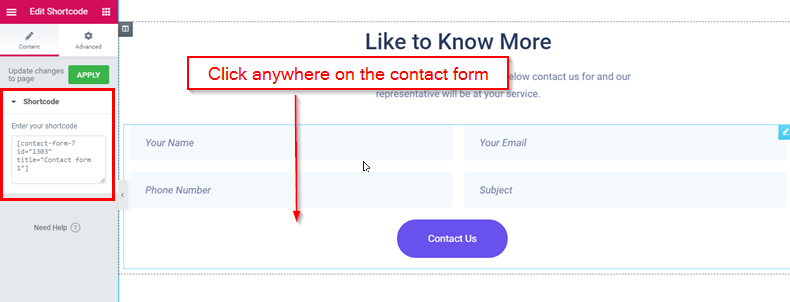
8) The contact form
Sometimes it is crucial for your business website to show the contact form right on the homepage. The contact form can be built using the contact form 7 plugin. Here, the contact form is shown below the text sections with the help of a shortcode.
To change the contact form, you can create a new contact form with the fields you want to display, and then copy it’s shortcode and replace the existing shortcode with it.
9) Image gallery
This image gallery can be used to show a carousel of your partner’s, staff, associates, services, or any other images. Just open the page with Elementor Editor and click on the section. You can create a gallery, choose an already existing gallery to display here.

Homepage version 3
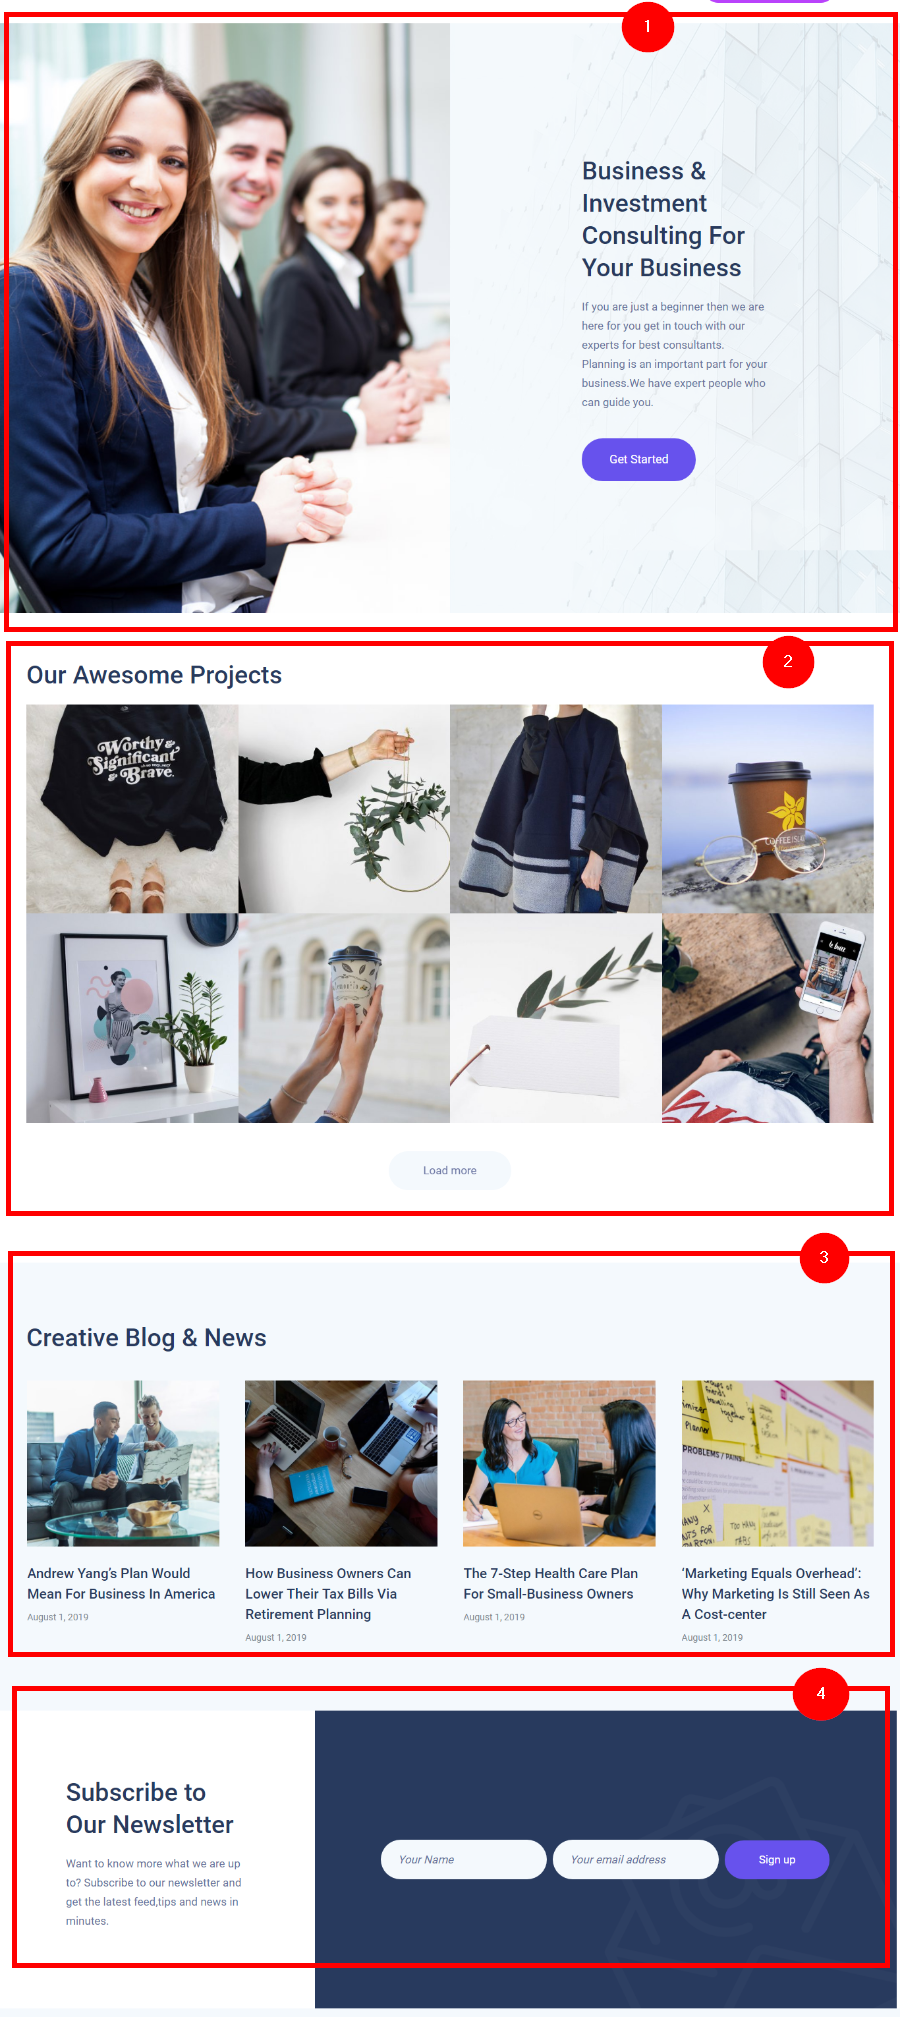
1) The banner
The banner section can be completely changed using the Elementor editor. You can easily update the image. Just click the image and upload a new one using the “choose image” option.
The half with image background and text on it can also be changed using the elementor options. You can upload the image and also change the text just by clicking on it.
2) Visual portfolio
This section is similar to the visual portfolio section of the homepage version 2. The steps to change what appears here are the same too.
3) Recent posts
This will simply show recent posts on your website. When editing with the elementor editor, all you need to do is click on the posts and the sidebar will show you options to manage the functions of this widget.
4) Newsletter signup
The final section on this homepage is the Mailchimp newsletter signup section. This too can be managed with the Elementor editor. Just click and go.
Service Pages
Service Page – Classic
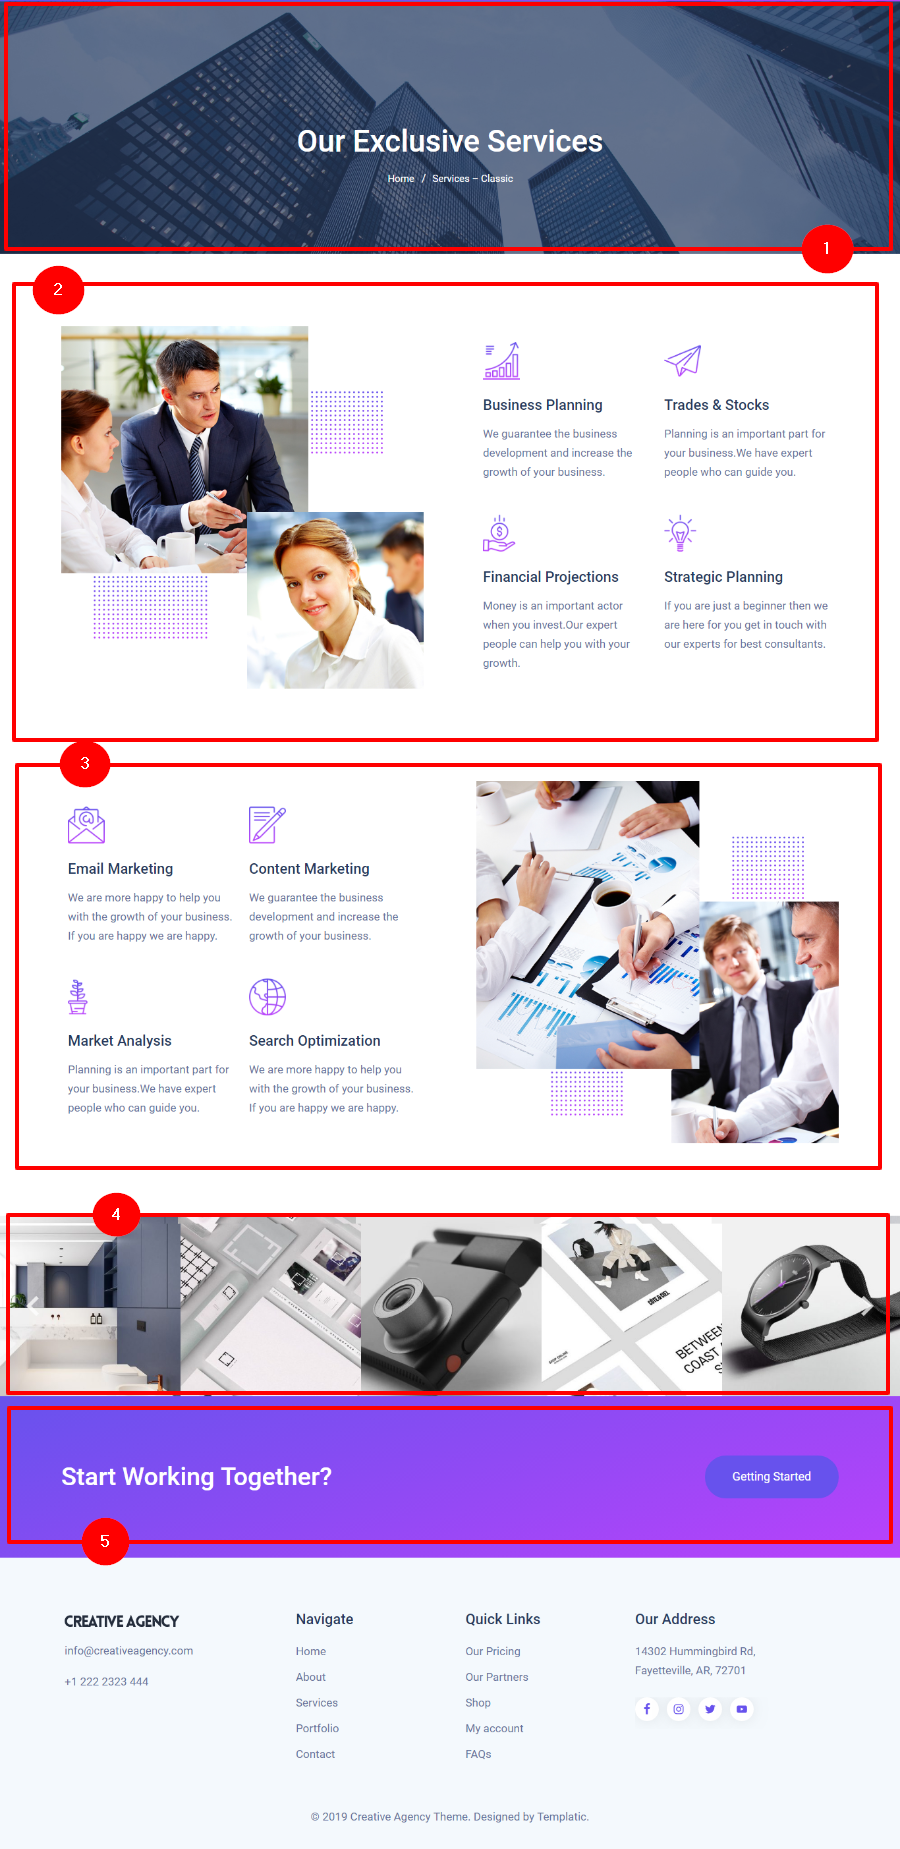
1) Updating the banner
Also see: How to remove the breadcrumb from the banner?
2) Service description section 1
This section helps you describe your services using a short description. It can be easily edited through the visual Elementor editor.
3) Service description section 2
This section is same as the ‘Service description section 1″, you can duplicate this to create a ‘service description section 3’ or delete it if you only want one service description section.
4) Image gallery
This section is a simple presentation of images in a gallery. To edit it with the Elementor editor, clicking on it will open the Elementor sidebar. Various setting options are available here, and you can also add or remove the images in the gallery through it.
5) Text Section with Background and button
This is the call to action section of your service page. Click on the individual elements – text, button, and right click and edit section for the the background, to change the section.
To change the background of this section, right-click the background, and select edit element. Change the background using the options available at the ‘style’ tab in sidebar.
Service Page – Slider
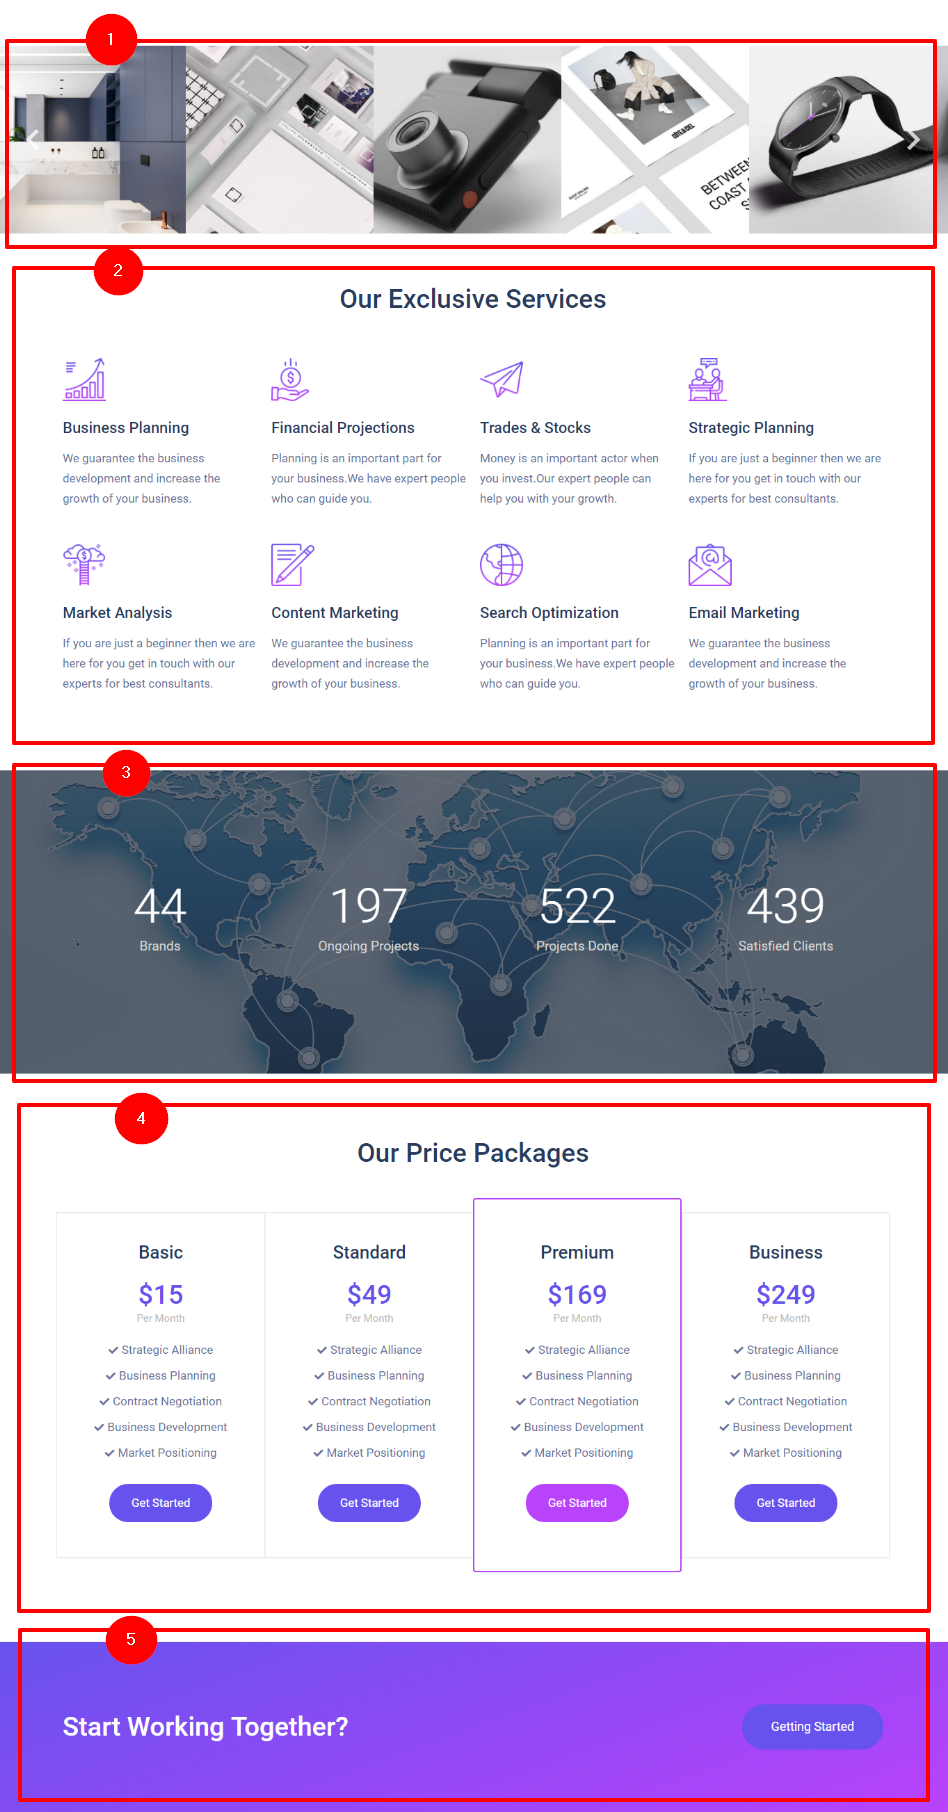
This is the service page with a countdown timer and a section with parallax background.
1) Slider Settings

2) Service section
This is similar to features section of the homepage. Follow the method mentioned here.
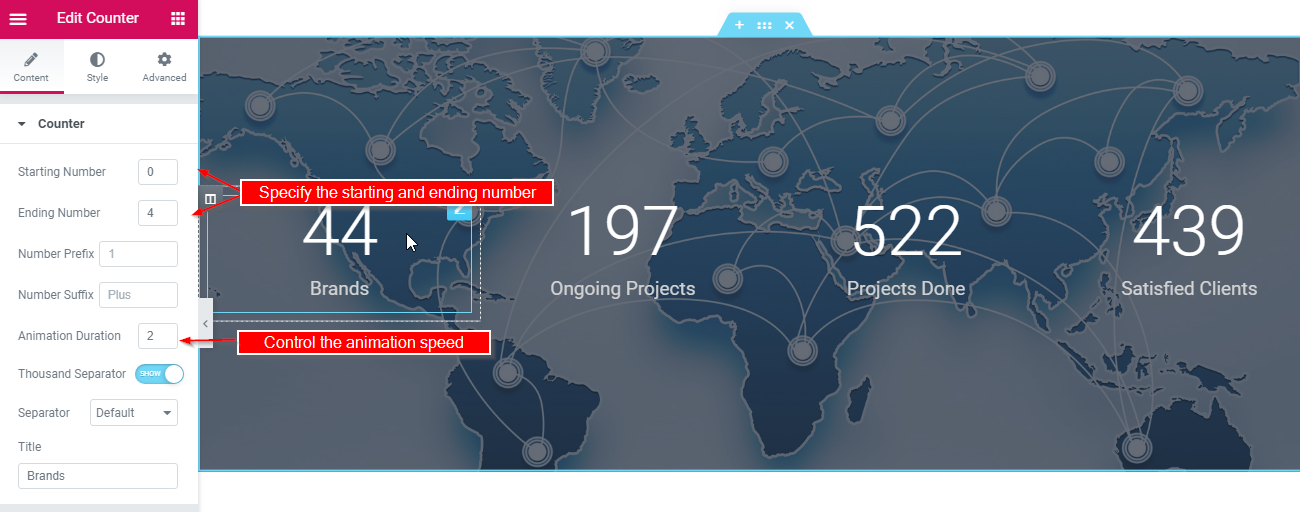
3) Countdown timer
The countdown timer makes your page look more convincing. You can completely reset the timer. You can change the text under the numbers and set the starting and the ending digits. Moreover, you can manage the animation, and many other things to totally personalize the timer.
Changing the background of this section
The background image of the timer can be any of your choice. Right click on the background image and choose to edit the section to set a new image for your background.

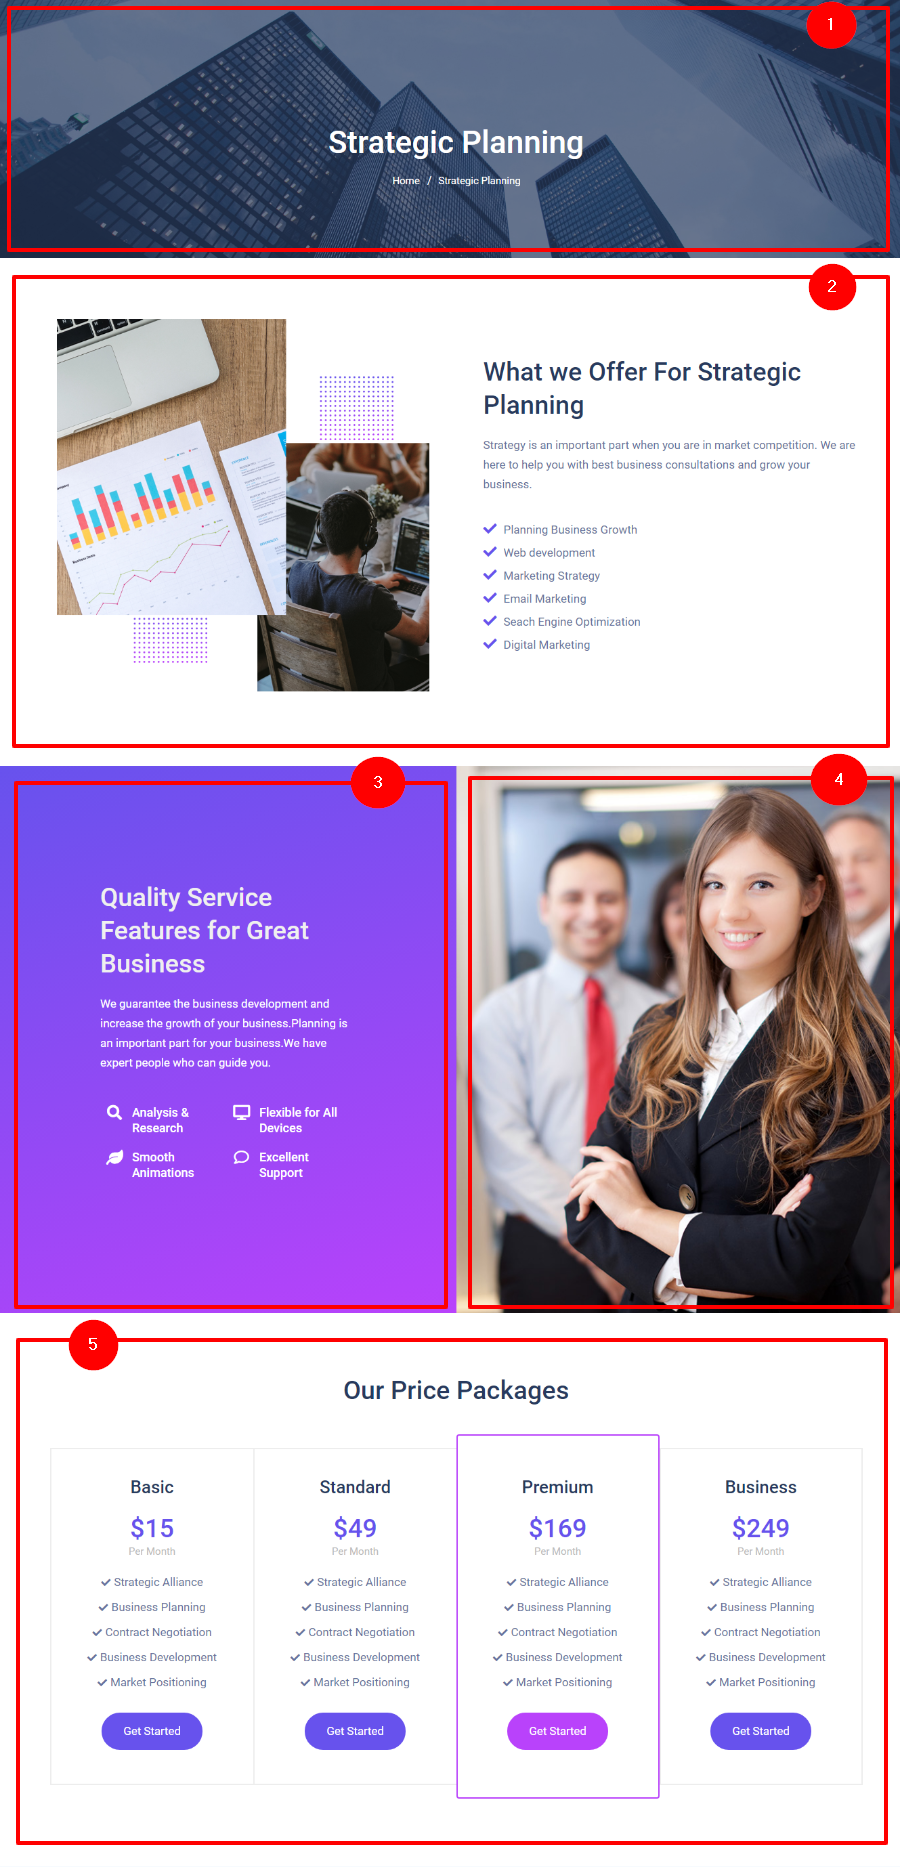
4) Pricing packages
The pricing package can be managed by simply clicking and editing.

5) Call To Action
The last Call to action is similar to the CTA section of the Service- classic page.
Service Page – Grid

As the name suggests, this service page variation shows the services in a grid format. You can easily change the content of this page using the Elementor editor.
1) Banner
The banner is similar to the banner in ‘Service Page – Classic’. Follow the steps mentioned here.
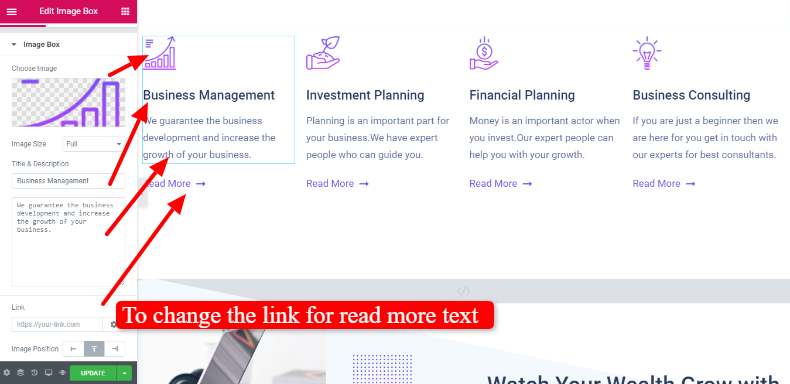
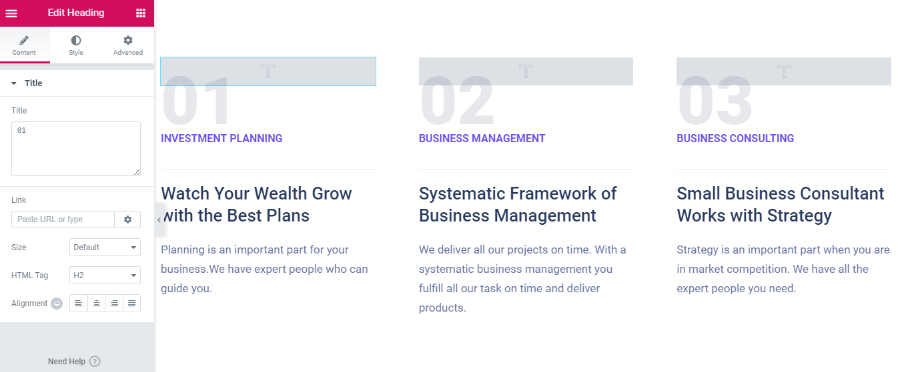
2) Service Grid
This is a the service description section with an image thumbnail and some text. It’s a click and edit section. Click on the image to change it and upload a new one. Click on the text and start writing your own.
You can even delete, duplicate or change the order of the cards of the service grid easily with the drag and drop options.
You can even set links for each of the service description section using the Elementor toolbar on the side.
3) Call to Action section
The last Call to action is similar to the CTA section of the Service- classic page.
Single Service page
The single service page lets you describe each of the service in detail. So you can create a dedicated page with a pricing table or call to action as per your requirements.
 1) The banner
The banner of the single service page is similar to the banner of the service page classic. The method to change it is also same as that of the service page classic.
2)Service description image and text section
3 & 4) Service description section 2
This is a click and edit section. All the details here can be changed by clicking the element. You can change the text, the icons, the background gradient, and the image using the options available in the Elementor sidebar column.
5) Pricing tables on single service page
The pricing tables too are click and edit. To change the details, just click and start editing using the sidebar options.
Contact Forms
For your agency website, the contact form will play a very important role.
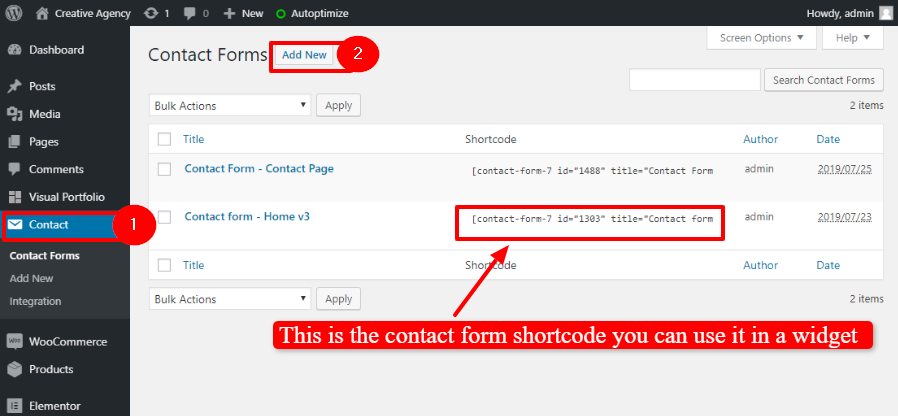
With the setup wizard, all the necessary plugins will be installed automatically including the contact form. With this plugin, you can create all the contact forms you want by navigating to the wp-admin dashboard ⇒ Contact. To create a contact form, you can click on the “Add new contact form” button, while to view the existing form templates, you can click the first option – “contact forms”.
For Agencies or small business, you need a simple contact form with fields limited to name, email address, and message. So instead of creating a new contact form, you can browse the “contact forms” and use the example templates itself.
However, if you need more fields, you can refer to the contact form 7 documentation and create a custom contact form for your website.
Creating a contact form
With the contact form 7 plugin, you can easily create a custom contact form to collect the data that you want from the users using the form. Here’s the contact form 7 guide on how to edit the form fields to create a contact form. Moreover, there are other tabs to set up the mail, and for advanced settings. Moreover, you can also change the messages to be displayed at certain events like successful form submission, validation errors, wrong email address, etc.
Contact form shortcode
Once you have created a contact form, you can use it on the different pages through the shortcode.
The shortcode will look something like:
[contact-form-7 id=”234″ title=”contact form”]
You can create a text block wherever you want to insert the contact form and then paste the contact form shortcode there to insert the contact form.
With the consulting theme, you can create different contact forms and use them on different pages, as per your website’s requirements.
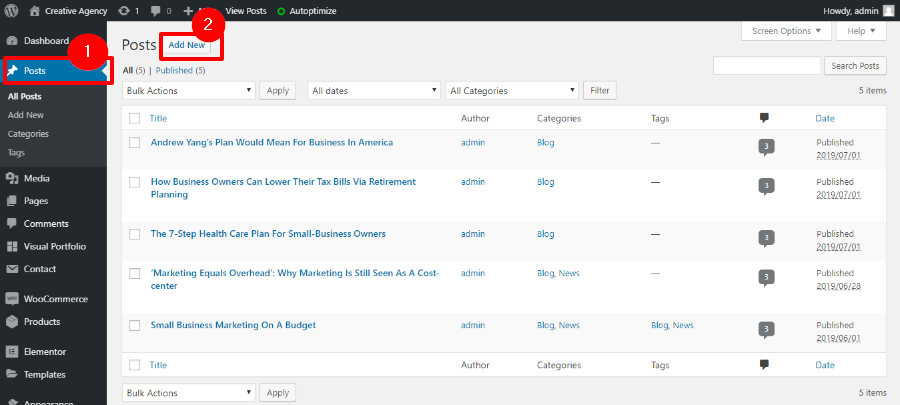
Using Blogs on your Agency website
You can use your Agency website as your blogging platform. To start blogging, you can navigate to wp-admin ⇒ posts ⇒ Categories and set the categories for your blogs.
Categories can be anything like business administration, finance, latest news, etc.
Blog page sidebar
You can manage the widgets of blog page at Appearance ⇒ Widgets ⇒ Sidebar.
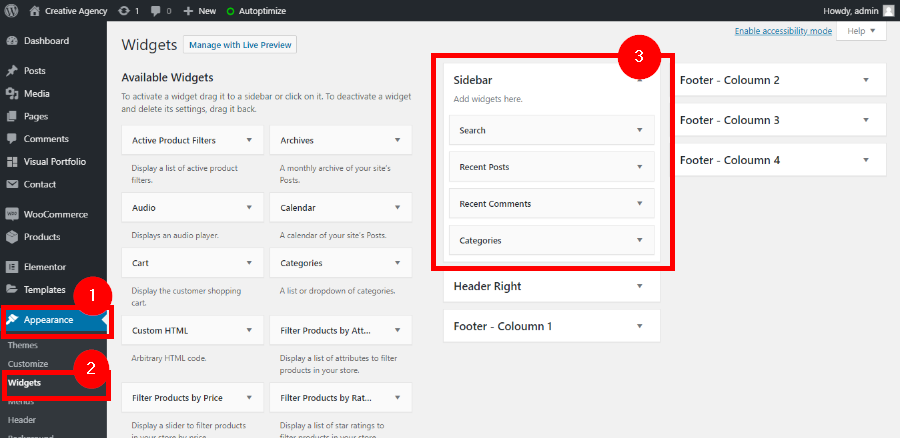
There are many widgets placed by default in the sidebar, you can remove the once you don’t like. Besides, you can rearrange them and also add new widgets too.
Set colors and image background
You can change the color and background of individual sections through the Elementor editor. However, you can also change the colors of your site at Appearance ⇒ Customize ⇒ Theme colors.

You can also set the background to your website using the image background option. To do so, navigate to Appearance ⇒ Customize ⇒ Background Image.
WooCommerce Store with Agency WordPress Theme
The Agency WordPress theme is fully compatible with the WooCommerce. So you can easily start an online store on your website whenever you wish.
To get started with the eCommerce on your website, you first need to install WooCommerce. It is free and very easy to use. If WooCommerce is not already installed on your site, you can download WooCommerce and install it at WP Admin ⇒ Plugins ⇒ Add New & by uploading the downloaded installation file.
To manage your shop with WooCommerce, you can refer the WooCommerce documentation.
Other Settings
How to remove the breadcrumbs from service page?
The breadcrumbs shown on the banner on the service page are through a shortcode. You can easily remove the banner by deleting the widget using the right click option.

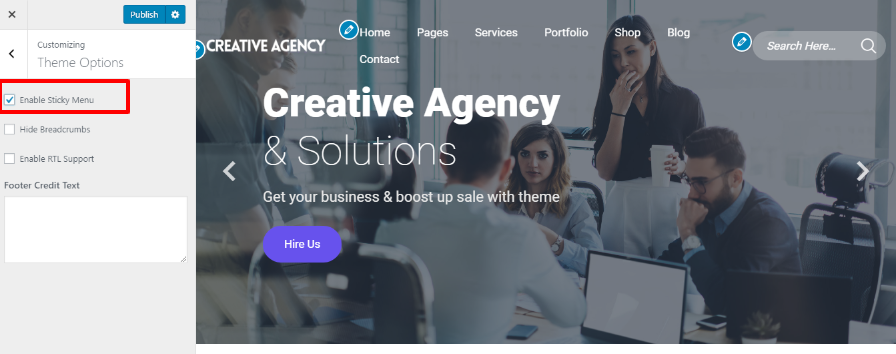
Or to completely disable the breadcrumbs, navigate to Appearance ⇒ Customize ⇒ Theme Options, and check ‘Hide Breadcrumbs’ option.
How to enable/disable sticky menu?
To enable or disable sticky menu, navigate to Appearance ⇒ Customize ⇒ Theme Options ⇒ Sticky Menu.
How to use the theme to create an RTL website?
If you want to create an agency website with RTL orientation, you can enable the RTL mode at Appearance ⇒ Customize ⇒ Theme Options by checking ‘Enable RTL support’.
The orientation of your website will change and you can start editing your website using Elementor, in RTL style.
How to copy a section from one page to another?
With the ability to easily replicate the design section from one page to another page, you can create beautiful pages easily. You can use the existing design from some other page on your current page.
To do so, follow the simple steps mentioned below.
1) Open the page with section you want to copy
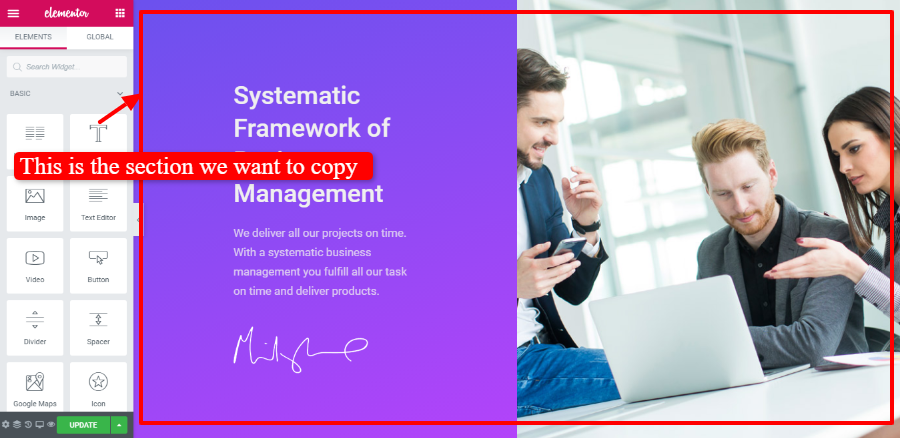
First you must open the page where the section that you want to copy for another page exists. Open the page with the “edit with elementor” option.
2) Save it as a template
It is really easy to save any section of your elementor based theme in the template library. Use the right click menu to do so.

Make it a point to properly name the template so it’s easier for you to recognize it when you want to reuse. Especially when you have a lot of saved templates in your template library.
3) Get back to the current page where you want to copy the section
Now you must open the page you want to add the section to. Choose to add a new section using the plus option.

4) Insert the template
Note: If the section is easy to recreate, you can avoid saving it as a template and than applying it at another page. For example: Section Titles like the one in the image.