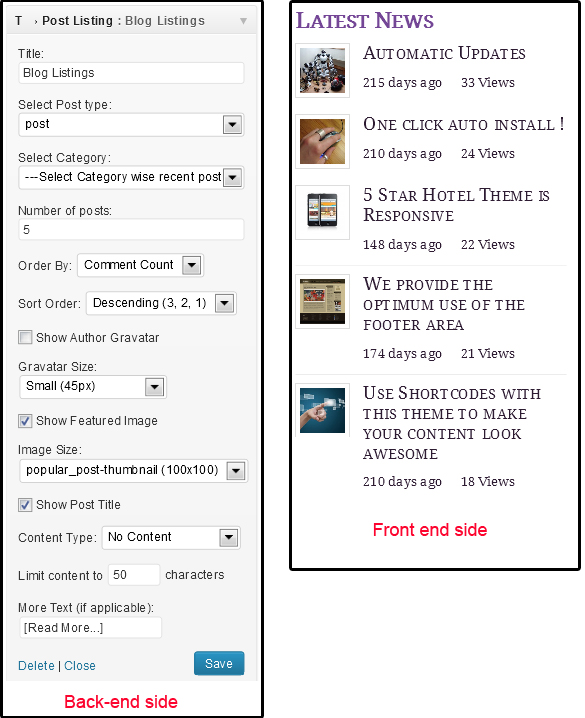
This widget is very useful when you want to show the posts belonging to any custom post type on your site. You can use this widget multiple times as per your requirement. Here is the field wise explanation,
This screenshot has been made selecting some of the options just to let you know that it can look like this on your site. But the way it appears on your site is subject to your option selections as mentioned below.
- Title – Whatever you add here will act as the title of the widget on your site. It will be the heading of the shown list of posts. (Color, look and feel of this title depends on the theme design)
- Select Post Type – This box will list you all the custom post type that you have on your site (like posts, events, places etc). You just have to select the one whose posts you want to show on your site.
- Select Category – It is dependent on the above field “Post Type“. Whatever post type you select above, you should select the category that belongs the above selected post type.
- Number of Posts – You can specify here the total number of posts that you want to show on your site. (Tip: You should show posts keeping theme design in mind. You should avoid the LONG list of posts here. Just keep it moderate.)
- Order By – You can sort your posts as per the given 5 options, also this option has a connected effect of the below given field “Sort Order“.
- Title – Follows the alphabetical order taking the starting word of the post title.
- ID – Sorts according to the posts Id. You can know your post Id by simply going to the post/post type sections and keep your mouse pointer on the “Edit” link of each post one after other, you will see an URL kind of thing at the bottom left of your screen. The numeric value that is written after “post=” is your post ID (e.g. wp-admin/post.php?post=40$action=edit. Here “40” is a post Id).
- Comment Count – Shows posts taking the number of comments a particular post has got in your selected category.
- Random – Shows posts of your selected category randomly. On each browser refresh, it changes the posts in the list.
- Sort Order – Allows you to show your post in ascending order Or Descending order. The deciding factor that what to be taken as base of calculating descending or ascending order is dependent on what you have selected in the above field “Order By” field.
- Show Author Gravtar – Check marking this will show author’s gravtar (Picture uploaded at https://en.gravatar.com/) along with the post title/content. Author means the one who has posted the post on your site.
- Gravtar Size – Select the size for author’s gravtar shown on your site (that you did using above field).
- Show Feature Image – Check marking this will show the feature image of each posts (inserted in the post as feature image). These posts and their images are dependent on the Select post type and Select category fields as mentioned above.
- Image Size: – This is the size of the feature image inserted in the posts. The options that you can see in its drop down come from the theme and so can be different when using it with different theme. So, select your preferred image size from the available ones.
- Show Post Title – As it lists your chosen number of posts on your site, check marking this will show its original post title above its content.
- Content Type: – You can decide what kind of content you want to show using this widget. There are 4 options,
- Show Content – Shows whole post content.
- Show Excerpt – Shows only excerpt content added in the post.
- Show Content Limit – It shows the post’s main content but up to the limit that you specify in the below given field “Limit Content to“.
- No Content – Will not show any content at all.
- Limit content to – You can enter the number of characters that you want to show. It takes only numeric value so type in an integer number.
- More Text (if applicable): – When you select “Excerpt” or “Show Content” option in the field “Content Type“, it shows a link to the detail page of that particular post. So, you can decide the text for such link. By default it will be “[Read More..]” but you can replace it with yours.