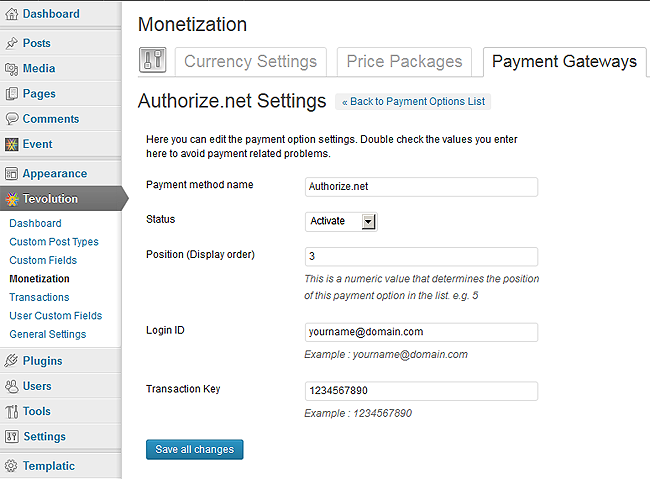
Here are some pre conditions and installation and configuration steps of Tevolution-authorizedotnet plugin,
Pre Conditions
To use this payment gateway, you should
- Visit the http://www.authorize.net/
- Read their policies such as Terms of Use, Privacy and Intellectual Property rights
- Sign up with them and make your merchant account.
Install and Activate
Here is how you can install and configure Authorizenet gateway using Tevolution-authorizedotnet plugin:
- Download the plugin from your members area to your desktop.
- Now, Go to WP-admin → Plugin → Add New → Upload.
- Browse the plugin zip file and click on “Install Now” button.
- You can also upload it in to your “wp-content/plugins” folder to your server directly using FTP.
- Once, uploaded go to WP-admin → Plugins and activate the plugin.
Back-end Configuration
- After activation go to Tevolution → Monetization → Payment Gateways. Activate the Authorize.net payment option from payment options list and click on settings link given below payment method name.
- Payment method name: This name is displayed on the checkout page. So it will give detail to your user about the gateway using which he’ll make payment.
- Status: This status should be “Activate” if you want to enable the payment method on your checkout page.
- Position (Display order): This contains a numeric value and it is used for ordering payment methods on front end.
- Enter Your Merchant Login Id and Merchant Transaction Key from your Authorize.net Merchant Account and save changes.
In which countries does it operates?
To use it, your business should be based in United States, Canada, United Kingdom or Europe. Figure out the eligible countries from here

