The construction theme from templatic comes with a front-end visual composer that will let anyone with the admin rights make visual changes at the front end itself and also update the contents. This guide focuses on installation and other general settings.
Installing and activating Construction
- Download the zip folder of “Construction” theme from the members area of the Templatic website.
- Now, login to your WordPress dashboard and navigate to Appearance >> Themes >> Add new >> Upload theme >> browse for the zip file you have downloaded and select it >> Install now.
- This will install your theme and then you can activate it.
- On being asked for the license key, go to your Templatic members’ area from where you downloaded the zip file,under “my downloads >> Construction, You’ll find the license key there. Refer this screenshot.
- Go to Appearance >> Themes >> and press ” Install Sample Data” . This will install the dummy data,making your site look like our demo. The process of installing dummy data will take 2-4 minutes. Let it complete without interruption.This will give you a precise idea of how to proceed with your own original data. Though it is optional, but we highly recommend it.
Installation using ftp
If you are new to ftp and its working please refer our ftp guide. That will help you get a better idea of how you can upload your files and organize them on the server using
FTP.
- For this also, download the zip folder of “Construction” theme from the members area of the templatic website.
- Extract the zip file using software like 7-Zip. Extract to the same folder and be careful that you don’t create the double folder problem.
- Now,navigate to /wp-content/themes/and upload the extracted folder of Construction.
- Then,Login to your WordPress dashboard and navigate to Appearance >> Themes >> Installed themes and you will find Construction there. Activate it
- You can install sample data from Appearance >> Themes to make it look exactly like our demo.
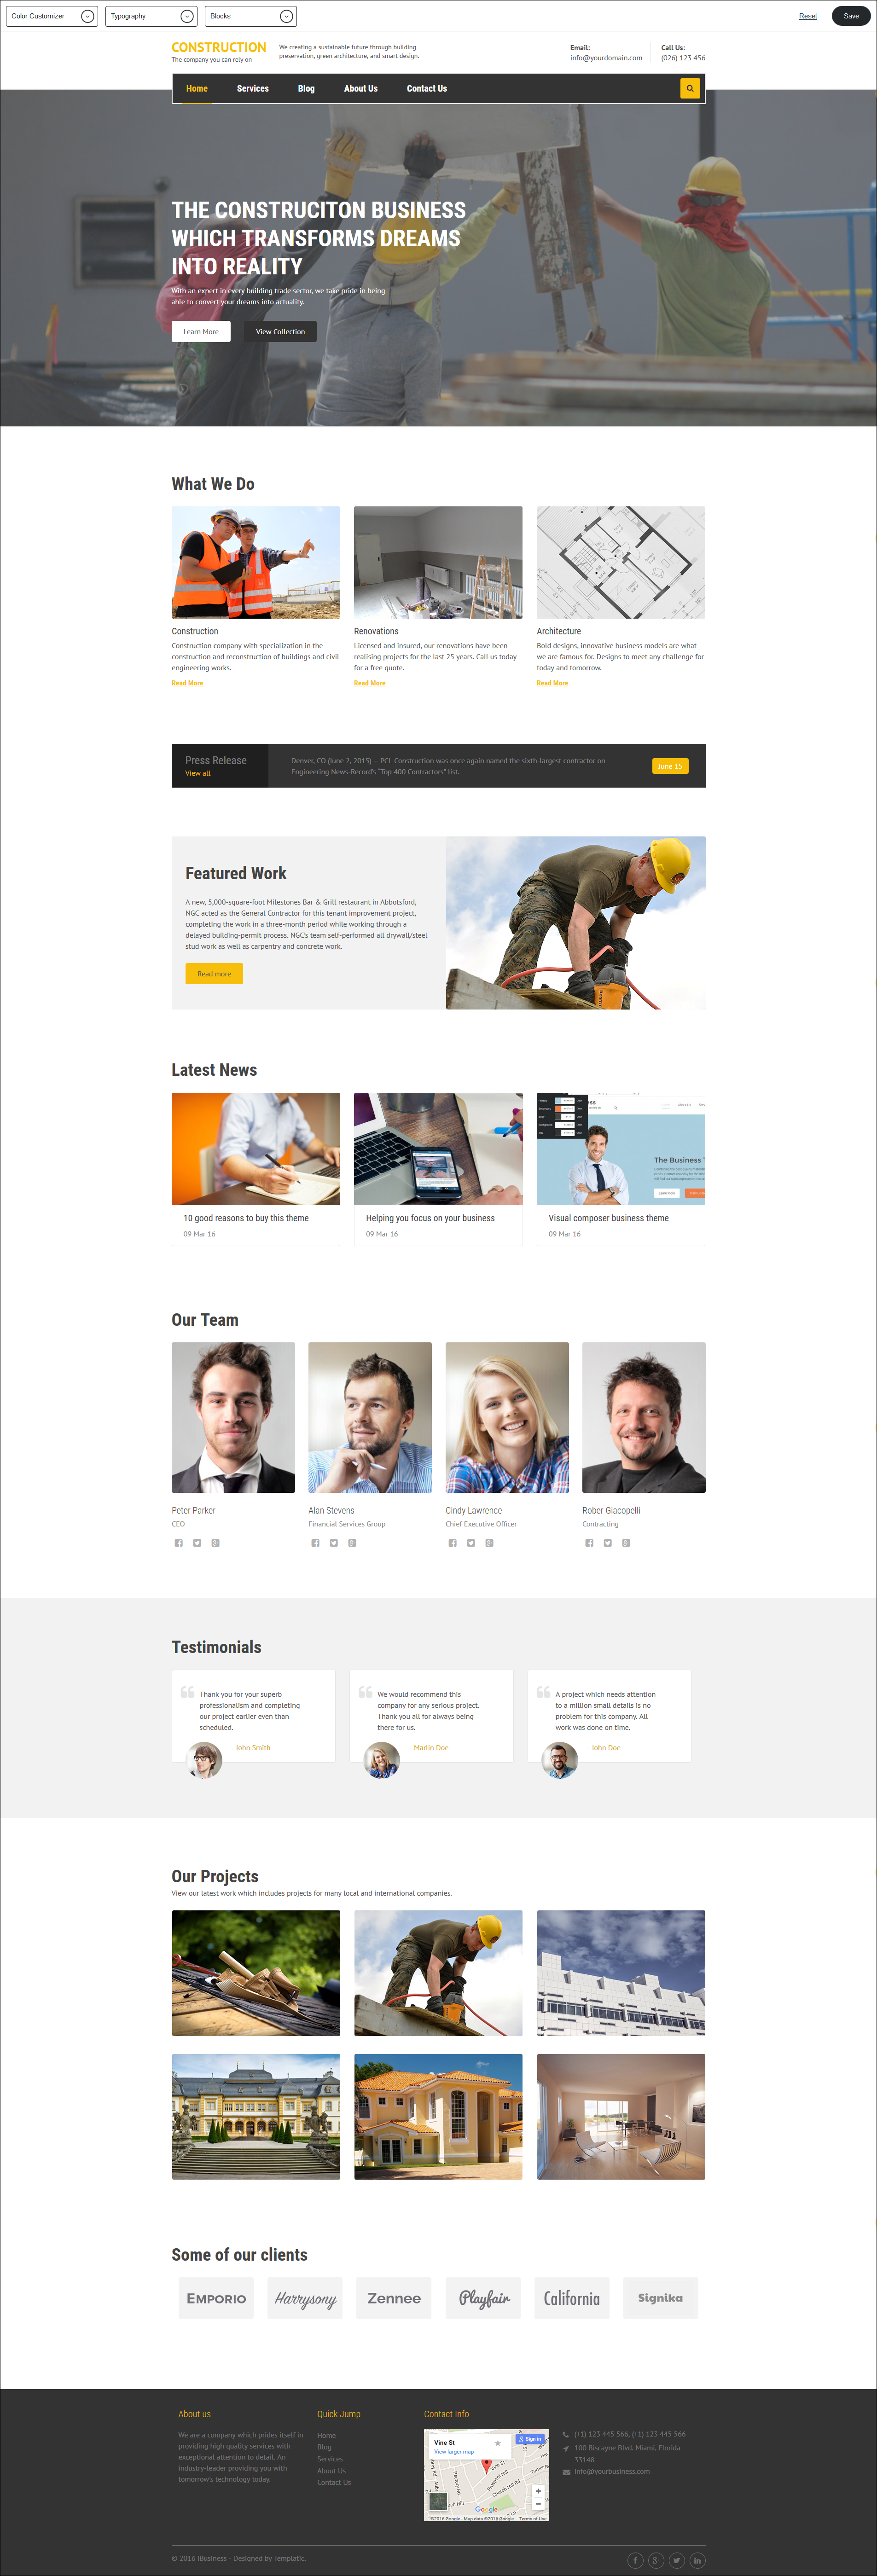
Setting up the home page
-
Setting up the logo
You can directly set up the logo by uploading an image from the front end. Or alternatively you can navigate to Dashboard >> Appearance >> Customize >> logo and upload your logo image there. From there only you can also change your favicon.
-
Site title and tagline
Use the front end editor to change the tagline or that can be also done by going to appearance >> Site identity >> where you can set the site title and the tagline.
In case you don’t want to show the logo image and just show the text name of the site, you can just set the site Title and remove the logo image.
If you do not want to show the site tagline, just uncheck the box for show site tagline.
-
Header right area
The header right area is used to display the email address and phone-number. You can directly change it. It come from the widget which can be also changed by navigating to Dashboard >> Appearance >> Widgets >> widget area “Header right” >> Text. The text and formatting can be changed from here.
-
Text
The text beside the logo comes from a text widget too. Directly change it or you can change it from the back-end by going to Appearance >> Widgets >> widget area “header right” >> text.
You can select the widgets and set it here if you dont want to show this text. You can also remove the text widget and leave it blank if you want.
-
Banner image
The easiest way to change the banner image is to change it at the front end. To get the perfect result the banner image’s dimension should be 1903 X 650.
-
Menu
The menu can be created or edited at Dashboard >> Appearance >> Menus . From here you can update the already created menu or you can also create a new menu.
-
Change the footer
The footer is divided into four portions and different widgets are placed there to add fields to the footer.
To change the about us text in the footer navigate to Appearance >> Widgets >> widget area “Footer column 1” >> Text. The content of About us and its title comes from this widget so you can change it from here.
To change the Quick jump in the footer, navigate to Appearance >> Widgets >> widget area “Footer column 2” >> Pages. Set the widget to show the quick links on the footer. This basically lets your users quickly navigate to some important pages from any page they are.
This is contained by a text widget. So all you need to do is change the code of the text widget by navigating to Appearance >> Widgets >> widget area “Footer column 3” >> text.
The column 4 of the footer shows some basic contact information and this is also rendered by a text widget. To change go to Appearance >> Widgets >> widget area “Footer column 4” >> text and simply change the text.
-
Copyright information
To change the copyright information at the very bottom of the site you have to go to the Appearance >> Customize >> footer and change the text code.
-
Latest News
This portion will show the latest blogs that have been published on your site. It is a fantastic way to let the users stay updated with the latest news about your business.
Using the visual editor
-
Color customizer
As the name suggests the color customize is used to changed the colors of the site. It let’s you change the colors of the site according to the categories. The categories like primary,secondary,body,etc are classified so that there remains a consistency in formatting throughout the site
Primary : It changes the color of the search buttons, links and primary headings.
Secondary : It will change the footer and menu back-ground
-
Typography
This lets you choose the fonts for heading as well as body.
-
Blocks
The blocks will let you add content blocks to a particular part. This blocks can be dragged and dropped anywhere and then edited to update your content in them.
-
How to change the text content
To change the text on the site just click there and a cursor appears. Your text is now ready to be edited. It is as simple as this.
-
Upload/ Change an image
Click on the image you want to change and an image uploader appears. Once the image is successfully uploaded it will automatically appear at that place.
-
How to give naviagtional-links to buttons and link texts.
When you click on the link the visual editor will show you a black textbox with a # or a previously set link. You can just update this from here, set your link or update the existing one.
-
To remove a content.
To remove text content, delete it using the editor.To remove a block, you can click on the delete button that appears.
Setting up the blog page
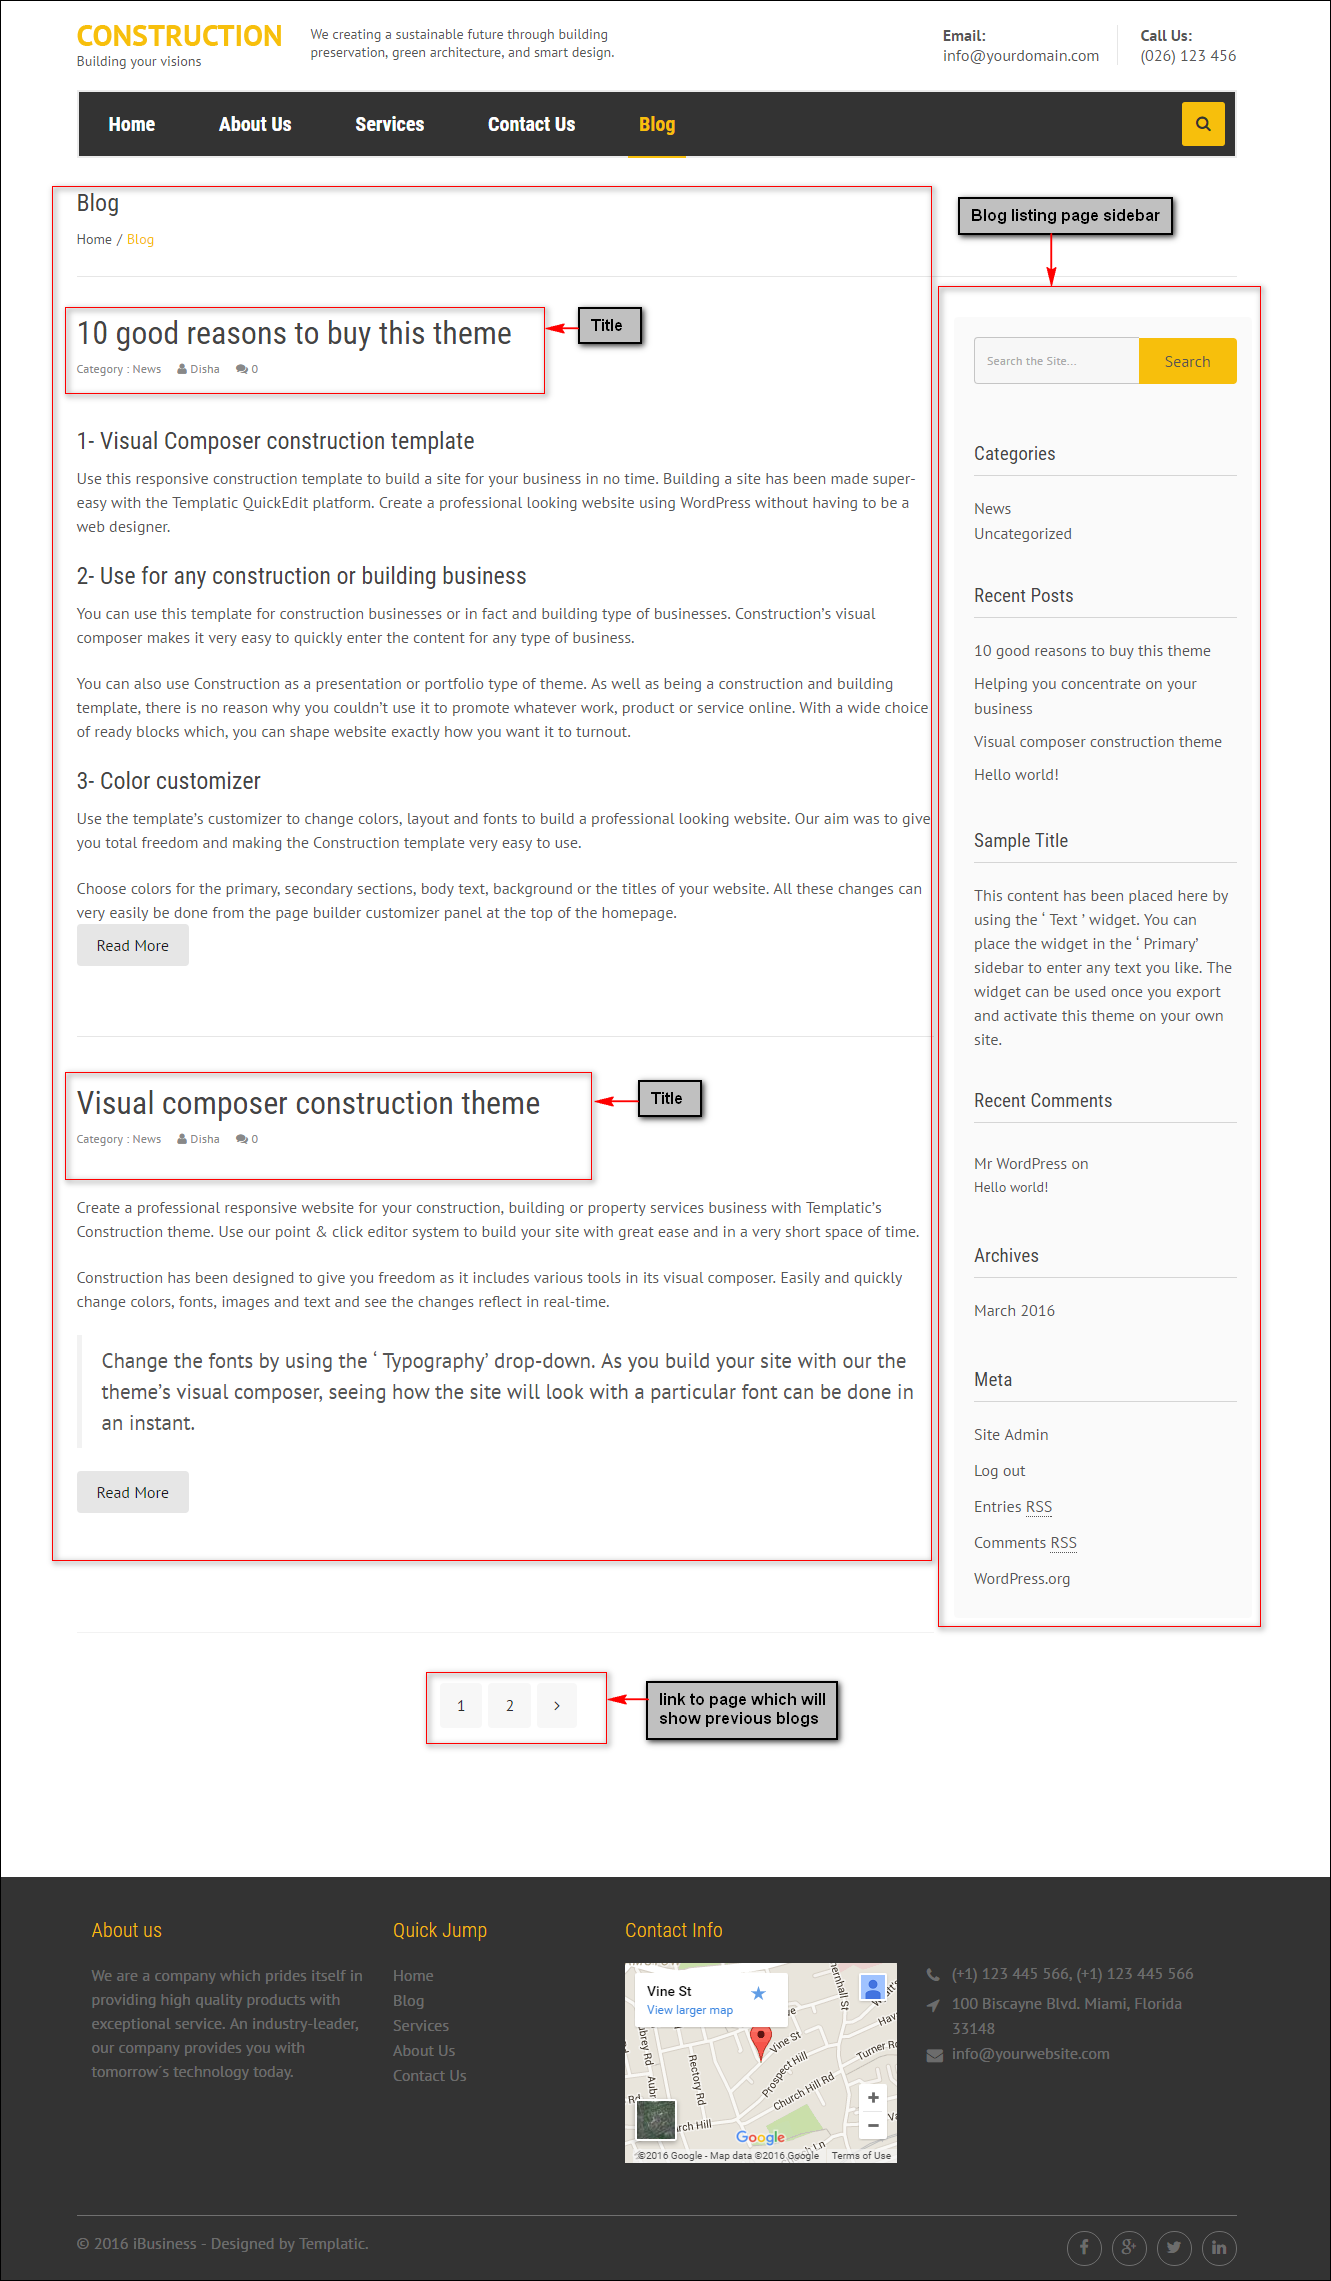
Sidebar You can go to the Appearance >> Widgets >> widget area “blog listing page sidebar” and change or configure the widgets. The following are the widgets already placed in the sidebar when you have installed the sample data.
-
Search
The search box that lets you search from your site.
-
categories
A category filter that lets the users select the category and see results pertaining to that category only. All the other results are eliminated.
-
Recent Posts
This lets the users know about the most recent posts that are updated on your site. It’s just like the latest news to keep track of what’s currently going on in your site.
-
Text
This widget is placed on the sidebar so that you can update it with some permanent text. If you don’t need this you can remove it.
-
Recent Comments
This shows the name of the person who commented and the name of post on which the user has commented. For example Mr. Abc commented on “Our new service – Interior designing.”
-
Archives
It will show a monthly archive of your post.
-
Meta
This will show you some meta-links like link for wordpress.org, login, RSS etc. You can remove this thing if you do not need it.
Number of blogs on a blog listing page:
The number of blogs that are shown on the blog listing page on one page can be set up at Dashboard >> Settings >> Reading settings >> Blog page show at most and set the number of posts you want to show on one page. The older blogs will be carried forward to other pages linked by pagination.
Blog detail page settings
Sidebar Go to Appearance >> Widgets >> Widget area “Blog detail page sidebar”. The widgets here compose the sidebar of the detail page.
The widgets in the sidebar are same as those in the blog listing page sidebar. “About us” content is managed by the text widget that can be settled by changing it.
If you don’t want to allow user comments on new posts.
To disable the users comments on new articles, before creating a new post, navigate to the Dashboard >> Settings >> Discussion Settings >> Default article settings – uncheck the check box against “Allow people to post comments on new articles”.
This will disable the user comments and the comment box won’t be shown on the blog detail page.
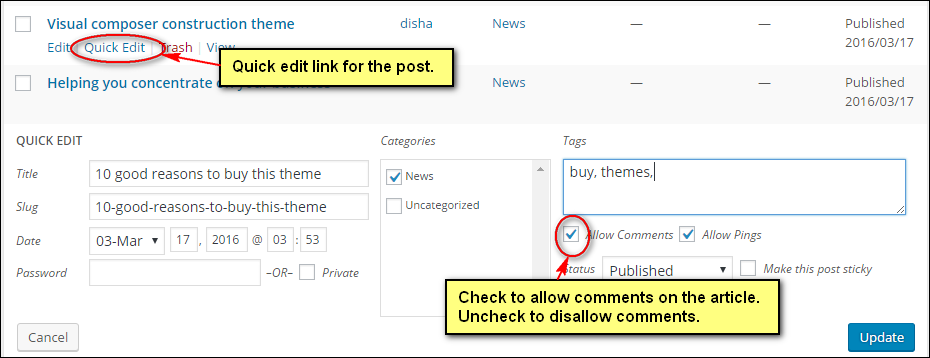
To enable/disable comments for individual articles
To enable/disable coments on a particular article you can go to posts >> all post >> Find the article you want to change settings for and click on the “Quick edit” link you see below it on hovering your mouse on its name.
In quick edit menu you can use the checkbox to determine the individual article.