Theme Installation
Installing LiveMagazine Theme using the WordPress dashboard
- Login to your member area, (use forgot password button if you don’t remember your password), Click on “My Downloads” and the LiveMagazine theme section will expand. Here you can download the LiveMagazine.zip file.
- From your wp-admin, navigate to Appearance ⇨ Themes ⇨ Add New ⇨ Upload ⇨ and load the .zip file you just downloaded.
- Once the upload is finished click on Install and “Activate” on next step. With that done click on the blue Install sample data button.
Installing with FTP
Installing via FTP is necessary on servers that aren’t optimized for WordPress and can often interrupt the installation process because of the long execution time. Good news is that this type of install isn’t particularly hard, just longer compared to installing from the wp-admin back-end.
For general instructions about using FTP please open this tutorial.
- Connect to the member area and download the LiveMagazine.zip file.
- Extract the file using software like 7-Zip. Use the Extract Here option.
- Assuming you read the above linked FTP tutorial, navigate to /wp-content/themes/ on your server and upload the extracted theme folder
- Login to your WordPress dashboard and go to Appearance ⇨ Themes. Activate the LiveMagazine theme.
- While in the Appearance ⇨ Themes section, click on the blue “Install sample data” button to populate your site with dummy data and make it look like our demo.
Manage LiveMagazine Theme
The homepage
To make your homepage look just like the one inside the image below make sure you load the theme’s sample data. You can do that from Appearance ⇨ Themes ⇨ Install sample data (button). If that doesn’t help you might have to tweak a WordPress setting. Click here for more details.
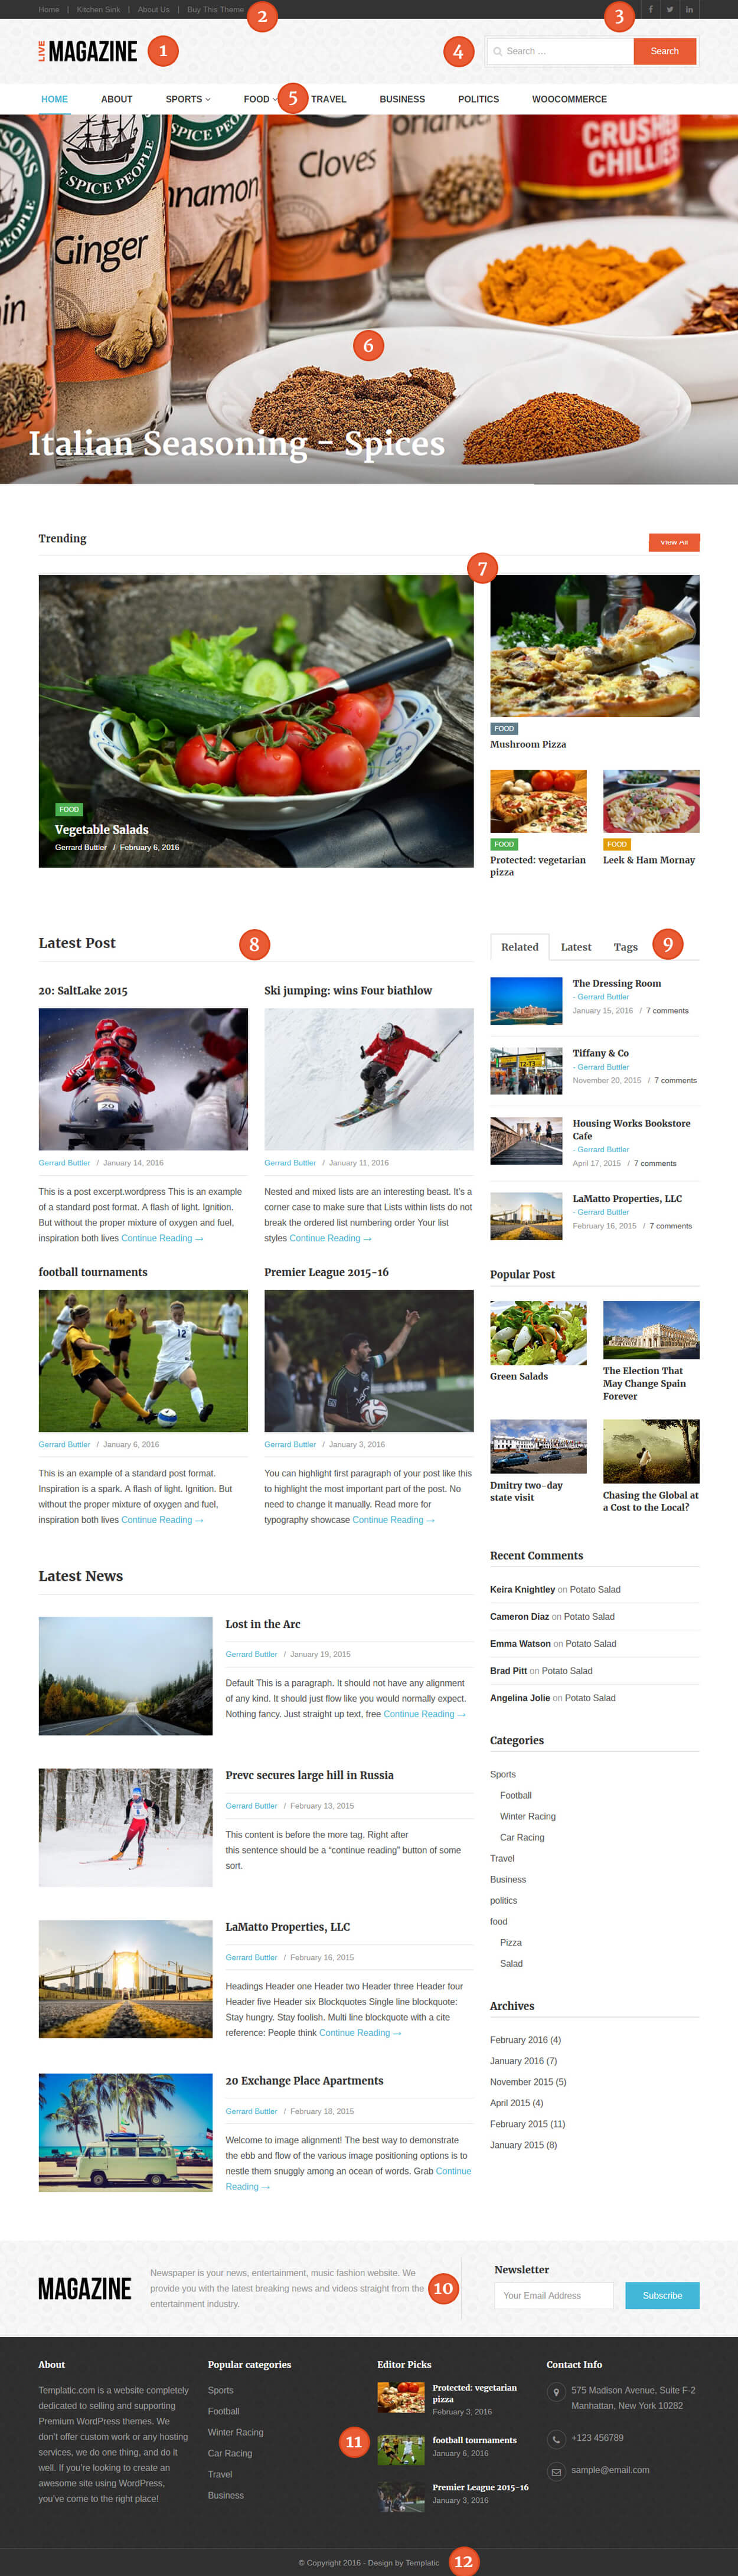
1 – The logo section
To change your logo go to Appearance ⇨ Customize ⇨ Site Logo ⇨ Upload image for logo. Default logo image size is 196×48 pixels. Try to make your logo roughly the same size.
To display your websites tagline below the logo expand the “Site Title & Tagline” section and check the “Display Tagline” option.
![]()
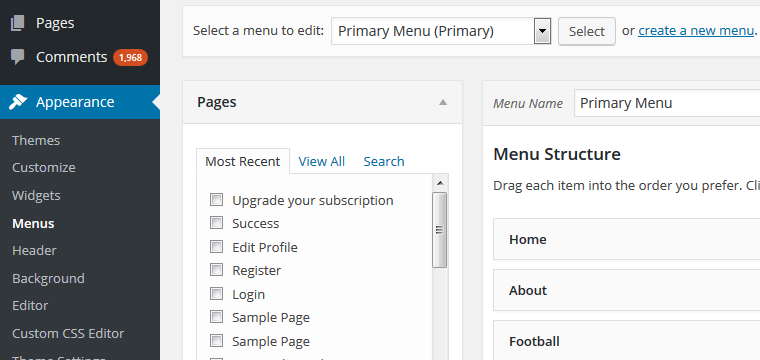
2 – Secondary Menu
This is an optional menu offer for users if wish to utilize magazine organizers pages like Home, About Us, Contact us. If don’t wish to have it could be removed from Appearance ⇨ Menus ⇨ Secondary Menu option from the drop down to control it.
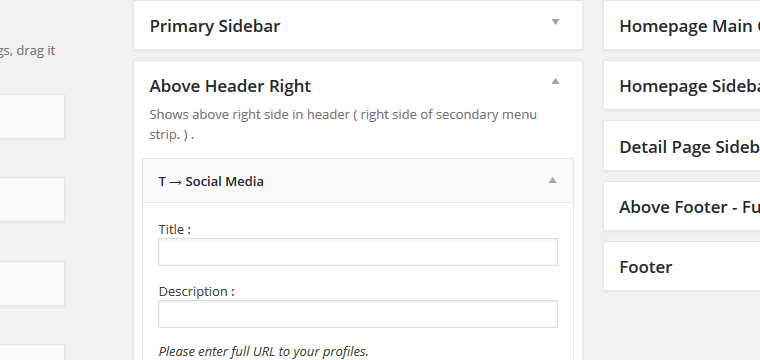
3 – Social Media
To put social media links or remove the ribbon itself you can control it from Appearance
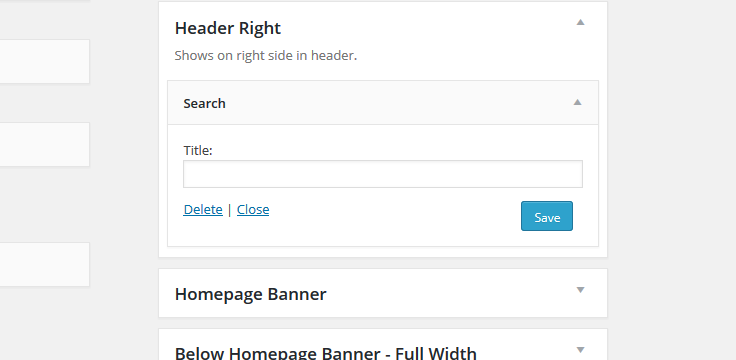
4 – Header Right
Edit this text by going to Appearance ⇨ Widgets. Expand the Header Right area and edit the Title inside that area.
5 – Primary menu area
You can assign a menu here by going to Appearance ⇨ Menus and creating a menu. When you’re done select “Primary Menu” under Menu Settings ⇨ Theme Locations. For details on how to create custom menus watch the following video…
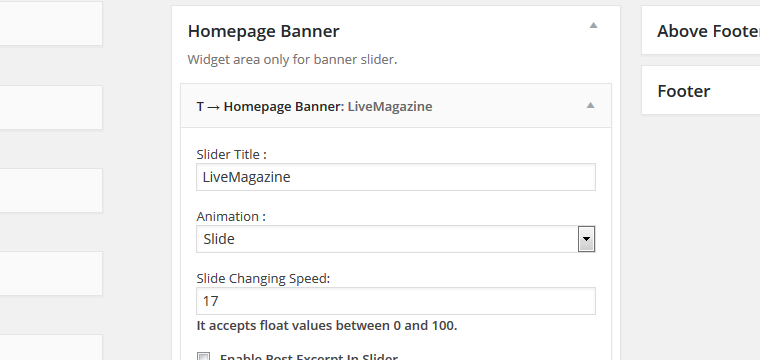
6 – Homepage Banner area
Edit this content by going to Appearance ⇨ Widgets and expanding the Home Page banner area. Edit the Slider Title within this area. You can select the categories from which you want to pull the banners.
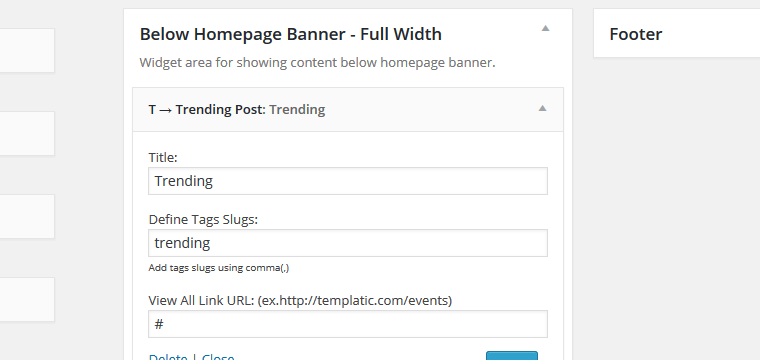
7 – Below Homepage Banner Full Width
Edit this section by going to Appearance ⇨ Widgets. Expand the Below Home Page Banner – Full width. Select the posts that you want to appear here by entering Taga Slugs. Add more than one tag slugs by including comma.
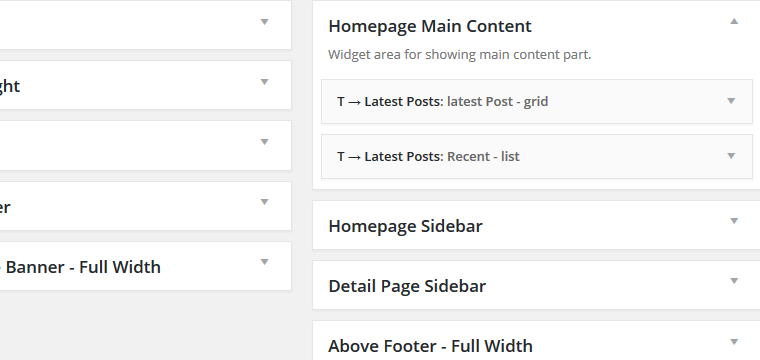
8 – Homepage Content area
Edit this section by going to Appearance ⇨ Widgets. Expand the Home Page – Content area and edit the three widgets located in there.
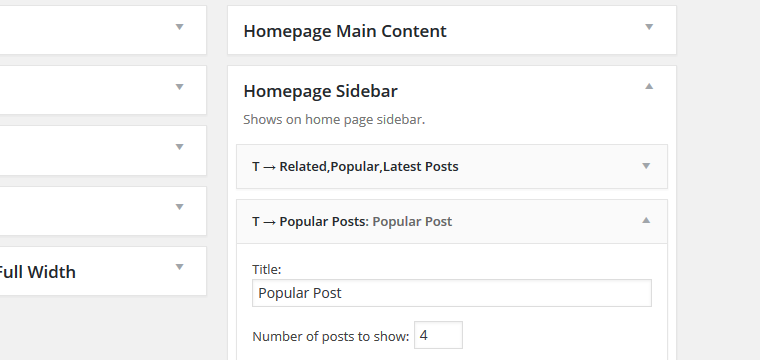
9 – Homepage Sidebar area
Edit this section by going to Appearance ⇨ Widgets. Expand the Home Page – Sidebar area and edit the widgets located in that area.
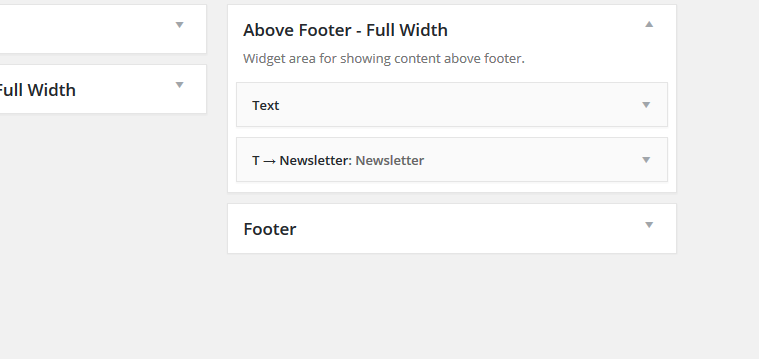
10 – Above Footer area
Edit this section by going to Appearance ⇨ Widgets. Expand the Home Page – Above footer Fullwidth area and edit the Text widget located in that area.
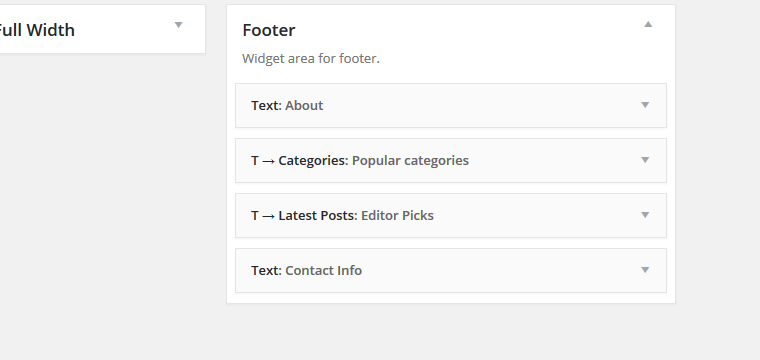
11 – Footer Area
To add, edit, remove components of this area, please go to Appearance ⇨ Widgets ⇨ Footer
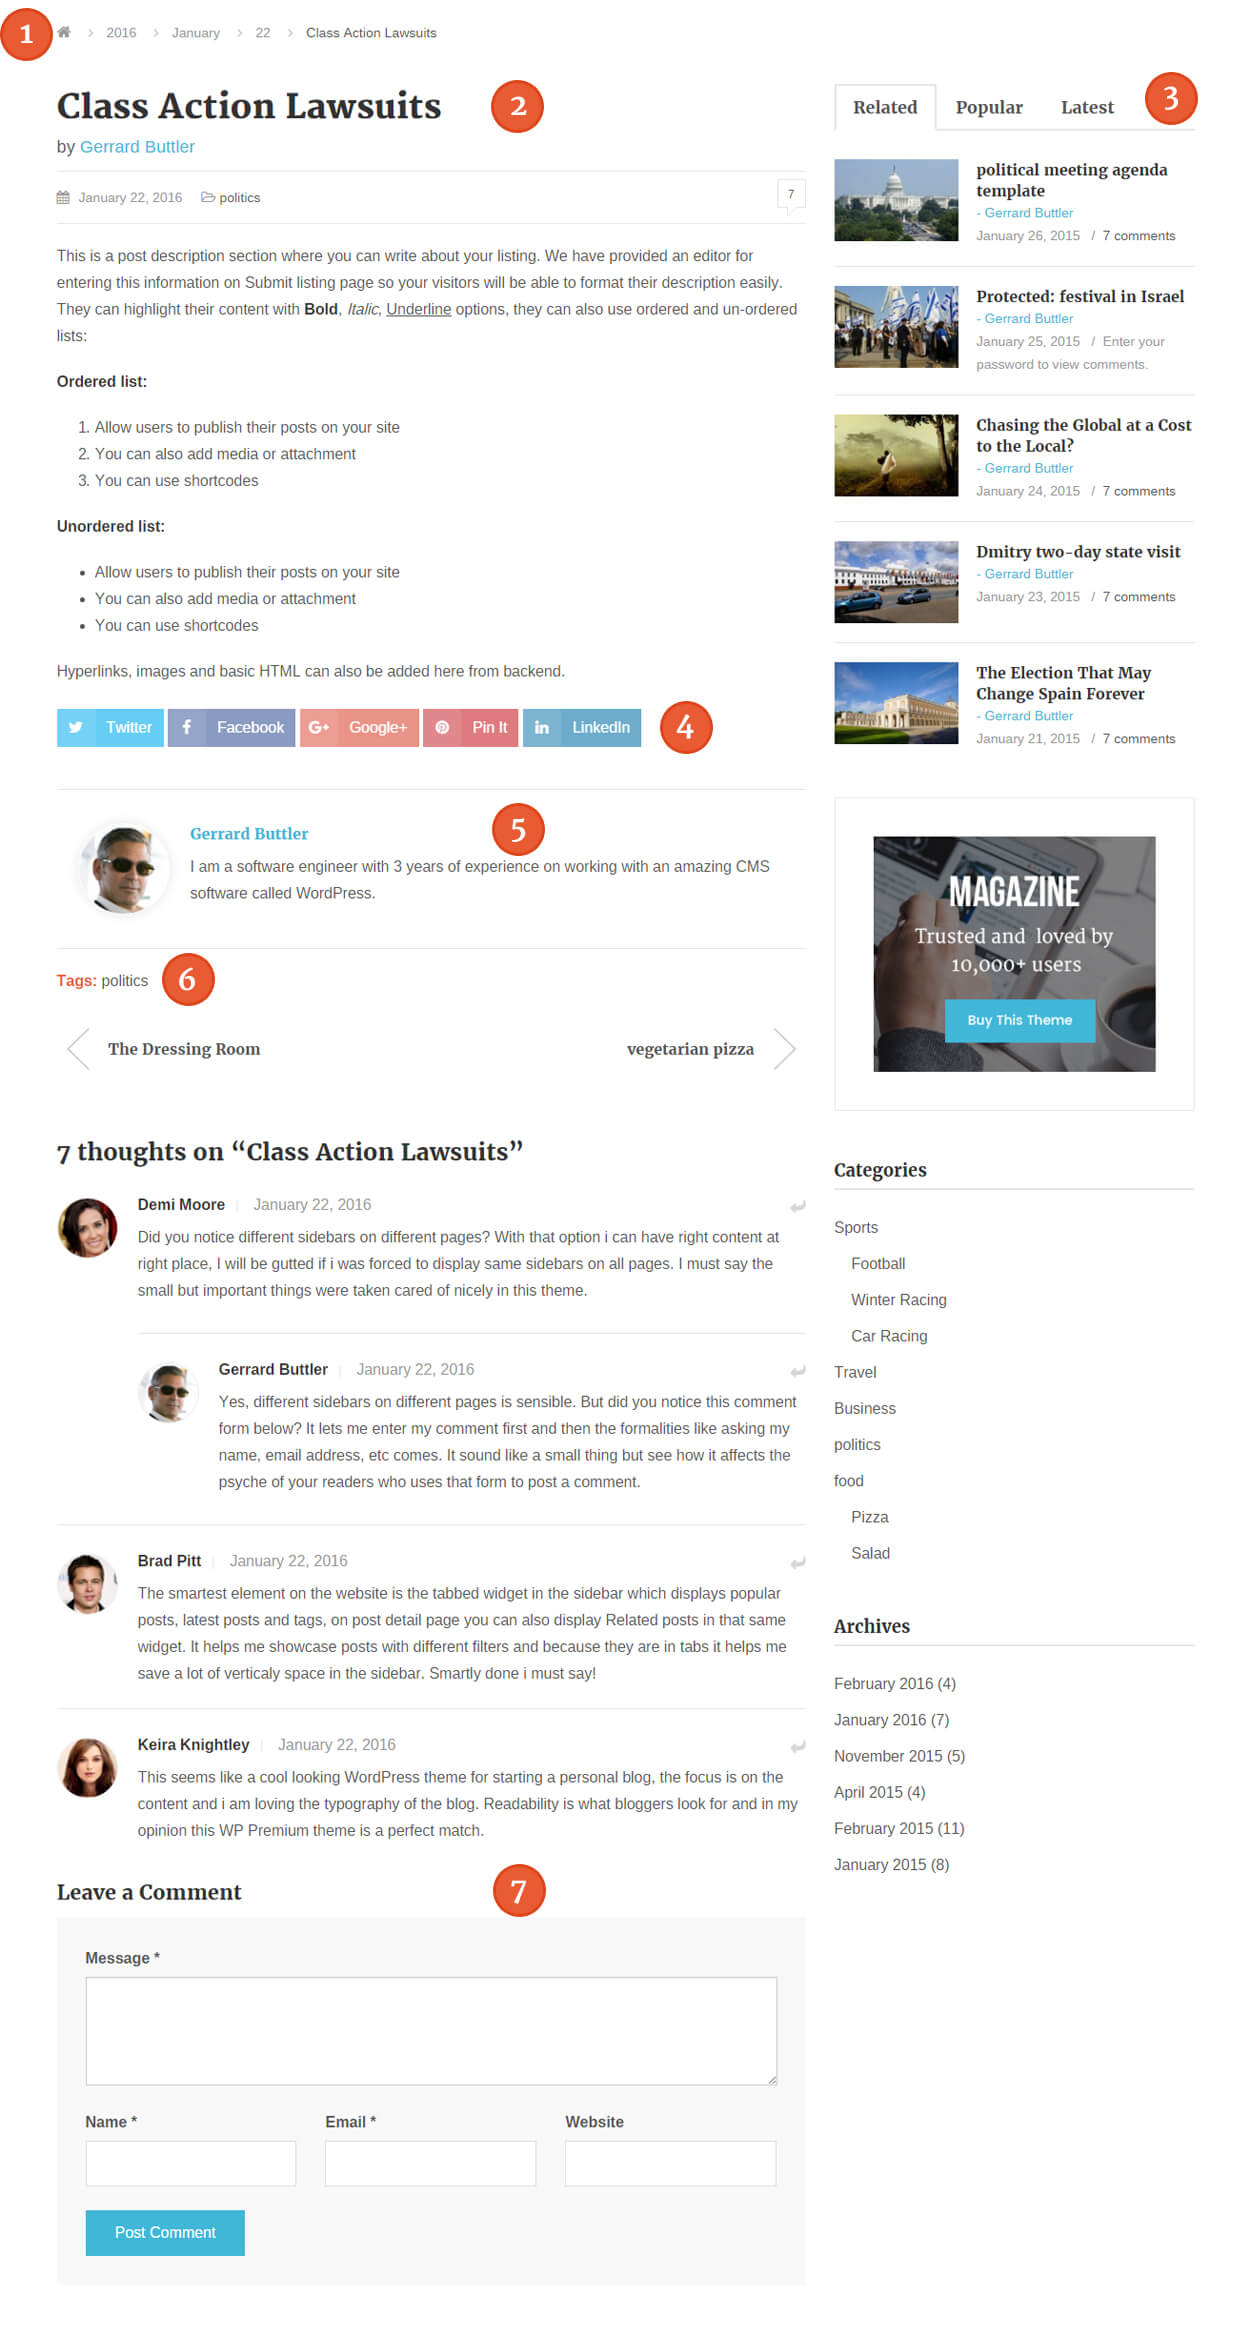
Individual posts
This is the page that opens when you visit a post created from wp-admin ⇨ Posts.
Setting up a Blog page
The Blog is essentially just a category holding individual blog posts. Follow these steps to create a Blog…
- Create a new category in Posts ⇨ Categories and name it Blog.
- Add posts to that category by going to Posts ⇨ Add New.
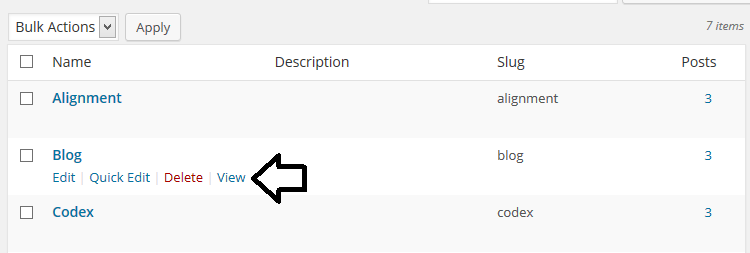
- By adding the posts our Blog page was automatically created. You can see it by going to Posts ⇨ Categories and clicking on the “View” link next to your Blog category.
I also recommend adding this Blog category to your navigation menu. Do that by going to Appearance ⇨ Menus and creating a new menu. Expand the categories dropdown, choose blog and hit “Add to menu”. For details on creating custom menus watch our video tutorial.
Customization options
Changing colors
Changing colors in SmallBiz doesn’t require your to touch any code, you can do it from the Appearance ⇨ Customize ⇨ Colors section.The available options are…
- Primary color – Affects the banner and footer background, heading link color, etc.
- Secondary color – Changes the color of the top header strip, menu highlight color, banner buttons, icon color, etc.
- Content color – Changes the color of your text on most pages.
- Body Background – Changing this will change the background of the whole theme. This includes the stuff inside and outside of the main content area (the container).
- Title Color – Changes the title color for all pages, posts and widgets.
Third-party plugin compatibility
SEO plugins
To optimize your content for search engines I highly recommend installing one of these two SEO plugins.
These plugins will work with SmallBiz in pretty much the same way as with other WordPress themes (there are no theme-specific features). For instructions on setting up each plugin just click on “detailed instructions” in the list above.
Contact form plugins
For setting up contact page (so visitors can get in touch) we’ve provided support for two plugins
- Contact Form 7 (free)
- Gravity Forms (premium)
Once you create the contact form (using one of the plugins) simply insert the provided shortcode inside any page or post inside the theme.
Frequently Asked Questions
How to disable the pop-in effect/animations?
To prevent the scrolling pop-in effect and make all elements show all the times go to Appearance ⇨ Custom CSS Editor and insert the following code
* .cbp-so-init .cbp-so-side {
    opacity: 1 !important;
}
* {
    transform: none !important;
    transition: none 0s ease 0s !important;
}
My homepage isn’t showing my widgets, how to fix that?
The homepage itself is a regular WordPress page created with the Home Page page template. This page (with the “Home Page” page template) is normally created during theme activation and automatically assigned as the sites front page. Please follow these steps if this page wasn’t created automatically:
- Go to Pages ⇨ Add New. Enter the page title as “Home” (for consistency sake, this isn’t really important) and on the right side, under Page Attributes ⇨ Template choose the “Home Page” template. Publish the page.
- Navigate to Settings ⇨ Reading and under “Front page displays” choose “A static page”. In the “Front page” dropdown choose “Home”.
- Go to Appearance ⇨ Widgets to populate the homepage with widgets.
Which sidebar area is displayed on regular pages?
It’s the “Primary Sidebar” widget area. Widgets added to that area should start showing up on regular WordPress pages (those created from wp-admin -> Pages).
How to translate LiveMagazine in a different language?
For details instructions on how to translate LiveMagazine (or any other Templatic theme) open this translation tutorial.