This theme guide is for Hotel Booking version 2.0 and higher. If you happen to have version 1.1.4 or lower please click here.
This theme is powered by the Tevolution and Booking add-on plugin. To learn more about the plugins please read the detailed Tevolution guide and Booking add-on guide
Upgrading from Hotel Booking v1.1.4 to HB 2
- Connect to the member area and
- download the Hotel Booking and Supreme themes to your desktop.
- Both the themes will be there in “Supreme Themes” section.
- Then, under the plugins download tevolution-booking Plugin and tevolution Plugin
- Use software like 7-Zip to unzip the downloaded files.
- After unzipping, you’ll have four folders: HotelBooking, supreme, Tevolution and Booking-system
- Now connect to your server and navigate to /wp-content/themes directory. Rename the HotelBooking folder inside that directory to HotelBooking_old
- While still connected to the server please upload:
HotelBooking and supreme folders to /wp-content/themes directory
Tevolution and Booking-system folders to /wp-content/plugins directory - While still connected, open functions.php file from HotelBooking theme folder
- At around line number 30 you will find this code:
function supreme_child_theme_setup() { - Directly below that line of code input this:
update_option('template','supreme'); - Visit your site and hit the refresh button. If you see an error hit refresh again – you should see your site now
- Now just undo the above change and make the file as it was earlier. Create a new ticket through Contact Us if you run into any problems
Please Note: Upgrading the theme includes Theme folder + Plugins folder. If you upgrade the theme folder but not the related and relevant Templatic plugins then there are high chances that it may not work accurately.
Installing Hotel Booking
- Connect to member area and expand the Hotel Booking section under My Downloads. Download all available files
- Connect to your WordPress dashboard (wp-admin) and then navigate to Plugins -> Add New. Now click on Upload and then on Browse. Load the tevolution.zip file you downloaded earlier and then click on Install Now
- Once the install process is done click on Activate Plugin
- Navigate again to Plugins -> Add New -> Upload and repeat the steps for tevolution-booking.zip. Activate the plugin once the install is completed
- With the plugins installed navigate to Appearance -> Themes. Click on the Install Themes tab and then on Upload. Use the Browse option to locate the supreme zip file on your hard drive – then click on Install Now. After the installation process is finished do not activate supreme.
- Navigate again to Appearance -> Themes -> Install Themes -> Upload but this time load/install the hotel booking zip file. Once it’s installed activate the theme.
In case WordPress rejects the .zip files use FTP to install the theme
For detailed instructions on using FTP please click here
- Upload tevolution.zip and tevolution-booking.zip to /wp-content/plugins directory
- Upload supreme.zip and hotelbooking.zip to /wp-content/themes directory
- Once uploading is done connect to the WordPress dashboard and activate them in this order:
1. Tevolution, 2. Booking System, 3. Hotel Booking - If you run into more problems during installation please visit our Installation Guide
Need help with installing the theme? Hire us!
Facing Problems in installing the theme? Don’t worry, we’ll do that for you, just click here!
Inserting Sample Data
You can insert 2 different Sample Data 1) Sample Rooms and Sample Houses and 2) Widgets setup, Posts, Theme customization options etc.
- Firstly, activate Tevolution Plugin from WP-admin ->Plugins
- Then activate Templatic Booking System Plugin from the same area WP-admin ->Plugins
- As soon as you activate the Booking System plugin, it will flash you a message to insert the Sample Rooms and Sample Houses, click it, if you want to have it.
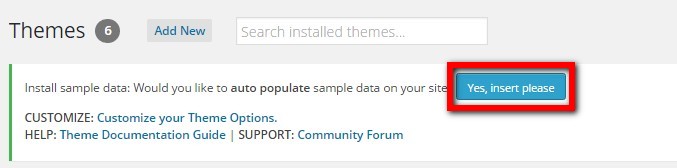
- Now go to WP-admin -> Appearance -> Themes. If you have activated the theme correctly, you’ll be able to see a button named “Yes, Insert Please”. Click on this button to insert the sample Widgets setup, Posts, theme Customization options etc
By following the above steps to insert sample data, you’ll have a site same like our demo site.
When yo want to delete it, you can click on “Yes Delete Please!”.
Deleting dummy data, will delete all the widgets settings too with the post data that it has inserted while inserting sample data.
Setting Up Home Page
How to set up slider on home page
Go to Wp-admin -> Appearance -> Widgets. Place “T > Home Page Main Slider” widget in the area named “Home Page Content”.
Now, there are multiple options given in the widget. So that you can change the look and feel of the slider from backend only.
Below are the ways you can set up the slider and it’s options:
a) Custom Images:
If you want to display some of yours images which are not there in any post or room then Mark the option named as “Use custom images?”.
On marking this option, there will be other related option visible:
- Banner Slider Title 1: this will be the title of the image/slide.
- Banner Slider Text2 1: This is a subtitle of the main title of the image. Or we can say a short description.
- Banner Slider Link 1: Here you can provide the link where user will get redirected on clicking the Title.
- Banner Slider Image 1 full URL: This will be the URL of the image that you want to display in the slider. If you are having the image on your local PC, then you can get its URL by uploading it in to your media library.
- Options to have 4 banners are given by default. If you want to add/delete some more than you can use buttons “Add Textbox” or “Remove Textbox”.
b) Display images from the Rooms/Posts:
If you want to display images those are already uploaded in to your Rooms or Posts, then first make sure to unmark the checkbox “Use custom images?”.
Now, select a category in the field “Select Taxonomy:” and specify how many number of posts you want to display inside the slider in the field named “Number of posts:”. That’s it!
c) Carousel slider:
This will allow you to have multiple images in one slide. Below options are provided for this:
- Item Width: This will describe the widget of one image in the slider. However, it does not reflect in the front end in HotelBooking. It is for internal coding purpose.
- Min Item: Minimum number of items in a slide.
- Max Item: Maximum number of items a slide can have.
- Items Move: Number of items to be move on animation.
[Note ] Make sure that you have selected “slide” in “Animation :” option.
d) Other common options:
- Animation: This field specify in which way you want to animate the slides. In short which effect you want to give in the slider.
- Slide show: If selected “Yes” then only the slide show occur. Otherwise users will need to move the images manually.
- Sliding Direction: This field specifies the direction of the sliding effect.
- Reverse Animation Direction: It reverse the direction selected in “Sliding Direction” field.
- Slide Show Speed: Specify the time in milliseconds to move the slide from one to another.
- Animation Speed: This is the speed of the effect or animation type. It will be in milliseconds too.
Other widgets rather than slider
Menu/Navigation
In HotelBooking, you can have a menu before the slider. For that, you will need to go to WP-admin -> Appearance -> Menus. Create and save a menu. Now, select the menu in the Theme Locations -> Secondary area.
Do you want to have jquery menu here? It will enhance the look of your menu if you have so many menu items.
For that, go to Wp-admin -> Appearance -> Widgets and place “jQuery Mega Menu” widget in “JQuery Mega Menu” area. That’s it! 🙂
Widget Areas
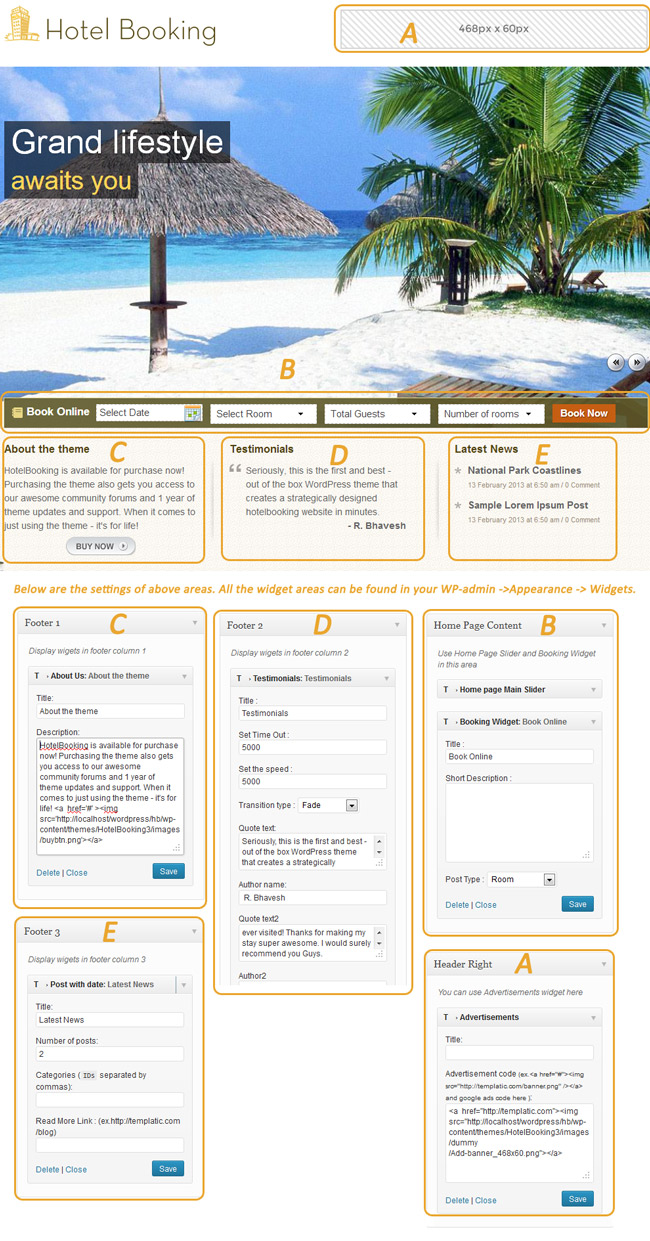
Below are the different widget areas provided in the theme:
- Home Page Content: This area affects on the middle area of your home page where you can set up slider and booking widget. More info you can have in Home Page section.
- Header Right: This area affects on the right side of the logo. You can place widget like T > advertisements.
- Primary: This is a sidebar area which affects on poge/post and post category sidebar areas.
- After Singular: This is a sidebar area which affects on after the content/description in single blog page or single page.
- Besides Menu: This area affects beside the menu.
- JQuery Mega Menu: You can place JQuery Mega Menu widget here which will display a JQuery menu in your menu bar.
- Contact Page Widget Area: As it name specifies, it displays widgets on the contact page. You can place “T → Google Map Widget” widget here.
- Footer1,2 & 3: These are the Footer areas which displays widgets in footer in every page. Read the Home page section for more info.
- House Listing – Sidebar: This area affects on the sidebar in the house category pages.
- House Detail – Sidebar: This area affects on the sidebar in the house detail pages.
- Room Detail – Sidebar: This area affects on the sidebar in the room detail pages.
- Room Listing – Sidebar: This area affects on the sidebar in the room category pages.
- Booking Listing – Sidebar: This area affects on the sidebar in the service listing pages.
- Booking Detail – Sidebar: This area affects on the sidebar in the booking detail pages.
- House Tag Listing – Sidebar: This area affects on the sidebar in the house’s tag listing pages.
- Room Tag Listing – Sidebar: This area affects on the sidebar in the Room’s tag listing y pages.
You may use WooCommerce widgets in the footer area but as they are not meant for this area they won’t look ideal with the theme design. Templatic’s Widgets and WordPress default widgets should be used for this area.
Pricing
a) How to include Tax
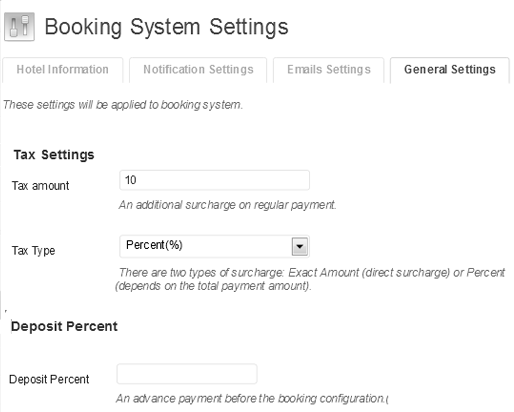
You can also charge some tax to the clients on the booking of the rooms. For this you will need to go to WP-admin -> Booking System -> Tax Settings.
Below fields are given which you’ll need to configure:
- Tax amount: This is the amount of that you gonna charge.
- Tax Type: You can charge either some percentage of the total amount or fixed tax on any amount. Depending on your need you’ll need to select one of the options in this field.
- Also, make sure that you have selected “Yes” in the field named “Include Tax?” from Add/Edit Room/House -> Custom Settings section.
b) Seasonal Prices
Seasonal Prices are the thing that enables you to give some discount to your guests on some special occasions.
Seasonal prices can be managed from the plugin Templatic Booking System. Go to WP-admin -> Booking System -> Manage Prices Section.
- Click on Add a New Seasonal Price. In the field “Seasonal Date” select the dates in which you want to activate the seasonal price.
- In the field ‘Select House/Room” you will need to select the Room/House for which the discount will be available.
- Status: The status must be enabled in terms to have the seasonal price affective on front end.
- Below these fields you will be able to see a table where you can set up the special prices for these duration.
Important Shortcodes in The Theme
First I would say what does Shortcode mean here. Shortcodes are some words/keywords specified by developers to display a particular type of content to your page/post. The theme is having these kind of shortcodes which perform some particular task assigned to it.
For example: To have availability calender to show your clients which rooms are available, you can use [booking_calendar] shortcode.
Tevolution Short Codes
Some of the Short Codes are the part of our Tevolution plugin that supports the Hotel Booking theme. With the help of these Short Codes, you can create & display many important pages on your front end like Login Page, Registration Page, Submit form (Submit Post Page) etc.
So, Click here to get the Short Codes.
Booking System Short Codes
Booking Calendar[booking_calendar]– Use this short code to show the booking calendar on your page.[booking_cancel]– This short code will let you cancel the booking & will show the details accordinglyBooking Request Form[booking_submit_form]– It displays a ready made booking form on your page from where your user can book his booking from the website.
Style, Color & Layout Settings
Go to WP-admin -> Appearance -> Themes. Click on customize.
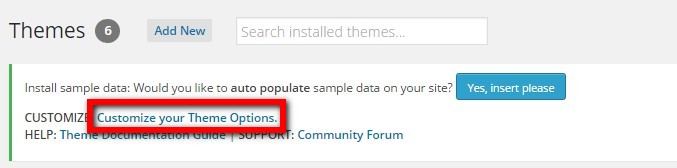
Now on front page you’ll be able to see the customizer on the left hand side. Here you can change some CSS for the site without editing the code.
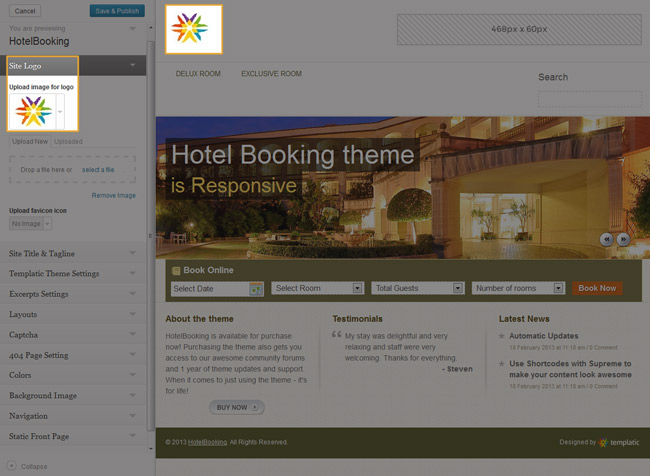
Change Logo/Title:
- Expand “Site Logo” by clicking on it. Here upload your logo image and click on “Save & Publish”.
- Instead of Logo image, if you want title there then it can be settled from Site Title & Tagline section. You can give description about your site in a line which will display under the logo in front end. Check mark site description field if you want to hide it.
Templatic theme Setting:
- Use Custom CSS: Enable this option if you are using custom.css file. Here is more details for custom.css file.
- Hide autoinstall: Enable this if you want to hide insert sample data option from WP-admin -> Appearance -> Themes.
- Enable comments on pages and posts: Enable this if you want to display comments on the pages and posts single pages.
- Show author biography on posts: Enable this if you want to display author detail and avatar on single post detail pages.
- Show author biography on pages: Enable this if you want to display author detail and avatar on single pages.
- Show Breadcrumb: Enable if you want to show breadcrumbs.
Excerpts Settings:
- Display excerpts on Search Result Pages: Enable this if you want to display excerpt on the search result pages.
- Display excerpts on archive pages: Enable this if you want to display excerpt on the category pages.
- Excerpt length: Specifies the length of the excerpt to be shown.
- Text for Continue reading: Text for the link to the detail page of the post.
Layouts:
Your site page’s layout can be changed from Layouts Settings:
- Default Layout: This is default layout as like our demo site.
- One Column: This is a full width layout without any sidebar.
- Two Columns, Left: This is a layout with sidebar on left hand side.
- Two Columns, Right: This is a layout with sidebar on right hand side.
404 Page Settings:
Post type slug(s): Here you can provide the slugs of the post types which you want to display on the 404 page. Categories of that post type will be displayed there. For example, to show posts, you can give “post” there.
Footer Copy Right Text:
This is easier now. Instead of editing footer.php, this can be done from Footer Section given in customizer. You can add your own code as well.
Shortcodes
The easiest way to add buttons or columns into a post is to use shortcodes. Click here to download the Shortcodes plugin and then follow the same instructions you used to install the theme, but instead of placing the folder inside /wp-content/themes, place it inside /wp-content/plugins. For detailed FTP instructions open this article:
https://templatic.com/docs/how-to-upload-and-edit-files-on-your-server-ftp-tutorial/
To see what are the actual shortcodes available to you click on the link below:
https://templatic.com/demos/catalog/shortcodes-guide/
Contact Us Page
Let’s see how we can set up the contact us page using HotelBooking:
- Go to WP-admin -> Pages -> Add New.
- In Page Attributes, select “Template – Contact Us”.
- Click on “Publish” button.
- To have Google map on this page you can place “T → Google Map Widget” widget in “Contact Page Widget Area” area under WP-admin -> Appearance -> Widgets.
- We have provided compatibility with a Captcha plugins: WP-reCaptcha. You will need to install and activate it first.
- Go to WP-admin -> Appeanrace -> Themes -> Customizer -> captcha option. Mark “Contact Us Captacha Setting” and click on “Save & Publish” button to make available the captcha in the Contact us page.
- Make sure to uncheck the options – Enable for comments form and Enable for registration form in the plugin’s settings.
- Also, make sure that you have provided correct API keys in the captcha settings.
Other Plugin’s Support:
We have also provided compatibility with some other plugins:
WooCommerce:
- You can click here to download wooCommerce.
- See the “Getting Started” Tutorial for installation and setting up WooCommerce plugin.
- WooCommerce’s Documentation/guide is available here.
bbPress:
Let’s see how this plugin works.
- First, download, install and activate bbPress just like you activate any other plugin. You can get it from here.
- When we activate the plugin, three taxonomies are added – Forums, Topics, and Replies. Replied depends on its Topic. Topic depends on its forum.
- For Example, In Templatic Forums, there are different forums: Catalog theme forums, GeoPlaces Theme Forums, etc… This Catalog theme forum is a “Forum” in bbPress.
- Now, under Catalog theme forums there will be many forums. These are treated as “Topics”.
- And a Topic can have many replies. Each of them is known as “Replies” in bbPress.
- Forums can only be added from backend. Topics & Replies can be added from Front-end & back-end.
- If you are adding a Topic from back-end, then you must select Forum for that topic from WP-admin -> Forums -> New Forum -> Forum Attributes -> Type field.
- If you are adding a Reply from back-end, then you must select its respective forum and topic from WP-admin -> Replies -> New Reply -> Reply Attributes section.
- bbPress’s other settings are placed in WP-admin -> Settings -> Forums.
WPML Plugin
This plugin is useful when you are willing to translate your theme in multiple language. Get the Plugin itself and detailed explanation on it
FAQs
1) How do this rates affect(calculation) the Houses or Rooms?
Mainly some prices that you set at the back end are,
- 1st is the actual amount that you charge on your Room/House (from wp-admin > House/Room > Add a Room/House > Price Settings)
- 2nd is the Tax Amount (from wp-admin > Booking System > General Settings > Tax Settings)
- Then, the particular Service Amounts (from wp-admin > Booking > Service > Category Price)
So, as per the price on number of persons that you set at the back end at the time of adding your particular House/Room will be counted + all the other charges like Tax & Services will be added to the total bill value as per the selection done by the client while booking from the Booking Form in the front end.
And not to forget, if you have set any “Deposit Amount” (from wp-admin >Booking System > General Settings > Deposit Percent) then it will ask the client to first pay that much of amount before booking confirmation, only then it will let him proceed further.
Example:
- Suppose, price for the deluxe room is $100 per day and $500 per week.
- John books this same room for 10 days then..
- He will be charged $500(weekly rate) + $300 ($100 daily rate) = $800 for 10 days.
The base of calculation here is amount entered PER PERSON in respective House/Room. So, formula is No. of Person X No. of Rooms/Houses.
2) How can I change the images of Houses or Rooms individually?
Uploading images to Rooms & Houses are same as for the regular WordPress Posts.
- Just go to wp-admin > House/Room > Add House/Room
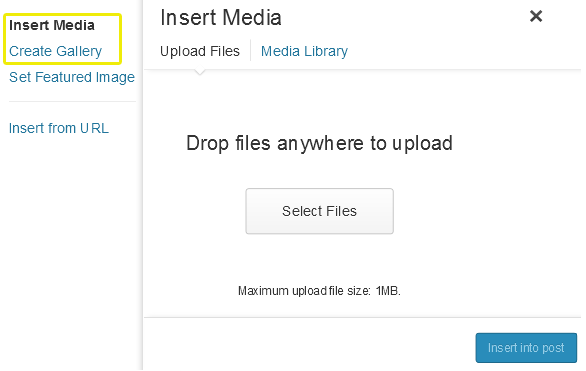
- Now, to add image click “Add Media” button & upload your desired image that’s it.
- But if you want to set any image as a feature image for your custom post then just click on “Set feature image” given at bottom right of your screen.
- Check mark the image from the available one or can also upload the new one. & click the set feature image button. (This image will be seen as a thumbnail on your custom post listing page)
- Similarly, you can also create the image gallery for your house/room. Whole process remains the same, just you need to click “Create Gallery” when you open the Add Media.
3) What do this “Deposit” feature does?
This feature allows you to set the amount in percentage of total bill value of the booking that is needed to be paid by the client before the booking gets confirm( Like an advance payment), otherwise it will not allow to proceed further. But if you do not want to charge such advance payment, leave this field blank.
You can use this feature from wp-admin > Booking System > General Settings
4) Can I add minimum stay for my House or Rooms?
You can add the minimum stay for your Houses but not for Rooms. Go to wp-admin > House > Add a House > Minimum Stay. (This will not let the clients book the House less than the specified minimum days.)
5) Can I add closing days for my Hotel Houses or Rooms?
Yes, you can. By adding closing days to your Room or House, it will not let the user book the same during these specified dates.
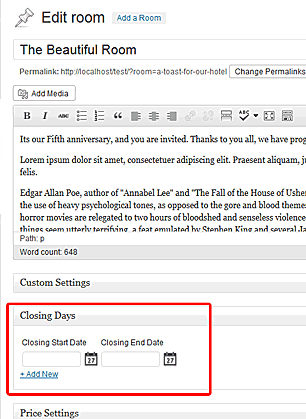
- You can do this from wp-admin > House/Room > Closing Days (You can have multiple closing days! just click “+Add New” link given there)
6) How can I delete the “House” or “Room” options completely?
If you just offer Rooms and not houses then it is likely that you want to delete the whole option of House from your back end. You can do this with the following steps,
- Remove all the Houses, House Categories and House Tags
- Delete them from the Trash as well. (This will delete all the data from your database as well)
- Now, go to wp-admin > Tevolution > Custom Post Types
- Click “delete permanently” given below the “House” custom post type
Similarly, you can also remove other custom post types as per your requirement.
Please note – You should first delete the houses, categories and tags to delete this custom post type from your database as well. Otherwise directly deleting it from the Tevolution > Custom Post Type will delete it from your back end but not from your database.
7) How to change banner images on different pages?
There are different images getting displayed horizontally on the site pages. Let’s see how you can change this images:
- To change the image in house/room/post/page detail pages, go to add/edit that room/house/post/page. In the Custom Settings -> Banner Image field, you can change it. Give the URL of the image that you want to display.
- To change the banner image in category pages, Go to add/edit the category. In the field “Enter Image Url” you can provide the new image URL.
8) Can I change date format calender/booking widget?
No. You cannot change the date format in the calendar or booking widget. 🙁
For changing date formats in other places like the success page, you can simply, go to General Settings of your WordPress and change the value in the field ‘Date Format”.
9) How to make the image clickable in the slider?
When you are using slider with custom images, and if you want to make click-able which will redirect the users to the link provided in the widget then you can do it by this way.
[Download]Since Hotel Booking is compatible with Tevolution, take a look on Tevolution Guide as well. Features such as price packages, Custom Post types, advanced custom fields, etc… are explained there.[/Download]
10) How to change the first day of my calendar?
By default the first day of the calendar is set to “Sunday”. But you may want to change it as per your requirement. For that you just need to follow certain simple steps as mentioned here:
- Go to your WordPress folder (which you are using) in your drive
- then go to wp-content > plugins > Booking-system > js
- open the file named “datepicker.php”.
- At around line number 173 you will find the code : starts: 0,
- Replace it with : starts: 1,
similarly, you can set any day your first day by applying any number between 0 to 6 range.
11) Can I show the pop up for my image gallery in normal WordPress pages?
Yes you can, but the condition is, if you have activated Templatic-Shortcodes plugin.
———————————————————————————————————————————————————-
If you have followed the whole theme guide and still you are not able set up some things then try to insert the sample data. If still having any queries then you can create a ticket in helpdesk.
Hope you enjoyed the guide and theme and best of luck for your site!
Need help with installing the theme? Hire us!
Facing Problems in installing the theme? Don’t worry, we’ll do that for you, just click here!