Creating Facebook App
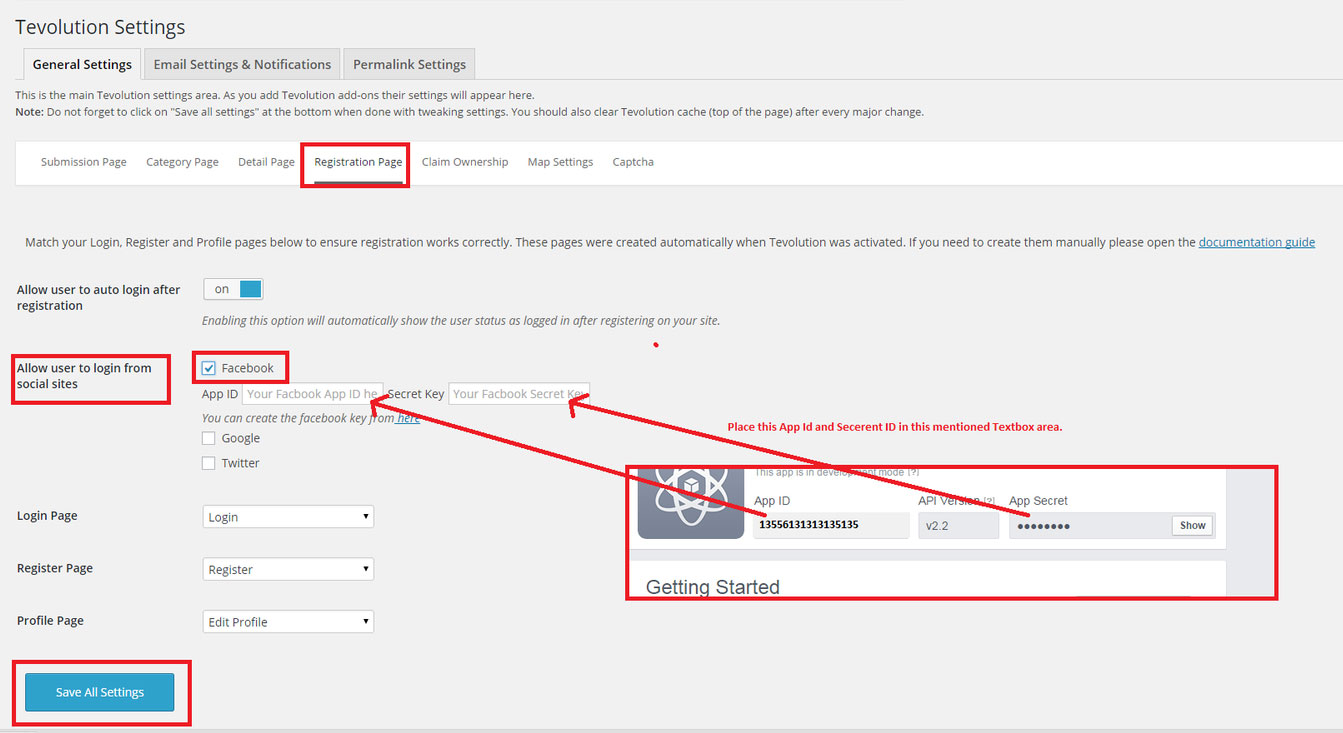
- Access to your site backend Tevolution >> Settings >> Registration Page (tab) and enable the option of Facebook.
- You will see to insert App Id and Secret Key. Click on the link below the field and you will be redirected to Facebook Login page.
- Login to your Facebook account or create a new one.
- Open the Facebook Developers page. Allow developer access if you get prompted for that.
- Inside the top left corner click on + Add New App.
- Add your Display Name and Email that you want to show when users Login through Facebook.
- You will see multiple options and in that you need to select Facebook Login and click on the Set Up button.
- Choose the WEB option and add your site URL for the relevant field and save it.
- Go to Settings option and you need to Choose Basic Settings for your app.
- Choose Category as “Community & Government” and add your site URL in the App Domain field.
- You need to add the Privacy URL for your app to use the Facebook Login to work on your site.
- You will get the Privacy URL from this link Privacy Policy and follow the steps shown in the Video.
- After Creating the Privacy URL you need to copy the URL and paste it in your app and save the settings.
- Now to to the App Review Section and you need to enable the app PUBLIC.
- Next go to Facebook Login Settings and enable the option and your site URL and save the settings.
- Final Setup would be Go to Basic Settings and copy the AppID and Secret Key and paste it on your site backend.
Please refer this mentioned screenshot:

So, you can enable Facebook login feature on your Directory website by creating a Facebook app this way.
This is the video demonstration to enable FB login in Tevolution Plugin.
Creating Google App
-
- Login to your Google account or create a new one.
- Open the Google Developers Console.
- Inside the top right corner of the screen you should see a “Select a project” dropdown. Expand the dropdown menu and click on “Create a project…”.
- Enter your name for the project and leave the rest as-is.
- Once the Dashboard of your new app opens click on “Enable and manage APIs”.
- Search for the Google+ API. Enable that API.
- Once you enable the API you should see a message saying you can use the API until you create credentials. Click on the blue “Go to Credentials” button”.
- Under Where will you be calling the API from? select “Web browser”. Under What data will you be accessing? select “User data”. Go to next step.
- Now leave the Authorized JavaScript origins field empty. Under Authorized redirect URIs enter this URL
http://YOUR_SITE.com/wp-content/plugins/Tevolution/tmplconnector/monetize/templatic-registration/hybridauth/?hauth.done=Google
Don’t forget to swap the YOUR_SITE part with your own domain.
- Click on the “Create client ID” button below to proceed to the next step. Click the button again if you stay on the same step.
- Enter the email address and product name that should be displayed to visitors when logging in to your app.
- In the Download credentials step click on “I’ll do this later”.
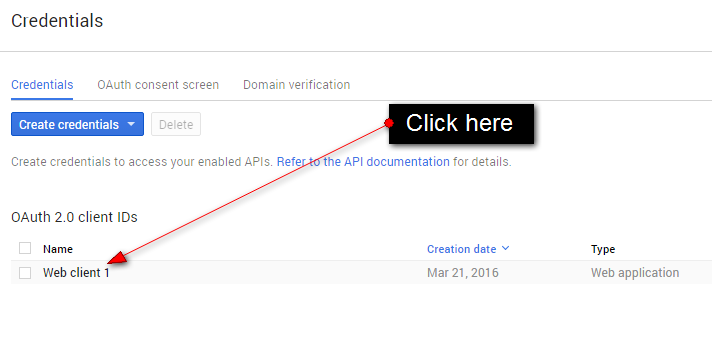
- You should now see this. Click on your Web client

- Now copy the “Client ID” and “Client secret” values available in the “Client ID for web application” section.
- Connect to your site and go to Tevolution ⇨ Settings ⇨ Registration settings. Paste the Client ID inside the App ID field and the Client secret key inside the Secret key field.
Creating Twitter App
- Login to your Twitter account or create a new one.
- Open the Twitter dev page.
- Click on “Create new app”
- Inside the “Application Details” fill in the Name and Description you want for the app. Also enter the location (URL) of your site. Enter this as the Callback URL:
http://YOUR_SITE.com/wp-content/plugins/Tevolution/tmplconnector/monetize/templatic-registration/hybridauth?hauth.done=Twitter
Don’t forget to swap the YOUR_SITE part with your own domain.
- Your app should now be showing. Click on the “Settings” tab and check the “Allow this application to be used to Sign in with Twitter” option.
- Open the “Keys and Access Tokens” tab.
- Copy your “Consumer” and “Consumer Secret” keys
- Paste the values inside Settings ⇨ Registration settings on your site.
Any Queries? Contact us and we’ll help you out.

