Note: Before installing this theme, please ensure that you are running WordPress 3.0 or higher
Install and Activate
- Connect to member area and expand the Automobile section under My Downloads. Download all available files
- Connect to your WordPress dashboard (wp-admin) and navigate to Appearance -> Themes. Click on the Install Themes tab and then on Upload. Use the Browse option to locate the automobile zip file on your hard drive – then click on Install Now. After the installation process is finished activate the theme.
In case WordPress rejects the .zip file use FTP to install the theme
For detailed instructions on using FTP please click here
- Extract automobile.zip then upload to /wp-content/themes directory
- Once uploading is done connect to the WordPress dashboard and activate the theme
- If you run into more problems during installation please visit our Installation Guide
Need help with installing the theme? Hire us!
Facing Problems in installing the theme? Don’t worry, we’ll do that for you, just click here!
How to install sample data
Click on “Yes Insert Sample Data” to insert the sample, as shown in the live demo.
If you wish to delete the dummy data that we populated in your site then you can remove it by clicking “Yes Delete Please!”
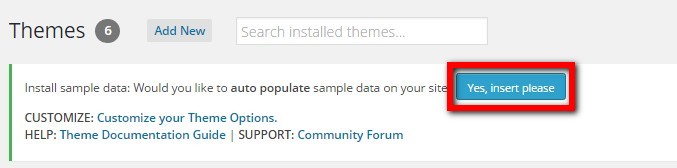
If you deleted this sample data and if in future you again want it, just go to Themes and click on “Yes Insert Sample Data”.
Note: If you entered your data by editing this dummy data, then please don’t click on “Delete sample data”, as it will delete all the data which you have entered.
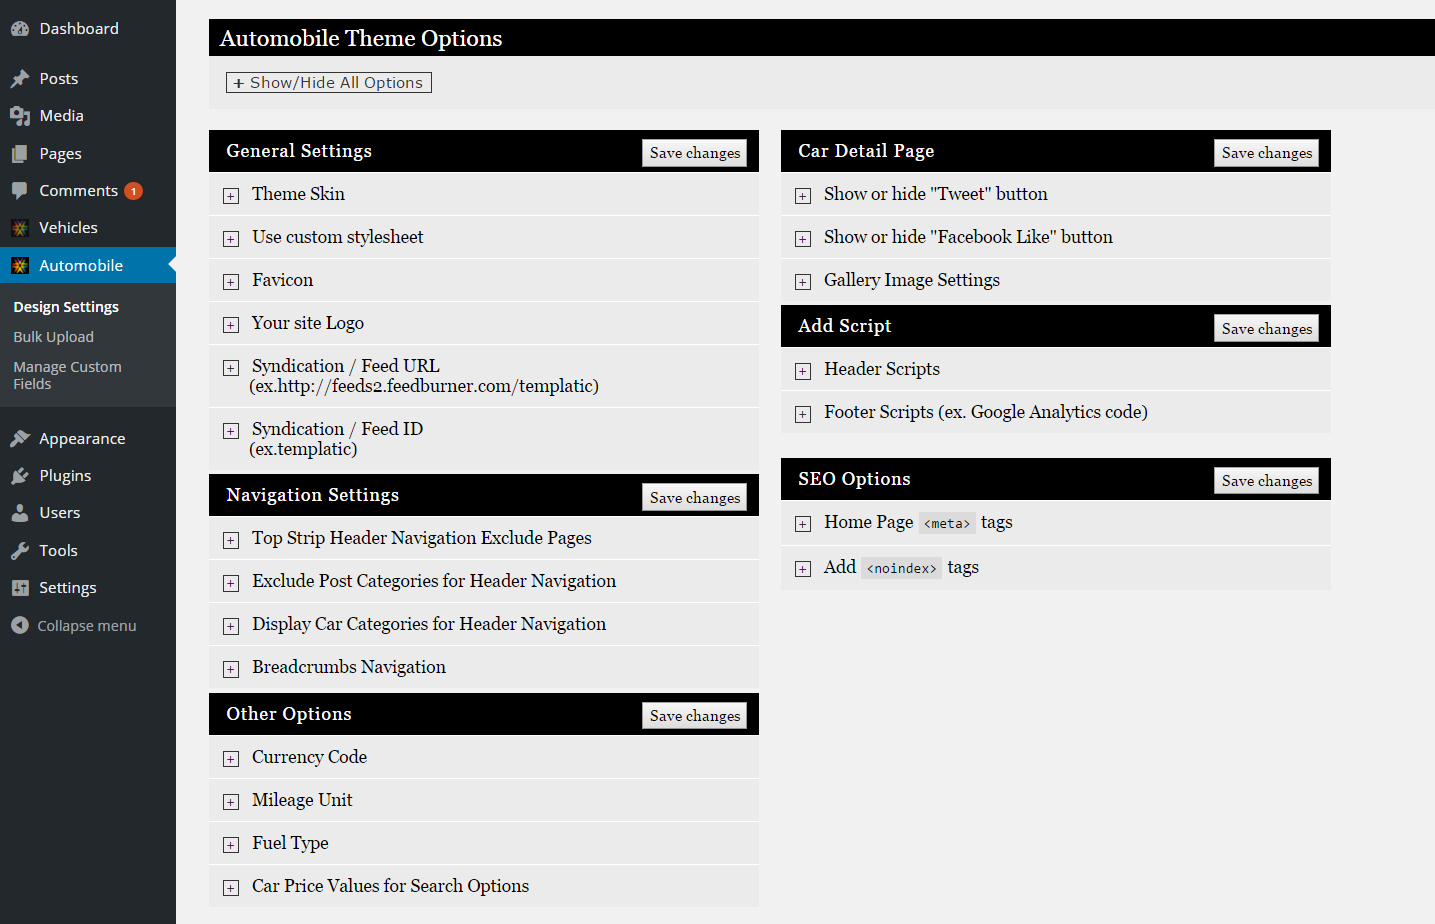
Automobile Theme Settings
Go to wp-admin > Automobile > Design settings and take a thorough look at all the flexible options available to you. Do the settings as per your wish and then save them.
Homepage settings
Now lets setup the Homepage. The Homepage is widget ready, just go to Appearance > Widgets and setup the widgets as shown in the below image, and also some settings are controlled from Automobile > Design Settings

- Top Navigation: Go to Wp-admin > Automobile > Design Settings > Navigation Settings > Top Strip Header Navigation Exclude Pages
- Logo Upload : Go to Wp-admin > Automobile > Design Settings > General Settings > Your site Logo
- Go to Wp-admin > Appearance > Widgets > Header Advt and insert the “PT – Advertise & Call Us text” widget here and add the advt code here.
- Go to Wp-admin > Appearance > Widgets > Header Advt and insert the “PT – Advertise & Call Us text” widget here and fill out call us text.
- Main Navigation: Go to Wp-admin > Automobile > Design Settings > Navigation Settings > “Exclude Post Categories for Header Navigation” and also “Display Car Categories for Header Navigation”
- Go to Wp-admin > Appearance > Widgets > Front Sidebar Left and insert the “PT – Find Car” widget here.
- Go to Wp-admin > Appearance > Widgets > Front Page Banner and insert the “PT – Home Banner” widget here.
- Go to Wp-admin > Appearance > Widgets > Front Sidebar Left and insert the “PT – All Car Models” widget here.
- Go to Wp-admin > Appearance > Widgets > Front Sidebar Left and insert the “PT – Subscribe” widget here.
- Go to Wp-admin > Appearance > Widgets > Front Sidebar Left and insert the “PT – Twitter” widget here.
- Go to Wp-admin > Appearance > Widgets > Front Page Content and insert the “PT – Manufacturers List” widget here.
- Go to Wp-admin > Appearance > Widgets > Front Page Content and insert the “PT – New Cars by Deals” widget here.
- Go to Wp-admin > Appearance > Widgets > Sidebar Right and insert the “PT – Social Media Link” widget here.
- Go to Wp-admin > Appearance > Widgets > Sidebar Right and insert the “PT – Featured Cars” widget here.
- Go to Wp-admin > Appearance > Widgets > Sidebar Right and insert the “Links” widget here.
- Go to Wp-admin > Appearance > Widgets > Sidebar Right and insert the “PT – Advertise” widget here.
Adding a new Vehicle
Now, lets learn how to add a new Vehicle. Go to Cars > Add Car and start adding all the information here.
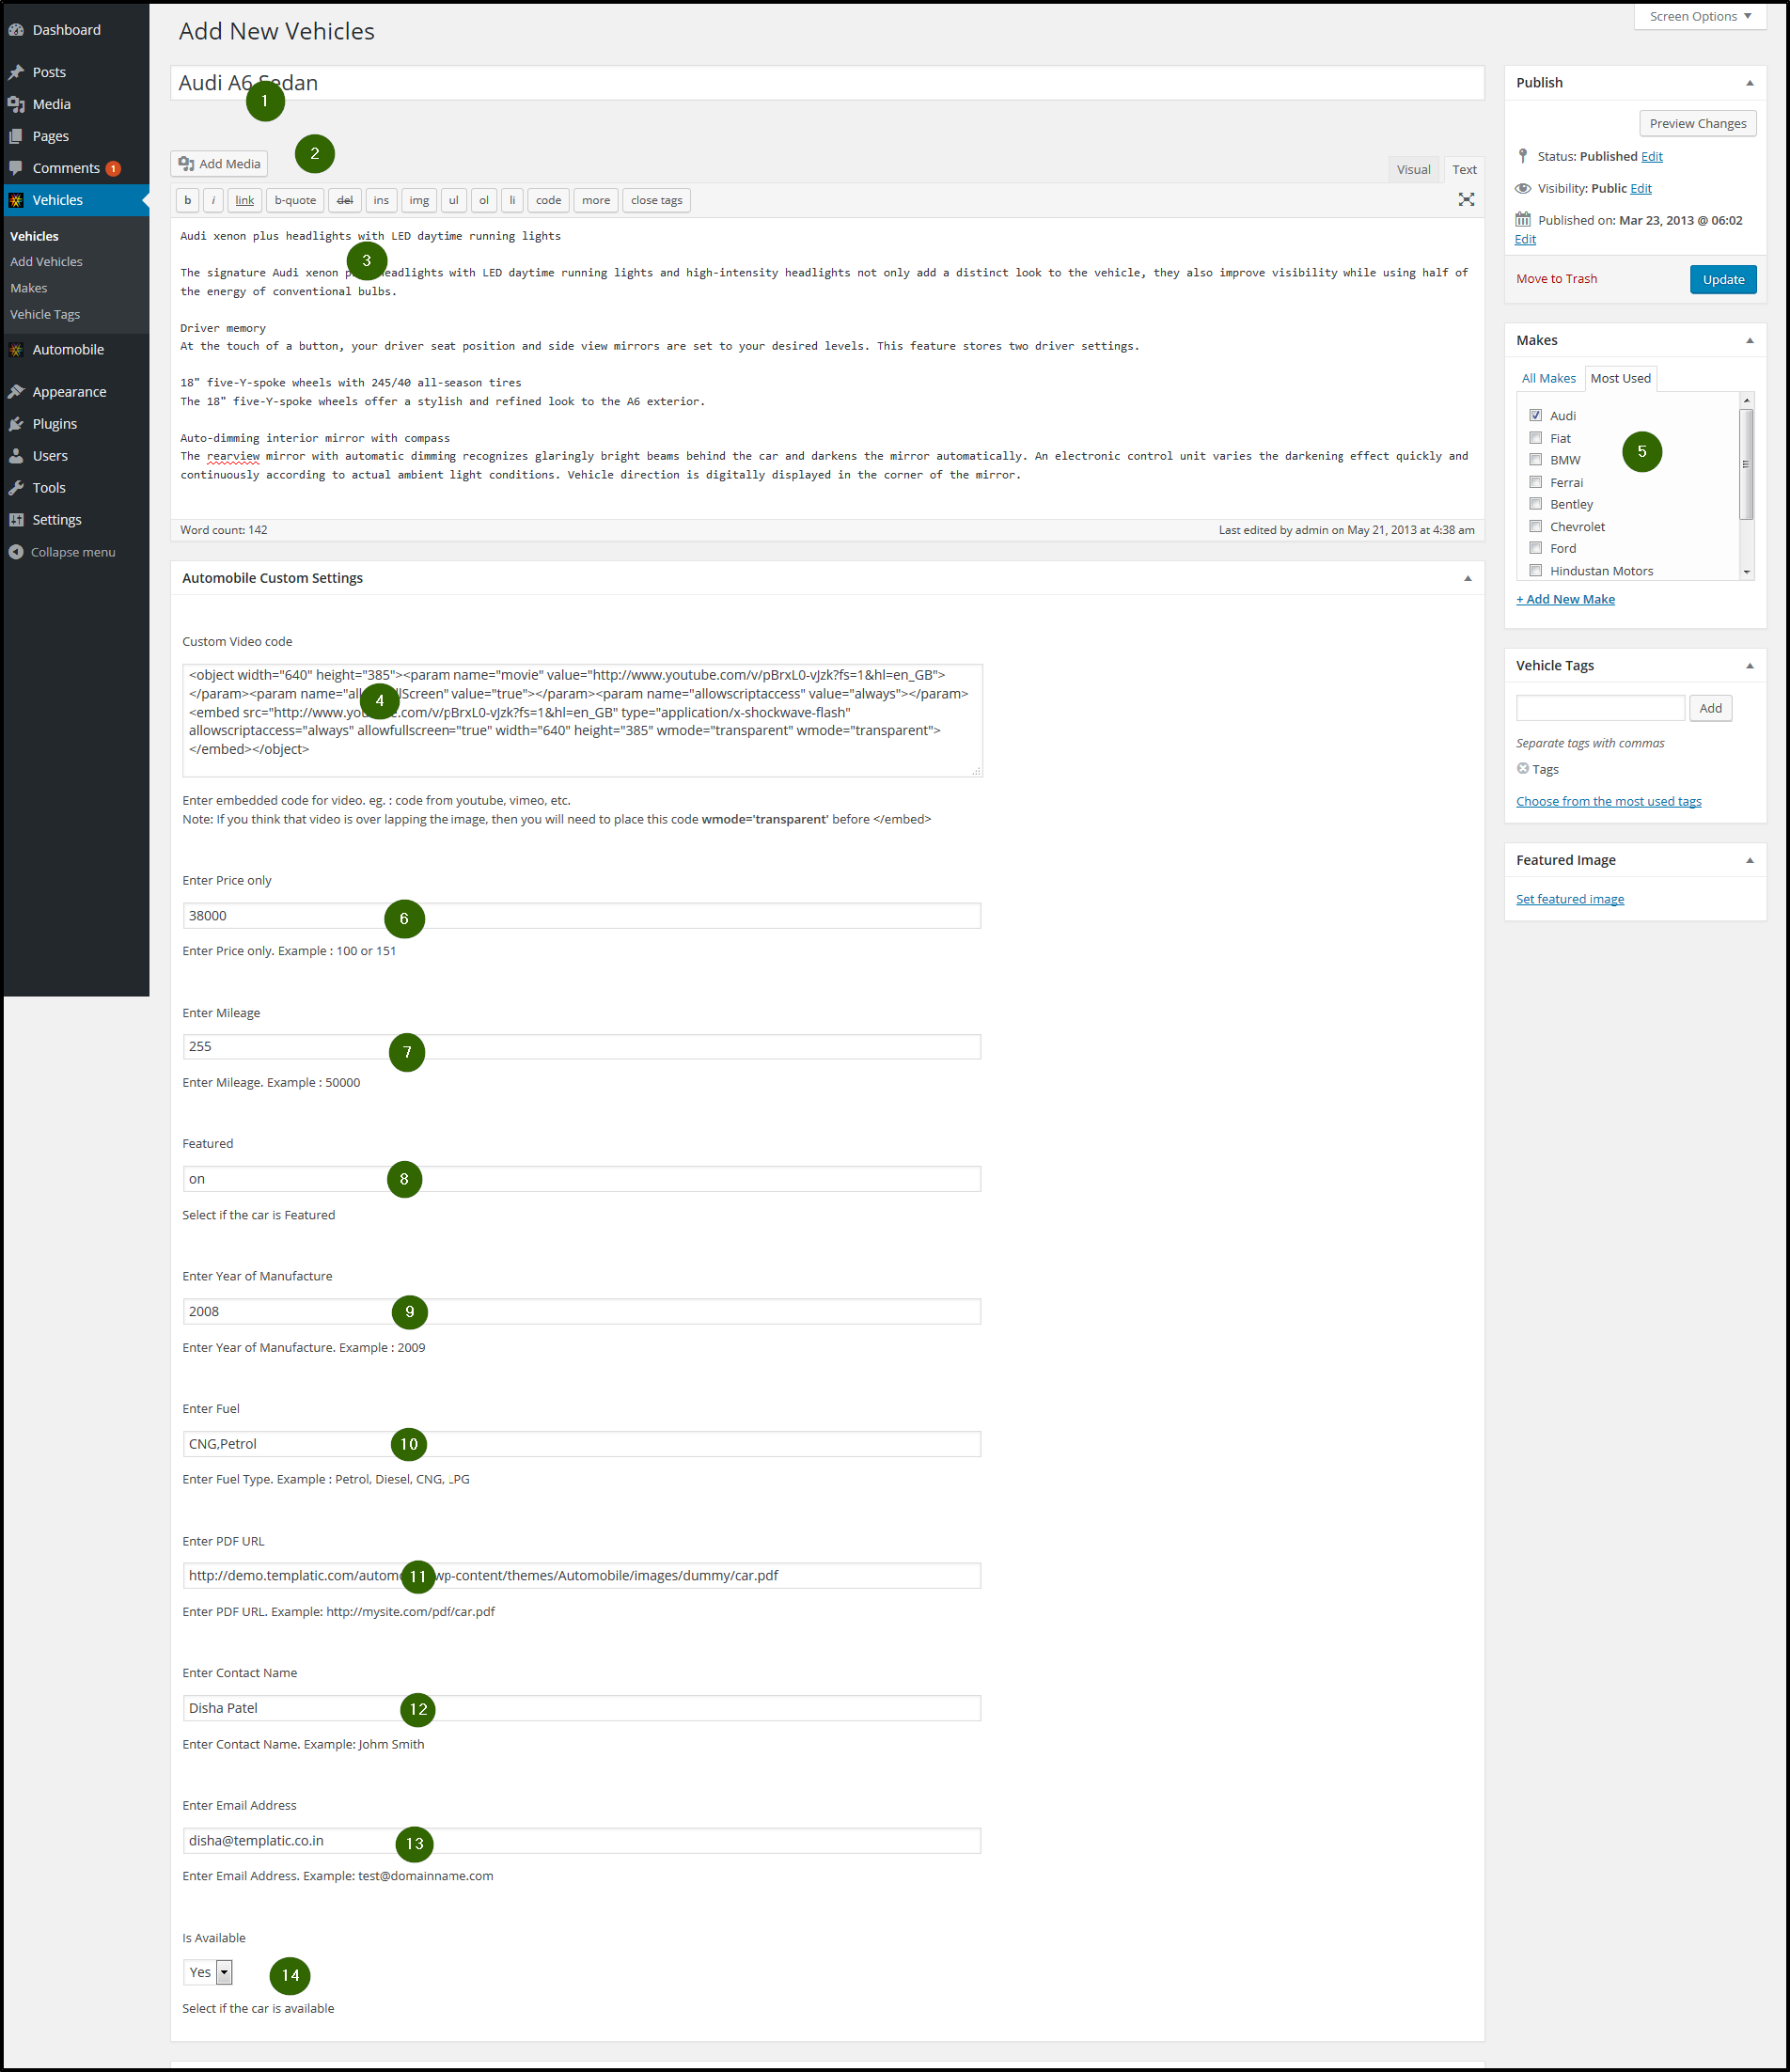
- Post Title
- Image: Click on “Add Image” button to add the image
- Description
- Custom Video Code: Enter the embedded video code here. You can take the embedded code from youtube, vimeo, dailymotion, etc websites.
Note: If you think that video is over lapping the image, then you will need to place this code wmode=’transparent’ before </embed> - Select a Category (make) or you can also click on “Add new make” to create a new category.
- Enter Price only (Example : 10000 or 150001)
- Enter Mileage (Enter Mileage. Example : 50000)
- Featured – Select if the car is Featured
- Enter Passing Year – Enter Year of Passing. (Example : 2009)
- Enter Fuel – Enter Fuel Type. (Example : Petrol, Diesel, CNG, LPG)
- Enter PDF URL – Enter PDF URL. (Example: http://mysite.com/pdf/car.pdf)
- Enter Contact Name – (Example: Johm Smith)
- Enter Email Address – (Example: [email protected])
- Is Available – Select if the car is available
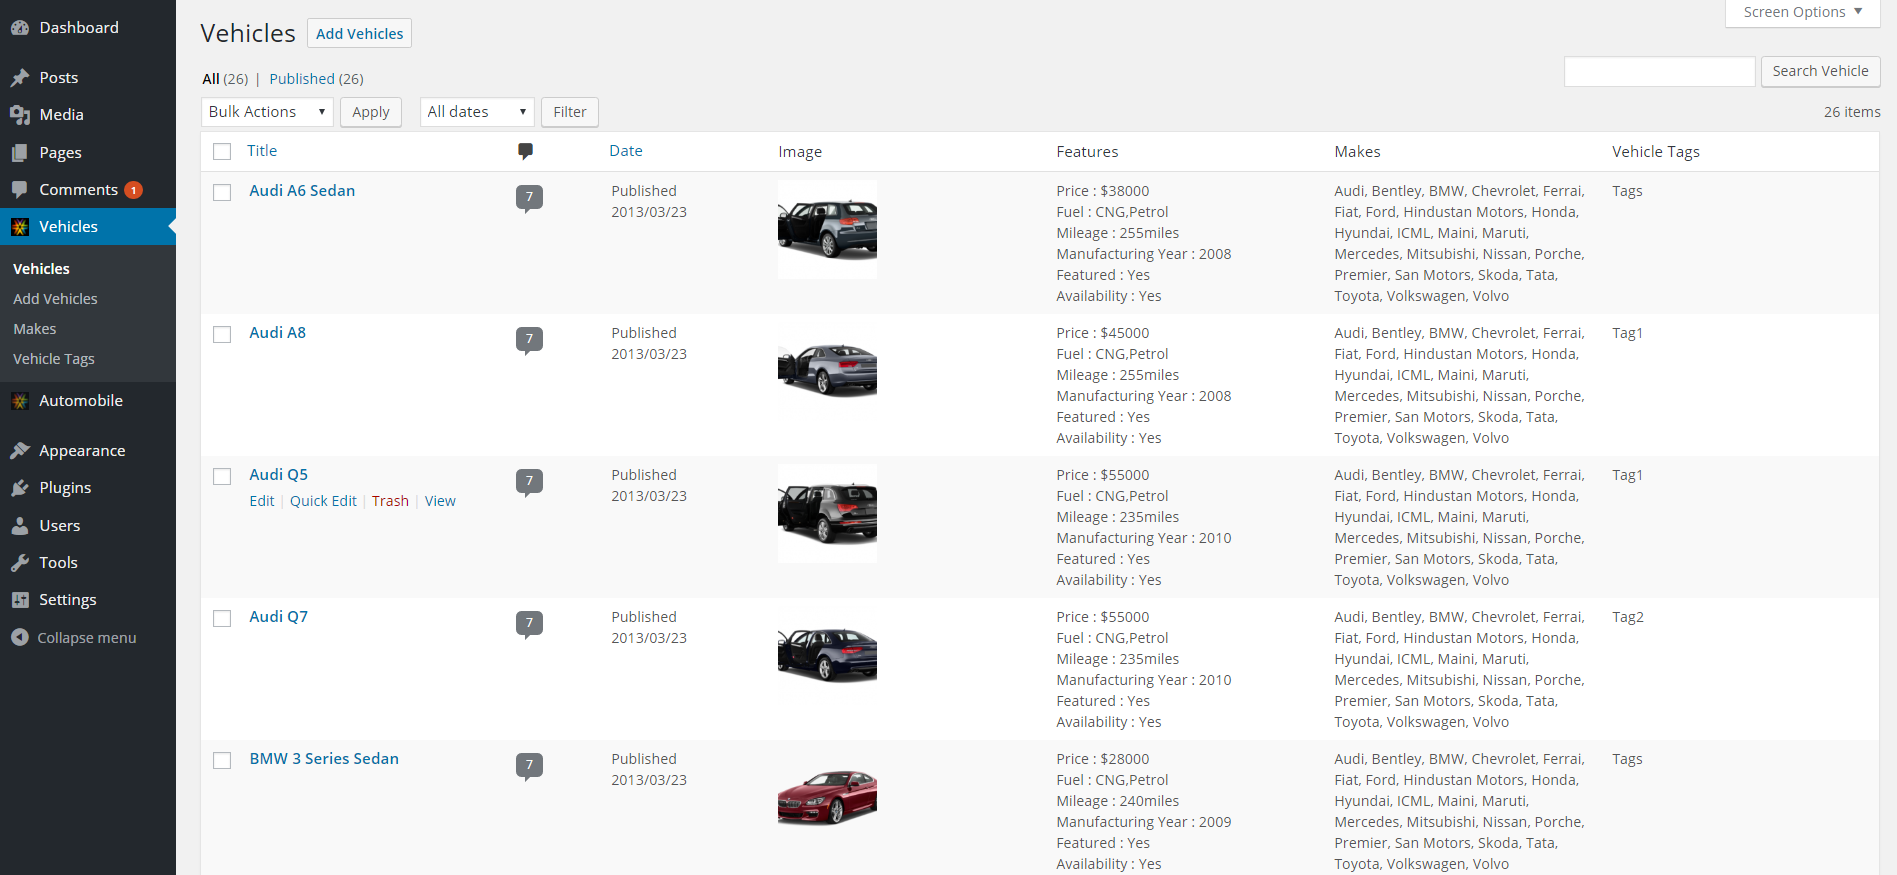
Viewing all the Vehicles and their information
To view all the vehicles which you added, just go Vehicles > Vehicles. From here you can view all the information like title, date, image, features, makes and tags. Note the “Add Vehicles” button at the top of the page. Just click on it to add a new vehicle.
Below is a preview of this page:
Editing Car or Vehicle
To edit a car, go to wp-admin > Vehicle > Vehicle. From here you can edit or delete any vehicle.
Vehicle Listing Page
Preview of Vehicle Listing Page:

Vehicle Detail Page
Preview of Vehicle Detail Page:

Adding a new Blog Post
To add a new Blog post, go to Posts > Add New

- Post Title
- Post Description
- Post Category
- Post Tags
- Featured Image
How to add a Blog and display it in navigation ?
You can also start a Blog in the website. This is easy, just go to Posts > Categories and make a new category. You can name it anything like Blog, or any other name. Now simply write one Blog post under that category and this new category will appear in Header Navigation. Note that minimum one post is required and then only that category will be displayed in navigation.
If you want to hide this category from Header navigation go to Automobile > Design settings > Exclude Post Categories for Header Navigation and select that category and click on “Save changes”.
Blog Category Post Lisitng
Preview of Blog Category Post Lisitng Page:

Blog Detail Page
Preview of Blog Detail Page:

Adding a new Page
Now lets add a new page. Go to Pages > Add New.
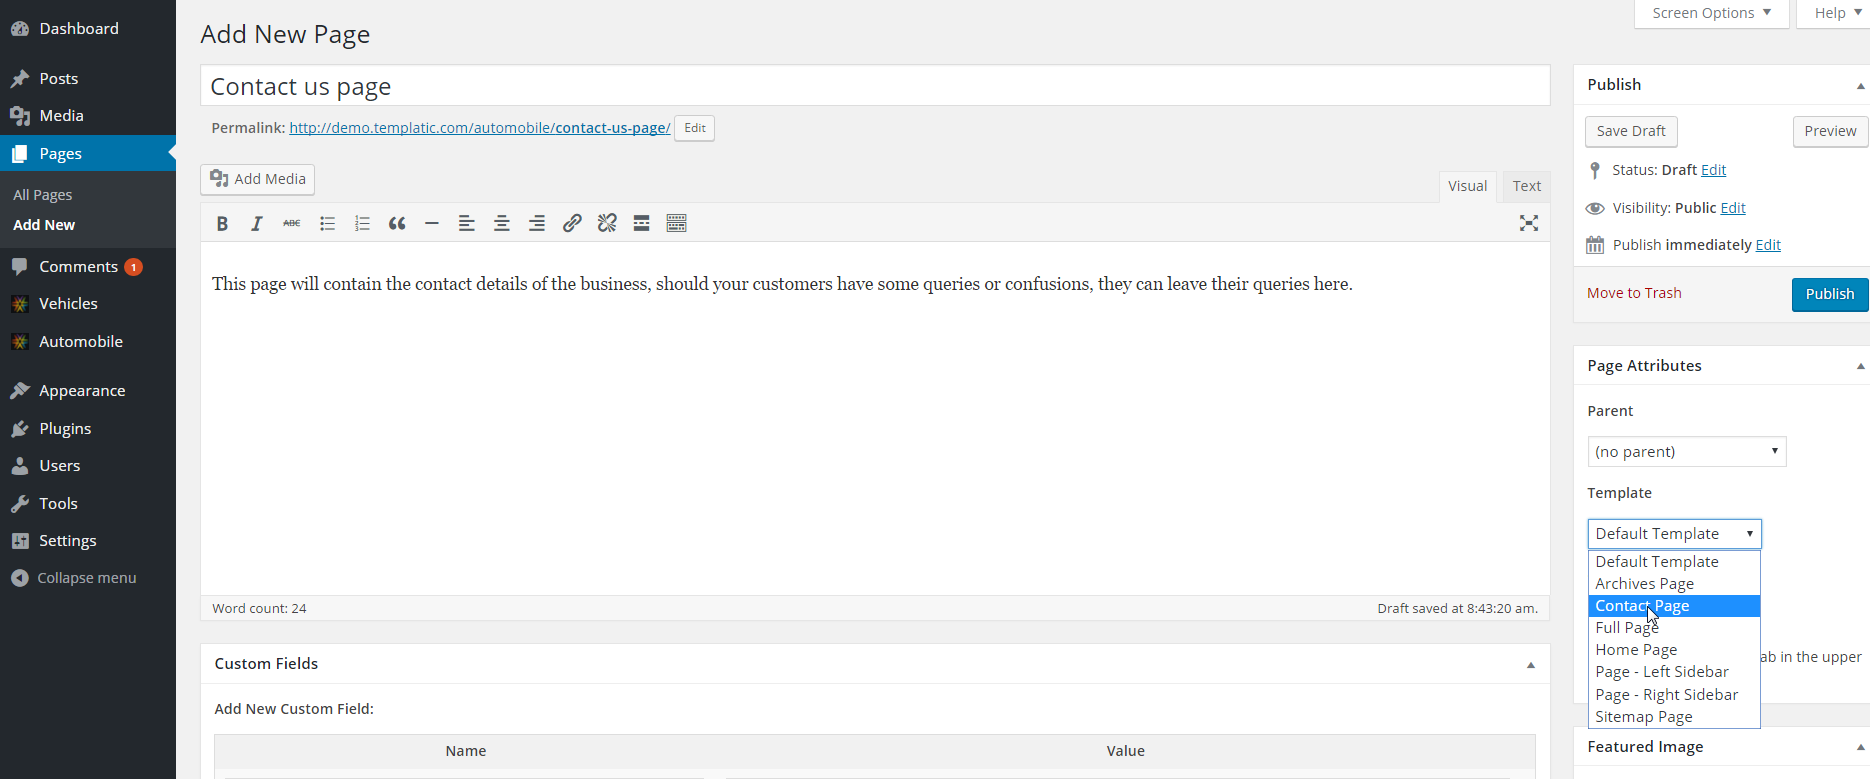
- Enter the page title
- Enter the page description
- And finally select the template and click on “Publish”.
There are 7 page templates which you can use namely:
- Archives
- Contact
- Full Page
- Homepage
- Page – Left sidebar
- Page – Right sidebar
- Sitemap
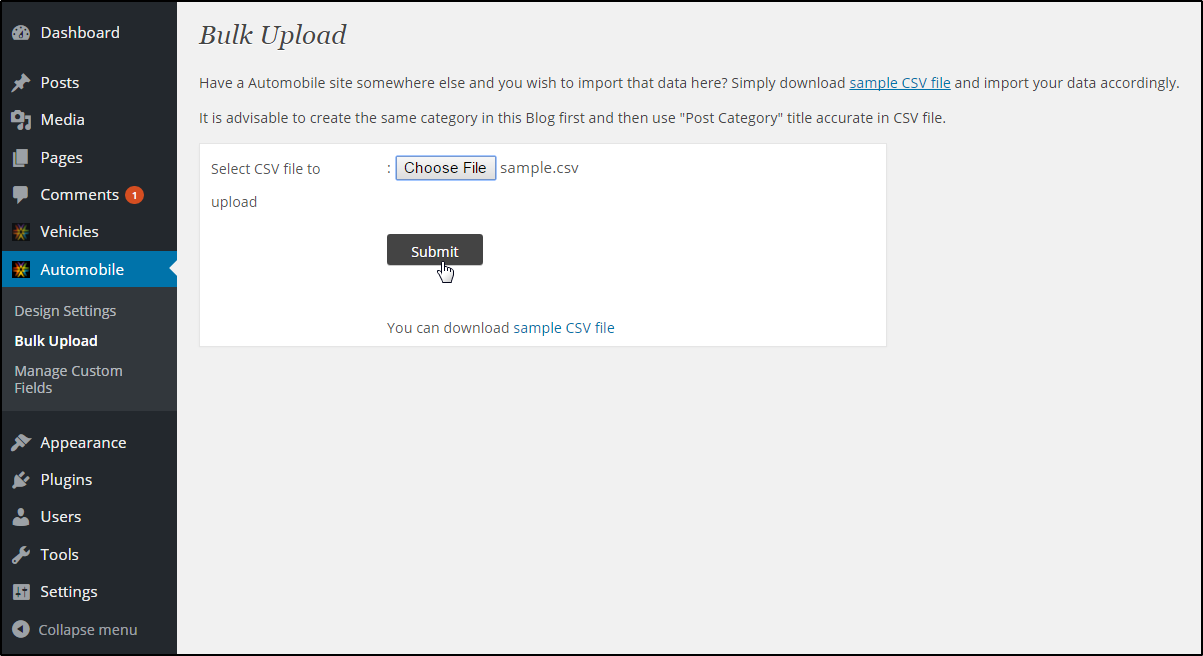
Bulk Upload
Instead of adding each vehicle separately you can also use the Bulk upload feature. Go to Automobile > Bulk Upload. Simply download sample CSV file and import your data accordingly. Bulk upload means uploading several vehicles automatically by just filling out the CSV. This saves time to manually add new cars. So bulk upload is a fast way to upload several vehicles.
It is advisable to create the same category in this Blog first and then use “Post Category” title accurately in CSV file. Note that if you are adding a new category for vehicle, then you need to add it from Cars > Make (“make” means category in simple terms)
Adding New Custom Field
Custom fields can also be added. If you want to add any other field like “tires”, then you can add a new custom field and it will be displayed on listing and detail page as per the settings.
To add a new custom field, go to Automobile > Manage Custom Fields
Editing or Deleting Custom Fields
Whichever custom fields you have added will be shown in Automobile > Manage Custom Fields. From here you can also edit or delete these fields.

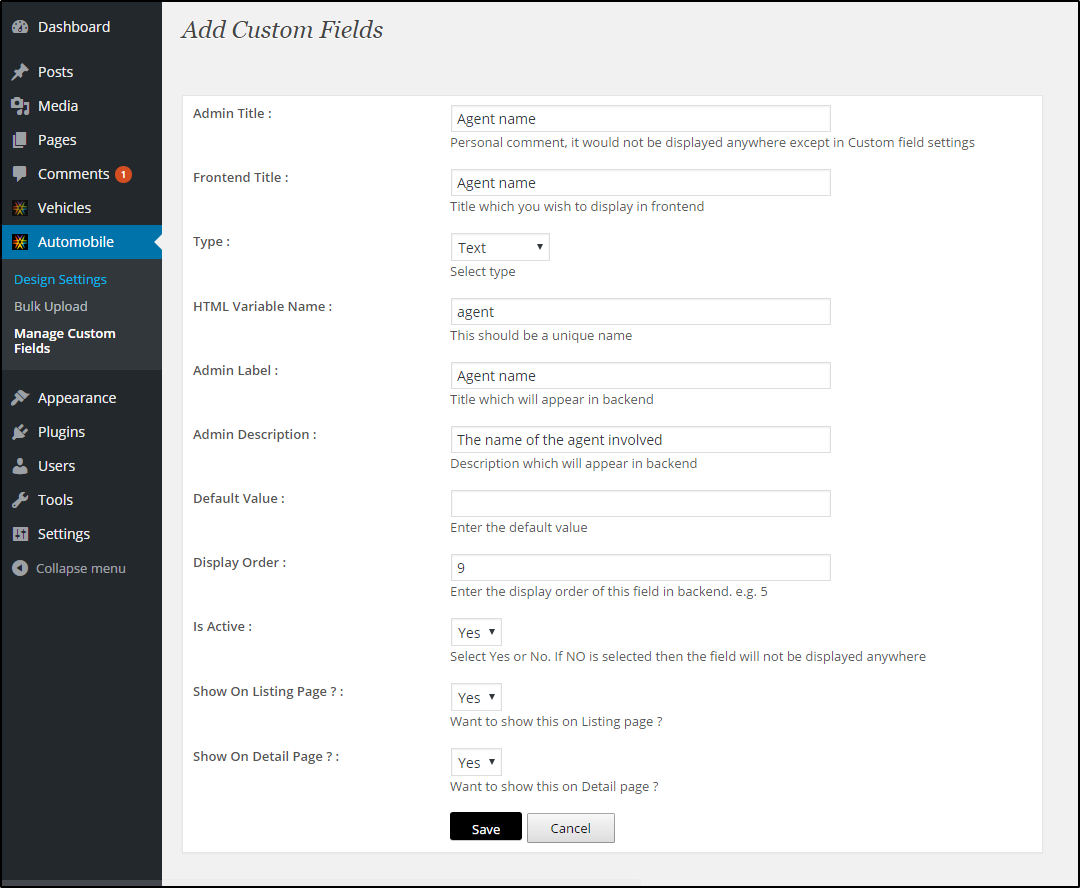
Lets take a look at each field in detail:
- Admin Title : This will be the title which will be shown in “Manage Custom Fields” and it will not be shown anywhere else. This is just for you to remember this custom field.
- Front Title : This title will be displayed in front end.
- Type : Select type e.g. text, checkbox, radio, etc
- HTML Variable Name : This should be a unique name which you have not used previously
- Admin Label : This is title which be displayed in backend in “Add Car”
- Admin Description : This is description which be displayed in backend in “Add Car”
- Default Value : The default value of the field
- Display Order : The order of this new custom field. E.g. 1. If 1 is entered then this would field would be displayed first in backend
- Is Active : Want to activate this new field or just want to save these settings ? If you want to activate it, then select YES and if you just want to save these settings to use later on then select NO.
- Show On Listing page ? : Select YES if you want to show this on Listing page
- Show On Detail page ? : Select NO if you want to show this on Detail page
So this is how you can create a new custom field.
How to solve video overlapping image issue in vehicle detail page?
In Opera, chrome and safari, you may face an issue in vehicle detail page. If you enlarge the image then the video will overlap the image. To solve this issue, in the video code, just use wmode=’transparent’ code before </embed >
So the final code of video will look like
wmode=’transparent’ </embed>
So before closing this </embed> tag, you can simply put this wmode=’transparent’ code.
Can I show the pop up for my image gallery in normal WordPress pages?
Yes you can, but the condition is, if you have activated Templatic-Shortcodes plugin.
Any Queries? Contact us and we’ll help you out.
Need help with installing the theme? Hire us!
Facing Problems in installing the theme? Don’t worry, we’ll do that for you, just click here!