The guide explains you all the steps in the series that you should follow while setting up your site.
Theme Installation
1. Upgrade to Responsive 2
- Connect to your WordPress dashboard (wp-admin) and navigate to Appearance -> Themes. Select the default “Twenty Twelve” theme as the active theme.
- Connect to your server and navigate to wp-content/themes. Rename your existing (old) Responsive theme folder. (e.g. Responsive_old)
- Now, connect to the member area and expand the Responsive section under My Downloads. Download the theme to your hard drive.
- Visit the WordPress dashboard (wp-admin) and navigate to Appearance -> Themes. Click on the Install Themes tab and then on Upload. Use the Browse option to locate the Responsive zip file on your hard drive – then click on Install Now. After the installation process is finished activate the theme.
Feel free to create a new ticket at Contact us if you face any problems.
2. Installing theme with WordPress back end
- Connect to member area and expand the Responsive section under My Downloads. Download the theme to your hard drive.
- Connect to your WordPress dashboard (wp-admin) and navigate to Appearance -> Themes. Click on the Install Themes tab and then on Upload. Use the Browse option to locate the Responsive zip file on your hard drive – then click on Install Now. After the installation process is finished activate the theme.
3. Install using FTP
- Extract Responsive.zip then upload to /wp-content/themes directory
- Once uploading is done connect to the WordPress dashboard and activate the theme
- If you run into more problems during installation please visit our Installation Guide
For detailed instructions on using FTP please click here
Need help with installing the theme? Hire us!
Facing Problems in installing the theme? Don’t worry, we’ll do that for you, just click here!
Getting Started
1. Insert dummy data
It is not compulsory to insert dummy data but it is advisable to do so because as it sets up the entire sample site for you, you can have over all idea how you would like to build your site and so increases your creativity!
After installing and activating the theme,
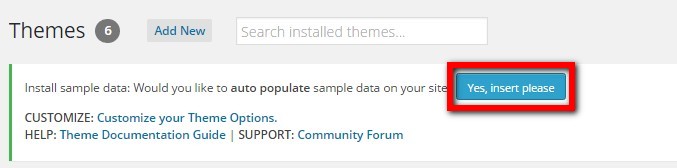
- Go to Wp-admin -> Appearance – > Themes
- Click “Yes,Insert please!” button to insert the Sample data
- As soon as you click this button, it will change to “Yes, Delete Please!” to let you delete all the sample data, if you want!
Be cautious, along with sample data, it also deletes all your modifications done using sample data forever.
2. Set your Business logo, Color and other theme options
We will be discussing few of the options from the customization theme options as most of them are quite easy to understand and operate.
Change the Logo
Changing the logo is just a simple process of uploading your own logo image!
- Go to wp-admin->Appearance ->Themes – > Customization
- Click Site Logo section to expand it.
- Click on existing image and load a new one from your hard drive. You can do the same for the favicon icon.
Edit General settings
- Hide autoinstall – checking this will turn off the dummy data activation option inside Appearance -> Themes
- Use custom css – enable this if you want to customize your theme using the custom.css file. The file can be modified from Appearance -> Editor sections. For details on using that file click here
- Enable sticky header menu – makes the header menu show even when scrolling down the page.
- Show author biography on posts – display the authors avatar, name and bio on posts
- Show author biography on pages – display the authors avatar, name and bio on pages
- Show breadcrum – display a navigation trail inside posts and pages (above the title)
Remove/Change the Templatic credit line from the footer
To remove the “Designed by Templatic” credit line inside the footer area, do this:
- In Appearance -> Themes -> Customize
- Click Footer option to expand it
- Now remove the second paragraph inside the section that states the Templatic credit line.
- OR you can also show your credit name and logo instead of “Templatic” by using the example given there just above the text box.
Similarly, you can change all the available theme options given in the “Customization” as per your requirement, including Color (Color change affects your site in real time i.e. you can preview the color before actually applying it to your site).
3. Setup the navigation bar (main menu)
Main menus are the key of your site. Users generally see the menu to figure out what you have in store for them!
- Go to wp-admin -> Appearance -> Menus.
- You can add and manage various items inside the menu. Post categories, Pages, Portfolios etc. For details on creating the Main menu watch the following video
4. Setting up the Home Page Slider
If you have activated the dummy data (from Appearance -> Themes) the slider must already be active. But if it isn’t then,
- Go to Appearance -> Widgets
- Place the “Home Page Main Slider” widget inside “Home Page Content” widget area. To make sure the slider shows on the homepage make sure you’ve set a correct static page as your homepage.
5. Set up your portfolios
As mainly Responsive is a Portfolio Theme, you can easily create the one and can show on your Home Page as well, if you wish to. Follow these steps for that,
A) Create the Portfolio
- Add the category of your work, using WP-admin -> Portfolio -> Type of Work like you do for a normal WordPress category.
- Now, go to WP-admin -> Portfolios -> Add Work
- Add your work/portfolio like you create a normal WordPress page and publish it (also check mark the ‘Type of the work’ that you created in the above step while creating the page.)
- If you want to add images to your portfolio then go to wp-admin -> Portfolio -> Add New Port Folio / Edit Existing one -> Click on ‘Add Media’ button -> Select the files to be uploaded. To have gallery do not click “Insert into post” button. Just close the box after all the images gets uploaded and then publish/update your portfolio.
B) Set up the Portfolio on the Home Page
- Place the “T-Home Page Main Slider” in the “Home Page Content” widget area.
- Expand this widget to choose various options in it.
- Then, Check mark the “Settings for Carousel slider option?”
- Now, select your desired category of portfolio for the home page in “Select Taxonomy” option of this widget.
- Click the save button of this widget and refresh your site to see the effect. (Know more, how to use T- Home Page Main Slider widget)
Going Deeper
1. Create Pages using Responsive Page Templates
A) Creating Page Template
Page Templates are the ready made pages based on some obvious needs. To create it,
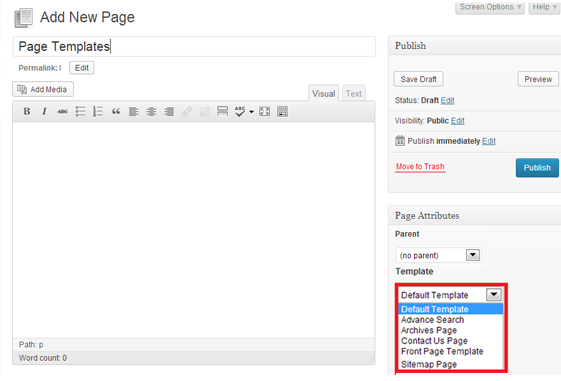
- Create a new page from wp-admin -> Pages -> Add New
- Select any page template from the Template option given in Page Attributes section on the right side of your screen and publish it.
- Your particular page is ready!
B) Responsive Page Templates
Responsive comes with below mentioned built in Page Templates.
- Advance Search – Shows a search form to search anything listed on the site.
- Archive Page – Shows the posts Month wise
- Contact Us Page – Shows a contact us form (Inquires sent using such form goes to the admin email Id as described in WP-admin -> Settings -> General)
- Front Page – Creates a static Home Page
- Portfolio – Lists your added portfolios together. (you can change the number of portfolios to be shown on a single page from wp-admin -> Settings -> Reading – > Blog Pages show at most)
- Sitemap Page – Lists the total posts,custom posts, pages of the site on the single page.
2. Customize pages using shortcodes
The easiest way to add buttons or columns into a post or page is to use shortcodes. To use them you will first need to install our Shortcodes plugin. Follow these steps:
- Download the plugin by clicking here
- Extract the plugin using software such as 7-Zip (use Extract Here option)
- Connect to your server using FTP. For details open this article
- Upload the plugin (folder) to wp-content/plugins
- Go to wp-admin -> Plugins and activate the plugin
To see what are the actual shortcodes available to you click on the link below:
https://templatic.com/demos/catalog/shortcodes-guide/
3. Translate Responsive
To translate Responsive, you will need software like Poedit. Using Poedit you need to load en_US.po located inside your /languages folder and translate it. For detailed instructions on translating with Poedit open our localization tutorial.
Along with the included .po file, Responsive is also WPML compatible. Once you purchase the plugin install it in the same way you did the shortcodes plugin. Once installed, open the WPML documentation (will be provided after purchasing) and start translating. The actual translating process is no different than with any other WordPress theme.
4. Protect your contact page with captcha
In order to add some spam protection to your contact page first go to Appearance -> Themes -> Customize and click on “Show captcha” inside the “Contact Page Settings” section. With that done we need to install the WP-reCAPTCHA plugin. The easiest way to install the plugin is to head over to wp-admin -> Plugins -> Add New and enter WP-reCAPTCHA inside the search bar. From there you can install the plugin very easily.
Once installed, head over to Settings -> WP-reCAPTCHA and enter the public and private keys. You can get the keys for free by clicking here. With the done, your contact page should now be secure from spammers.
5. Creating a mega menu
In the Getting Started section we explained how to create a simple custom menu and make it display on the homepage. A mega menu is similar to a regular custom menu, but instead of allowing you to have just one dropdown per menu item, it enables you to create several columns inside one item. To create a mega menu you first need to install a plugin, follow these steps:
- Download the plugin by clicking here
- Extract the plugin using software such as 7-Zip (use Extract Here option)
- Connect to your server using FTP. For details open this article
- Upload the plugin (folder) to wp-content/plugins
- Go to wp-admin -> Plugins and activate the plugin
Now that you’ve installed and activated the plugin go to Appearance -> Menus and create your new menu. To utilize the mega menu plugin your menu should have a structure in which at least one item has two or more sub-items and those sub-items then have items themselves. For more info on custom menus watch this video.
With that done head over to Appearance -> Widgets and place the jQuery Mega Menu widget inside Mega Mega Navigation area. Inside the widget the “Number Items Per Row” option is the most important since it directly influences the structure of the mega menu item.
6. Compatibility with third-party plugins
WooCommerce Plugin – Like many of our themes, Responsive 2 is also compatible with WooCommerce plugin! This plugin helps you in setting up the web store along with managing shipping ,Tax, Stocks etc.
To Download, install and use it, follow these steps,
- Download WooCommerce plugin
- See the “Getting Started” Tutorial for installation and setting up WooCommerce plugin.
- WooCommerce’s Documentation/guide is available here.
Along with the WooCommerce, Responsive is also compatible with some other plugins which you can/should use to extend the functionality of your theme. The most important of those are:
- WordPress SEO by Yoast – by far the best SEO plugin inside the WordPress plugins directory. Since Responsive doesn’t come with SEO features built-in it’s highly recommended you install a plugin such as WP SEO by Yoast.
- Gravity Forms – unlike the SEO plugin, Gravity Forms is a premium plugin, but work every penny! It allows you to setup everything from simple contact forms to extensive and powerful order forms.
Important note: We cannot provide support for setup issues with these plugins; you can get support from the plugin makers. However, feel free contact us in case of any compatibility issues as these plugins are officially supported.
Frequently Asked Questions
1. My home Page isn’t showing the widgets that I have placed, why?
Check whether you have inserted sample data OR followed these below given steps? if your answer is NO for both these questions then that’s the reason why your widgets are not working! Please follow these steps to make your widgets work.
- Create a new page from WP-admin -> Pages -> Add New (Simple WordPress process of creating Page)
- Select the “Front Page Template” from the Template option given in Page Attributes section on the right side of your screen and publish it.
- Now, go to WP-admin -> Settings -> Reading
- Select the option A static Page (Radio Button)
- Then select the page name that you created using Front Page Template in Front page displays -> Front Page (Drop Down)
- Save your settings and refresh your site once. Your widgets must be working now!
2. Why are my video pages conflicting with the sticky header?
Most people won’t have a problem with this, but if you do instead of entering the embed code like this
<iframe width=”560″ height=”315″ src=”http://www.youtube.com/embed/1yyRPI7Mu3M?rel=0″ frameborder=”0″ allowfullscreen></iframe>
Enter it like this
<iframe width=”560″ height=”315″ src=”http://www.youtube.com/embed/1yyRPI7Mu3M?rel=0?wmode=transparent” frameborder=”0″ allowfullscreen wmode=”transparent”></iframe>
In short, add ?wmode=transparent to the end of the source (src) URL and wmode=”transparent” at the end of the iframe.
Developers’ Section
1. Make little tweaks using the custom.css file
Located inside the theme root folder, the custom.css file enables you to quickly overwrite any css class inside the theme. This allows you to store and manage all css tweaks using just one file. Before you start using the plugin, turn it on inside Appearance -> Themes -> Customize -> General Settings -> Use custom.css. Once activated, the file can be modified from the Appearance -> Editor section (or directly on the server).
To learn more about custom.css visit the following article.
2. Create a child theme
Child themes are the best way to customize a theme without compromising the main (parent) theme. Updates become a major issue when updating parent themes, since you often need to update files that you’ve previously tweaked. With child themes your core (parent) files are left alone and all modifications are performed inside a separate folder.
Since creating child themes isn’t theme-specific there are a number of articles available online that you can utilize. These two will provide a great starting point:
3. Key Responsive Files
In this area we’ll try to outline some of the theme’s sections and the files that control them, i.e. the files you must edit in order to make changes. It’s up to you whether changes will be made directly in the files or via the child theme.
- Homepage logo area – header.php
- Post detail page – post.php
- Post listing page (blog page) – content.php
- Most widgets – /library/functions/widgets.php
If you run into any problem, please Feel free to create a new ticket at Contact us and we’ll help you out.
Need help with installing the theme? Hire us!
Facing Problems in installing the theme? Don’t worry, we’ll do that for you, just click here!