Get Started
1. Upgrading your theme
- Connect to the member area and expand the “Vacation Rental” section given under My Downloads section.
- Download the Supreme, Vacation Rental Theme, Tevolution plugin and Templatic Booking Plugin to your desktop.
- Use software like 7-Zip to unzip the downloaded files.
- After unzipping, you’ll have four folders: Vacation Rental version 2.0, supreme, Tevolution and Templatic Booking Plugin
- Now connect to your server and navigate to /wp-content/themes directory. Rename the VacationRental folder inside that directory to VacationRental_old
- While still connected to the server please upload:VactionRental and supreme folders to /wp-content/themes directoryTevolution and Booking-system folders to /wp-content/plugins directory
- While still connected, open functions.php file from VacationRental theme folder
- At around line number 34 you will find this code:
function supreme_child_theme_setup() { - Directly below that line of code input this:
update_option('template','supreme'); - Visit your site and refresh it. If you see an error then refresh it again & see the effect.
- Now, remove the code that you added (update_option(‘template’,’supreme’); ) as it is required just once and make the file as it was earlier. Feel free to create a new ticket at helpdesk if you face any problems
Please Note: Upgrading the theme includes Theme folder + Plugins folder. If you upgrade the theme folder but not the related and relevant Templatic plugins then there are high chances that it may not work accurately.
2. Install Theme
- Connect to member area and expand the Vacation Rental section. Download all available files (Supreme, Vacation Rental, Tevolution and Templatic Booking plugin)
- Connect to your WordPress dashboard (wp-admin) and then navigate to Plugins -> Add New. Now click on Upload and then on Browse. Load the Tevolution.zip file you downloaded earlier and then click on Install Now
- Once the install process is done click on Activate Plugin
- Enter your exclusive licence key (given under the Your Subscription section in your member area)
- Navigate again to Plugins -> Add New -> Upload and repeat the steps for tevolution-booking.zip. Activate the plugin once installation is completed
- With the plugins installed navigate to Appearance -> Themes. Click on the Install Themes tab and then on Upload. Use the Browse option to locate the supreme zip file on your hard drive – then click on Install Now. After the installation process gets finished do not activate supreme.
- Navigate again to Appearance -> Themes -> Install Themes -> Upload but this time load/install the vacation rental zip file. Once it’s installed activate the theme.
In case WordPress rejects the .zip files use FTP to install the theme
For detailed instructions on using FTP please click here
- Upload tevolution.zip and tevolution-booking.zip to /wp-content/plugins directory
- Upload supreme.zip and vacationrental.zip to /wp-content/themes directory
- Once uploading is done connect to the WordPress dashboard and activate them in this order:
1. Tevolution, 2. Templatic Booking add-on, 3. Vacation Rental - If you run into more problems during installation please visit our Installation Guide
Need help with installing the theme? Hire us!
Facing Problems in installing the theme? Don’t worry, we’ll do that for you, just click here!
3. Inserting Sample Data
Inserting Sample data is not compulsory but is advisable to do so as you will have an overall idea of setting your website up & it will make you more creative for it.
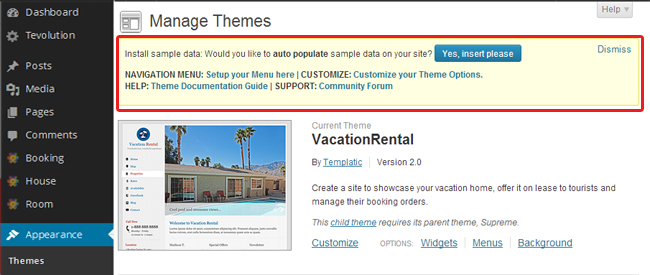
Inserting Sample Data
After installing the Vacation Rental version 2.0 theme,
You can insert 2 different Sample Data 1) Sample Rooms and Sample Houses and 2) Widgets setup, Posts, Theme customization options etc.
- Firstly, activate Tevolution Plugin from WP-admin ->Plugins
- Then activate Templatic Booking System Plugin from the same area WP-admin ->Plugins
- As soon as you activate the Booking System plugin, it will flash you a message to insert the Sample Rooms and Sample Houses, click it, if you want to have it.
- Now go to WP-admin -> Appearance -> Themes. If you have activated the theme correctly, you’ll be able to see a button named “Yes, Insert Please“. Click on this button to insert the sample Widgets setup, Posts, theme Customization options etc
- Refresh your site in the browser to see the effect.
- By following the above said steps, the “Yes Insert Please!” button will change into “Yes Delete Please!” to let you delete all the sample data from your site (If you want!)
- But, if you delete the sample data, your modifications done with those sample data will also be lost including widgets,posts,pages etc.
- For Example – If you modify some text part by removing it from the page/post/widget that was added by ‘insert sample data’ & then if you delete sample data, all your modification done with it will get deleted
- Sample data are subject to the version of the theme. So, if you are upgrading your theme & then after again inserting the sample data then it will be the new one & not similar to the previous version sample data.
Settings
All the back-end settings are explained here. You need to follow the here given steps to set up your website nicely.
1. Set logo, various colors and other theme options
It is very easy to apply these options to your website. We give you the following options to set your choice.
- Go to Appearance > Themes > Current Theme > Customize
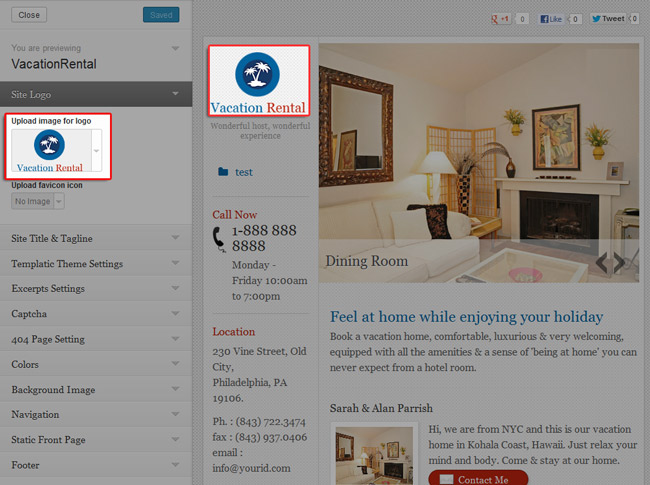
Customizing your Site
1) Site Logo
- From here you can upload your company’s or any desired logo for your site.
- If you want to have favicon icon for your site, you can do that as well! Just upload it by simple file selection process.
2) Site Title & Tagline
- You can give a title to your site from here by just entering the simple text in the given field.
- Taglines to the site add the additional information about it. To do that, just give your desired text in the tagline field given here.
- If you want to hide the tagline of your site but don’t want to remove it completely in the backend, you can check mark “Hide Site Description” box.
3) Templatic Theme Settings
- Use custom css – Check marking it, will apply the style settings coded in the custom.css file residing in your wp-admin/Themes/vacationrental2/custom.css. But before that you need to apply your style code in the custom.css file. Know more about custom.css
- Hide autoinstall – To hide the “Insert Sample Data” option from Appearance > Themes, activate it.
- Enable comments on pages and posts – Shows the comments given to your posts or on any pages along with the comment box on your website. To activate, check mark it.
- Show author biography on posts – Choosing this option, you can show the details of the Post author besides his own post such as who has wrote it, profile picture of the author etc.
- Show author biography on pages – The same thing happens like ‘Show author biography on posts’. But here, Author’s information will be displayed on the page instead of the post.
- Show Breadcrumb – It is basically a navigation check strip which shows you that you are viewing which page & from where you have come to that page.
4) Excerpts Settings
- Display excerpt on archive page – This shows your post excerpts on the archive page, if you check mark it.
- Excerpt Length – By entering the numeric value to this field, you can limit the number of characters to be shown in the excerpt of any content.
- Text for Continue reading – From here, you can give the name to the excerpt text like “Read More” where user can click to continue the reading from where he is directed to that actual post or page.
5) Captcha – This one will let you show & set the captcha to your contact us page, if you check mark it.
Note: It will let you show captcha only if you have Wp-recaptcha installed & activated
6) 404 Page Settings – By giving the slug name for any page/category/Tags, you can display it on your error page. Slug name is asked when you create any Post Type/Category/Tags. If we leave this field blank then it will be same as the “Name” of that particular post type.
7) Colors – Set the colors for various things on your website as mentioned below:
- Headings, Titles and Pagination – Color set here will affect your site’s headings, titles & displayed pagination (page numbers).
- Change color of Navigation background – Selected color will be displayed as a background color for the navigation menu.
- Change color of Content text, Input text – You will be seeing this color on the entire content text & on those texts as well where you have been asked to input on the website.
- Change color of Button Hover – This color is applied to the buttons at the time of hover. So, basically you will see it when you hover any button on your site.
- Change color of Body Background – This will work as a main background color of your website.
8) Background Image – Like color, you can also set the image as a background to your site by just selecting your image file.
9) Navigation – Using this option, you can apply your navigation menus at the Sidebar of your page (Secondary).
10) Static Front Page – This option is concerned with your homepage that what should be displayed as your home content.
- Your latest posts – Choosing this will show respective widgets placed in the widgets areas (in back end) on your home page.
- A static page – You can set any available page as your home page by selecting it from the drop down “Front Page”.
And also can choose the page from another dropdown “Posts Page” to display your posts on that page.
11) Footer – With this one, you can upload your logo at this place & can also use the html<tags> to display your desired thing here (example: Copy right, trademark etc)
After Finishing all the settings, click the button “Save & Publish” to save & apply your settings.
2. Create navigation menu
There can be two types of navigation menus A) Custom menu (WordPress regular) and B) Mega menu. Let’s see them in detail,
A) Custom menu
Main menus play a vital role for your site. Users generally see the menu to figure out what you have in store for them!
- Go to wp-admin -> Appearance -> Menus.
- You can add and manage various items inside the menu. Post categories, Pages, Portfolios etc. For details on creating the Main menu watch the following video
This way you can create a regular WordPress menu but if you want to add some visual effects to it then you can use the mega menu for it.
B) Mega menu
A mega menu is similar to a regular custom menu, but instead of allowing you to have just one dropdown per menu item, it enables you to create several columns inside one item. To create a mega menu you first need to install a plugin, follow these steps:
- Download the plugin by clicking here
- Extract the plugin using software such as 7-Zip (use Extract Here option)
- Connect to your server using FTP. For details open this article
- Upload the plugin (folder) to wp-content/plugins
- Go to wp-admin -> Plugins and activate the plugin
Now that you’ve installed and activated the plugin go to Appearance -> Menus and create your new menu. To utilize the mega menu plugin your menu should have a structure in which at least one item has two or more sub-items and those sub-items then have items themselves. For more info on custom menus watch this video.
With that done head over to Appearance -> Widgets and place the jQuery Mega Menu widget inside Mega Menu Navigation area (You can see this widget area only when you activate Mega menu plugin as said above) . Inside the widget the “Number Items Per Row” option is the most important since it directly influences the structure of the mega menu item. It will be usable only in secondary navigation..
Read a tutorial on Mega menu to understand it even better.
If you are using Mega menu then make sure you have unchecked the option “Secondary” at wp-admin -> Appearance -> Menus -> Menu Settings -> Theme Locations to let it work correctly.
3. Have image icons for your menu items
Want to display your menu items with image icons like in the Vacation Rental Demos? If yes, do the following.
![]()
- Go to WP-admin -> Appearance -> Menus. Create a custom menu of your need. See more details on how to create a custom menu.
- Now, in “Navigation Label” field put the value like this:
<i class="icon-home"></i>Home- Where, Home is a title of your menu and “icon-home” is name of the icons which you want to display.
- Different names for the icons are listed here. Also read this Article to understand it better.
![]()
4. Create pages using theme page templates
Page templates are the ready made pages that are designed to achieve the specific design. With Vacation Rental you get 3 page templates. Let’s figure it out,

- Template – Archive – Shows posts month wise based on publish date
- Template – Contact Us – Creates a contact form using which your site visitors can directly send you any inquiry. The inquiries sent using this form will be e-mailed on the email address mentioned under the wp-admin -> Settings -> General -> E-mail Address (You can change it anytime).
- Template – Sitemap – Shows the list of all your posts, pages etc on a single page.
There is one more page that you can create but it is not a page template instead it is a shortcode that helps you create an advance search form for any particular post type,
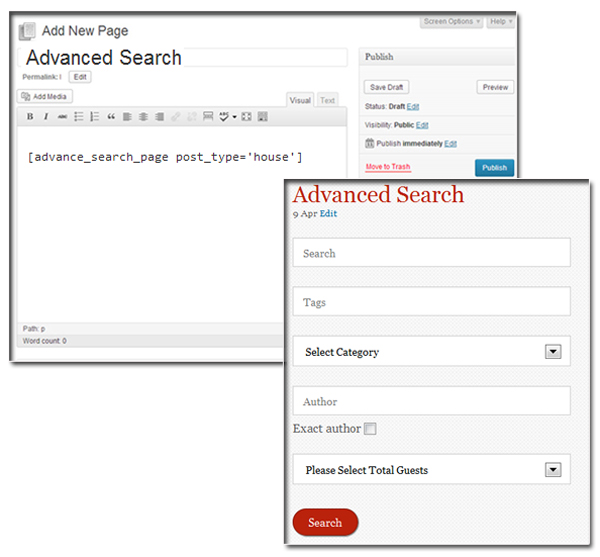
- Copy this shortcode –
[advance_search_page post_type='house'] - Paste it in your WordPress page at wp-admin -> Pages -> Add New
- Publish your page and refresh your browser to see the effect.
In above said shortcode, post type =’house’ is shown, you can also create the same form for the post type ‘room’.
5. Translate Vacation Rental theme to your language
To translate Vacation Rental, you will need software like Poedit. Using Poedit you need to load en_US.po located inside your /languages folder and translate it. For detailed instructions on translating with Poedit open our localization tutorial.
As Vacation Rental works with a combination of various plugins, so you have to translate each of their .po files located under their folders. Here is the list of those .po files and their locations,
- Vacation Rental theme – ..\wp-content\themes\VacationRental\languages, open en_US.po file.
- Supreme – ..\wp-content\themes\supreme\languages\supreme-en_EN.po
- Tevolution – ..\wp-content\plugins\Tevolution\languages, open en_US.po file.
- Templatic Booking – ..\wp-content\plugins\Templatic-Booking\language, open en_US.po file.
Along with the included .po files, Vacation Rental is also WPML compatible. Once you purchase the plugin install it in the same way you did the shortcodes plugin. Once installed, open the WPML documentation (will be provided after purchasing) and start translating. The actual translating process is no different than with any other WordPress theme.
6. Compatible with 3rd party plugins
We know that various plugins are very important to enhance the richness of a particular website! So, we provide you compatibility with certain other plugins too.
a) WooCommerce:
- You can click here to download wooCommerce.
- See the “Getting Started” Tutorial for installation and setting up WooCommerce plugin.
- WooCommerce’s Documentation/guide is available here.
b) bbPress:
Let’s see how this plugin works.
- First, download, install and activate bbPress just like you activate any other plugin. You can get it from here.
- When we activate the plugin, three taxonomies are added – Forums, Topics, and Replies. Replied depends on its Topic. Topic depends on its forum.
- For Example, In Templatic Forums, there are different forums: Catalog theme forums, GeoPlaces Theme Forums, etc… This Catalog theme forum is a “Forum” in bbPress.
- Now, under Catalog theme forums there will be many forums. These are treated as “Topics”.
- And a Topic can have many replies. Each of them is known as “Replies” in bbPress.
- Forums can only be added from backend. Topics & Replies can be added from Front-end & back-end.
- If you are adding a Topic from back-end, then you must select Forum for that topic from WP-admin -> Forums -> New Forum -> Forum Attributes -> Type field.
- If you are adding a Reply from back-end, then you must select its respective forum and topic from WP-admin -> Replies -> New Reply -> Reply Attributes section.
- bbPress’s other settings are placed in WP-admin -> Settings -> Forums.
7. Show the pop up for image gallery in normal WordPress pages
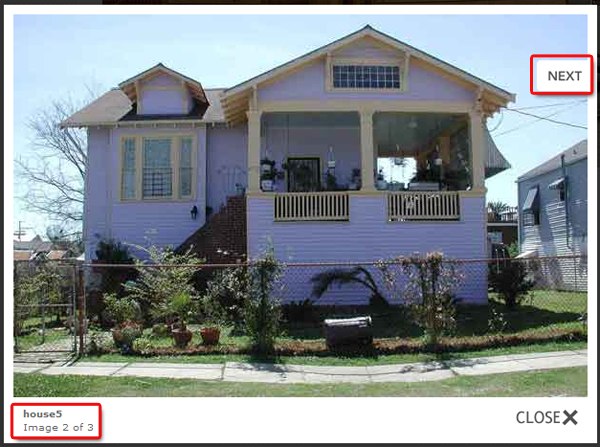
Yes you can, but the condition is, if you have activated Templatic-Shortcodes plugin. Otherwise, it will open the image gallery as pop up for the rooms/houses but not for the normal WordPress pages.
Configure Various Page
Here is the full explanation for configuring various pages of your website. The explanation given here is based on our Vacation Rental demo site.
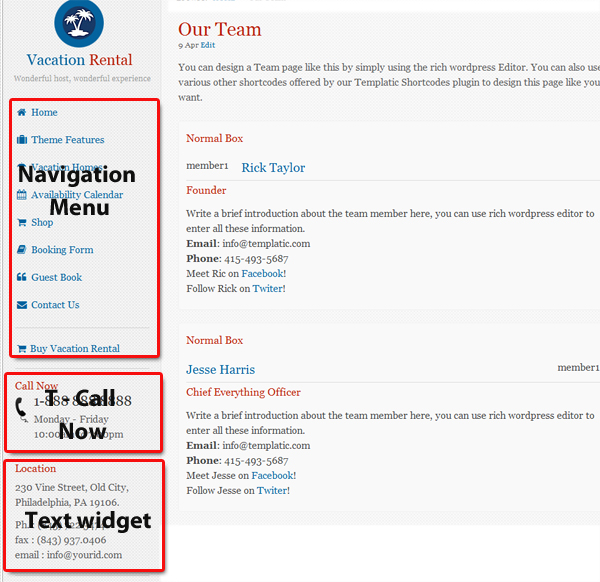
1. Homepage
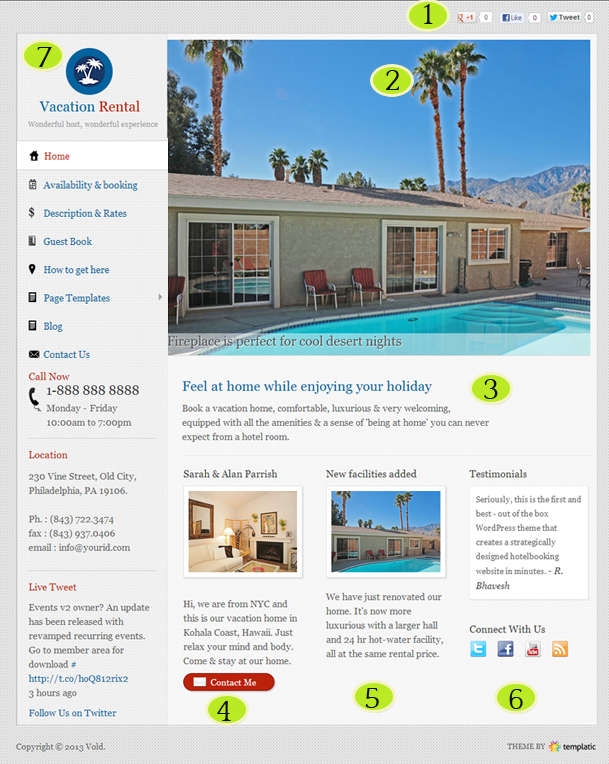
Setting up the Home Page
To set up home page, please follow the numbering given in the above screenshot
Go to wp-admin > Appearance > Widgets
The widget areas that you can see are:
1. Header Top Right – You can always choose to place widgets as per your requirement but placing the suggested widgets will be the most suitable ones.
Suitable Widgets:
- T-Like This – Lists the social media account icons from where your users can follow you
- T – For Reservation – This widget emphasis on your contact details, so it just asks for Title & phone number.
2. Home Page Slider – Slider plays the important part in making your site viewable & pretty.
Suitable Widgets:
The widget specially designed for this area is “T – Home Page Slider” Let’s have a detail view on how to use it
3. Home Page Content – Row – This is a row area just below the Slider.
Suitable Widgets:
You can place the widget “T – Book Now Strip” or “T-Advertisements” etc here.
- T – Book Now Strip – It will let you show the short description along with the title & your booking form URL.
- T-Advertisements – Using this widget, you can add your ad with its Title & its code using html<tags>.
4. Home Page Content – Column 1 – This area comes after the Home page Content Row & can be utilized to showcase your vacation homes.
Suitable Widgets:
- T-Text with image – Using this widget, you will be able to show a short description about your vacation home along with title & your desired image.
- T – Facebook Fans – This widget can be used in any widget area (Depends on your necessity). It asks for very simple fields like,
- Facebook Page URL – Mention your Facebook URL
- Width – Size the area for displaying it
- Show Faces – Allows you to show the profile pictures of your fans
- Show Stream – Shows the list of your posts with the latest one first.
- Show Header – Will show a header content like “Find us on Facebook”
5. Home Page Content – Column 2 – Like column 1, this area can be used for the same purpose as you may have many vacation offerings. Use the same widget as used in the Content – Column 1.
Suitable Widgets:
- T -Newsletter Subscribe – With this widget, you can show a newsletter subscription from where your users can subscribe to it.
6. Home Page Content – Column 3 – This is the area adjacent to Content Column 2.
Suitable Widgets:
- T-Testimonials – It will allow you to show the review of your clients/users on your home page. Here, you need to set up certain fields like
- Title – Give title to your testimonial
- Set Time Out: – Sets the time for a particular testimonial text to stay on the screen
- Set the Speed: – Sets the speed of change between the testimonial texts.
- Transition type: – Select the way how it will be displayed.
- Quote Text: – the text written as testimonial
- Author name: – Name, who has written it.
You can add or remove as many testimonials you want to this widget. Each time you add it, you will have to fill the above said fields.
7. Primary – This is a sidebar that will appear on the “Home Page” as well as on the inner pages. This is the area where most of the widgets fit well. However it varies from the site to site requirements.
Suitable Widgets:
You can place the widgets like “T – Call Now”, “Text”, “T – Latest Twitter Feed” and many more, let’s have a look:
- Navigation Menu – The useful WordPress widget here. To add the various icons to your menu items, follow the link
- T – Call Now – With this widget, you can add simple text, Phone number & your availability hours as it is specially designed to emphasis your contact information.
- T – Latest Twitter Feed: – This widget lets you show your tweets with its specific URL.
- T – Booking Widget – It will let you show the booking kind of form with the title, calendar, short description & the Post Type (Like Room). The widget works with two post types only: Room and House.
- T – Browse by Categories – It lets you show the list of posts according to the categories they were posted in.
- T – Browse by Tags – It will let you show the list of posts according to the particular Tags given to them.
- T – Flickr Photos – By just providing your Flickr Id& number of Photos that you want to display, you can show those Flickr photos here too.
- T – For Reservation – This widget emphasis on your contact details, so it just asks for Title & phone number.
- T – Newsletter Subscribe (mentioned in Home Page content column 2)
- T – Recent Reviews – Using this widget, you can show the latest comments on your posts in reverse chronological manner. Just select the post type & to limit the number of comments, mention the numeric value in the asked field “Number of Reviews”
Apart from the House (Listing, Detail, Tag pages) & Room (Listing, Detail &Tag pages), this primary Sidebar area will be applied to all the pages. In fact the Navigation (normal menu or JQuery Mega Menu) will be visible on this area only.
2.House Pages
House is a default post type that gets activated as soon as you activate the whole Vacation Rental system. To setup all the house pages, 2 things are important, i) creating houses and ii) setting up widgets for its various pages.
i) Create house
- Go to wp-admin -> Houses -> Categories
- Create the categories for your houses and name them as per your need. (e.g. villa) It is the best option when you want to offer different vacation home and not the “HOUSE”
- Add houses from wp-admin -> House -> Add a House
- Fill up all the required fields there and check mark the house category that you create for it. (If you want add some more fields to your house/room detail page then you can create custom fields from wp-admin -> Tevolution -> Custom Fields Setup. Read more on custom fields)
- Publish it and refresh your browser to see the effect.
Read more in the Booking add-on documentation guide.
ii) Place widgets on different house pages
The pages that effects the house post type are listed here along with the explanation how we should configure them,
A) House Category Page
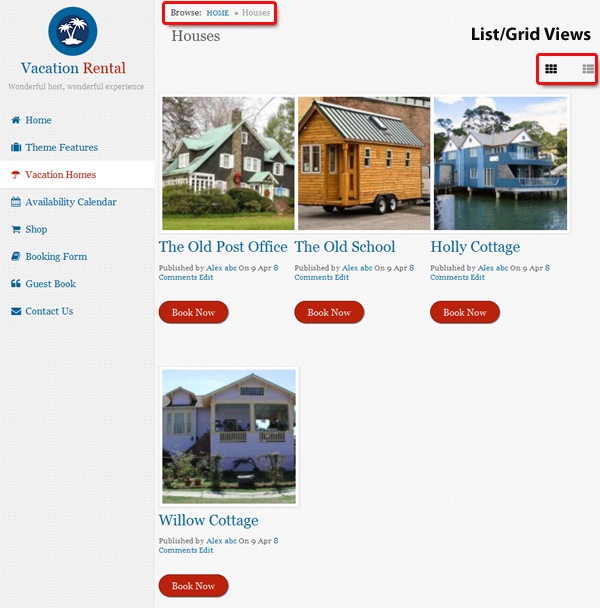
This is the page that shows the list of available houses with a “Book Now” button under a particular category. Now it gets created automatically, you just need to
- Place the categories in the navigation menu bar. So that users can actually locate the category page
- Now, place your required widgets in the “House Category Page Sidebar”
B) House Detail Page
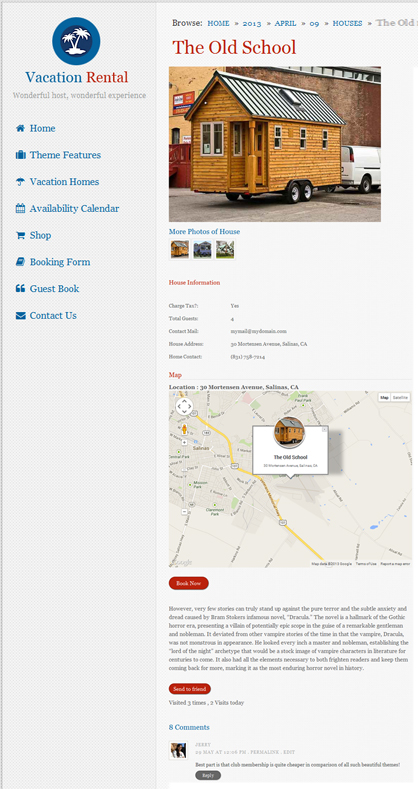
The page that shows the full content of any particular house along with “Book Now” button is a house detail page. Being an admin, you can also view it directly from the back-end, open the page of any house from wp-admin -> House and click “View House” button.
Now, like its category page, place your required widget in the “House Detail Page Sidebar” widget area located at wp-admin -> Appearance -> Widgets.
C) House Tag Page
When you are creating a house from wp-admin -> House -> Add a House, you can give it a tag(s) in the field “House Tag” given at the middle right side of your “Add a House” screen.
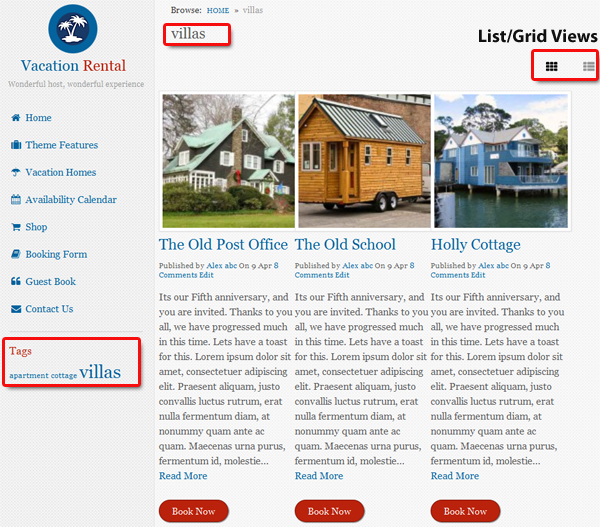
- Now, place a Tag widget either in your navigation bar or in the sidebar area of any of your house page, so that people can locate the tag page
- Then, head over to wp-admin -> Appearance -> Widgets and place your required widget in the widget area House Tag Page Sidebar.
- Save it and refresh your browser to see the effect.
3. Room Pages
Room is also a default post type that gets activated as soon as you activate the whole Vacation Rental system. Just like House, 2 things are important, i) creating rooms and ii) setting up widgets for its various pages.
A) Room Category Page
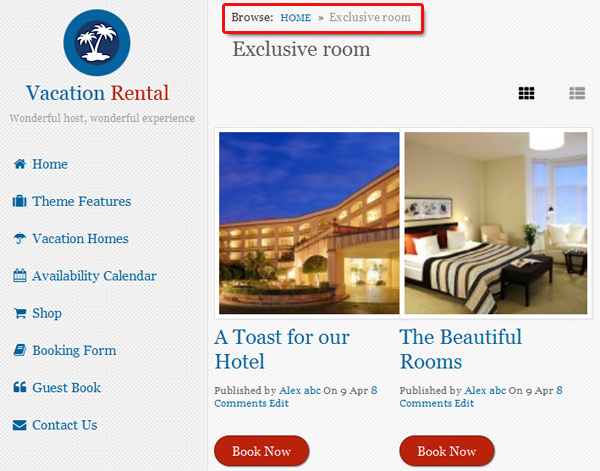
This is the page that shows the list of available rooms with a “Book Now” button under a particular category. Now it gets created automatically, you just need to
- Place the categories in the navigation menu bar. So that users can actually locate the category page
- Now, place your required widgets in the “Room Category Page Sidebar”
B) Room Detail Page
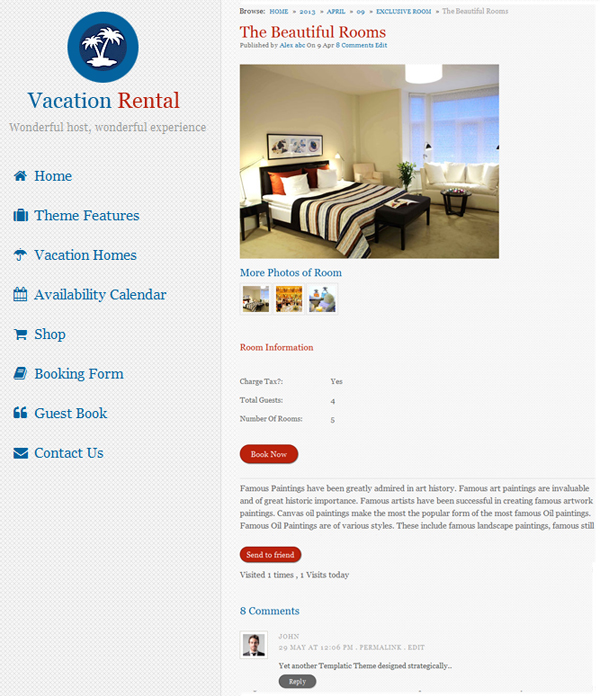
The page that shows the full content of any particular room along with “Book Now” button is a room detail page. Being an admin, you can also view it directly from the back-end, open the page of any room from wp-admin -> Room and click “View Room” button.
Now, like its category page, place your required widget in the “Room Detail Page Sidebar” widget area located at wp-admin -> Appearance -> Widgets.
C) Room Tag Page
When you are creating a room from wp-admin -> Room -> Add a Room, you can give it a tag(s) in the field “Room Tag” given at the middle right side of your “Add a Room” screen.
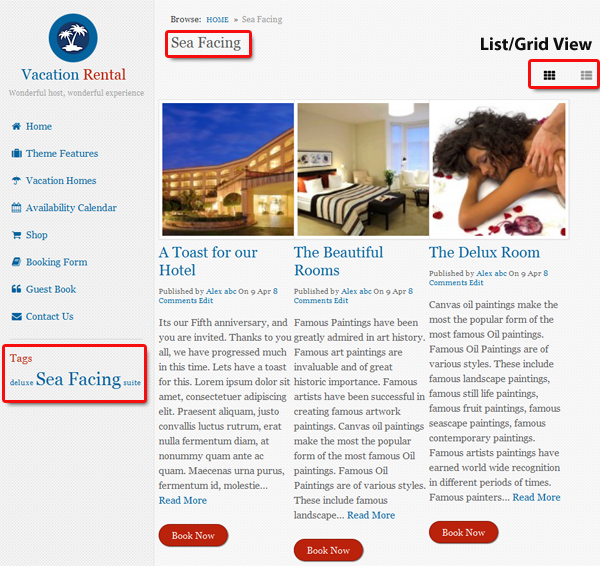
- Now, place a Tag widget either in your navigation bar or in the sidebar area of any of your room page, so that people can locate the tag page
- Then, head over to wp-admin -> Appearance -> Widgets and place your required widget in the widget area Room Tag Page Sidebar.
- Save it and refresh your browser to see the effect.
4. Contact Page
You can create contact page with the help of “Contact Us” page template from wp-admin -> Pages -> Add New, select it in the field “Template” given under the section “Page Attributes” that creates a ready made contact form.
There are 2 widget areas that has effect on contact pages,
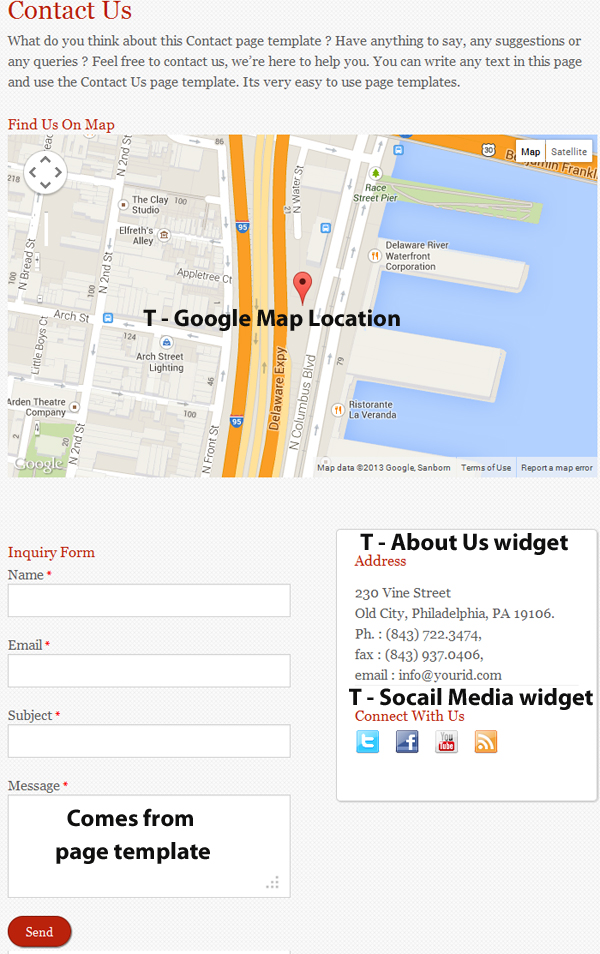
Contact Page Widget Area – Shows placed widgets right to the contact form.
Suitable widgets: T – About Us, T – Social Media etc
Contact Page – After Content – Shows the widgets above the contact form.
Suitable widgets: T – Google Map Widget
5. Primary Sidebar
This is a sidebar that will appear on the “Home Page” as well as on the inner pages. Blog listing page will also display the widgets placed in this sidebar area. It is the area where most of the widgets fit well.
Suitable Widgets:
You can place the widgets like “T – Call Now”, “Text”, “T – Latest Twitter Feed” and many more, let’s have a look:
- Navigation Menu – The useful WordPress widget here. To add the various icons to your menu items, follow the link
- T – Call Now – With this widget, you can add simple text, Phone number & your availability hours as it is specially designed to emphasis your contact information.
- T – Latest Twitter Feed: – This widget lets you show your tweets with its specific URL.
- T – Booking Widget – It will let you show the booking kind of form with the title, calendar, short description & the Post Type (Like Room). The widget works with two post types only: Room and House.
- T – Browse by Categories – It lets you show the list of posts according to the categories they were posted in.
- T – Browse by Tags – It will let you show the list of posts according to the particular Tags given to them.
- T – Flickr Photos – By just providing your Flickr Id& number of Photos that you want to display, you can show those Flickr photos here too.
- T – For Reservation – This widget emphasis on your contact details, so it just asks for Title & phone number.
- T – Newsletter Subscribe (mentioned in Home Page content column 2)
- T – Recent Reviews – Using this widget, you can show the latest comments on your posts in reverse chronological manner. Just select the post type & to limit the number of comments, mention the numeric value in the asked field “Number of Reviews”
Apart from the House (Listing, Detail, Tag pages) & Room (Listing, Detail &Tag pages), this primary Sidebar area will be applied to all the pages. In fact the Navigation (normal menu or JQuery Mega Menu) will be visible on this area only.
6. Create a guest book for your website
To increase the credibility of your vacation homes, you can show your guests reviews on your website creating a guest book, like we did on our demo site,
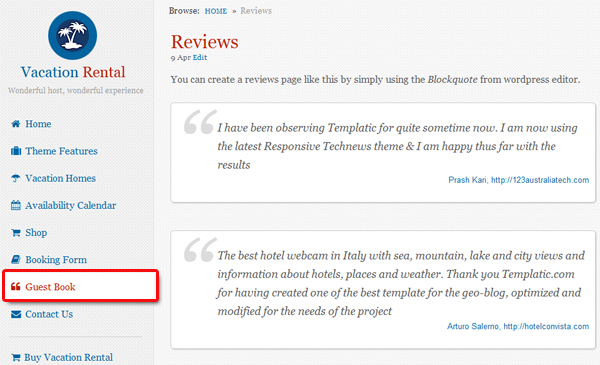
Basically, we did nothing much big. It is just a normal WordPress page with block quotes and some html code. Let’s have a look what we did,
- Go to wp-admin -> Pages -> Add New
- Write your guest reviews and apply them a block quote
- Write <hr/> tag to have the horizonal division between your two reviews.
<blockquote>I have been observing Templatic for quite sometime now. I am now using the latest Responsive Technews theme & I am happy thus far with the results<cite>Prash Kari, <a href="http://123australiatech.com" target="_blank">http://123australiatech.com</a></cite></blockquote> <hr /> <blockquote>The best hotel webcam in Italy with sea, mountain, lake and city views and information about hotels, places and weather. Thank you Templatic.com for having created one of the best template for the geo-blog, optimized and modified for the needs of the project<cite> Arturo Salerno, <a href="http://www.hotelconvista.com" target="_blank">http://hotelconvista.com</a></cite></blockquote> <cite></cite> is a attribute that has the main purpose to identify the contained text as a reference to another source, be that a book, a play, a periodical publication.
Any Queries? Contact us and we’ll help you out.