A list of some of the best and useful WordPress Gutenberg blocks and how they can help you create content effectively.
The WordPress Gutenberg editor has gotten people talking right from the day it was announced. Specifically, because it is said to be one of the major changes in the history of WordPress.
This new version of the WordPress bets to redefine how content is created and published with WordPress. The new editor is going to replace the existing WordPress TinyMCE editor.
The already popular WordPress Gutenberg editor tries to integrate page builder kind of features for adding content in your WordPress website. This editor works based on blocks. For different content sections, you can use different blocks.
For example, Paragraph block for inserting a text paragraph, video/image block to insert media into your page, list block to create a bulleted list, etc.
These blocks can be added, removed and re-arranged on your WordPress pages as per your requirements. The block-based design is, therefore, more flexible and lets you create content more efficiently.
Before the WordPress Gutenberg editor comes integrated with the release of the WordPress 5.0, it is available as a separate plugin. You can integrate this plugin into your website and try the new editor to see how it can help you create content faster and effectively.
Here is a list of the best WordPress Gutenberg blocks that will really re-define the editing experience on WordPress.
- The Classic editor as a Gutenberg block
- Shared blocks of the Gutenberg editor
- The beautiful gallery block
- Embed easily with the embed Gutenberg block
- Gutenberg block for Custom HTML with a preview
- Column blocks: Text columns & beta columns
- The button block
- Upload image/video Gutenberg block
1) The Classic editor block
We are going to miss our TinyMCE WordPress editor, aren’t we?
The classic editor, or the TinyMCE editor as we know it, has been there since the launch of WordPress and we are so accustomed to creating posts using it, that a sudden transition is unsettling.
And there may come a time when you’d rather have you post done with the basic WordPress editor than the advanced Gutenberg editor for WordPress.
The classic editor block of the new Gutenberg editor is designed to let you do just that. If you want to type your post just the way you do in the TinyMCE editor, all you need to do is to insert this block and have the pleasure of using the old editor in the new system.
The WordPress community is constantly debating about the necessity of a new editing system. However, the replacement of TinyMCE editor is compensated with this block in the Gutenberg plugin. It gives the users a chance to use their very one classic editor to create content for their post.
And this block, just like any other Gutenberg block, can be used along with other blocks too. Suppose you want the comfort and familiarity of the TinyMCE editor to write your content, but want to use the button block for a CTA section.
You can easily do this by opting for a Classic editor block and then inserting a button block into your website. You can even use any other block like an image, video, embed, anything you want. And then again, for more text, you can use another classic editor block.
With the combination of all these blocks, you can create beautiful content effortlessly.
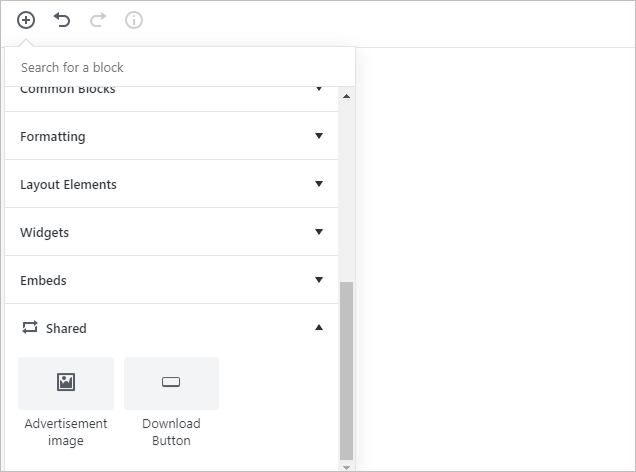
2) The Shared blocks
The new Gutenberg editor is designed for a redefined publishing experience through WordPress. We tried the Gutenberg plugin that is available for free download at the WordPress repository.
Now while creating your content, there may be a part of the content that you repeatedly use on different posts/pages. This can be anything. For example, A content block that shows a particular advertisement on different pages, or a content block for a certain call to action, a download the ebook button, a subscribe to the newsletter section or a text section for some important note/announcement.
For such content blocks, you can use the shared block feature. You can turn any block you want to a shared block and reuse it on some other page. Shared blocks, as the name suggests, are the blocks that can be shared among the posts.
But remember, the changes that you make on a shared block will be reflected everywhere it is used. If you want to change a shared block exclusively for a single page or post, you can first convert it to a
How do you create a shared block in Gutenberg editor?
Creating a shared block can be done in 3-mini-steps
- Add the block you want to set as a shared block. Customize it.
- Open the menu for the block and click “convert to shared block”.
- Name it and save it.
Now the saved block will start appearing under the title of the shared blocks and you can reuse the block for any number of posts you want.
There are three things about shared blocks that you must know before you start using it:
- A shared block is shared among posts. So the changes you make to the shared block will be visible everywhere the shared block is used.
- You can easily convert a shared block to a regular block. You would want to do this when you want to use a shared block but customize it for a particular page, without globally and permanently changing the shared block. When you convert a shared block to a regular block on a page/post, it just converts the instance of the shared block on the page. So you can customize it as per your requirements without affecting its other instances.
- You can delete a shared block. Once deleted, it will be removed from all the pages it has been used on. So be careful when deleting a shared block from your website.
3) Gallery block
The WordPress Gutenberg editor comes with a beautiful block called Gallery block. As the name suggests, this block lets you create gorgeous image galleries on the go.
So while creating content for your pages, if you want to create a gallery of images, instead of looking for an HTML code to create galleries, or looking for plugins related to galleries, you can directly use this block.
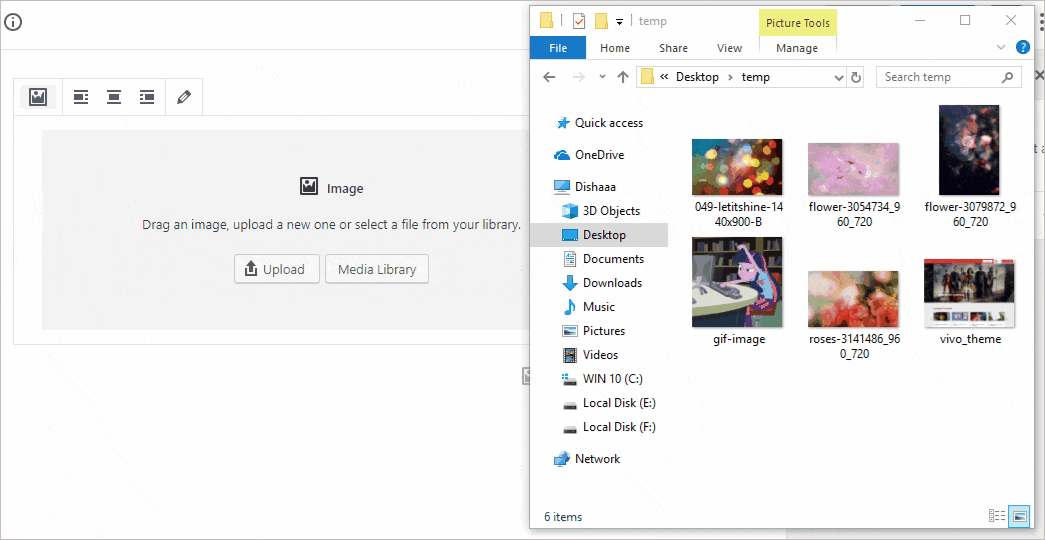
You can insert this block on your WordPress page just like you insert any other block. Now you can upload new images, or choose from the images that are already uploaded, from your website’s media library.
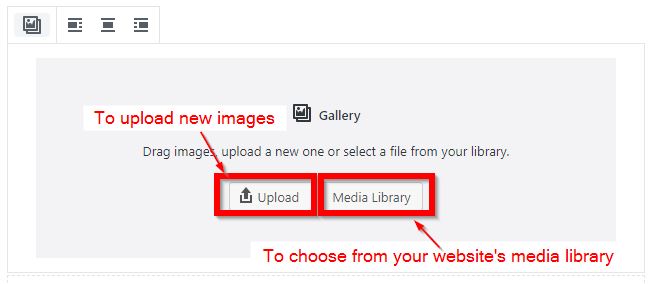
When you choose the upload options, it will open a browse file dialog box and you can easily choose and upload the images you want. You can also add images by drag and drop options. The images will be automatically adjusted to create an attractive gallery.
The gallery block allows you to rearrange the images, edit the gallery to add a new image or remove the image, and even write a caption for the images.
The Gallery block also supports GIF
Social media and other internet platforms are making GIFS popular. Do you want to use the GIF images into your website’s Gallery? This Gutenberg gallery block allows you to do that too.
Gifs can be uploaded just like you upload any other images. So you can create a gallery with a GIF image, or a combination of simple as well as GIF images, or all GIF images.
Here’s an example of Gallery with a GIF image.

Control the columns
You can set the number of images you want to appear in one line. This allows you to control the kind of gallery you want to show on your page.
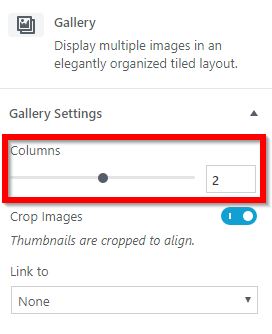
Additional CSS class
For advanced formatting for your galleries, you can define a dedicated CSS class.
4) The Embed Gutenberg block
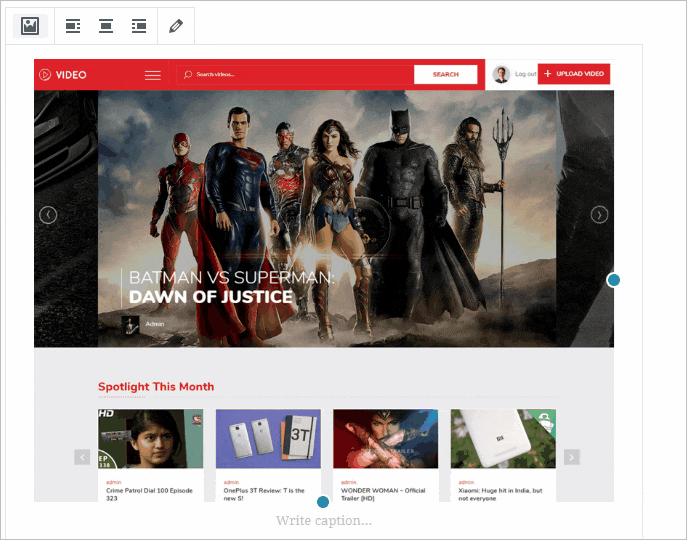
If you want to embed the content of some other web page into your WordPress post, this Gutenberg block makes it easier than ever.
The embed block lets you easily embed videos, Instagram photo, YouTube video, Tweets, Reddit thread, Soundcloud post, etc.
Here’s how a typical embed block will look.
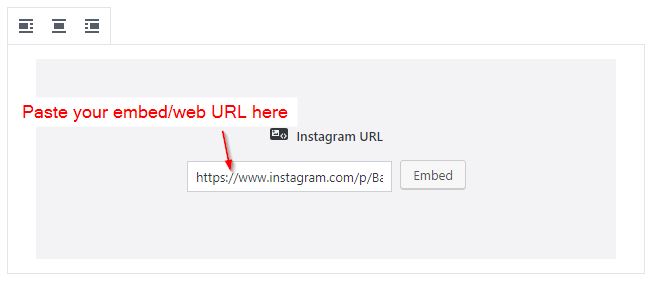
The embedded web element looks beautiful & organized when published. The embed blocks let you choose from the available embed sources. Once you choose an embed block, you can easily insert the link of the element you want to embed.
That can be an Instagram image URL forIinstagram embed block, the tweet’s link for Twitter embed block, the video URL for YouTube, etc.
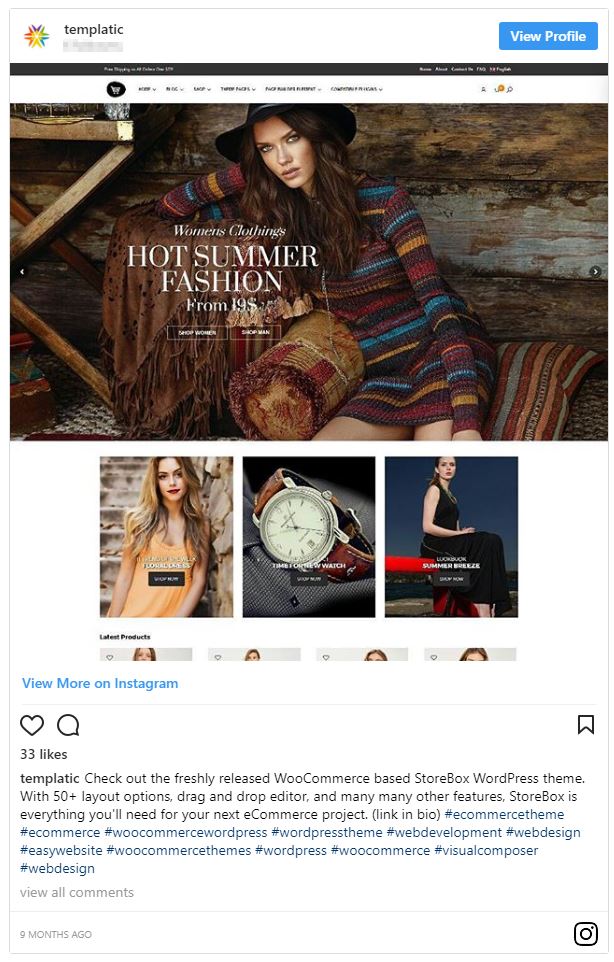
Here’s how an embedded image from Instagram will look after publishing:
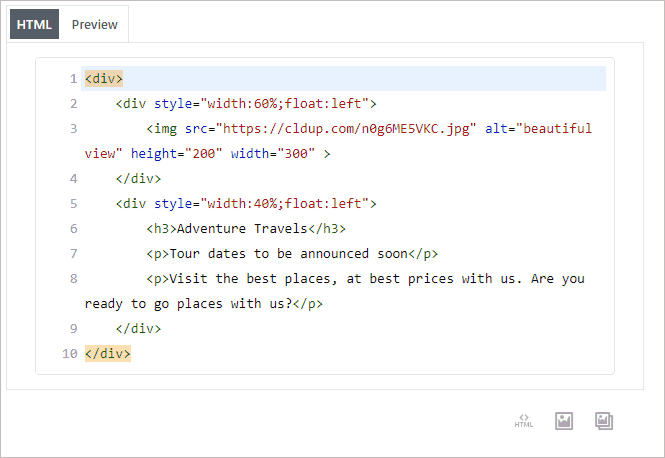
5) Custom HTML with preview option
HTML is one of the easiest ways to insert web elements on your page.
You can use this block to embed custom HTML codes, or absolutely any kind of HTML element into your website.
This block also lets you preview the output of the HTML code. This can be of great help if you have a ready to use HTML code that you want to utilize on your page.
When you are displaying sponsored advertisements on your website, the advertisers may sometimes provide you the HTML code for advertising. You can also insert the Google AdSense code here to show advertisements on your site.
Besides HTML, there is also a block called “code” which you can use to insert code snippets for integrating web elements on your page.
The blocks like HTML/Code are very useful since they let you add programmed elements easily. You can create an attractive page by directly integrating beautifully animated elements using these blocks.
6) Column block [text columns/beta columns]
No one likes boring content. Specially if you are creating long-form content, variations in content format can help make it more readable.
Long ago, when I was a newbie blogger using WordPress, I used HTML and <div> tags to separate my content in columns. It looked terrible until my WordPress + Programming pro friend helped me out.
The column block of the WordPress Gutenberg editor is a gift for people like me. Now, it really easy to organize your content into columns without meddling with HTML and <div> tags.
Simple text column block
The concept here is simple, If you want to create content in columnar form, you can use this block. It is a rather simple block that allows you to divide your section in as many columns as you want.
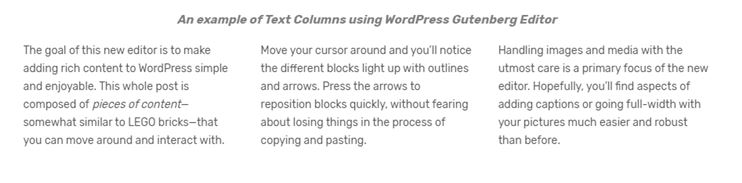
You can set the number of text columns you want. The following in how the content displayed by text column will appear after publishing.
Here’s an example of how a three columned text content will appear:
The Columns (beta) block
Sometimes you would want to use different columns of a section for different content. For example, you want the first column to display an image, and the next column for textual explaination.
The Columns (beta) block of WordPress Gutenberg editor, is a rather smart block. It doesn’t just help you divide your section into columns, but lets you select blocks for each of the column you create.
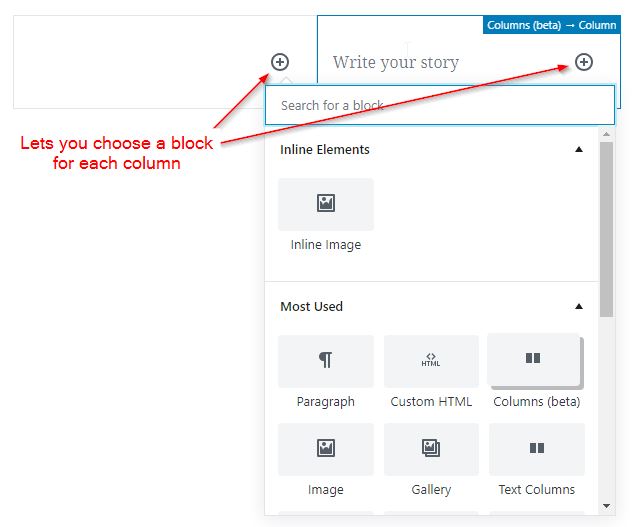
So you can easily insert the element of your choice using a dedicated block for each column. If you want to insert an image in the first column and text into the one next to it, the columns block makes it really easy.
7) The button Gutenberg block
Say goodbye to the HTML codes to generate buttons. The new Gutenberg editor comes with a block dedicated for buttons.
Until the Gutenberg editor, you had to use shortcodes or HTML to create buttons on your website. But the new Gutenberg editor will let you create buttons on your website without having to create an HTML code. This feature will work wonder for all those bloggers out there who want a completely coding free blogging experience.
You can create fancy buttons with some easy options and use them into your website. These buttons can be used anywhere on the page.
The button settings let you easily set the text on button and format the text, you can enter the button text and set the redirection link, easily.
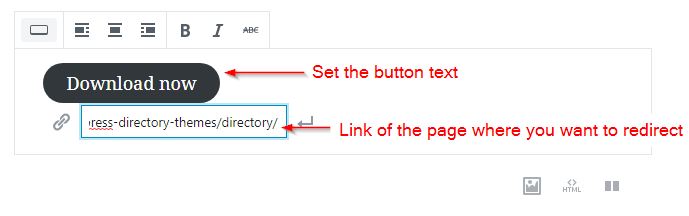
Besides, there are options to change the button color as well as the text color. You can also choose the button style: rounded, squared, or outlined.
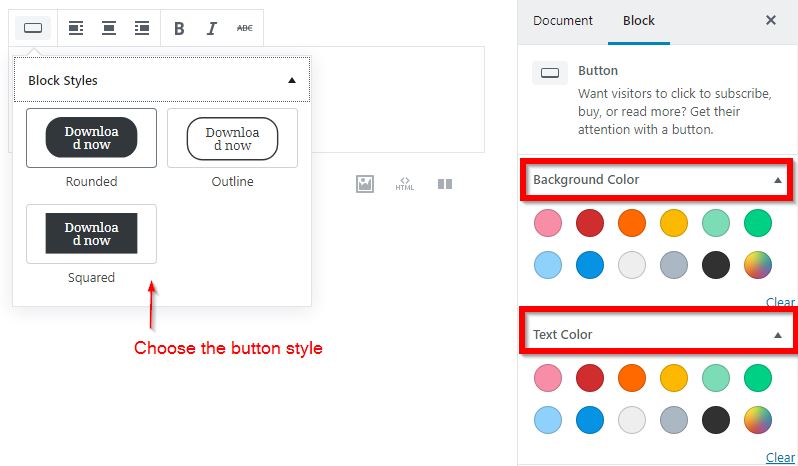
Moreover, if you want to create buttons that you desire to use on different pages, you can create a shared button block. So you can reuse the button block wherever required without having to create it again and again.
8) The Upload Video/Image blocks
The separate block for inserting images and videos using the image and video block, respectively, makes a bloggers life easier.
Both these blocks allow you to insert and manage multimedia content into your WordPress page. While in the TinyMCE WordPress editor, we are supposed to insert an image/video using the “add media” button. There were absolutely no resizing options. To resize the image, you had to edit the code for the image and manually insert the height and width.
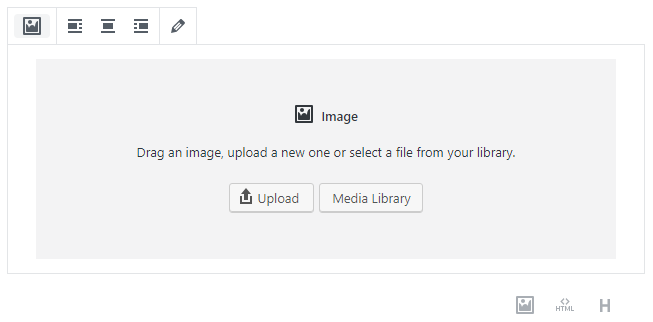
With the WordPress image block, all you need to do is to drop the image or use the file upload dialog to choose the image. You can then easily, change, resize, edit and update image. Resizing image is really easy using the Gutenberg image block just by dragging the edges.
The video option lets you easily embed videos into your website. It lets you upload video, or choose a video already uploaded from the media library. For embedding video, you can go for the embed blocks.
This option lets you easily upload the video and set its height width and how it appears on your page.