Today we will write about how to create multilevel menus in WordPress. This is a very useful task that you will accomplish very easily once you’ve read this article.
First we will explain to you why it is useful to have a multilevel menu. If you have many pages/posts/categories, it is very difficult to arrange them next to each other in the menu. Instead, it is much easier to group them by some specific and similar characteristics. Long menus are poorly displayed on small screens, you would have to keep scrolling the screen to select an item. Believe it or not, parts of a long menu can disappear when you want to publish or save a large menu. This happens because your data is too much for your hosting server to handle, and then all kinds of problems appear. That’s why you should have as short and simple menus on your sites as possible.
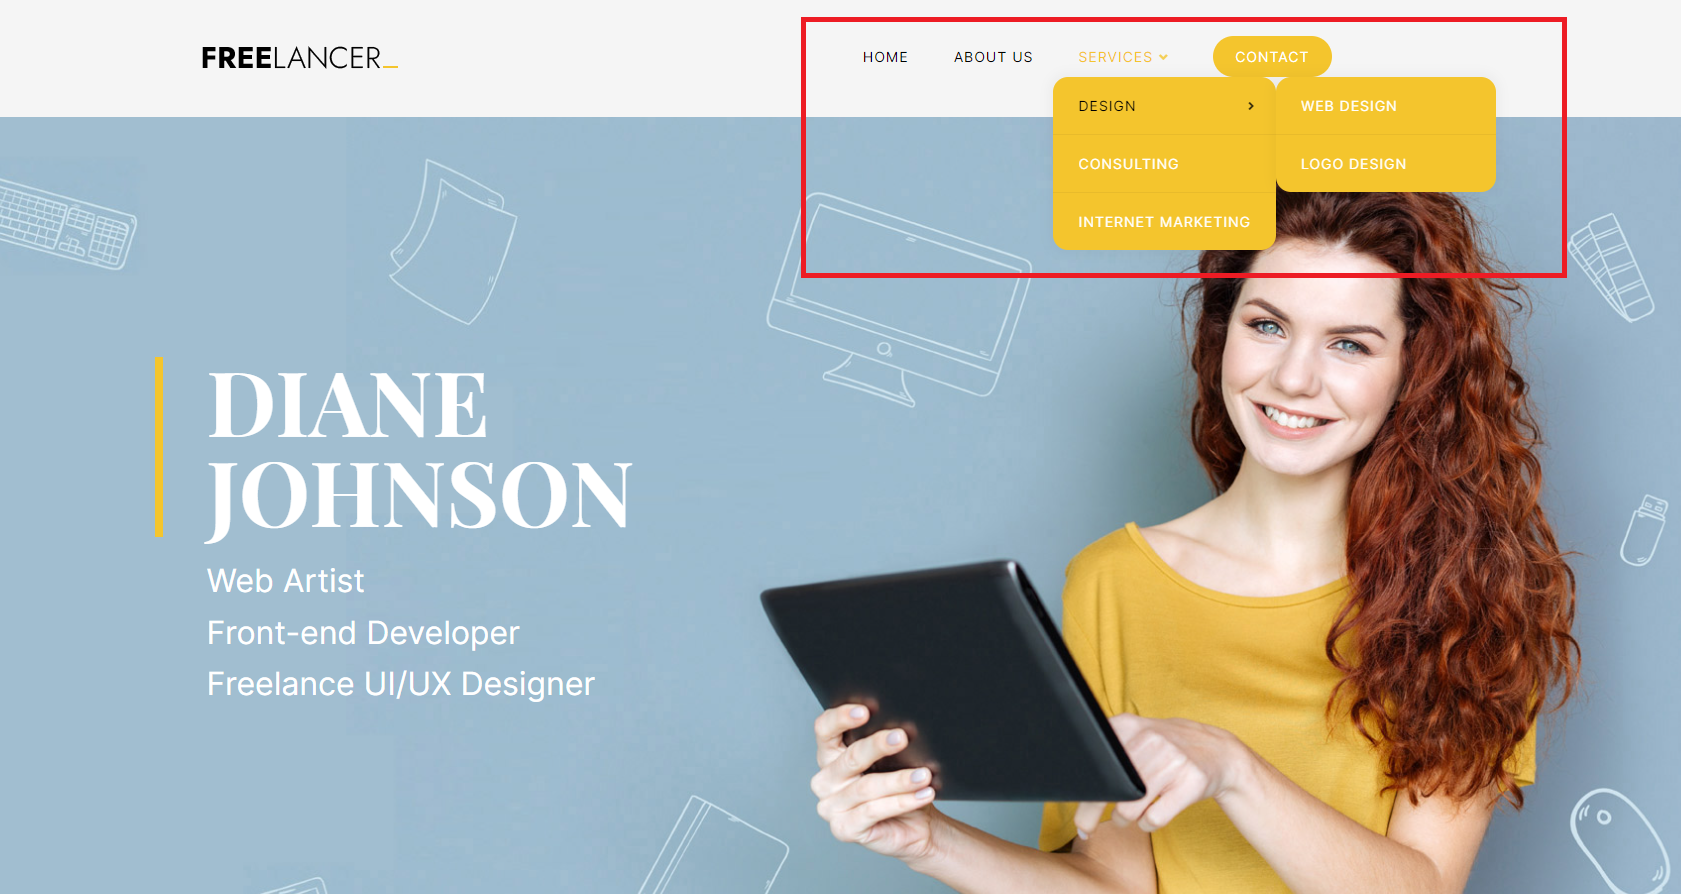
Imagine that within the menu you have the items “Services”, “Web Design”, “Logo Design”, “Consulting” and other menu items. If you leave them next to each other your menu will look ugly and it will not be practical, the user will have to move the screen to see all the menu items. So create the item “Services”, and when the user clicks on it (or just puts the cursor on it) then the remaining items will appear below – web design, logo design, consulting. Isn’t this much more practical?
Create new menu using WordPress menu editor
Let’s start creating our new menu.
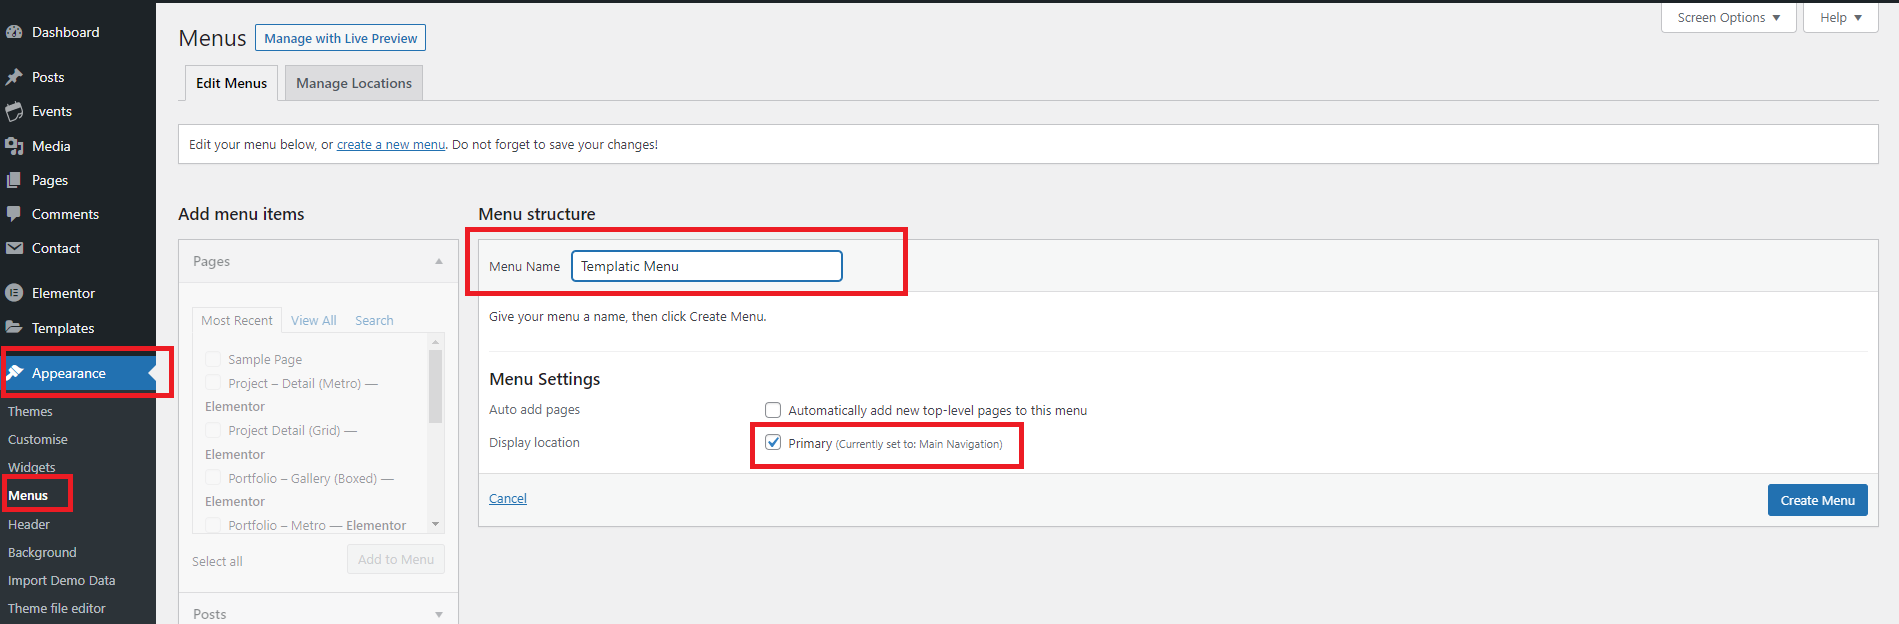
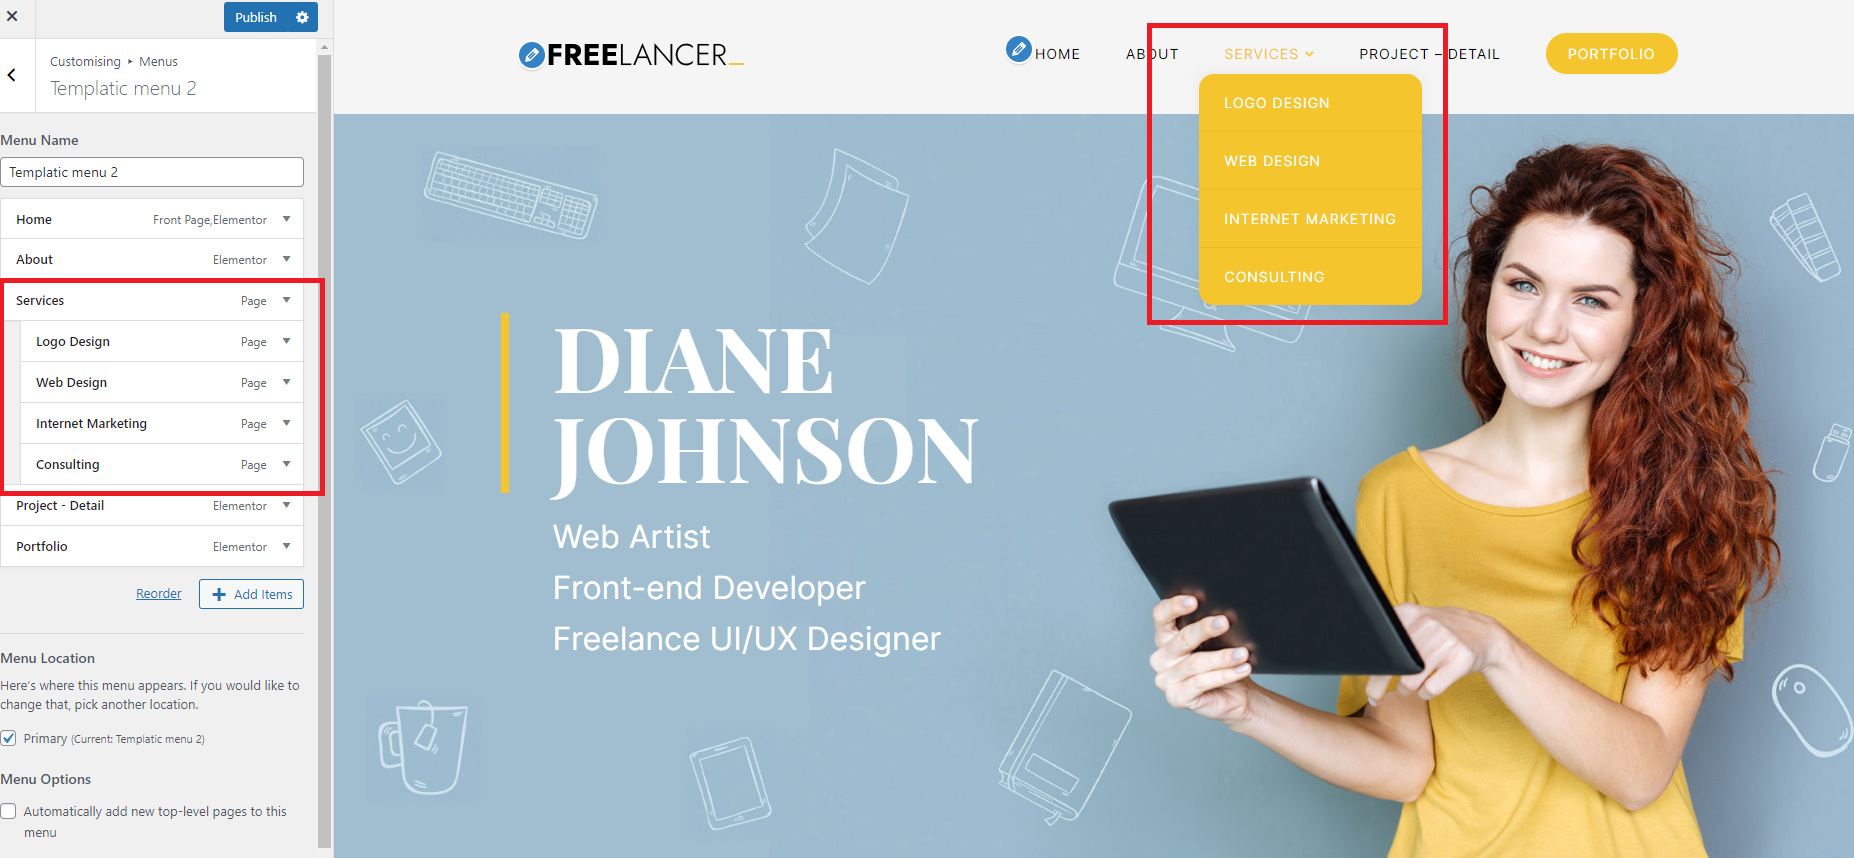
First, you need to log in to the WordPress admin dashboard and create a new menu. Click on “Appearance” and then on “Menus.” Enter a name for your new menu and be sure to click the checkbox to mark this menu as Primary. Click on “Create menu” and your menu is created.
On the left side, all pages, posts and categories that you can include in your menu will be listed. Select all the items you want and click “Add to menu.” After you have added all the desired items to your menu, click on “Save menu.” Your new menu is ready to use.
If you want to change the arrangement of items within the menu, simply drag and drop any item below or above. After that, save the menu again and the job is done. However, you will notice that this menu looks ugly and needs some improvements. All the menu items are next to each other and the menu is too long.

In order to make our menu look nice we will create a multilevel hierarchical menu. Simply select one parent item and below it add the menu items that you want it to contain, moving each menu item one space to the right. Next to those items, the inscription “sub item” will appear, which means that we have nested that item under the main parent item. It should look like this:
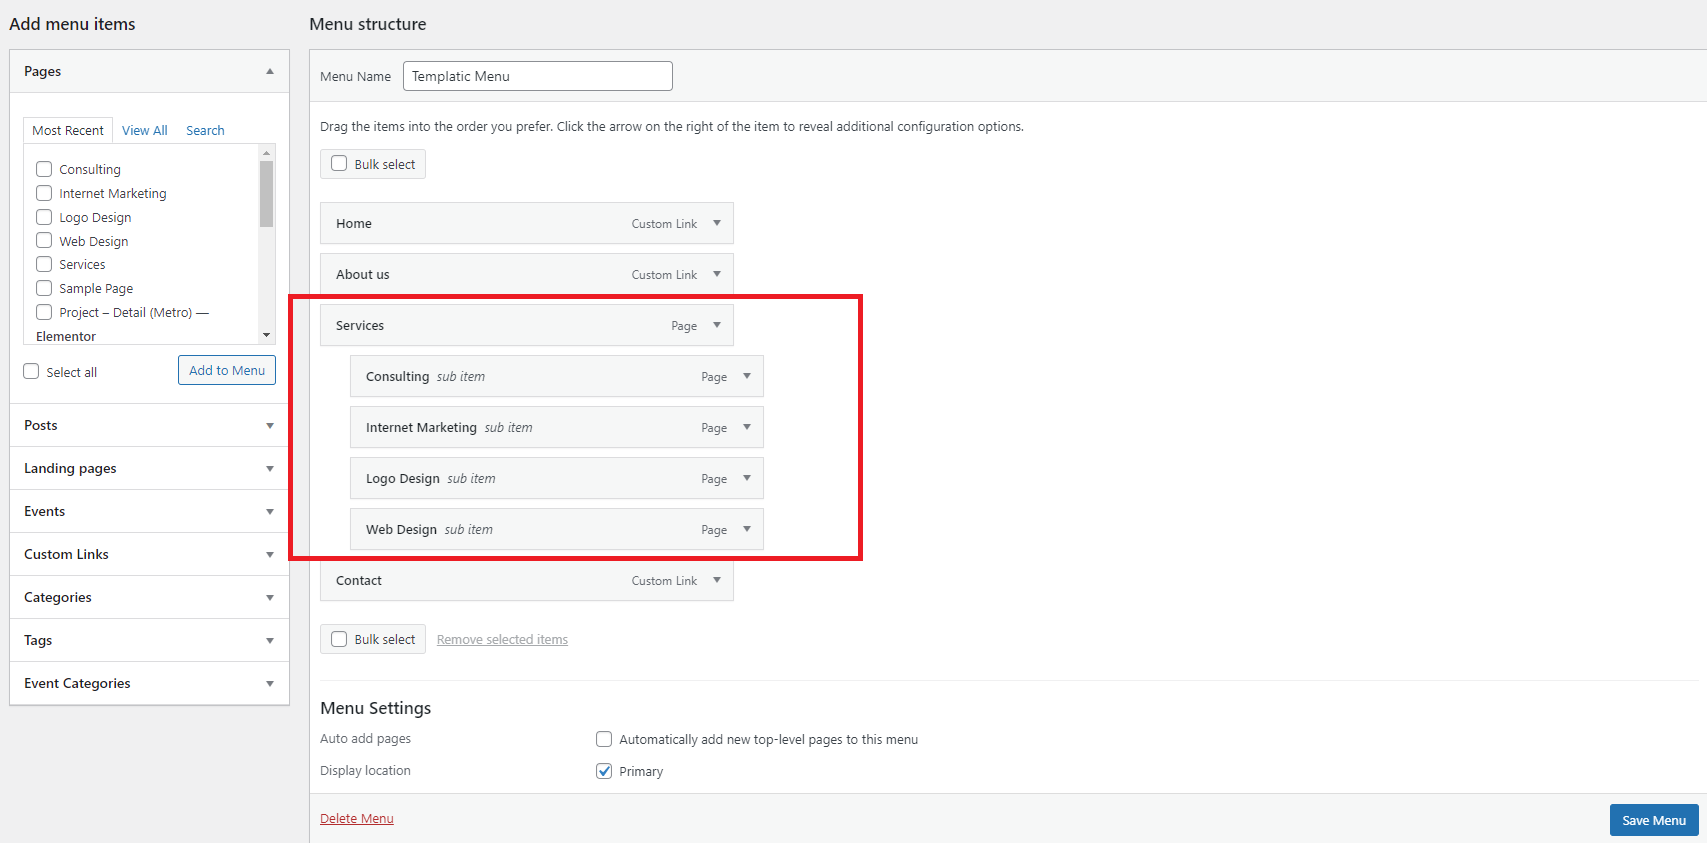
After that, click on “Save menu” and refresh your site. Now all menu items should be inside one main item.

After the visitor places the mouse cursor on “Services”, all the items we have placed there will be displayed automatically. In this way, our menu saves space, is more functional and looks much better.
It is important to note that you can have several levels within your menu. Each sub-item can contain another sub-item of its own or several of them. You’ll do this the same way you add items to the menu, then inside the sub item move the item one place to the right.
For demonstration purposes I created a new item that I named “Design.” I placed it under “Services.” Under “Design” I’ll put “Web design” and “Logo design.” This is how I created a multilevel menu.
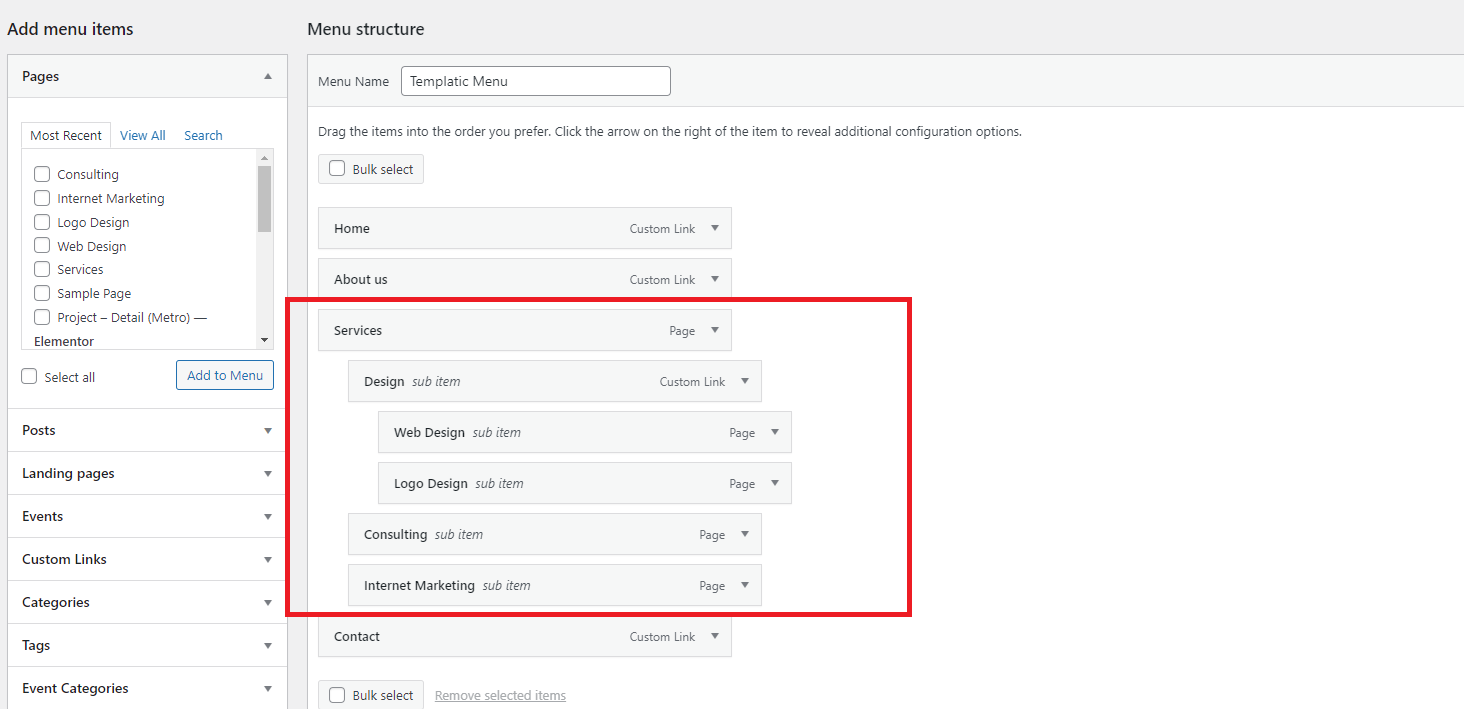
Don’t forget to click “Save menu” to save your changes. After I did a refresh and returned to the homepage it looked like this:
Our menu looks great, it is functional and doesn’t take up much space. It will also look great on small screens, no matter what device someone is visiting your website from.
We have shown you how to create your own multilevel menu within the WordPress menu editor. You can also create your own menu using the theme customizer. It’s a great option where you can see live changes to your menu – how your menu looks on the website.
Create new menu using the theme customizer
Below we will create a menu using the theme customizer. Click on “Appearance” and then on “Customize.”
A new window will open where you can change absolutely all parts of your website. We are interested in the 5th item in the left menu, which is “Menus.” Click on it, and then on “Create new menu.”

Enter a menu name, click the checkbox to select “Primary”, and then click “Next.”
Your current menu will disappear from the website, and on the left side you will see the option “Add items.” Click on it to start creating your menu.
Once you’ve added all the items to your new menu, click “Reorder” to reorder the items within the menu. Arrows will appear to move each item up or down. When you’re done, click “Done” and you are finished.

When you have successfully added all the items to your menu and reordered them according to your wishes, now you need to create a multilevel menu.
You will do this the same way as in the WordPress menu editor. Each item you want to be in the sub menu simply drag and drop it to the right. Once you’ve done that, each item will automatically be below the main one you set for the parent item.
In the upper left corner, click “Publish” and your new menu is published.
We have showed you how to create multilevel menus in WordPress. There are also numerous plugins that extend the possibilities of the WordPress menu editor. You can try them if you want your menu to have media support and to display images inside the menu. Your menu is the most important part of your website because it provides the fastest way for visitors to find the desired content and to navigate your site. Our recommendation is to keep menus as small and simple as possible, and group menu items by common characteristics. We hope that that you find this article useful.