
Are you limited by the choice of fonts on your WordPress theme? In this article we will show you how to add Google Fonts to WordPress website. If you have a modern designed website but you are not satisfied with the appearance of the text, then this article is for you. Today we will show you how you can improve the appearance and quality of text using Google Fonts on your WordPress pages.
Although WordPress has its own text editor, its capabilities can be quite limited if you’re looking for that special font. For the correct display of the text, so that the text is not cluttered or difficult to read, it is best to use Google Fonts, which are completely free.
Before we start adding fonts to our WordPress pages, we will first explain what Google Fonts are and why you should implement them on your website.
What are Google Fonts?
Google Fonts is a free collection of almost 1,500 fonts that you can use completely free of charge, even for commercial purposes. The big advantage is that you don’t have to have them on your server, but you can call them with functions and use them directly from Google services. Great, right? Most of the WordPress themes that you can find on the market today support the use of Google Fonts. If this has encouraged you to use Google Fonts, then let’s start adding Google Fonts to our WordPress pages.
Adding Google Fonts to our pages consists of several steps:
1- Finding the right Google font
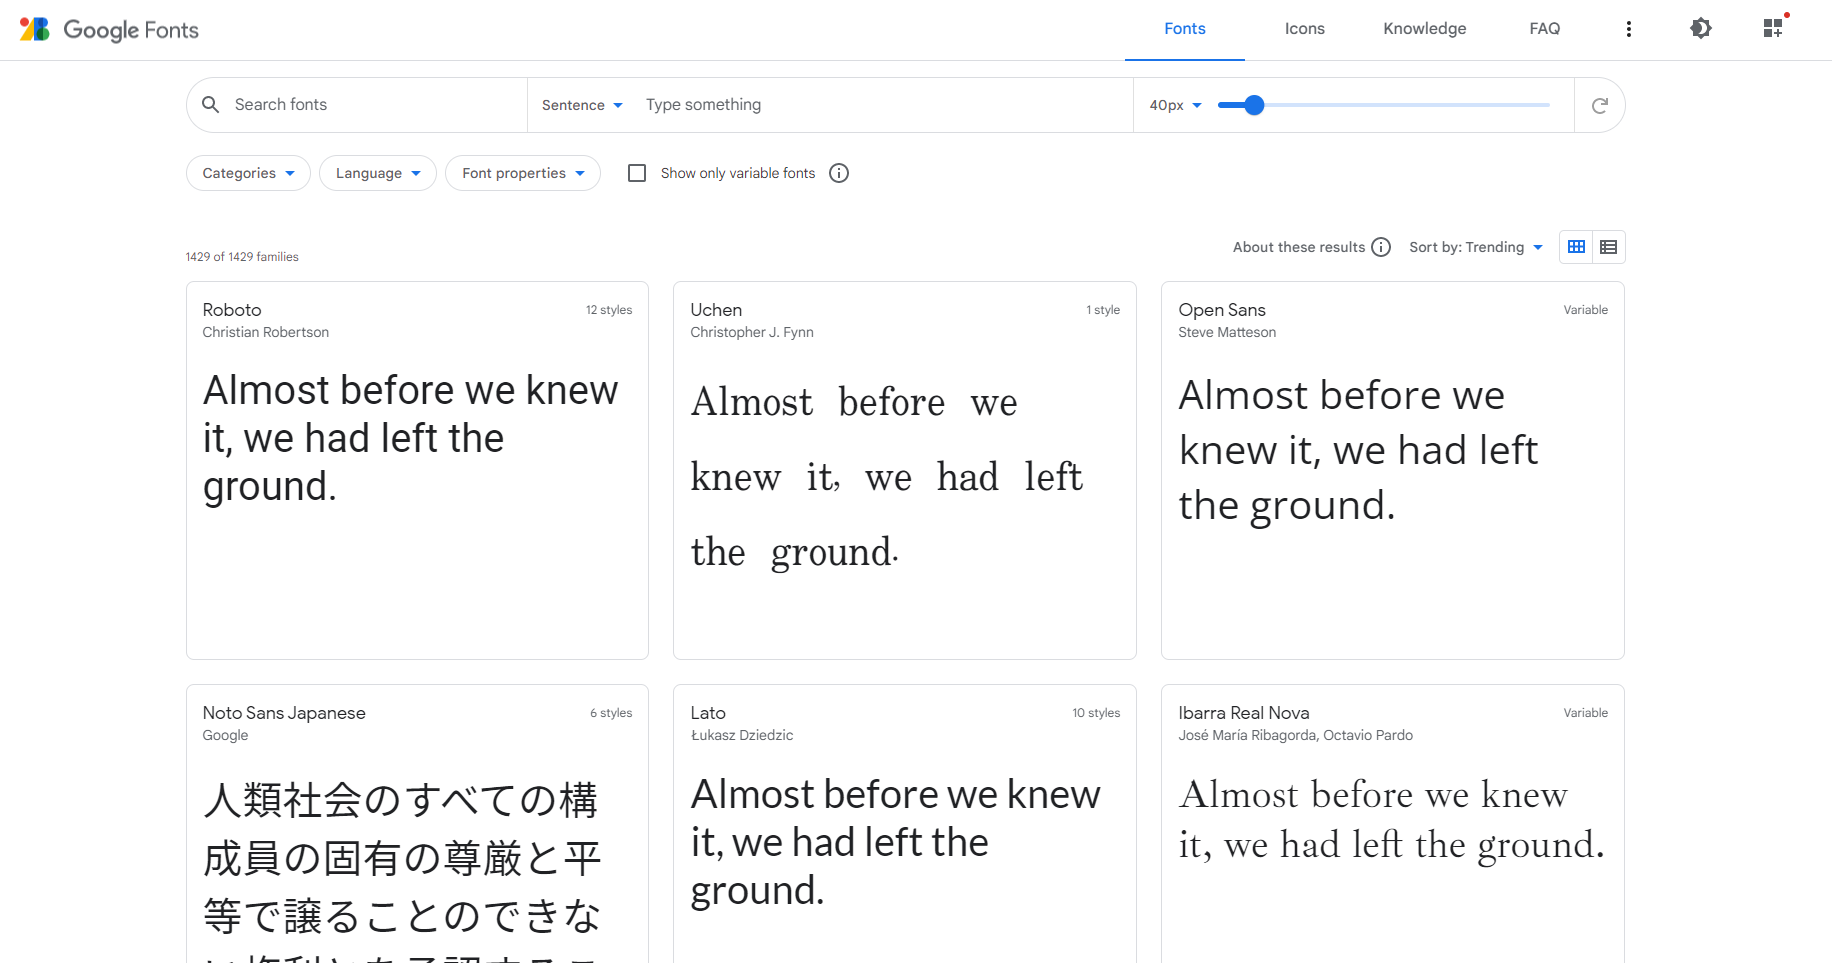
Click here to visit the Google Font Collection to select a suitable font. There is a great filtering option that allows you to find a font by category, style, language, popularity and many other filters.
2- Font selection
Click on the font you like. You can type in some text to see how that font looks with your slogan or text. Once you’ve decided on one of them, click the (+) sign on the right to add the font to your collection. Immediately after that, a window will open in which the code for implementing the specified font will be printed.
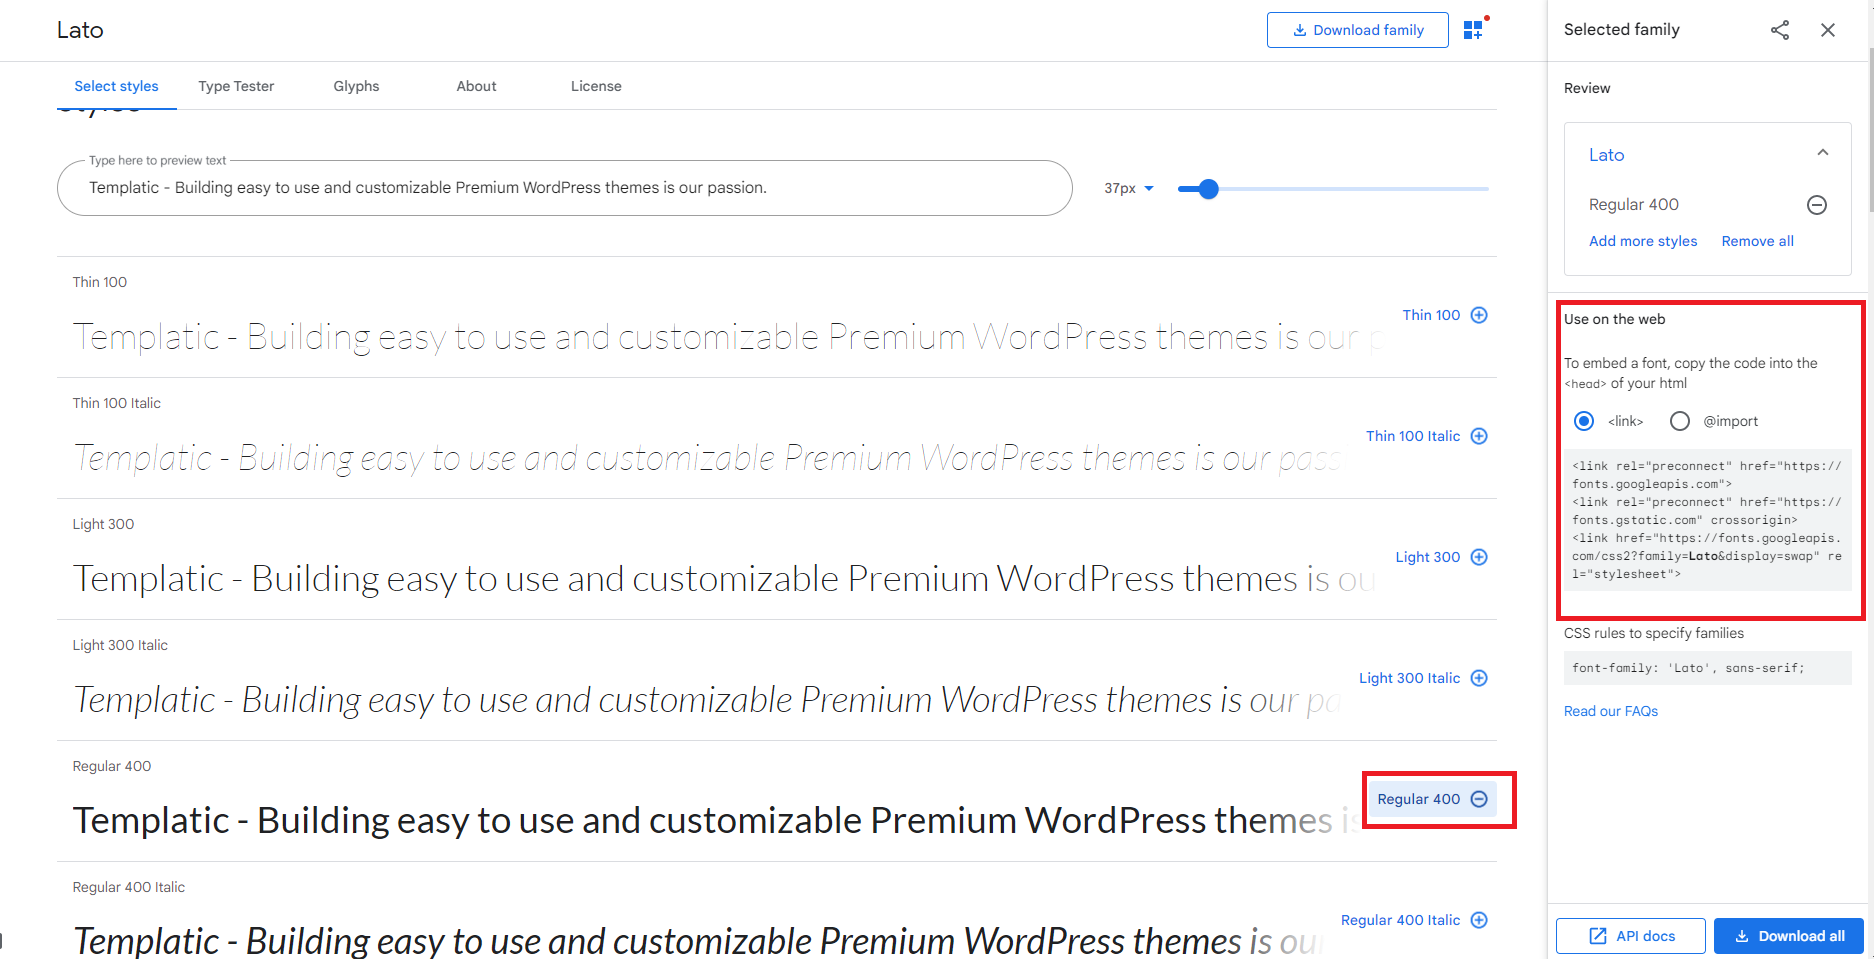
You can select multiple fonts and their layouts at the same time, but be aware that this may slow down your pages when they load. For demonstration purposes we have chosen the Lato Regular 400 font.
3- Implementation
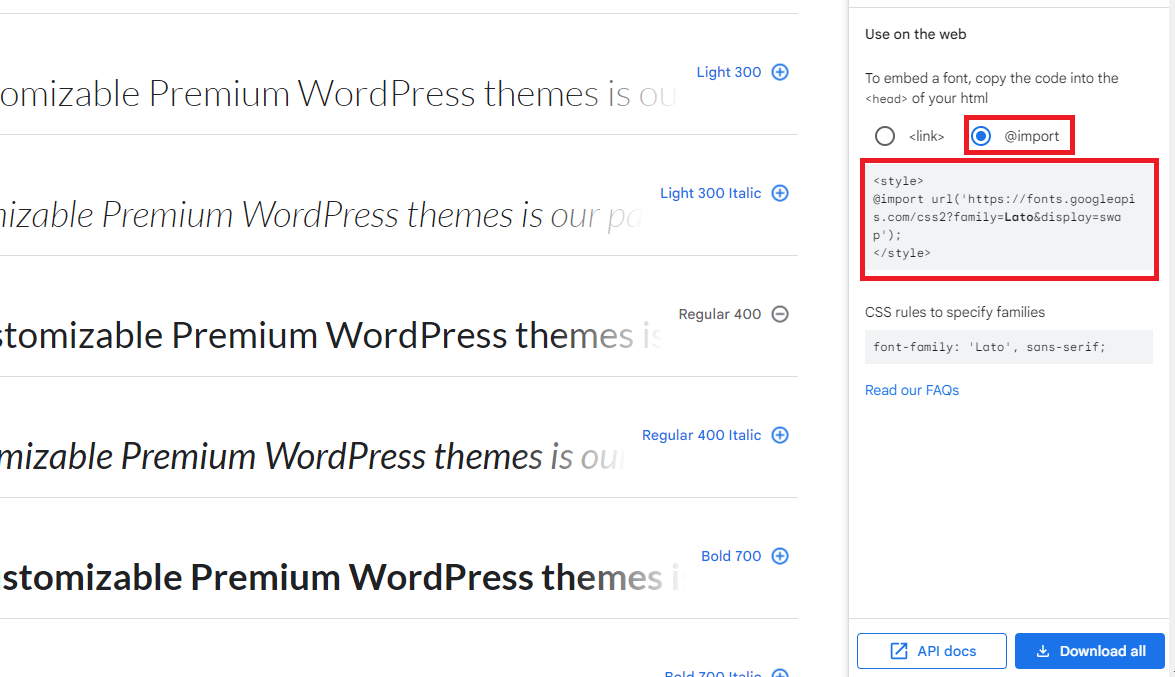
When you have selected the desired font, you will notice that a new window has opened on the right, inside which is the code that will embed the font inside your WordPress pages. There are two options, “<link>” and “@import.” We will click on the latter and copy the content.
After you’ve copied the box content, locate and edit your theme functions.php file. We will add the font using the wp_enqueue_style() function.
Inside your functions.php file type this code:
function add_google_fonts ( ) {

wp_enqueue_style ('add_google_fonts' , ' https://fonts.googleapis.com/css2?family=Lato&display=swap' ) ; }

add_action ( 'wp_enqueue_scripts' , 'add_google_fonts' ) ;
Don’t forget to insert the URL of your font instead of the specified URL. This way, you have successfully added your Google Font to your WordPress site.
As you can see, manually adding Google Fonts to your WordPress pages can be quite tricky. For this reason, many people decide to use one of the plugins made for this purpose.
Adding Google Fonts with a plugin
Below we will show you how to add Google Fonts using a plugin.
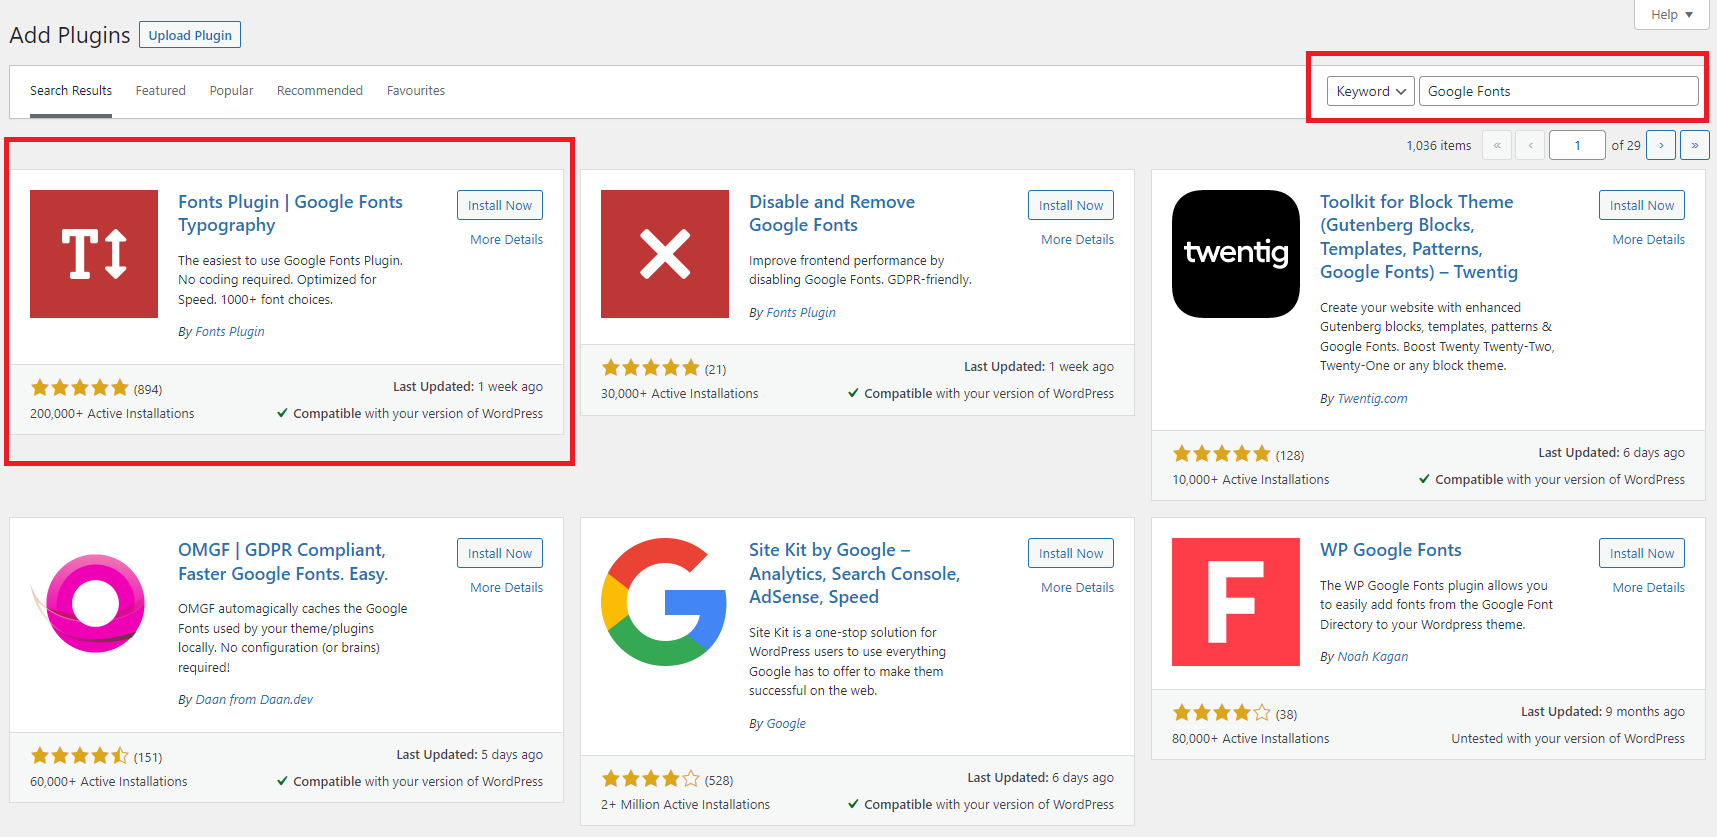
Visit your admin dashboard, then “Plugins” and then “Add new.” In the search field, type “Google Fonts.”
Install the first plugin from the list called Fonts Plugin | Google Fonts Typography. The plugin has excellent reviews, is used by many people and as we can see is regularly updated which is very important from a security point of view.
This excellent plugin has around 1000 unique fonts available that you can use very easily on your WordPress website. What is very good is the ability to use different fonts for different parts of your website. So, for example, you can use one font for the title and another font for the main text.
You can see any changes you make to fonts live in the theme customizer. Once you’ve chosen the fonts you want, simply save any changes and they’ll become publicly visible on your website.
Another reason why we chose this plugin is that it should work with all WordPress themes and there is no coding required. It has support for SSL and HTTPS, and can be easily translated into any language. It has been tested on PHP7, is SEO friendly, offers one-click updates, hosts Google Fonts locally and gives the possibility to upload custom fonts.
After installation, you will see a new option appearing in the “Theme Customizer” option – “Fonts Plugin.”
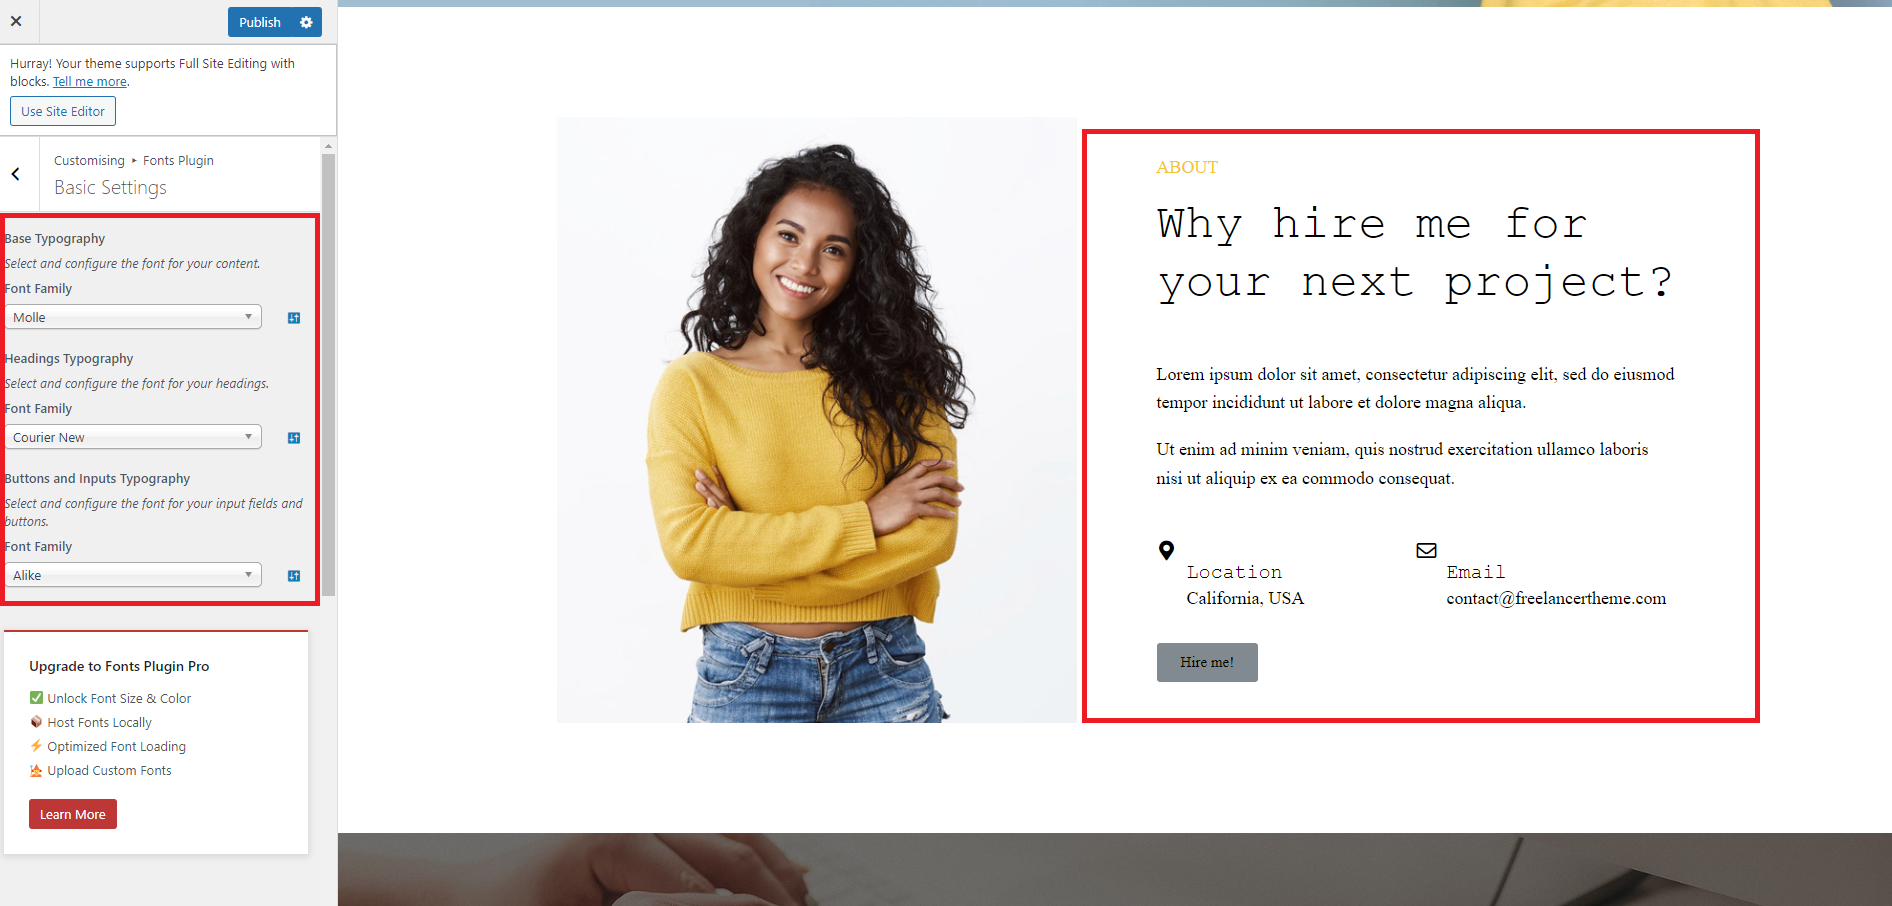
When you click on it, you will see several options that you can adjust, namely “basic settings”, “advanced settings”, “font loading” and “debugging.”

Basic settings – here you can adjust the font for your content, font for your headings and font for your input fields and buttons;
Advanced Settings – here you can adjust the fonts related to your branding, navigation, content, sidebar and footer;
Font loading – the ability to turn off fonts that you do not use so as not to slow down your website;
Debugging – an excellent option where you can force styles if your fonts are not displaying correctly, you can disable editor controls by removing font controls from the individual post editor screen. There is also a “Reset all fonts” option here, which will remove all the changes you’ve made. This action cannot be reversed.
For demonstration purposes, We’ve put ”Molle” as the content font on our website. For our headings the font is Courier New, and for my buttons the font is Alike. As we have already mentioned, you can see all the changes live. Once you’ve selected the fonts you want, click “Publish” and all changes will become publicly visible.
It is important to note that this is a commercial plugin that in its free version only offers the use of Google and Adobe fonts. If you want to upload custom fonts, host fonts locally or want priority support then you will have to buy the commercial version.
We hope this article has helped you learn how to add Google Fonts to WordPress websites and beautify the content of your website. Content that looks good will make users stay on your pages longer, increasing conversions and the overall user experience.