Do you want to save and run a copy of your website on your local environment too? You can easily install WordPress on your localhost to test, preview or modify it.
The steps for doing so may look time consuming and complex. But it is absolutely easy and will not take more than 20 minutes.
Moreover, both WAMP and WordPress can be used without any prior experience. They are quite simple to use and understand.
So let’s jump right in! Here is a breakdown of the steps we need to follow:
- Download WAMP
- Using phpMyAdmin to create a database
- Download WordPress
- Installing WordPress
- Setting up WordPress
Download WAMP or XXAMP
WAMP, is a combination of Apache web server, PHP and MySQL combined for an easy installation with Windows. With WAMP, you can quickly install all those services on your computer and start using WordPress in just minutes.
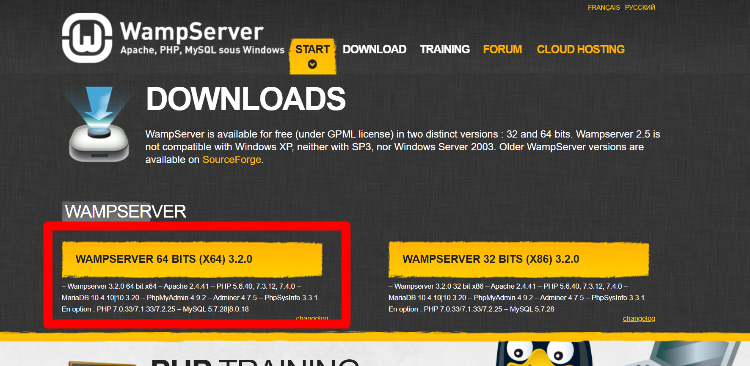
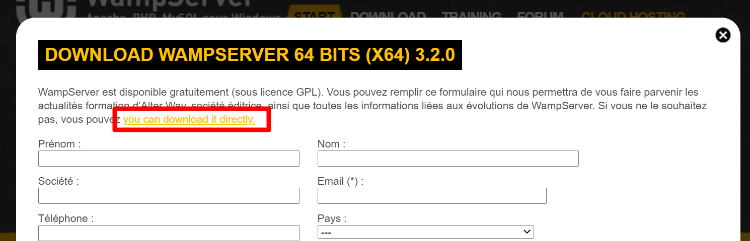
You can download WAMP Server from WAMP Server details. You can download it directly.
Installing WAMP
WAMP comes with an easy to setup wizard designed to give you a simple interface to install and use the WAMP server.
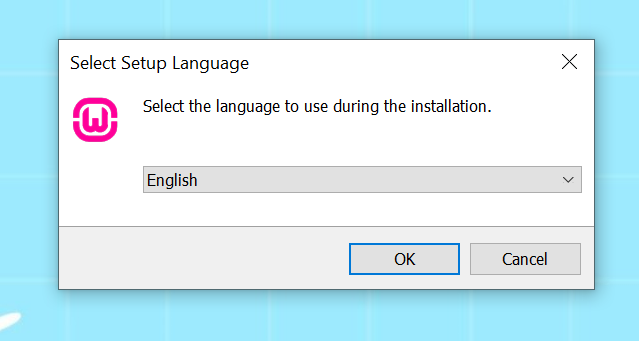
The steps are self explanatory. They are as follows:
1. Choose the language
2. Accept the license agreement
Carefully read and accept the License Agreement.
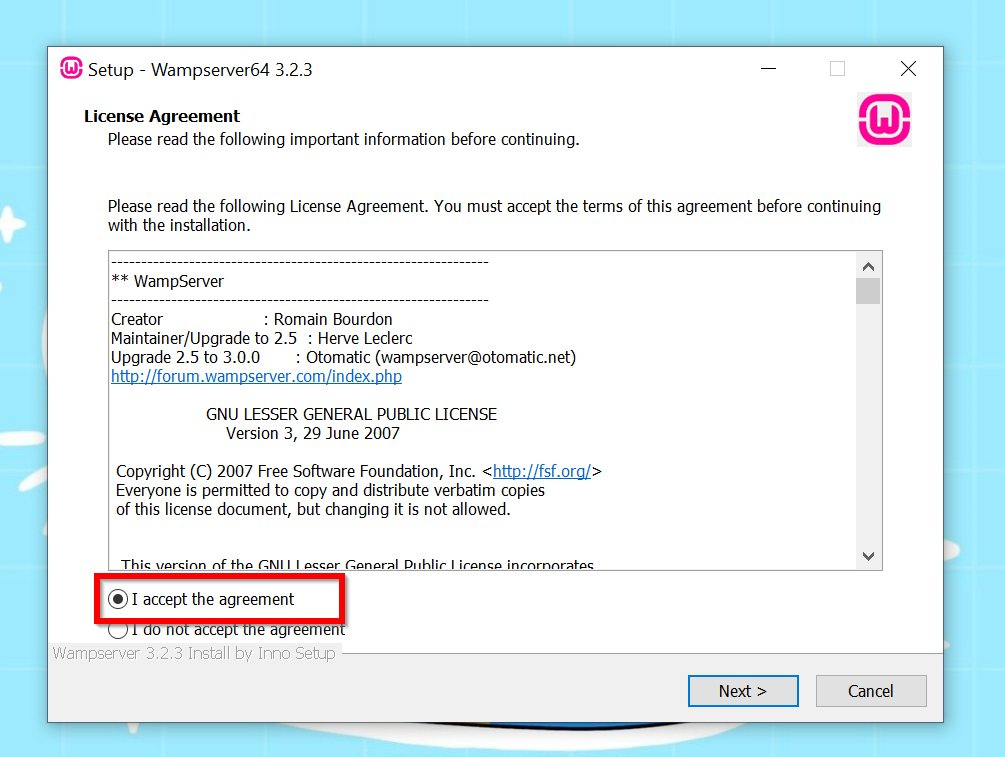
Read the agreement and press next
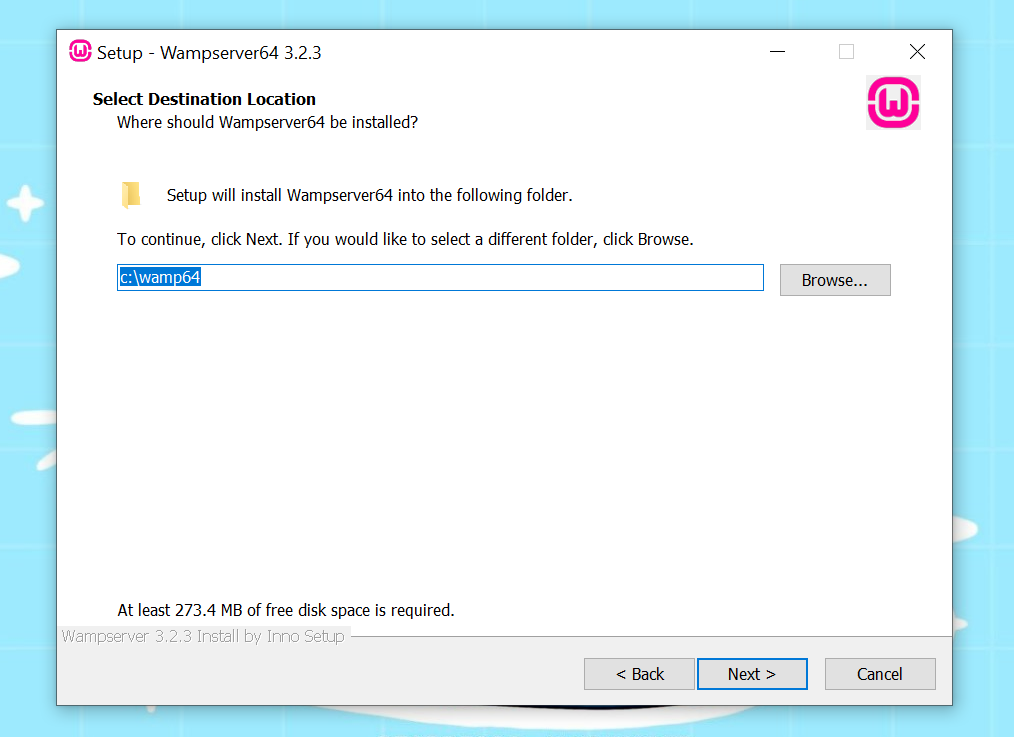
3. Choose the path for the installation.
This can be any location you want your WordPress website’s files to be saved at.
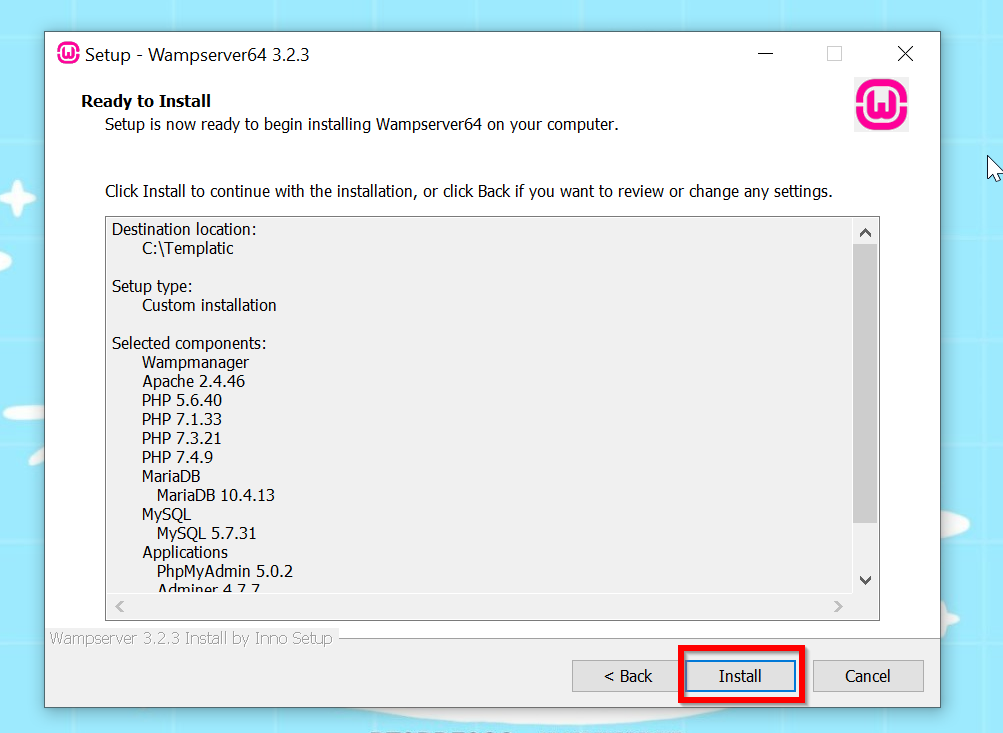
4. Choosing the components for Installation
Here you can choose the components for installing under WAMP server. Generally, you won’t have to change anything extra for WAMP server, you can just continue by clicking next.

And you are almost done.
5. Click “Install” to start the installation process.
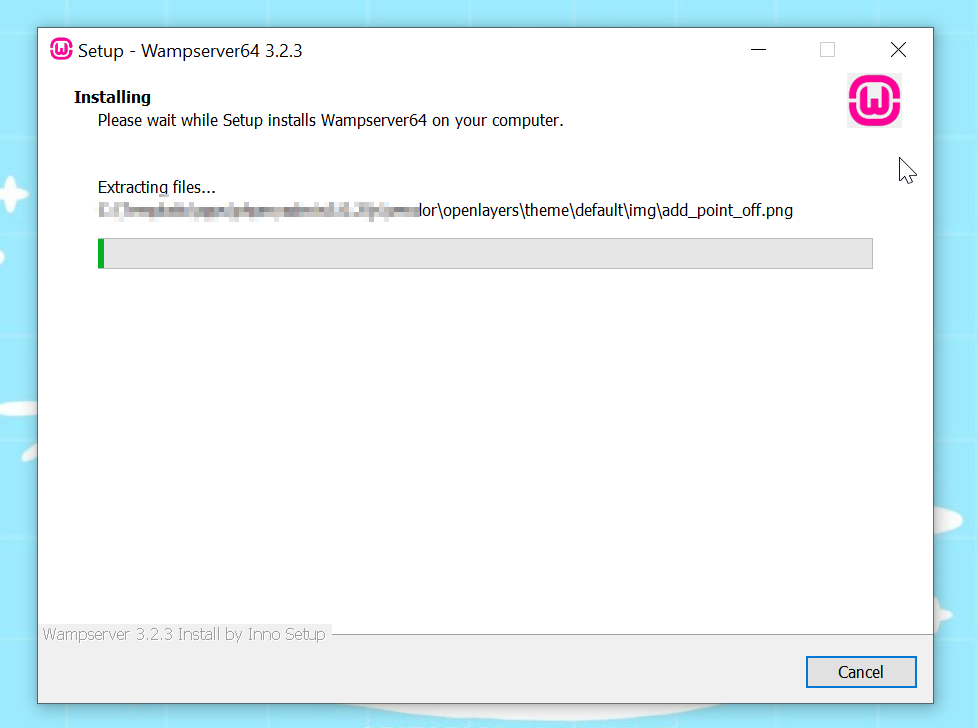
6. Wait for the intallation
The installation process will take a few moments and you can just wait for the installation to be done.
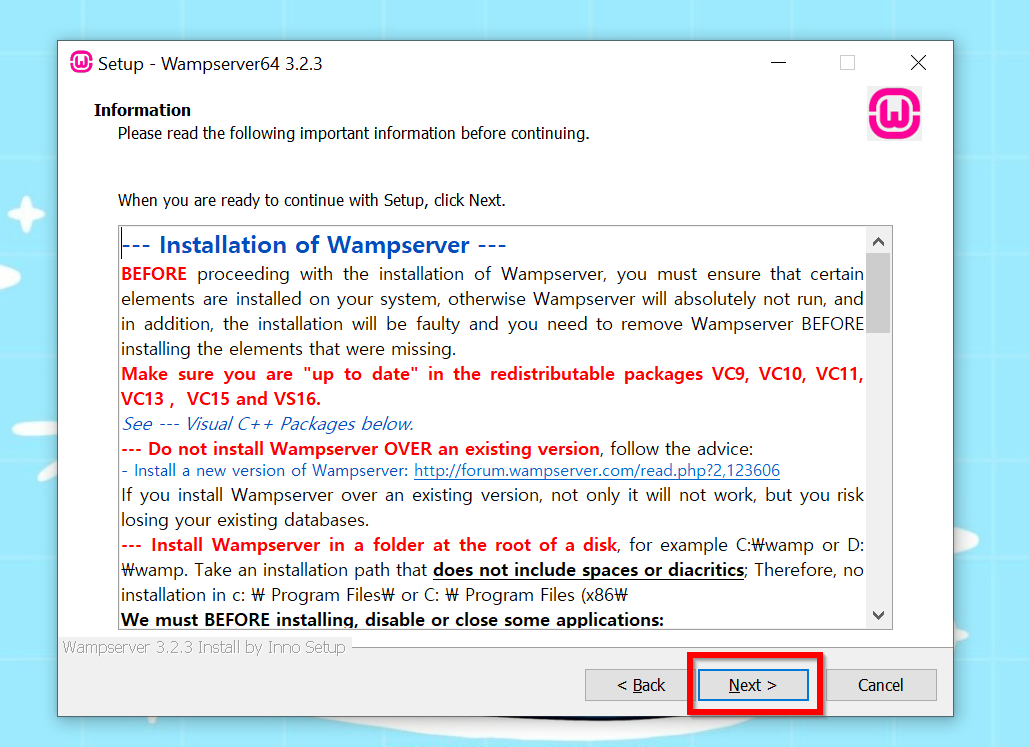
7. The prompts you may get during the installation process
Most of the installation process will progress without asking for your input, you may get these two prompts before it is completed.
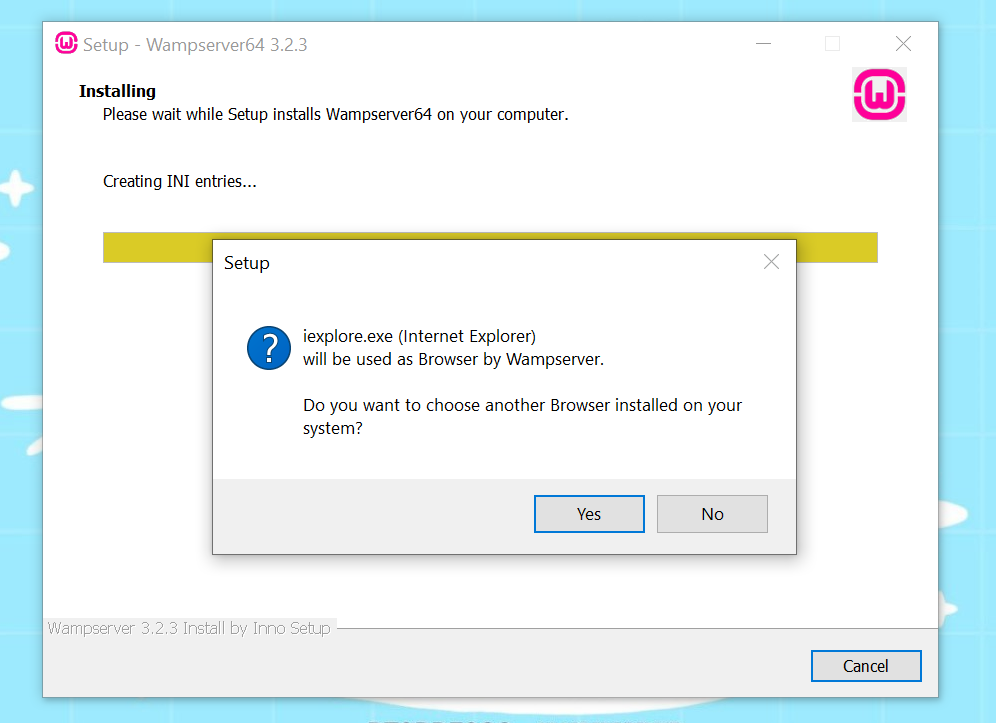
1) Choosing the browser
Here you can choose the default browser for your WAMP server. You can choose “yes” if you wish to choose some other browser for your website, or “no” if you want to continue with the default browser.
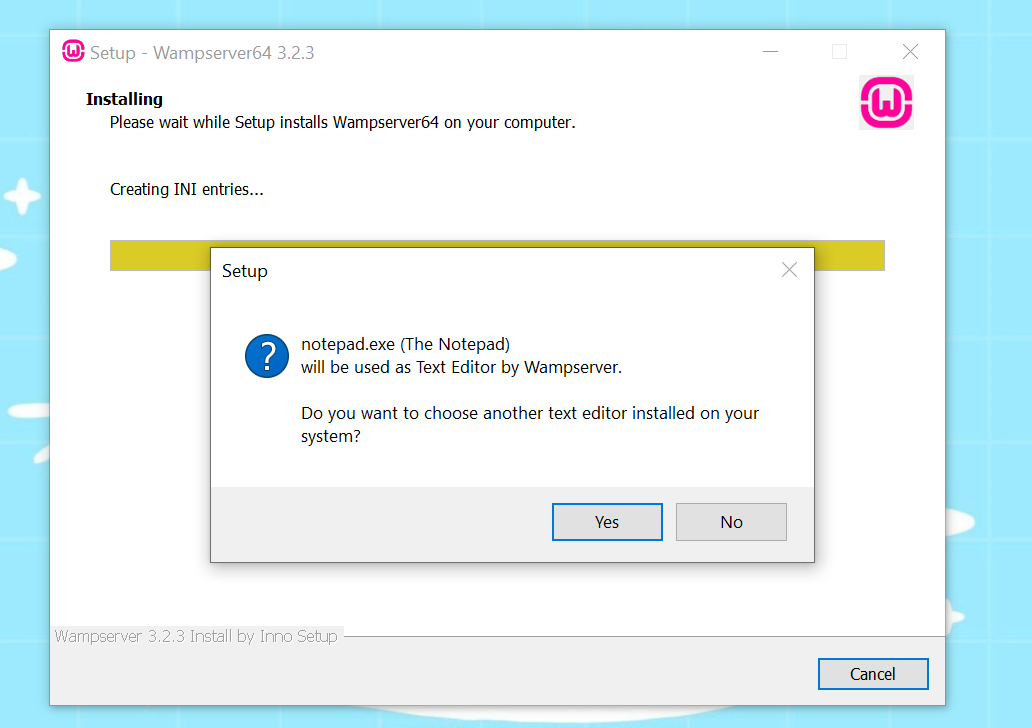
2) Choosing the Editor
Lets you set the default editor to open the text, html or other editable files with. Choose “yes” if you wish to choose some other editor for your website, or choose “no” if you want to continue with the default editor.
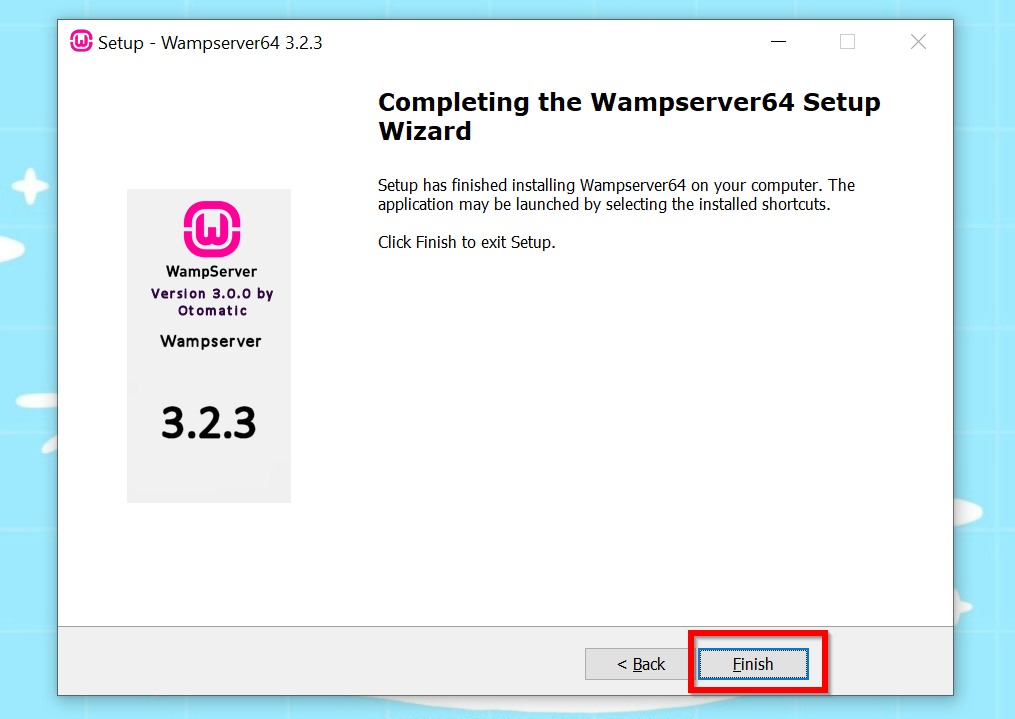
8) Done
Finally, you will have your WAMP server installed on your computer.
Using WAMP Server
1. Click on the WAMP server icon and it will activate WAMP.

2. A tray icon will appear for WAMP server, that would look something like the image below:
![]()
Your WAMP server is now active and ready to use.
Use PhpMyAdmin to create a Database
WordPress will manage the database content on it’s own, and tables will be created automatically. But what you need to do is to create a database.
One of the components of WAMP server is PhpMyAdmin. This database manager is easy to use and has a user friendly interface.
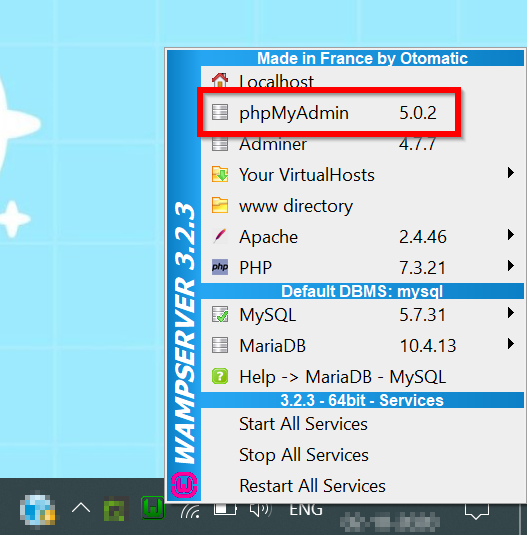
1) Use the tray icon to access phpMyAdmin
To create a database with phpMyAdmin, you can click on Wamp Tray Icon and select PhpMyAdmin.
2. Login to your phpMyAdmin
phpMyAdmin will open in your browser. It will look something like this:
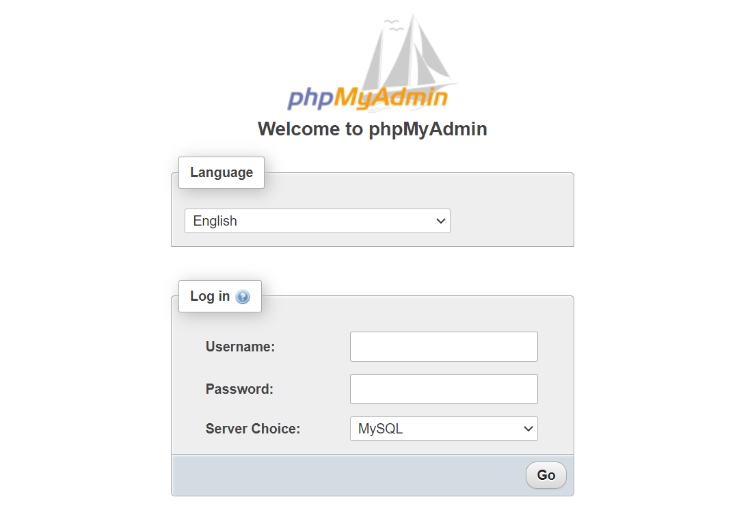
The default username is “root” and the password field should be left blank. This will enable you to login.
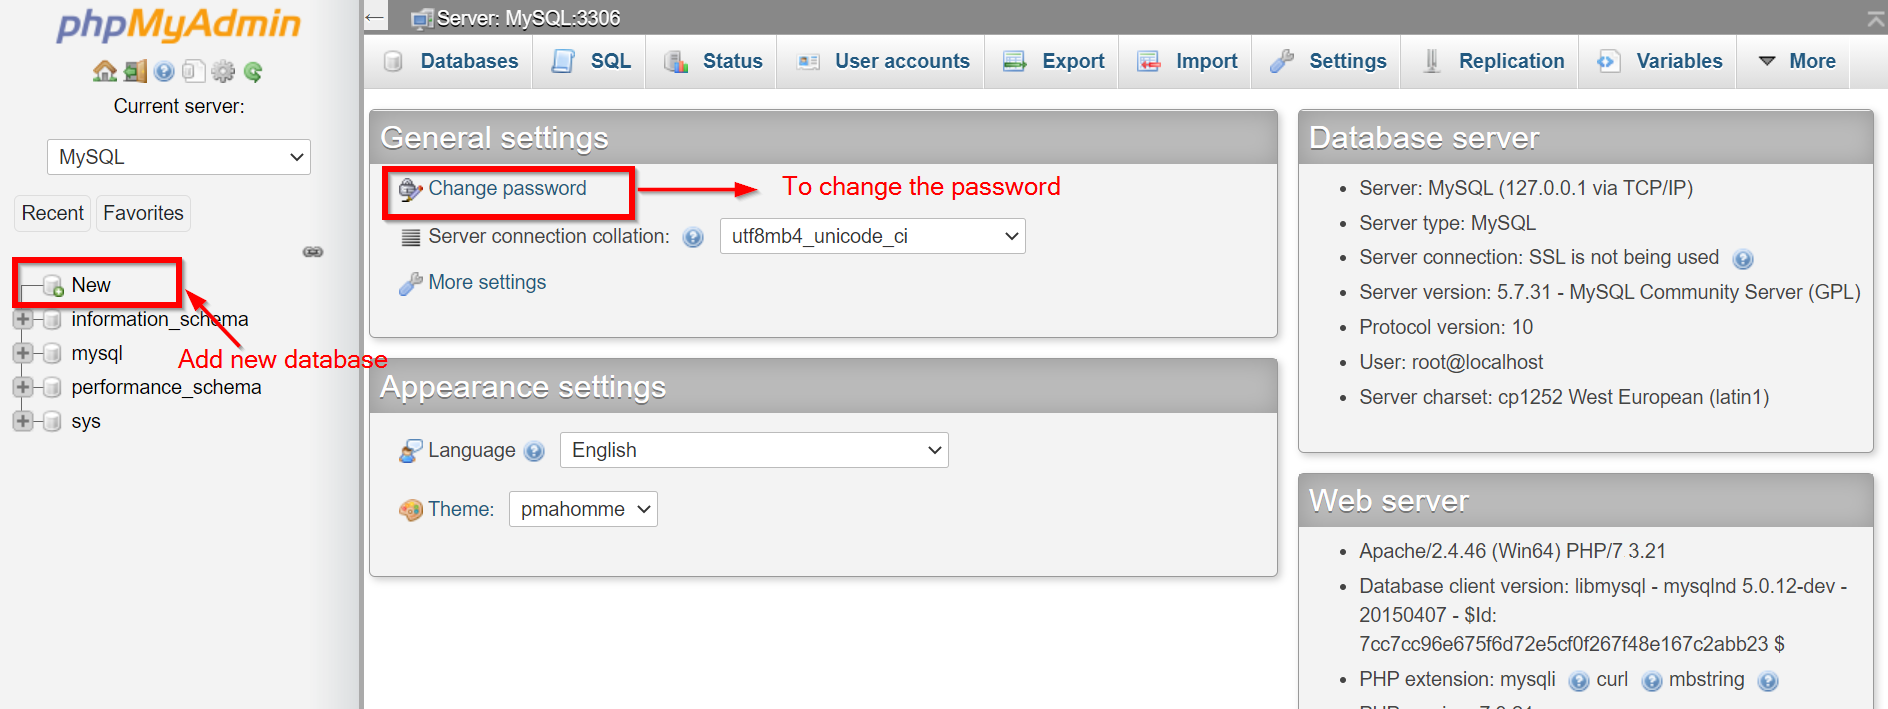
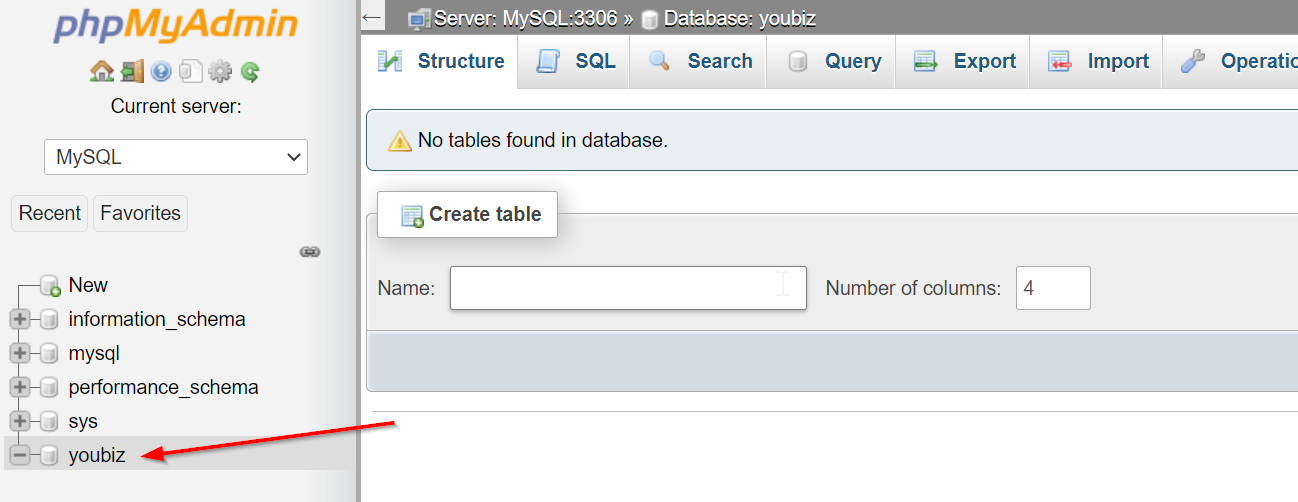
3) Create a database
Once you login, you can change the password with the given option, or you can right away start creating a database.
In the next step, enter the database name, and press create.
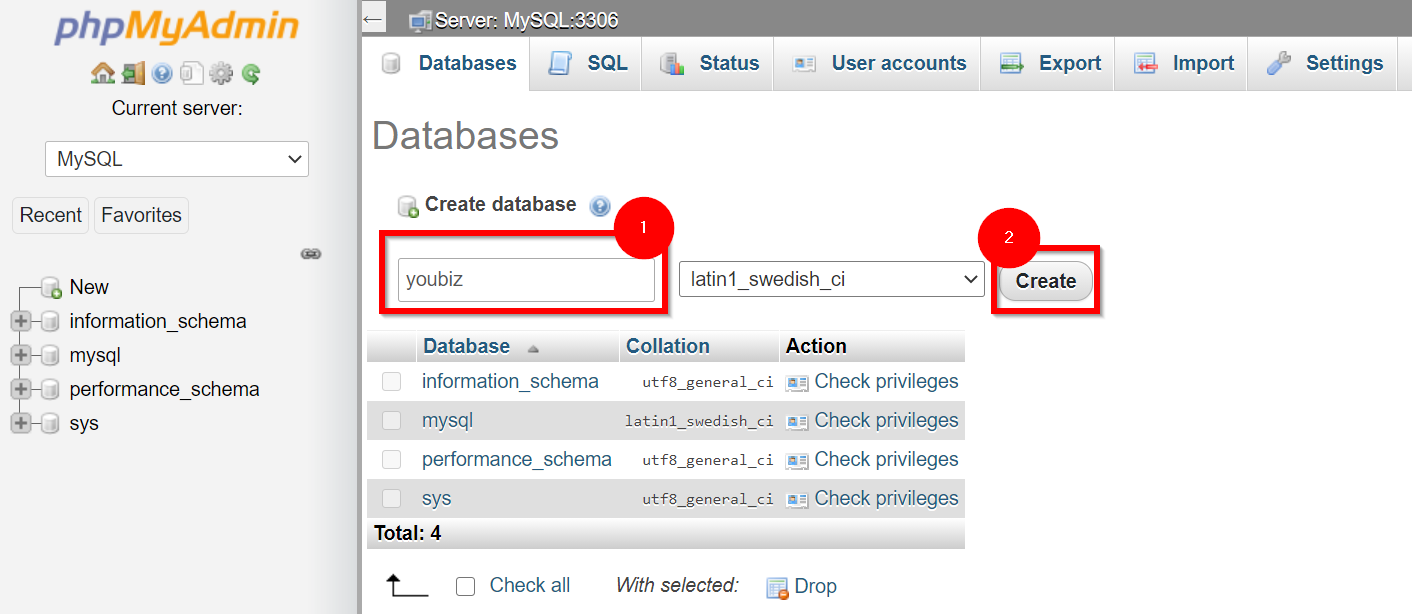
4. Database is created
The database will be created and appear in the list of the databases available.
Now we will use this database and connect it to WordPress.
Will I need to install PhpMyAdmin separately?
No, It will be a part of your WAMP installation. It will be automatically downloaded and installed as you install WAMP.
Get the latest version of WordPress
You can download the latest version of WordPress from Get WordPress.
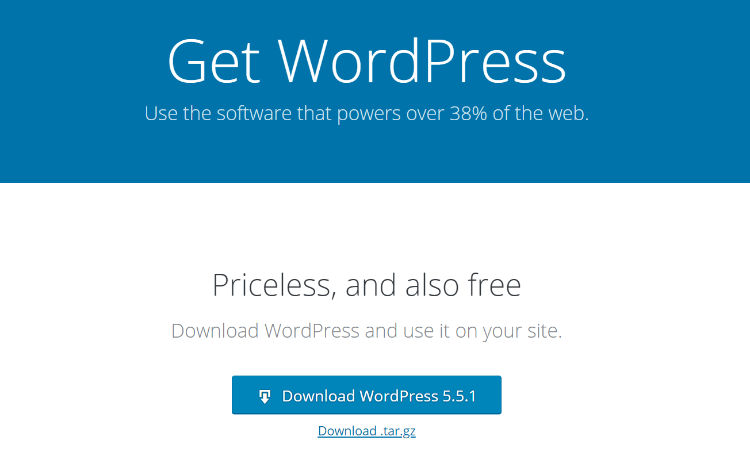
WordPress is free and open source. Moreover, it is very easy to download. Just click the “Download” button, no registration or further action is required and the download will begin right away.
Installing WordPress
This process will not take more than a couple of minutes to install WordPress. It is just about extracting the content and pasting it at the right place. It is simple and easy.
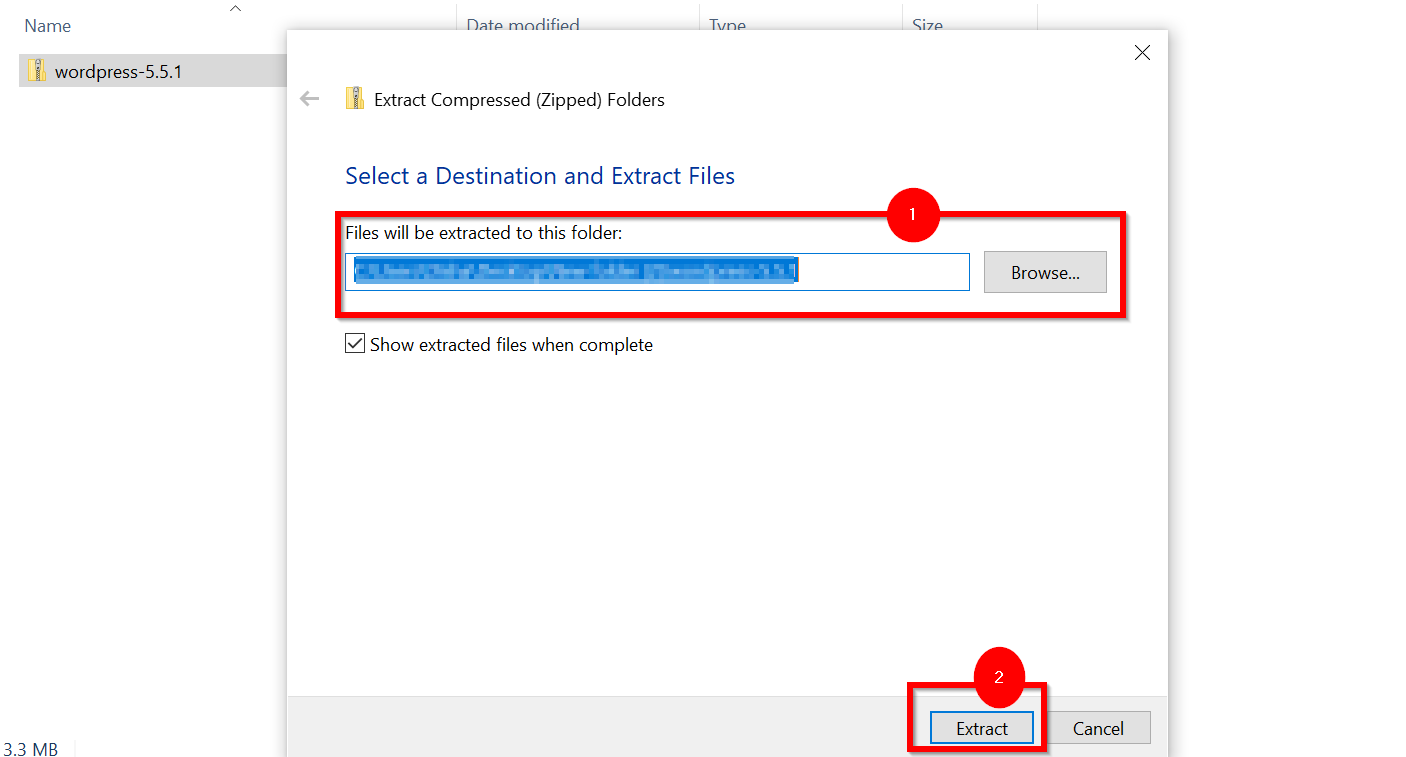
1. Extract the content of the zip folder
Now is the time to use the WordPress zip installation folder that we downloaded in the previous step. Unzip this folder to extract its content.
2. Copy them to WWW
Now navigate to the folder where you installed wamp. Under the WAMP folder, there will be a folder named www, where you need to copy your WordPress folder.
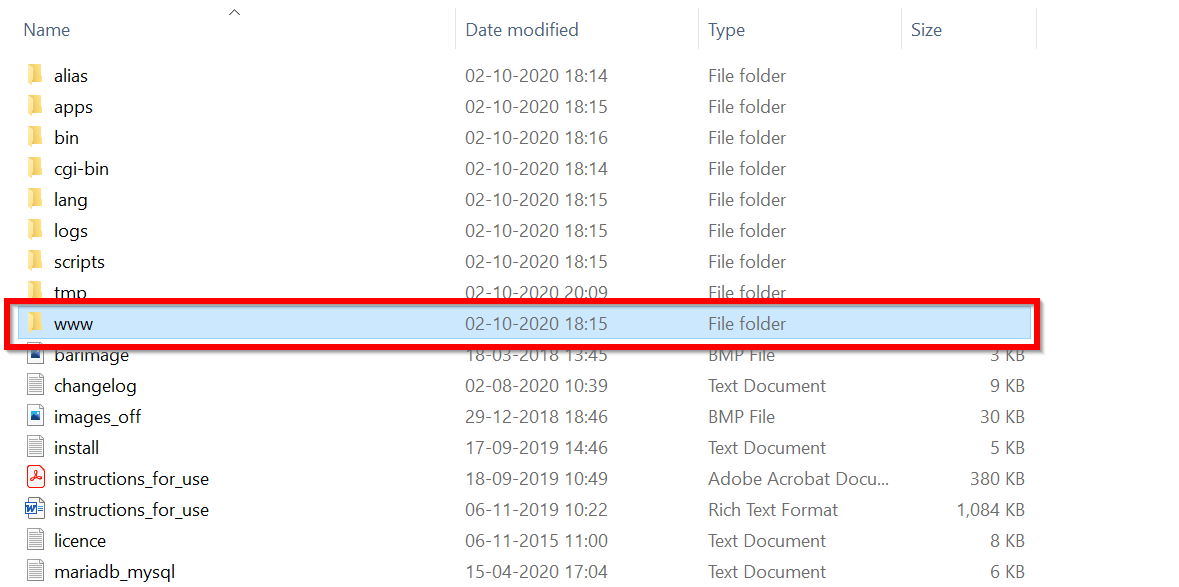
This is the folder where you should copy the extracted WordPress folder.
3. Rename the WordPress folder [Optional but recommended]
You can rename it as per your requirements. This folder will contain all the files for your new WordPress website,
I generally rename this folder with the name of my site which makes it really easy to locate in my computer. You can rename it to whatever you want, whatever makes it easiest to recognize.
I will rename it to – youbiz, just for an example.
4. Your WordPress is installed
Now, you can open your browser and directly go to – http://localhost/youbiz/
OR
You can again click on the tray icon and choose localhost. This will open the localhost home page in your browser. Here you will find your folder’s name under the title – Projects.
Setting up WordPress
These are the final steps and here we will use all the components we prepared in the previous steps.
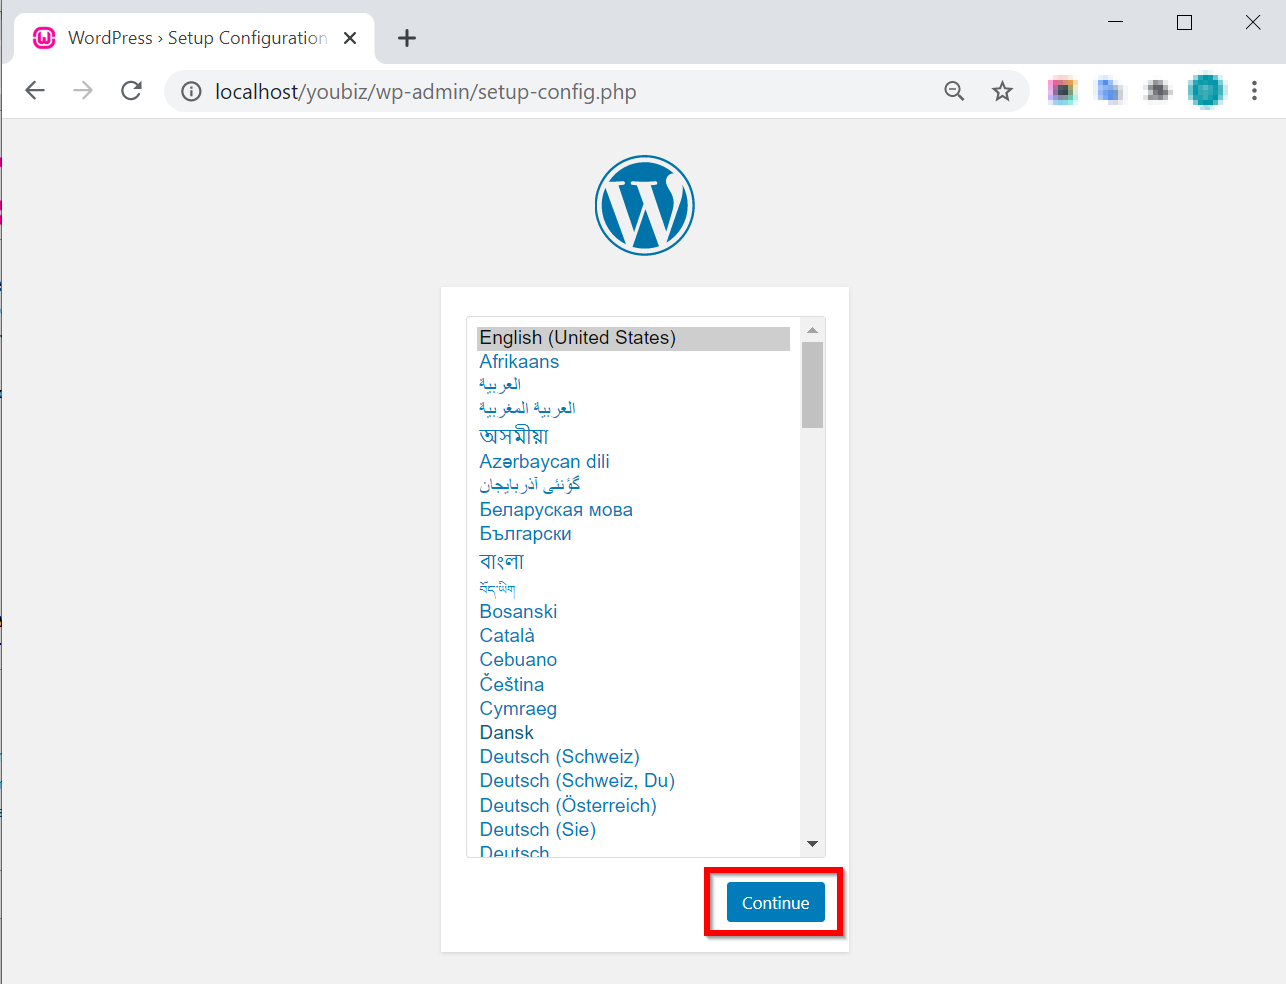
1) Select the language
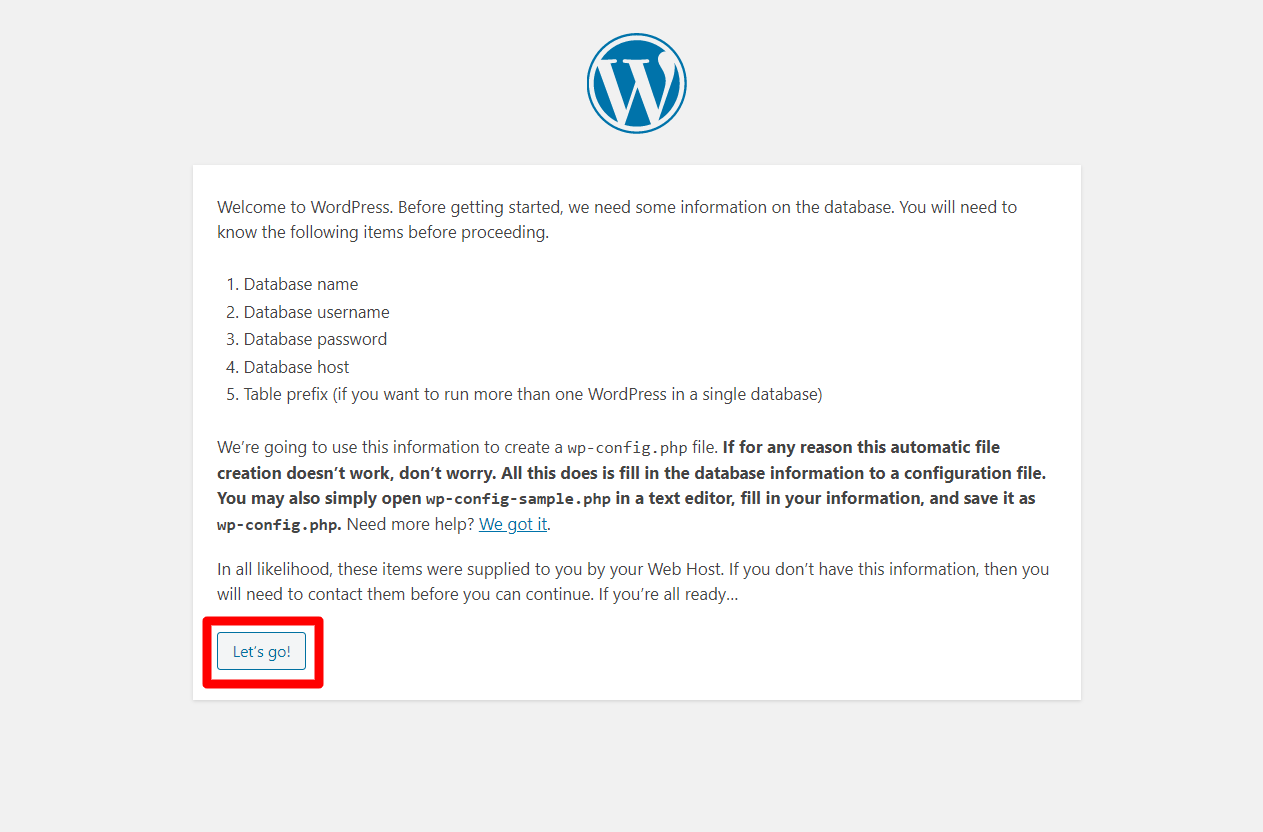
The first step is language selection. WordPress is available in different languages and you can choose your preferred language from the list and press continue to proceed to the next step.
The next page comes with some important instructions for connecting your database. Now you can proceed to connect your WordPress website to the database, that we named as youbiz while creating it in phpMyAdmin.
2) Connecting Database with WordPress
This is one of the most important steps while setting up a WordPress website. However, it is not a difficult one. The only thing you have to be careful about is entering the right details.
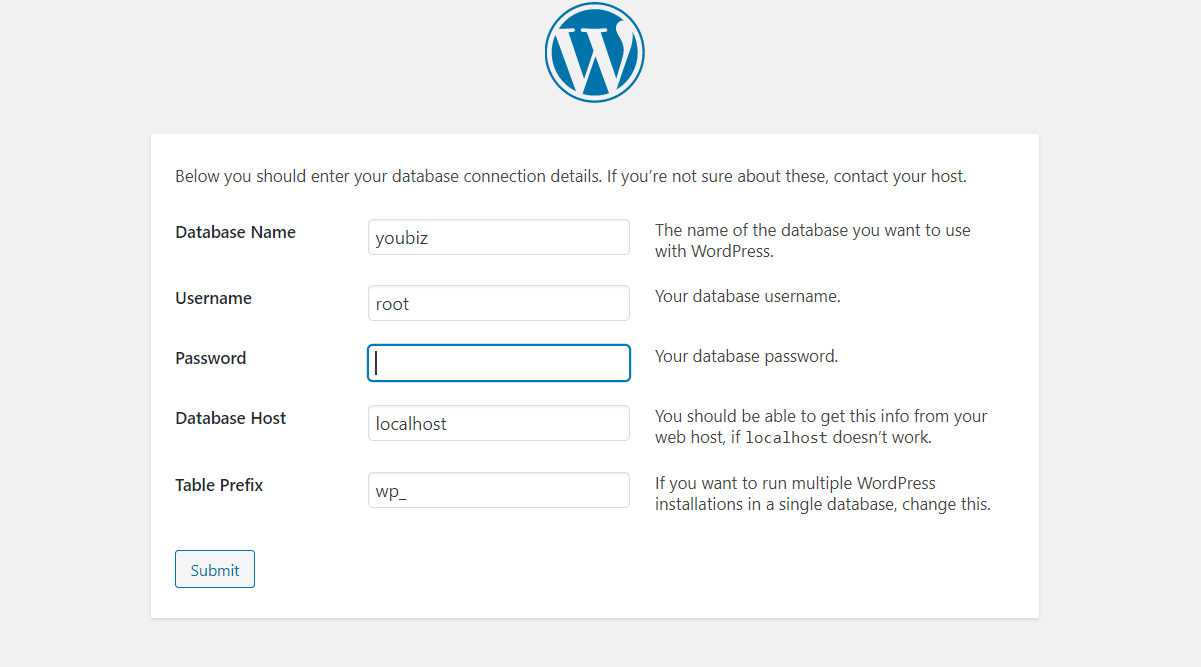
So the required details are:
Database name: Carefully key in the same database name that we created through phpMyAdmin. A slightest spelling error will make your website unable to connect to your database.
Username: Enter the phpMyAdmin username, that by default is “root”. However, if you have changed the username & password for your phpMyAdmin, you should use that username instead.
Password: If you are using the default username and password, leave this field empty. But if you have changed it, use the new password.
Database host: Since we are setting up WordPress to be used through localhost, the value here will be localhost.
Table prefix: This field is for those who want to use a single database for multiple websites. For that purpose, your different websites can refer to the database with a unique prefix.
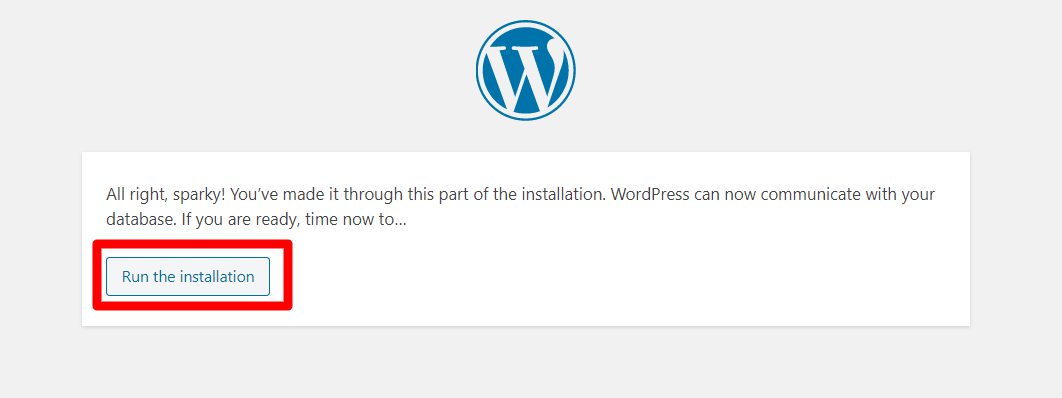
3. Run the installation
Click submit and on the next page, click “Run the installation” to proceed further.
4) Configure your site details
Now is the time to set the site details for your WordPress website.
Site Title: The title of your website, this will be the identity of your website and appear instead of logo until you upload one.
Username: You must create this username to log in to your WordPress website to view your website’s dashboard.
Password: The password required to log in to your WordPress website to view the dashboard options to edit your website. Remember this password, or note it down at some secure place because you will need this password to access your website’s backend. Also, use the inbuilt options to create a strong password
Your Email: Enter a valid email address.
Search engine visibility: Since we are trying to use WordPress on localhost, the value of this field doesn’t actually matter.
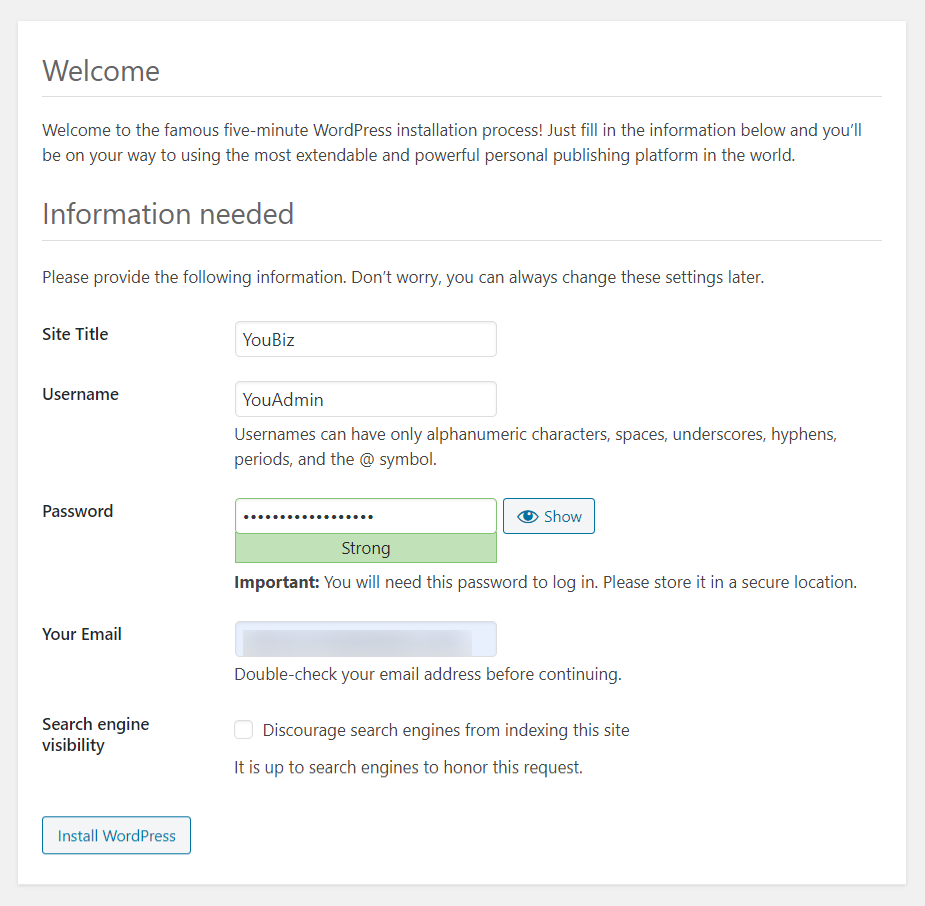
Fill up all the fields according to your preferences and click ‘Install WordPress’.
If all the fields are correct, you will be taken to the next page that will ask you if you want to log in now
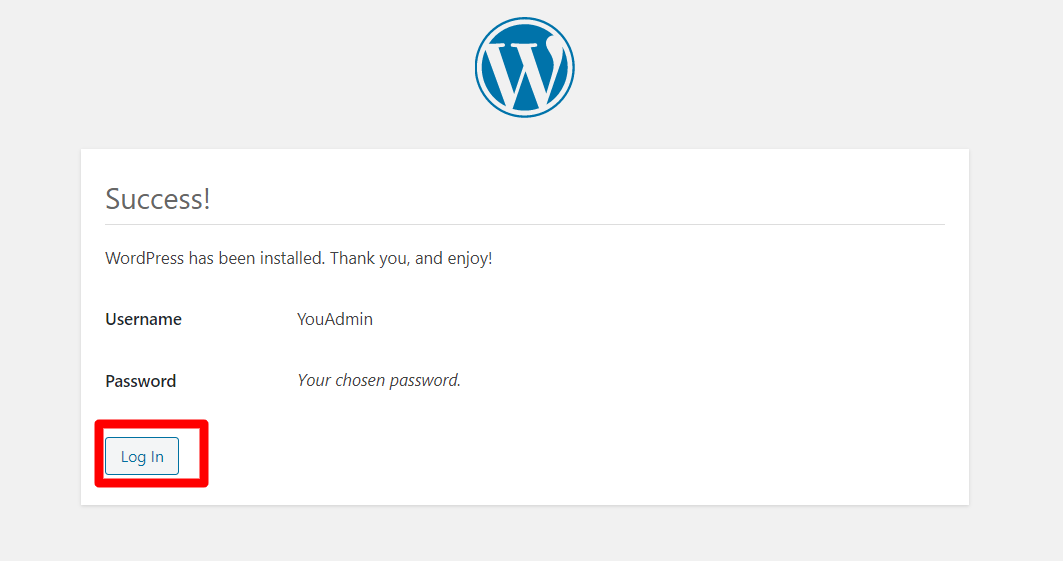
5. Logging in to your WordPress dashboard
Your WordPress website is almost ready. Now we can login and view the dashboard, choose the theme and setup our website.
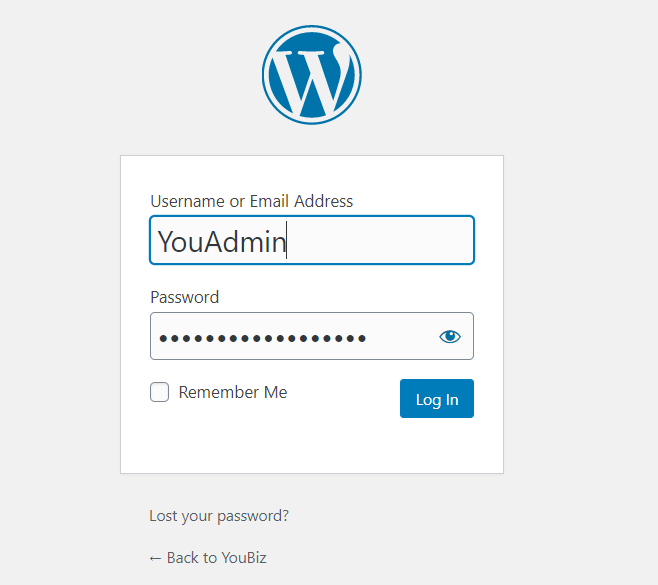
After logging in, you can view your WordPress dashboard, install the theme and start with your website building.
For the first time, WordPress will automatically install a default theme. So you can log in to your WordPress dashboard and explore all the options.
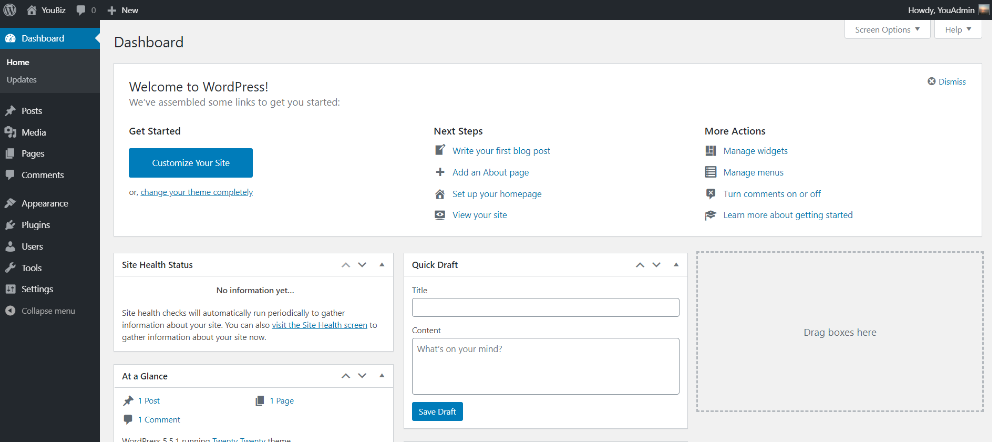
The WordPress dashboard is quite intuitive and you will find all the quick options to install a new theme, write your blog, setup your homepage, manage widgets, etc.
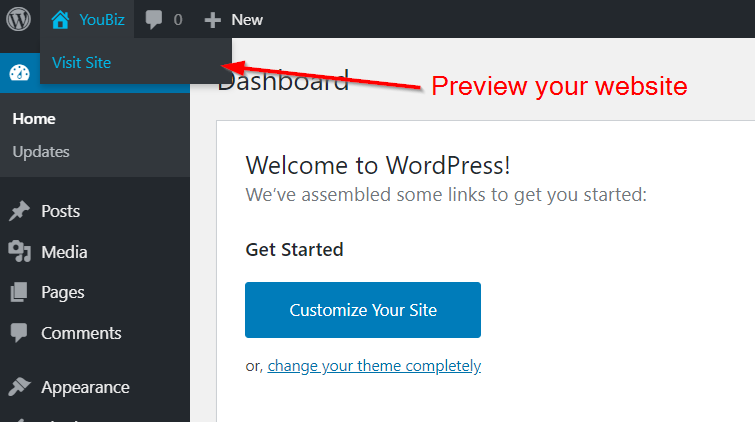
Or you can preview the website as shown in the image below:
So these were the steps to setup WAMP and install WordPress to start creating a website at your localhost, in your computer. This lets you work offline for your website, before you make it live.
You can later on move your WordPress website live from the localhost, easily.
Further Reading:
- How to create an eCommerce website with WordPress
- Quickly launch an Online directory with WordPress
- Creating a business website with WordPress
- How to build a blog with WordPress