How to make eCommerce website with WordPress: Step by Step Guide
Posted onSelling products through an online shop is the best way to introduce your products to a large number of people at once.
There are so many advantages of eCommerce websites over physical stores. And that is the reason why a large number of traders are inclined to take their business to next level by creating an eCommerce website.
However, “Creating an eCommerce website” sounds like a lot of Work. Doesn’t it? But, in this article, you will see just how easy it is.
With these easy options, you can create, manage and maintain your own website effortlessly. No need to hire IT engineers and no need to look for technical assistance every now and then for site maintenance. Just do it yourself.
A quick look at the steps we’re going to perform on how you can create an eCommerce website with WooCommerce.
- Choosing WordPress + WooCommerce for easy eCommerce website building
- Acquire the domain name and hosting service
- Select an elegant and fully functional eCommerce WordPress Theme
- Customizing your site as per your requirements
- Adding products to your online store
- Setting up Payment methods and Managing inventory
- Adding taxes or Discount
- Order Processing and Shipping Management
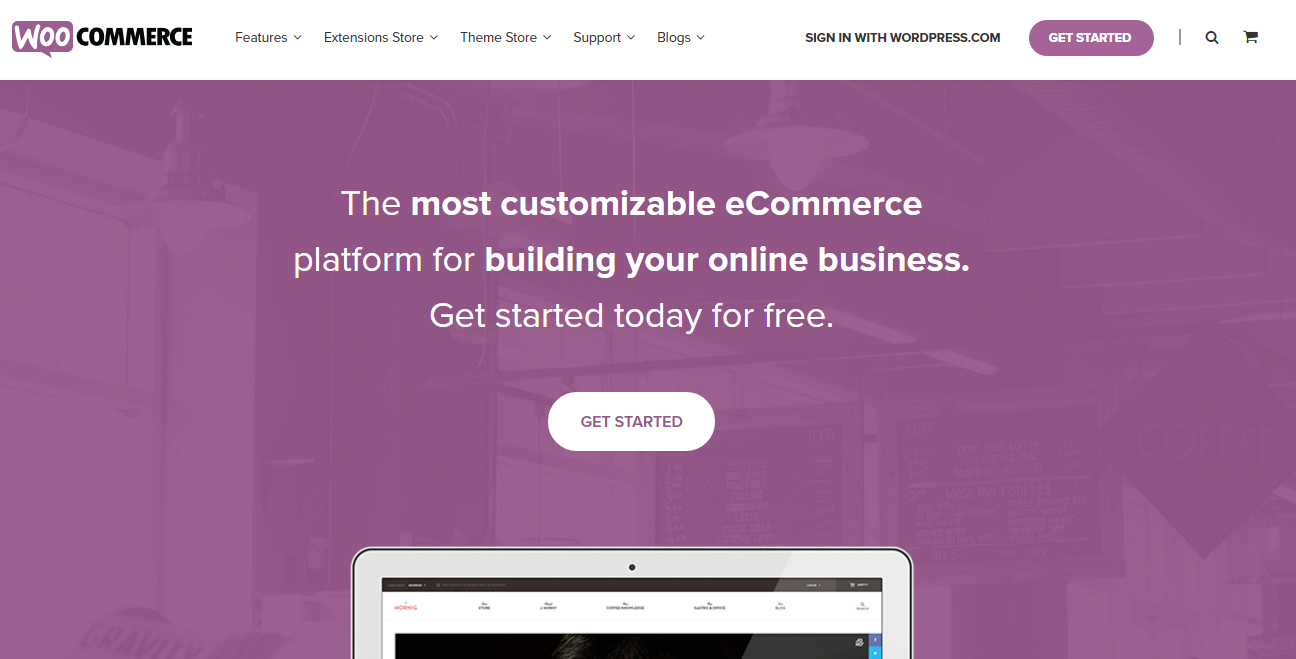
WordPress makes website making easier
First, comes the task to choose the right eCommerce platform for your website. While there are so many eCommerce platforms available to get started with your online selling website, I suggest using WordPress.
Why?
Because WordPress is a free and open-source CMS and there’s no limit to what you can do with it. WordPress has made it easier for non-technical people to build their dream websites on their own.
Plus, we have the mighty WooCommerce plugin. It helps you turn your WordPress website into a fully functional eCommerce website. And what more? It is free too!
The quick first steps: Acquiring domain and hosting service
We’ll always choose the hosting based on the kind of website you want to create. Here, when we are kick-starting our new online shop, we’ll focus more on a secure and fast host.
First, we’ll select a reliable and secure host
You can choose a hosting provider based on many factors like – the kind of website you are creating, the functional area of your website, the number of visitors, size & the scope of your website, security requirements, etc.
For choosing the hosting of your eCommerce website, the following are the checks you should make
- Security, because eCommerce websites involve a large number of transactions on a daily basis
- Accessibility and Uptime should be maximum for your online shop
- Quick Page loading – Who likes waiting while shopping? No one.
- Regular backups of your site (that happens to be your lifesaver in times of crisis)
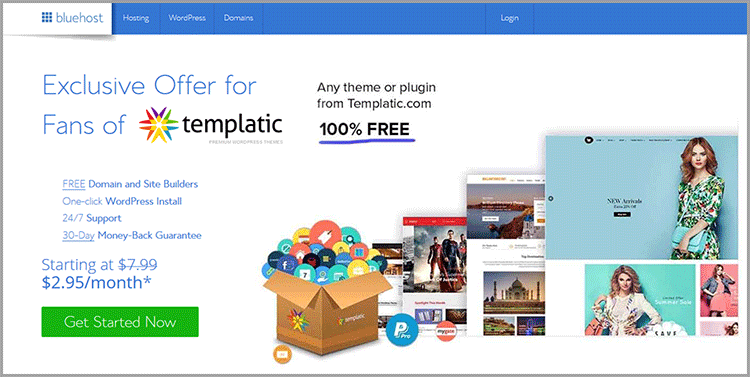
We find Bluehost to be the best hosting for any kind of website. Here are their affordable pricing plans.
The domain name for your website is your permanent address. It’s a unique identity for your website and people will reach your e-shop following that address.
Now, a domain that represents your business identity
You know how important the domain name is. Basically, people will identify your online shop with your domain name, so choose it carefully.
The following are a few factors that you should consider while choosing a domain name
- Short, intuitive, and easy to remember
- Avoid using difficult spellings
- Use a hyphen to differentiate the words in your domain name
- Get a name that represents your brand
When you go for Bluehost hosting, they’ll let you choose the domain name when you check out for their hosting package. Type in the domain name you like and check if it is available for registration.
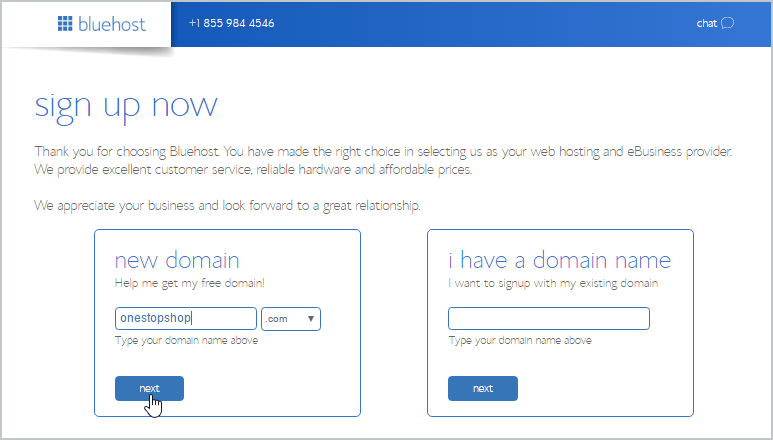
So ultimately, you can choose your hosting plan, and insert the domain name and check out at once. A domain name is not something that you can change very often. So take a while to think about the domain name and go for an intuitive and interesting one.
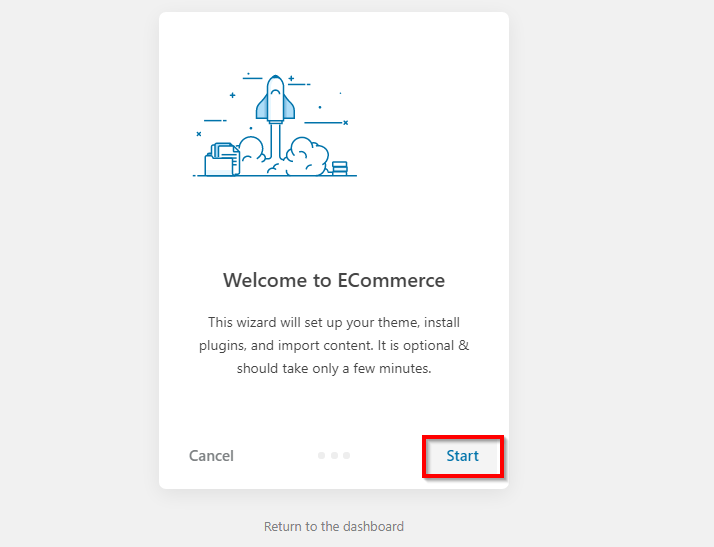
Choose the eCommerce WordPress Theme
Okay, so we now have a domain name, hosting service, and WordPress for our eCommerce website building.
All of these themes are pre-designed and customizable. They come with distinguishing features that you can use to create your website.
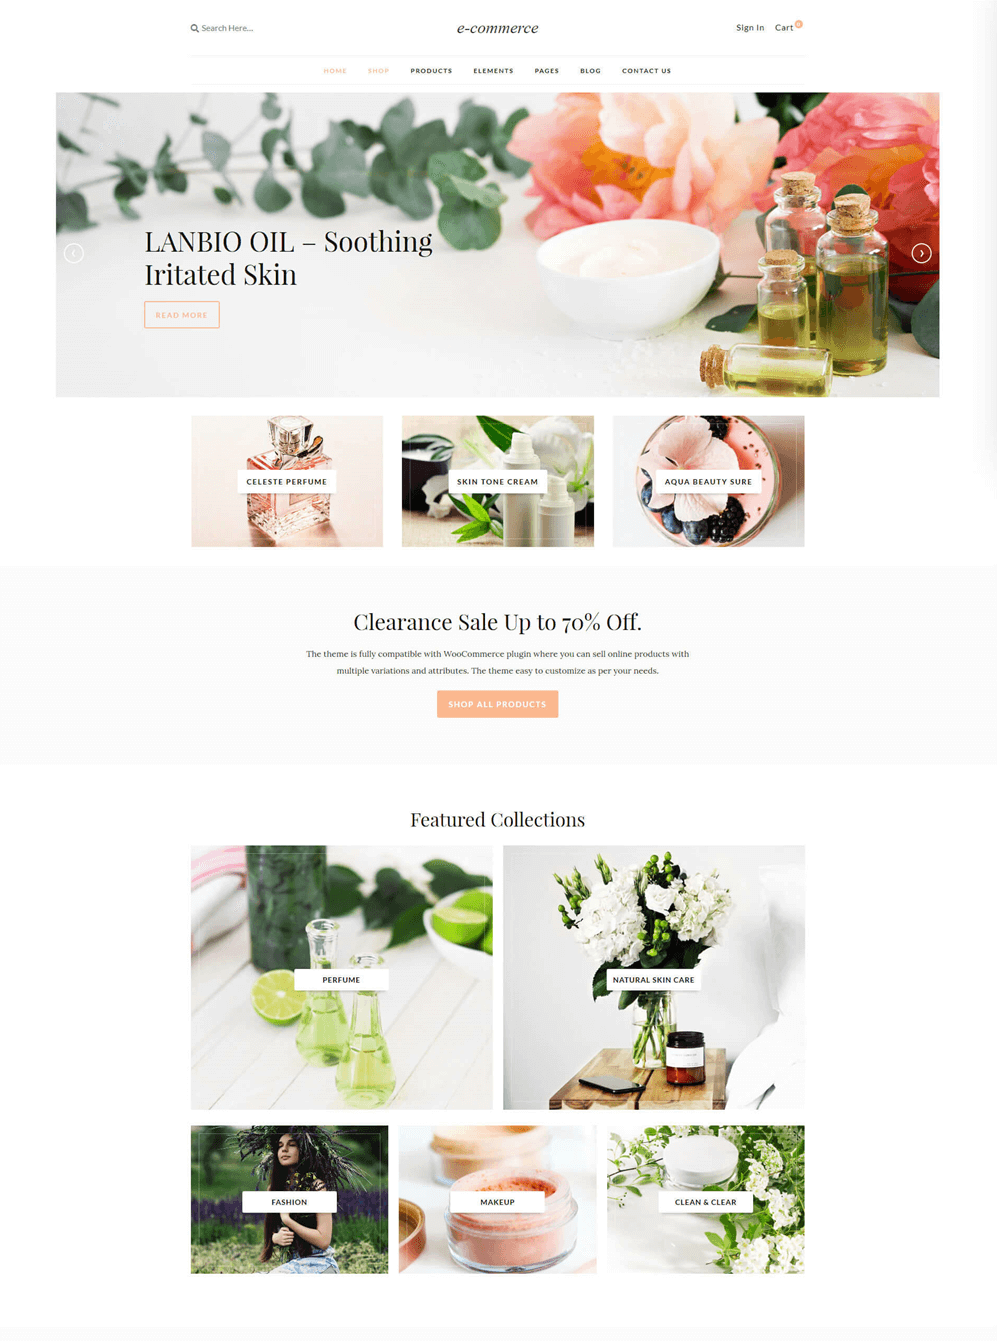
For this article, I’ll use the eCommerce WordPress theme to create an online selling website. It is a high-quality eCommerce WordPress template that you can use for selling your physical as well as downloadable products. The theme runs on the WooCommerce Ecommerce Plugin.
You can pick your favorite eCommerce WordPress Theme from this list.
Download the theme and install it. Once the eCommerce theme is installed and running, you can install the WooCommerce plugin for advanced eCommerce features on your shop website.
And wait, you get this WooCommerce theme for free!
Yes, subscribe to BlueHost using this link and get your favorite theme or plugin from our store without paying anything.
Just one another click to install the sample data and your website will turn into a ready-to-use eCommerce website.
All you need to do now is to replace the sample content with your original products and pages and set up the transaction processing, shipping, and order management options.
Your online shopping website, your way
Once you get yourself a WordPress theme, the next thing you should do is to customize it according to your requirement. You can get creative by using the options and widgets available with your theme.
If you do so, you’ll actually enjoy this part of your eCommerce website development. We recommend you also refer to these eCommerce website design tips to optimize the performance and improve the user experience.
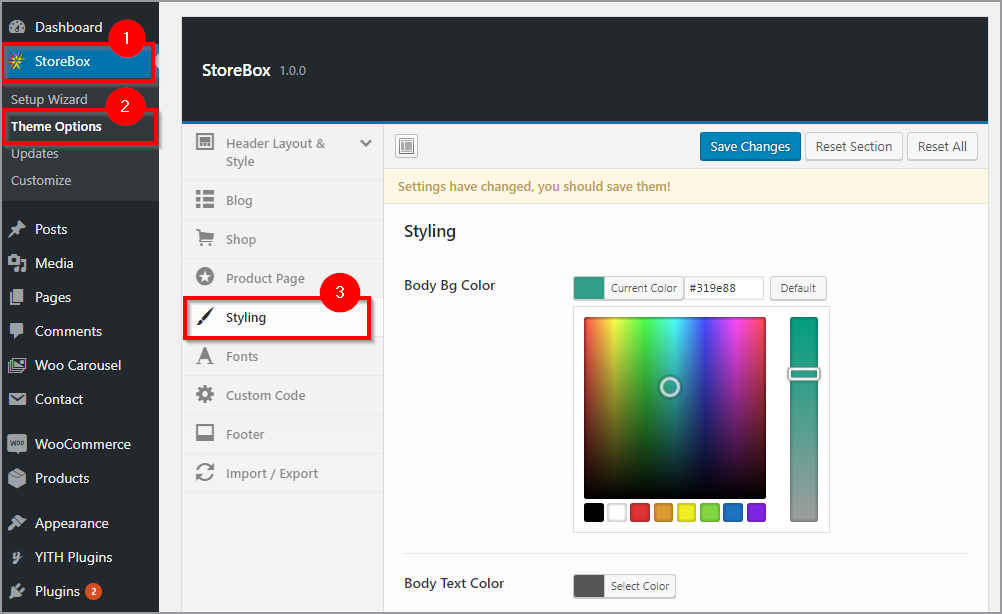
1. Changing the logo, color, and background
Personalize your website by setting your own logo. The eCommerce theme lets you set the logo and site title. However, if you don’t have a logo designed, you can just key in the name of your shop and it will be displayed elegantly as shown in the figure.
![]()
Next, set up the colors according to the subject of your website or as per your choice. You can choose the color of your site using the color picker. So your website can have any shade of color you want.
However, for your convenience, the color scheme of the eCommerce WordPress Theme is divided into color groups. For instance – The color group secondary affects the color of some buttons, subtitles, and links. The background color will only change the background.
2. Reorganizing the pages of your website
Now when you’ve got your website running, you need to make it work the way you want. And therefore, a little bit of reorganization is required.
You can log in to your dashboard and have a look at all the widgets you have in your hand. You can use it by dragging and dropping the widget into the widget area. With the easy options, you can configure the widgets to show the exact details you want to display.
There may be other plugins you might want to use:
For the eCommerce-related features, you have WooCommerce and other addons. But you can even use some other WordPress plugins to enhance the performance and usability of your website:
- Image optimization plugins optimize the image, save space, improve speed and enhance performance.
- Security plugins to make sure all the user data and transactions on your website are safe.
- SEO plugins to optimize your eCommerce website for search engines, better visibility.
- Translation plugins for WordPress to create localized online stores.
- To make sure visitors can reach you easily, Contact form plugins
- Performance tracking and analytics is important to get accurate reports through Google Analytics Plugins
- More plugins
Adding products to sell on your online store
With the above steps completed successfully, your website is now ready to display your products for sales. You can now log in to your dashboard and easily add products to your WooCommerce based eCommerce website.
Follow two easy steps to add products to your WooCommerce based online selling website. But before that, we will need to create some categories.
With an additional plugin called WooCommerce product variations, you can even add Variable products and subscribable products through WooCommerce.
Creating eCommerce product categories according to the product types
Classifying the products on your eCommerce website is necessary because
- It makes your website content organized
- It facilitates the search facilities for the visitors
Besides, there are many other benefits of proper categorization. So first, jot down all the categories(and their subcategories) that your products would require.
For instance – For a bookselling website, the categories will be fiction, Romance, history, autobiography, etc. While that for a fashion store will be totally different.
While selling clothes online you’ll generally provide clothes in the categories of men wear, Women wear, and Kidswear. Under each of these categories, there can be a number of sub-categories like Casual Wear, Formals, Summer dresses, etc.

While that for a fashion store will be totally different. While selling clothes online you’ll generally provide clothes in the categories of men wear, Women wear, and Kidswear. Under each of these categories, there can be a number of sub-categories like Casual Wear, Formals, Summer dresses, etc.
A thoughtful and precise categorization of products on your eCommerce website will surely enhance the user experience.
Wondering How?
It’s quite simple to see. Imagine a person coming to your online electronics store and searching for a toaster. Now instead of going through all the products on your site, he can directly click on Kitchen appliances and find the sub-categories called “Toaster and Sandwich Makers”.
This makes it easy for the visitors to find the products of their choice, instantly. Without wasting time on the products that they’re not looking for.
Product title, images, price, description, etc
Contrary to how complicated and time-taking it looks, adding a product with the WooCommerce options is a cakewalk. Adding a product to your WordPress website won’t take more than 5 minutes. The process is as follows.
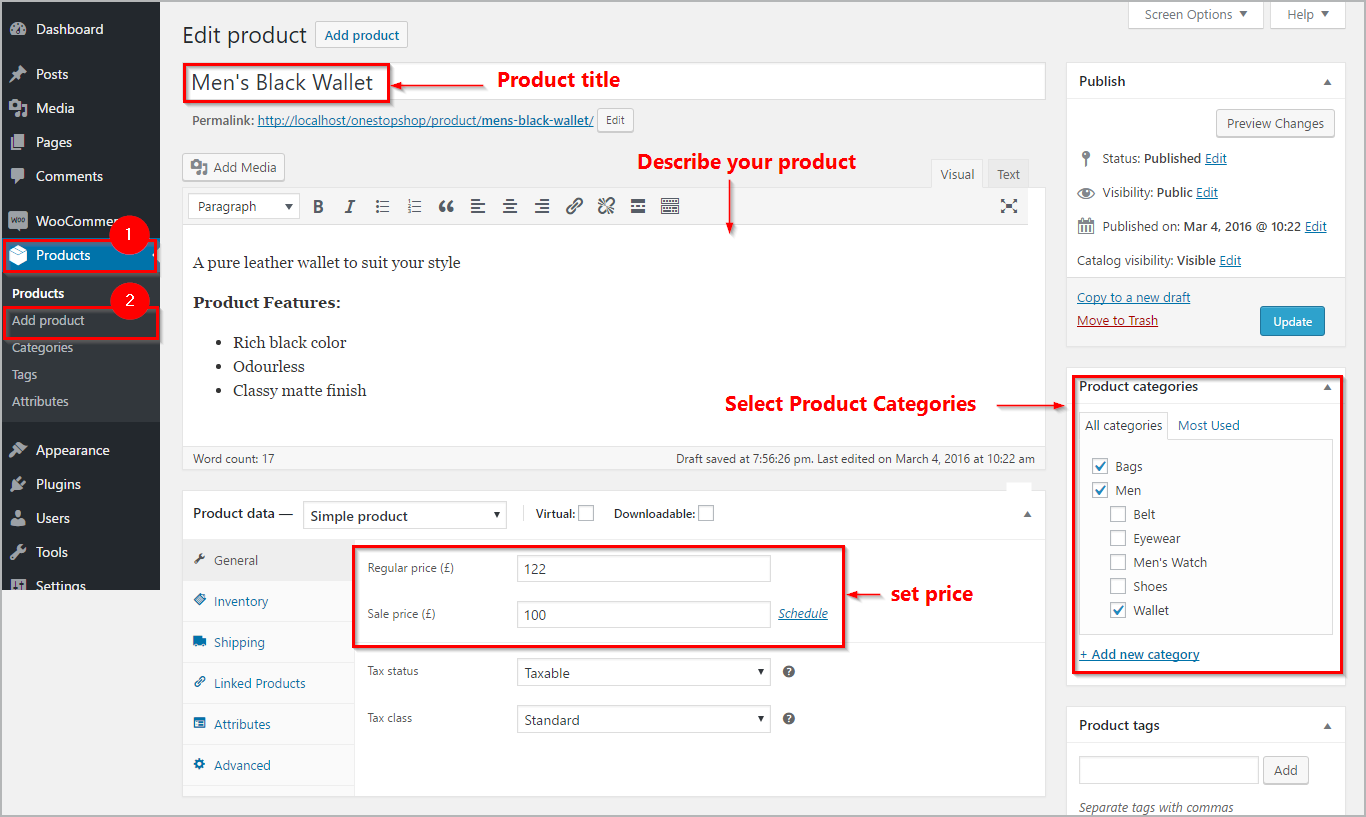
1.Product Title
Provide a suitable title for the products you add to your website. This is basically the product’s name. It tells the potential buyers about your product.
An example of an insightful title is shown in the image below.
For instance – Consider the title “Blue Lady Jasmine deodorant for women – 800 ml”. It tells you a lot about the product. We’re talking about a Jasmine flavored deodorant, that is for Women and the brand is ‘Blue Lady’. Titles like this do not only help SEO but also helps.
Titles like this do not only help SEO but also helps the visitors find their products easily and quickly.
2. Adding the Product Images
There’s no need to explain the role of product images on your eCommerce website. The images say it all about the product. With WooCommerce and WordPress, you can add multiple images of a product to your eCommerce website.
- Try to use the exact image of the product
- Avoid using misleading images on your product pages
- Use multiple images of products, wherever possible
- Use high quality, optimized images on your site for best results
PS: You must have seen a few websites where the cursor on a product image shows a zoomed version of the image section. There are many such WooCommerce plugins and addons that can help you improvise the user experience on your WooCommerce based eCommerce website. Check out the complete list of Must have WooCommerce plugins for your eCommerce website.
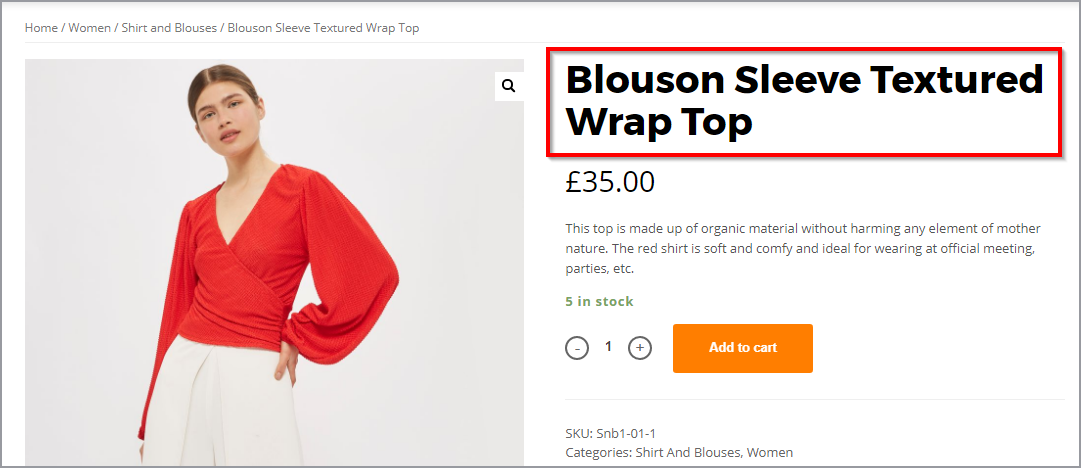
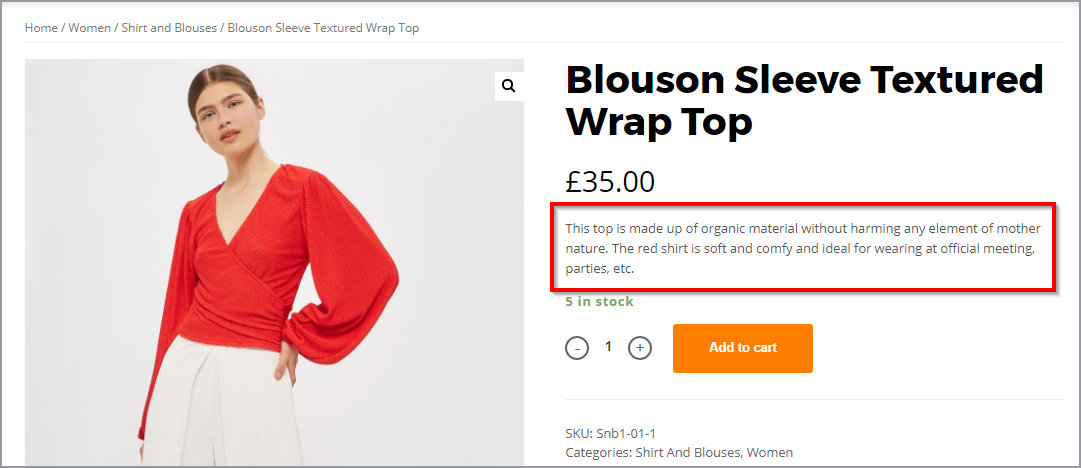
3. Product Description
This section lets you write down the details about the product. Find a few words to let the buyers know what the product is all about.
The details here do the job of the salesmen you have at your physical store. Use this section to convey all the important qualities or characteristics of the product.
For instance – The image below shows how the product details will appear to your prospective customers on the front end
Note: How you display products and describe them, plays a very important role in the overall performance of your eCommerce website. Technically, adding a product using WooCommerce options looks like child’s play, but how well the products are presented matters the most. Read the simple product page optimization techniques for a better eCommerce experience.
Accepting payments for your products
E-commerce websites are the kind of websites that involve a large amount of transaction processing. Against the goods your users purchase, you want your website to be able to accept those payments.
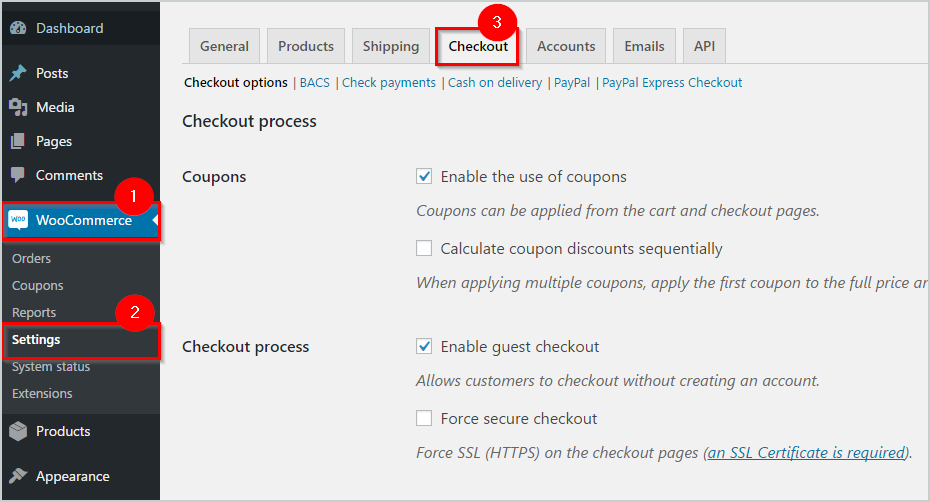
To simply manage the payment options of your WordPress eCommerce store, you can go to the checkout settings page.
You can use this guide for Payment method settings with WooCommerce. WooCommerce allows you to integrate the payment processor of your choice to accept online payments through your eCommerce website.

You can choose the payment processor for your online shop by considering the following:
- Choose a payment gateway that provides 100% security assurance for secure payment processing
- The convenient gateway according to the area of operation of your e-store
- Consider the processing fee and assess if it is appropriate
- If you are selling products on a recurring basis, make sure that you choose a payment gateway that allows it
The payment gateways are the modules directly responsible for how you can accept payments through your WordPress eCommerce website. However, flexibility is one of the best things about WordPress and so you can choose from a large range of WooCommerce payment processors.
Managing inventory
Be it a general store with physical products or an eCommerce website selling products, inventory management of a store is a vital process of store management.
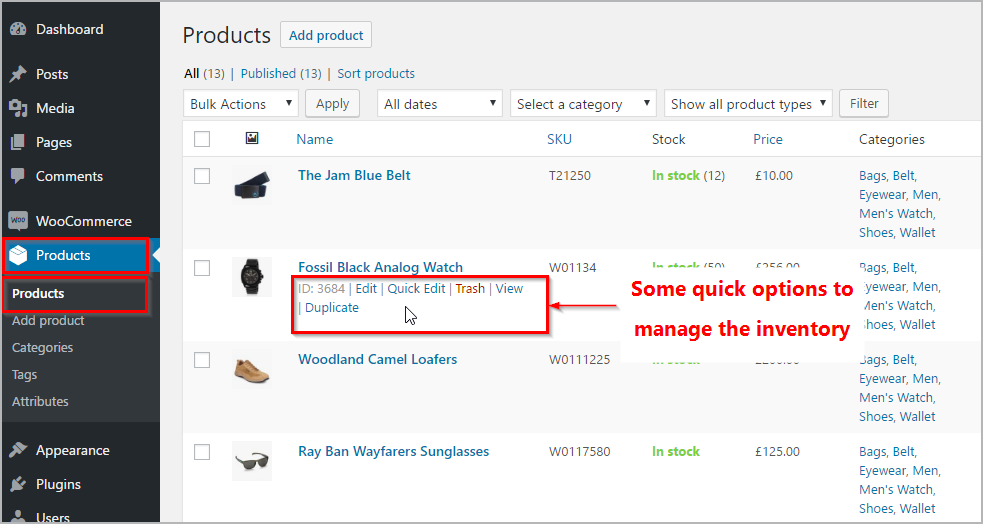
Thankfully, WooCommerce comes with all the features to let you manage the inventory very easily. Check out the complete details on how you can manage inventory with WooCommerce.
With the quick edit options, you can instantly manage the inventory, change categories of the product, manage tax classes, prices, etc.
Setting price, taxes and Discount
WooCommerce lets you easily define the tax classes for your products. The tax classes are basically tax rules that are different for different product groups and buyer locations.
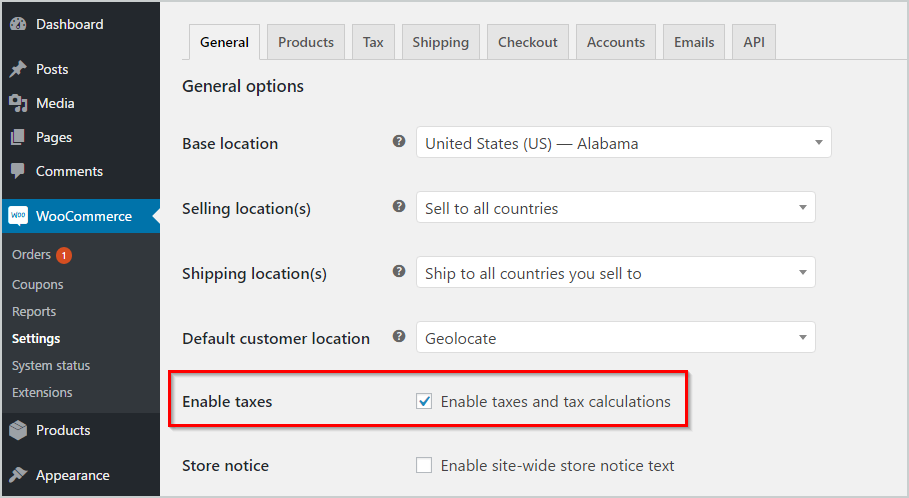
Once you enable taxes, you will be allowed to control all the aspects of how you want to charge tax by navigating to the dedicated tax tab. Create tax classes as per your requirements. The tax will be automatically calculated on each taxable product at checkout.
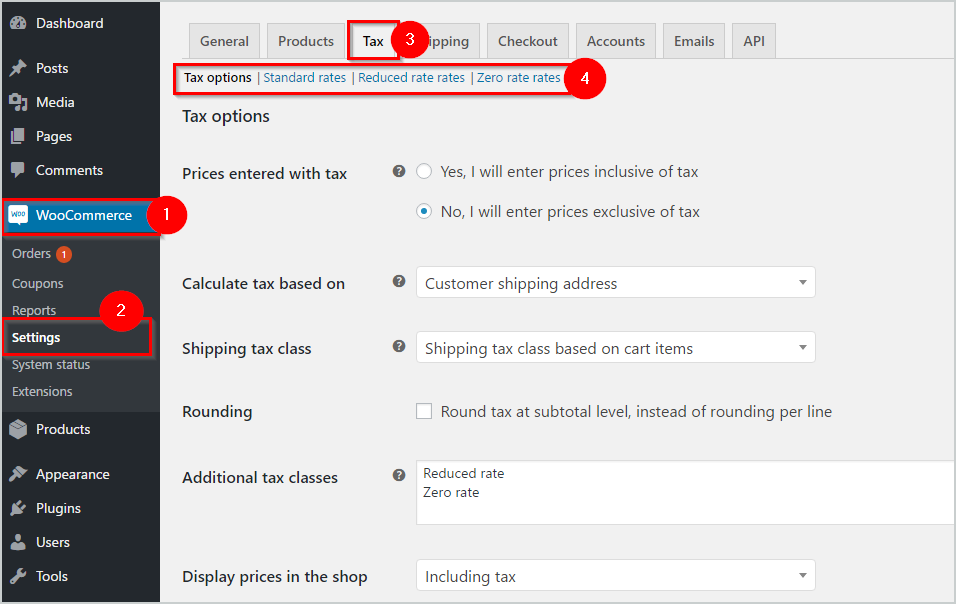
Also, you can define the discounted price for each product, enter the discount commencement and end date. So for that specific period, the users can buy the product at a discounted price.
Managing orders, and shipping, after-sales, etc
When a person places an order, the smart WooCommerce will reduce the inventory, accept payments and show you the order status. Once, the order is placed by a customer, you will be able to view it from your dashboard. Each new order will be assigned a unique order id along with order details and the order status.
Here is a complete guide on How you can manage inventory with WooCommerce.
Managing shipping and fulfillment of your eCommerce products
For the delivery of the physical products sold through your website, you will have to promote safe and timely delivery. Ideally, you should acknowledge the estimated time of delivery for a product. And the best practice is to ensure that the product reaches the buyers quickly once the order is received.
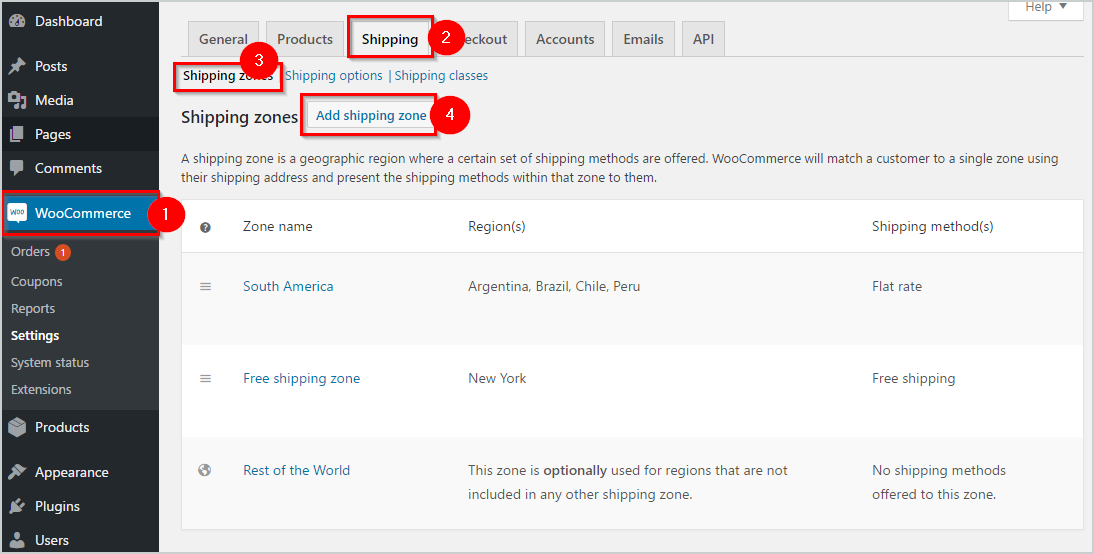
It totally depends on you if you want to impose the shipping charge or not. If the shipping charge is to be accepted, it will be calculated during the customer’s checkout.
On the other hand, for the delivery of goods, you will need to hire some eCommerce logistic companies. Their responsibility is to collect the products from your warehouse and deliver it to your customers.
Mostly, such services provide the customers with the “Tracking Code”, through which they can trace the location of their goods during the delivery process.
If the operational level of your website is limited to a certain region, local logistic services prove to be more efficient.
However, the choice of your logistic partner depends much on the type of goods you sell and the locations you are supposed to deliver the products to. Anyways, you should always go for a
Anyways, you should always go for a logistics service that assures you safe, affordable, and timely delivery of your products to your customers.
Now you’re ready to create your eCommerce website on your own
Before you start building your eCommerce website, you should have a look at the best eCommerce website examples to get some ideas from.
With the availability of the CMS and eCommerce platforms, creating an eCommerce website has become easier. You won’t need to hire experts to get your work done.
So even if you are not a programmer or computer expert, you can create and maintain your online shop easily. Besides, WooCommerce and the theme documentation can help you set up your website easily.
If making money on your website is what you want, you should have a look at the following posts as well:
- Creating a money-making job board website with WordPress
- Creating a Classifieds website with WordPress
- Best WordPress Themes for creating Online stores
And now is the perfect time to take the first big decision that can change the way you look at running a business. Digitize your shop and let more and more people buy your products regardless of physical boundaries.
Get started now. Have a look at how your website can look with WordPress eCommerce theme.