
Instagram is one of the most popular and visited social media sites on the Internet. Therefore, driving visitors from your Instagram site to the WordPress Instagram feed on your site is an excellent thing to do.
You can build your Instagram followers and that will increase visitors to your WordPress site. If you own multiple Instagram accounts, all of them can be included in your WordPress site. The pictures on an Instagram feed will attract visitors, and you can change them as you need.
Including an Instagram feed on your WordPress site will bring a lot of Instagram photos onto your site seeing that the Instagram. Your photographs can vary to attract attention. It is advisable to adapt them to the time of the year and for suitable holidays.
In this article, you will be instructed on installing a Smash Balloon, Instagram feed plugin into your WordPress site, and it is an easy process.
In order to maintain the “free” version of the plugin, a pro version is also available. The pro version comes with a lot of advantages and is recommended.
Follow these easy steps that explain how to get your Instagram Feed on your WordPress site. Installing a social media Instagram feed plugin and get your Instagram feed on WordPress is essential. You can use the WordPress Editor or the Elementor page builder to get your Instagram feed on WordPress.
How To Install The Plugin?
You must be registered on WordPress and have an existing blog or website on a Business plan, not the normal free plan. On top of this, you must have a registered account on Instagram. Sign in to WordPress, and you will be transferred to the Dashboard of your site.
To install the Instagram feed plugin, follow the following steps:
On the left black menu bar, you must select the Plugin option, which’s close to the bottom of the options.
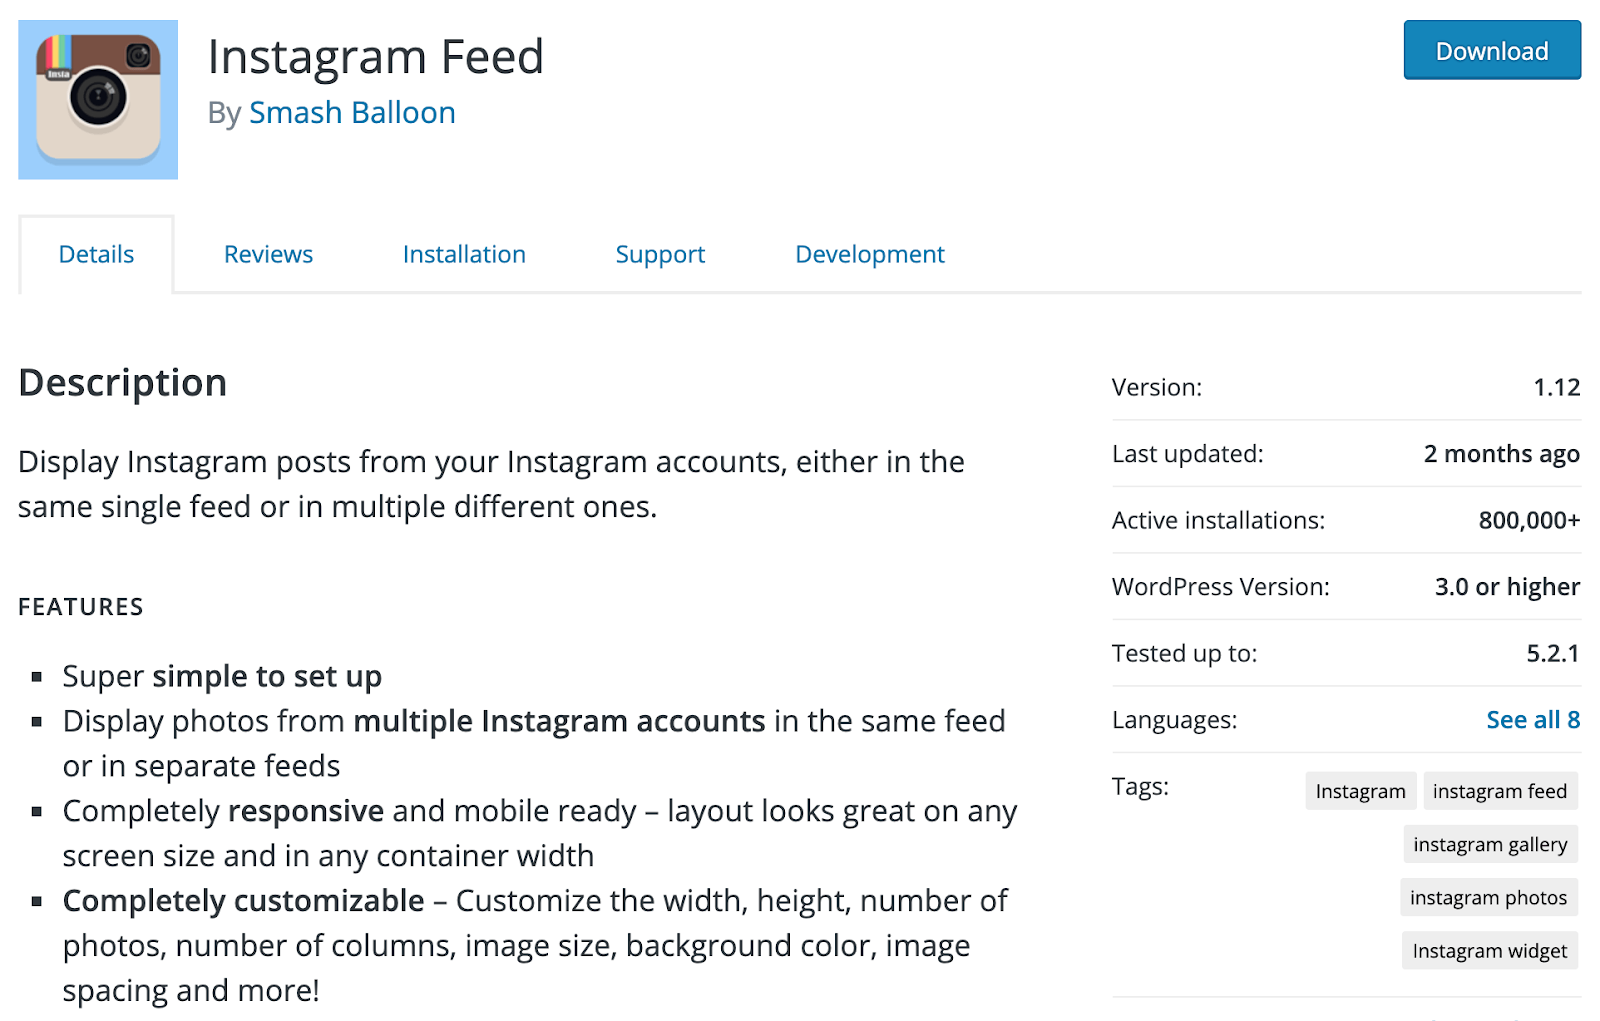
- Then you must select Add New in the new options button that is displayed. You will see a search bar on the right top of the screen. Type in “Instagram” there and hit return.
- In the center of the page, you will see an object with “Instagram Feed” written on top.
- On the right of “Instagram Feed,”
- you will see a button “Install Now,” click on that. It will work for
- a few seconds and click on
- “Activate “as soon as that dialogue occurs in the same position.
Now your Instagram feed is on WordPress, but you must still configure it. During configuration, you will decide where you want it and exactly how it must look.
Configure Your Feed
Configuring your feed or Instagram feeds is easy to use. Go back to the menu on the left and scroll down until you reach the “Instagram” button menu item and click on that. If it’s not there, you can see it on your list of plugins on the right and click on “Settings.”
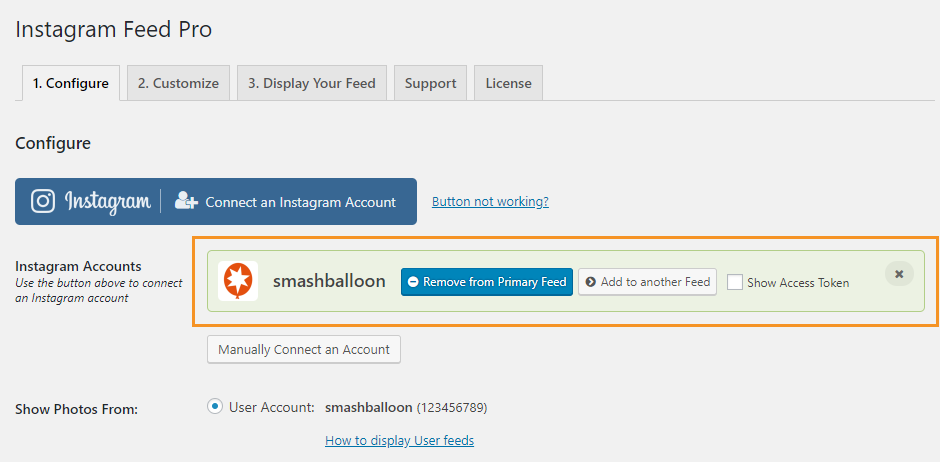
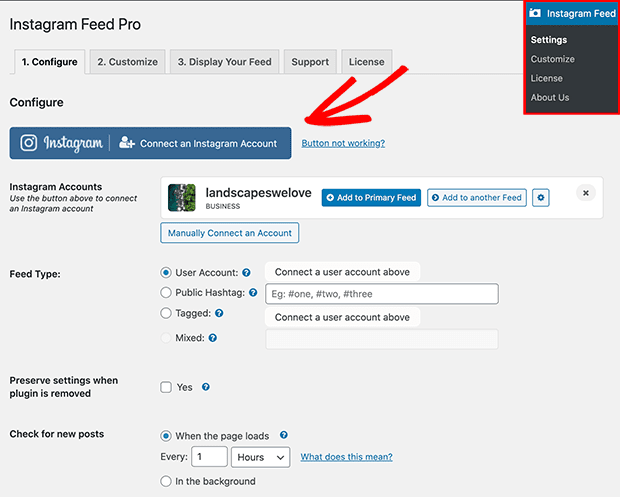
Another page will open with a big blue button written “Connect an Instagram Account” click on that.
You will get to a WordPress Instagram login window.
It may show your account, or you can select “Switch account.” Fill in your login details and right-click login.’ You also have the ability to include multiple Instagram feeds.
Enter your details, or check the login tab to continue with the account. You will be shown another window where you are told what it is taking from your account. Just check the green “Authorize” button.
On the next page, you should see your Instagram feed pop up. If it doesn’t, just click the button “Not Working.”
On the next page, you will get instructions on how to connect these accounts manually. Click on the blue button that says “Click here to get your Instagram Access Token and User Id.”
A white popup window will be displayed. You have to select a check box to indicate whether your Instagram is for Personal or Business use.
Check the corresponding check box and hit the blue “Connect” button.
After that, a login page is displayed, and you can go ahead and log in. After that, you can scroll down and copy the access code that is displayed.
Now go back to your WordPress account and check the box that reads ‘Click here to get your Instagram Access Token and user ID’ Copy the token displayed.
Paste the copied token to the box saying; “Add a valid Instagram Access Token” and click the blue box next to it saying; “Connect this account”
Please scroll down and change the settings on the page the way you prefer it. You can change the interval in which new pictures will appear and click “Save changes” in the blue box.
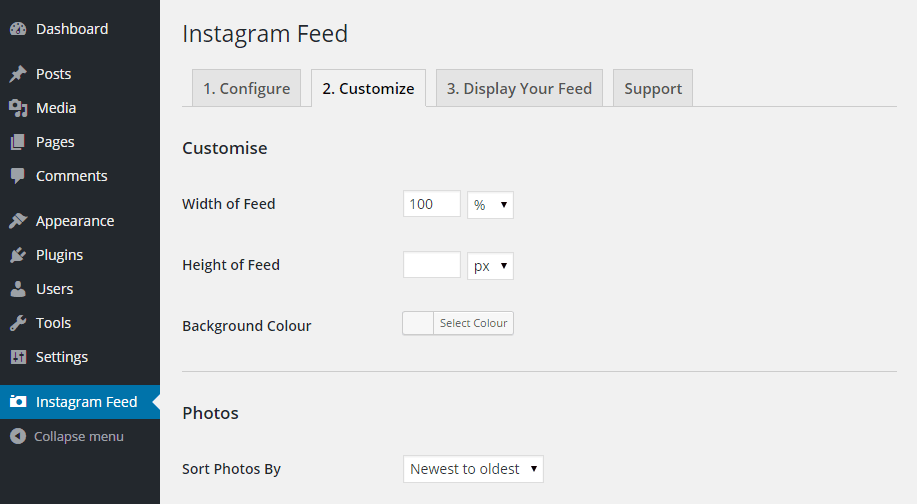
Now you want to determine what your feed must look like. Go up the page and select the second option, “2. Customize)
Scroll down, and you will first see “General Settings,” which you can keep the same or change if necessary.
Next, you can change the “number of foto’s” to display. Change the selection so that the images are nicely displayed wherever you want to put the feed. Change the number of columns to give a clear picture of each picture.
As you scroll down, you will see various settings that can be changed so that the feed will suit your site. When finished, remember to check the “Save Changes” box.
Setting up your plugin and your feed is complete, and now it’s time to display your feed on your WordPress website.
Display Your Feed on Your Website.
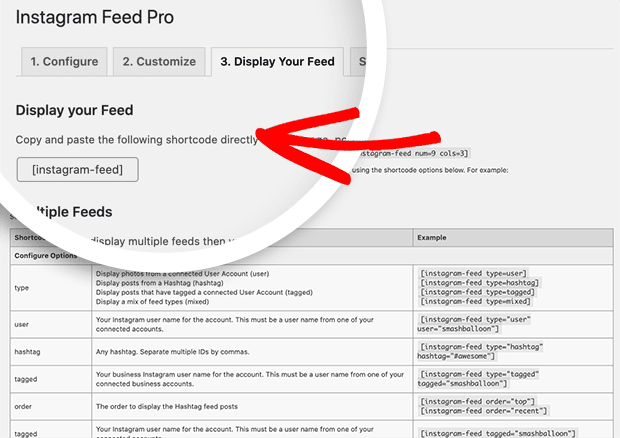
To display your Instagram feed on your WordPress site, go back to your WordPress site and select the third button on top reads, “Display your feed.”
Right below, you will see an Instagram feed shortcode displayed; “Instagram feed,” and copy it. Lower down the page, you have the option to display multiple feeds.
From here, you can do everything else in two different ways. Firstly you are going to do it with the WordPress Editor.
The other method, using the Elementor Page Builder, will be discussed after this section.
Go up and click pages in the left menu, and now you can select on which page you want to have your Instagram images displayed. If you want a new page, hover over pages and check “Add New.”
Give your page a name in the text box on top and click “Add Block” in the left-hand left corner.
A new page will open up with a text box where you can type “shortcode.” After that, a box with “shortcode.”
Copy the Instagram feed shortcode displayed on the page.
Paste that box into the text box below the place where you have given the page a name.
Make sure to go to the right, top corner and click “Publish.”
Return to the page’s left top side and
click the “View Page,” written in light blue.
And there is your Instagram feed precisely as you have selected it in the options! You can go directly to your Instagram account, and if you hover over the pictures, you get all the information about each social photo.
You and all visitors can go directly to your Instagram or hover over your photos to see more detail. This feature gives you a fully responsive WordPress-Instagram page that can attract visitors and views to both sites.
To use the Elementor Page builder, you need to go back to your WordPress site and click on the “Instagram Feed” button on the black box on the left of the page. Go to the top of the page and select no 3, “Display Your Feed.”
Copy the shortcode in the text box.
Now you must go to the page you want it to display. Go to your Home page and click “Visit Site.”
That will take you to your site, and you can click “Edit With Elementor.”
Scroll down to where you want the photos and click the + to add a section.
Go over to the “Search Widget” text box and enter “Shortcode.”
The shortcode block will appear and drag that into that section
Right-click and paste the Instagram Feed shortcode and then move right and click on “Apply.”
Go to the bottom left and click on the green dialogue box “Update” and then on the little eyeball to the left of it to preview your feed.
And here you will see your Instagram feed using Elementor Page Builder!
There you’ve got two different ways to embed your Instagram feed onto your WordPress site. And now you can entertain and engage visitors to your site!
How Do I Add My Instagram Feed To My WordPress Sidebar?
Including a live Instagram feed on the sidebar of your WordPress site to display your photo feed on Instagram has lots of advantages. Instagram, one of the most visited social sites on the Internet, can drive visitors to your site, where they are able to see your Instagram feed as well. So they will spend more time on your WordPress site.
Including an Instagram feed on your site will bring a lot of pictures onto your site. These pictures can be varied to attract attention. It is advisable to adapt them to the time of the year and for the right holidays.
In this article, you will be shown how to install a Smash Balloon plugin into your WordPress site, and it is an easy process.
In order to maintain the free version of the plugin, a pro version is also available. The pro version comes with a lot of advantages and is highly recommended.
Follow these easy steps to install your plugin and get your Instagram feed on WordPress.
How To Install The plugin.
First, you must be registered on WordPress and have an existing blog or website on a Business plan, not the normal free plan. You must also have an active Instagram account. Sign in to WordPress, and you will be taken to the Dashboard of your website.
On the left menu bar, you must select the ‘Plugin’ option that is close to the bottom of the options. Then you must select Add New in the new options button that is displayed. You will see a search bar on the right top of the screen. Type in “Instagram” there and hit return.
In the search text box, type in ‘Instagram feed’ and check the ‘Install Now button.’
In the center of the following page, you will see an object with “Instagram Feed” written on top.
On the right of “Instagram Feed,” you will see a button “Install Now,” click on that. It will work for a few seconds and click on “Activate” as soon as that dialogue occurs in the same position.
Now your Instagram feed is on WordPress, but you must still configure it. During configuration, you will decide where you want it and exactly how it must look.
Configure Your Feed.
Go back to the menu on the left and scroll down until you reach the “Instagram” button menu item and click on that. If it’s not there, you can see it on your list of plugins on the right and click on “Settings.”
Another page will open with a big blue button written “Connect an Instagram Account” click on that.
You will get to an Instagram login window.
It can show your account, or you can select “Switch account.”
Enter your details, or just check the login tab to continue with the account. You will be shown another window where you are just told what it is taking from your account. Just check the green “Authorize” button.
On the next page, you should see your Instagram feed pop up. If it doesn’t, just click the button “Not Working.”
On the next page, you will get instructions on how to manually connect these accounts. Click on the blue button that says “Click here to get your Instagram Access Token and User Id.”
A white popup window will be displayed. You have to select a check box to indicate whether your Instagram is for Personal or Business use.
Check the corresponding check box and hit the blue “Connect” button. After that, a login page will be displayed, and you can go ahead and log in.
After that, you can scroll down and copy the access code that is displayed.
Paste the copied token to the box saying; “Add a valid Instagram Access Token” and click the blue box next to it saying; “Connect this account”
Please scroll down and change the settings on the page the way you prefer it. You can change the interval in which new pictures will appear and click “Save changes” in the blue box.
Now you want to determine what your feed must look like. Go up the page and select the second option, Customize. Scroll down, and you will first see “General Settings,” which you can keep the same or change if necessary. Next, you can change the “number of foto’s” to display. Change the selection so that they are nicely displayed wherever you want to put the feed.
Change the number of columns to give a clear picture of each picture.
As you scroll down, there are many settings that can be changed so that the feed will suit your site. When finished, remember to check the “Save Changes” box.
Setting up your plugin and your feed is finished, and now it’s time to display your feed on your WordPress sidebar.
Installing The Feed On The Sidebar
Go to your WordPress site dashboard. Seeing that the Flash Balloon widget is installed and you want to customize your feed, you can go ahead and right-click on” Instagram Feed” and then select “Customize.”
By selecting “Appearance,” “Widget,” you can use the widget that was created to place the Instagram feed anywhere on the page.
Drag the Instagram widget on the left menu bar and release it on the ‘Default’ sidebar on the right.
And there is your Instagram photo feed displayed on your sidebar as you have set it up!
Now your visitors can interact with you, and you with them, through your site or your Instagram feed.
How do I show my Instagram feed?
To show your Instagram feed on WordPress is easy and you have many customization options that will ensure your site looking fresh with a totally customizable photo feed. There will be fresh photos on your site.
You can engage your audience and make them stay on your site longer. The images on your Instagram feed will captivate the visitors, especially if they are in line with what’s happening on your site.
Instagram is one of the most popular and visited social networks on the Internet. Therefore, driving visitors from your Instagram site to your WordPress site is an excellent thing to do. You can build your Instagram followers and that will increase visitors to your WordPress site.
The pictures on an Instagram feed will attract visitors, and you can change them as you want them.
Including an Instagram feed on your site will bring a lot of pictures onto your site. These pictures can be varied and various customization options can be used to attract attention. It is advisable to adapt them to the time of the year and for the right holidays.
In this article, you will be shown how to install a Smash Balloon plugin into your WordPress site, and it is an easy process.
Two ways to display your Instagram feed or feeds on your site will be discussed in this article. The first one being, how to display your Instagram feed on the site, and the second one is how to show it in the Sidebar.
You can select one method or both of them.
To maintain the free version of the plugin, a pro version is also available. The pro version comes with a lot of advantages and is highly recommended.
Follow these easy steps to install your plugin and get your Instagram feed on WordPress. You can use the WordPress Editor or the Elementor page builder.
How To Install The plugin.
In this part, you will be shown how to install the free plugin or Instagram feed WordPress plugin to display the completely customizable, Instagram feed of your social media account.
First, you must be registered on WordPress and have an existing blog or website on a Business plan, not the normal free plan. You must be an active Instagram user. Sign in to WordPress, and you will be taken to the Dashboard of your site. On the left menu bar, you must select the Plugin option that is close to the bottom of the options.
Then you must select:” Add New” in the new options button that is displayed. You will see a search bar on the right top of the screen. Type in “‘Instagram” there and hit return.
In the center of the page, you will see a dialogue box with ‘Instagram Feed’ written on top.
On the right of “Instagram Feed,” you will see a button “Install Now,” click on that. It will work for a few seconds and click on “Activate” as soon as that dialogue occurs in the same position.
Now your Instagram feed is on WordPress. You must still configure it. During configuration, you will decide where you want it and exactly how it must look.
Configure Your Feed.
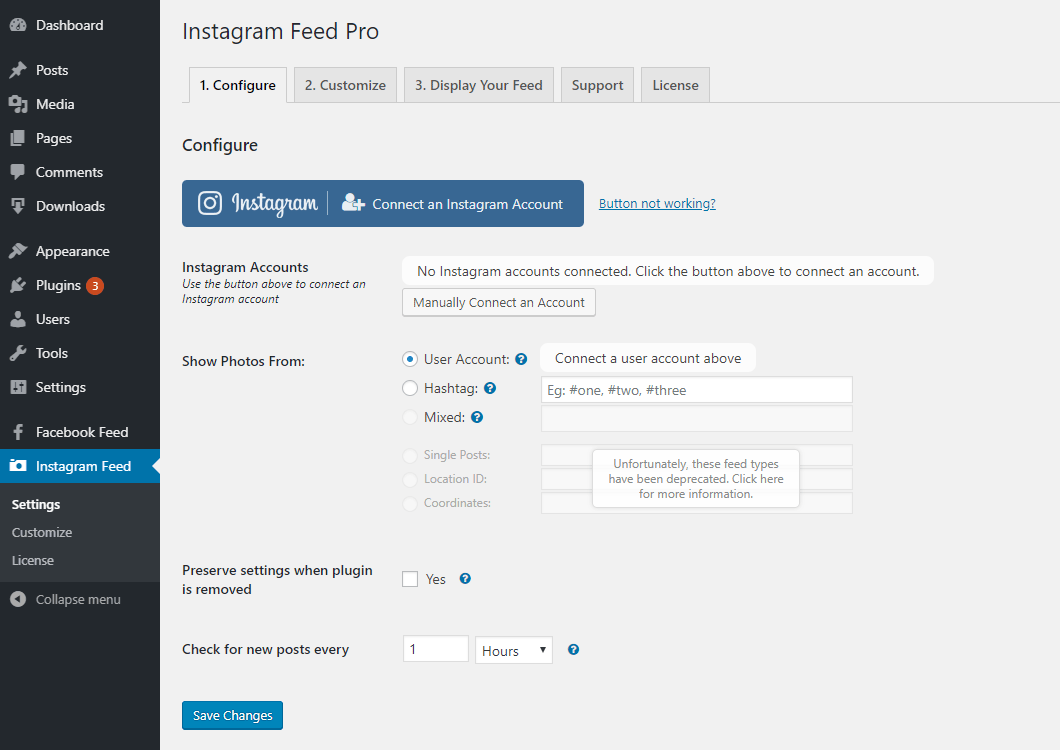
In order to configure your feed, the feed settings need to be changed. Go back to the menu on the left and scroll down until you reach the “Instagram” button menu item and click on that. If it’s not there, you can see it on your list of plugins on the right and click on ‘Settings.’
Another page will open with a big blue button written “Connect an Instagram Account” click on that. Here you can select to include multiple accounts. Based on hashtags you are able to shoe just certain photos of your Instagram feed.
You will get to an Instagram login window.
It can show your account, or you can select “Switch account.” Enter your details, or just check the login tab to continue with the account.
You will be shown another window where you are just told what it is taking from your account. Just check the green “Authorize” button.
On the next page, you should see your Instagram feed pop up. If it doesn’t, just click the button “Not Working.”
On the next page, you will get instructions on how to manually connect these accounts. Click on the blue button that says “Click here to get your Instagram Access Token and User Id.”
A white popup window will be displayed. You have to select a check box to indicate whether your Instagram is for Personal or Business use. Check the corresponding check box and hit the blue “Connect” button.
The next page will be a login page, and you can go ahead and log in. After that, you can scroll down and copy the access code that is displayed.
Now go back to your WordPress account and check the box that says “Manually add an account.” Copy the token displayed.
Paste the copied token to the box saying; “Add a valid Instagram Access Token” and click the blue box next to it saying; “Connect this account”
Please scroll down and change the settings on the page the way you prefer it. You can change the interval in which you want to display new pictures as well as the width and height of photos. There are also a few other settings that are totally customizable. When finished, make sure to click “Save changes” in the blue box.
Now you want to determine what your feed must look like. Go up the page and select the second option, ‘2. Customize’
Scroll down, and you will first see “General Settings,” which you can keep the same or change if necessary. Next, you can change the “number of photos” to display. Change the selection so that they are nicely displayed wherever you want to put the feed.
Change the number of columns to give a clear picture of each picture.
As you scroll down, there are many settings that can be changed so that the feed will suit your site. When finished, remember to check the “Save Changes” box.
Display Your Feed on Your Website.
Go back to your WordPress site and select the third button on top reads; “Display your feed”.
Right below, you will see a shortcode, “Instagram-feed,” and copy it.
On top of the next page, in the left menu, you can select which page you want to have your feed on. If you want a new page, hover over pages and check “Add New.”
Give your page a name in the text box on top and click “Add Block” in the left-hand left corner. This will open up a text box where you can type “shortcode.” After that, a box with “shortcode” will appear at the bottom. Just copy and paste that box into the text box below the place where you have given the page a name.
Go to the right, top corner and click “Publish.” Return to the left top side of the page and click the “View Page,” written in light blue.
And there is your Instagram content as you want to display it. On top, you can go directly to your Instagram account, and if you hover over the pictures, you get all the information of each Instagram photo.

The feature to hover over your picture to see more detail can be utilized by yourself and all your Visitors. This gives you an interactive WordPress-Instagram page that can attract visitors and views to both pages.
Display Your Feed on Your Sidebar
Including a live, completely customizable Instagram feed on the Sidebar of your WordPress site have lots of advantages.
Instagram, one of the most visited sites on the Internet, can drive visitors to your site, where they are able to see your Instagram feed as well. So they will spend more time on your WordPress site.
Including an Instagram feed on your site will bring a lot of pictures onto your site. These pictures can be varied to attract attention. It is advisable to adapt them to the time of the year and for suitable holidays.
In this article, you will be shown how to install a Smash Balloon plugin into your WordPress site, and it is an easy process.
In order to maintain the free version of the plugin, a pro version is also available. The pro version comes with a lot of advantages and is highly recommended.
Follow these easy steps to install your plugin and get your Instagram feed on WordPress.
How To Install The plugin.
Sign in to WordPress, and you will be taken to the Dashboard of your site. On the left menu bar, you must select the Plugin option, which is close to the bottom of the options.
Then you must select Add New in the new options button that is displayed. You will see a search bar on the right top of the screen. Type in “Instagram” there and hit “Install Now.”
In the center of the page, you will see a blue box with “Instagram Feed” written on top.
In the right-hand top corner of “Instagram Feed,” you will see a button “Install Now,” click on that to install your feed. It will work for a few seconds, and then a new dialogue box will appear.
Click on “Activate “as soon as that dialogue occurs in the same position. Now your Instagram feed is on WordPress, but you must still configure it. During configuration, you will decide where you want it and exactly how it must look.
Configure Your Feed
Go back to the menu on the left and scroll down until you reach the “Instagram” button menu item and click on that. If it’s not there, you can see it on your list of plugins on the right and click on “Settings.”
Another page will open with a big blue button written “Connect an Instagram Account” click on that.
You will get to an Instagram login window. It can show your account, or you can select “Switch account.” Enter your login details and right-click the ‘Login’ tab.
Enter your details, or just check the login tab to continue with the account. You will be shown another window where you can see what is taken from your account. Check the green “Authorize” button if you are comfortable with that.
On the next page, you should see your Instagram feed pop up. If it doesn’t, just click the ‘Button Not Working.’
On the next page, you will get instructions on how to connect these accounts manually. Click on the blue button that says “Click here to get your Instagram Access Token and User Id.”
A white popup window will be displayed in the middle of the next page. You have to select a check box to indicate whether your Instagram is for Personal or Business use.
Check the corresponding check box and hit the blue “Connect” button. After that, a login page will open up, and you can go ahead and log in.
After logging in, you can scroll down on the next page opening up, and copy the ‘access Token’ displayed.
Paste the copied token to the box saying; “Add a valid Instagram Access Token” and click the blue box next to it saying; “Connect this account”. Now your Instagram is activated.
On the left black menu bar, you must select “Appearance,” “Widget.” You must drag the widget over to the Sidebar. You can also add a title in the text box for that. When finished, click “Select”
Go to your Dashboard. In the left upper corner, you will see “visit site.” Right, click on it, and you can see your Instagram feed in the Sidebar.
And you are ready to get visitors to interact with your Instagram content and Instagram posts on your WordPress site.
Alternatively, you can select to have your Instagram feed displayed on the Sidebar throughout your site. You can display your feed in various places on your site.
Where Is Instagram Feed Customized?
Having an Instagram feed or Instagram posts on your WordPress site is a great way to attract and engage visitors to your site. Will you, however, want to change the look of the feed on your site, then you have to customize it again.
To do that, follow these simple easy to set steps and change your selections in the settings.
In this example, we are using the pro version of the Instagram feed, and it is easy to upgrade to a premium account with Word Press and use the pro feature of the plugin.
Go to your WordPress site dashboard. Seeing that the Flash Balloon widget is installed, and you want to customize your feed, you can go ahead and right-click on ”Instagram Feed” and then select “Customize.”
Here you will be to change feed settings and even select a single Instagram photo to be displayed.
With this plugin for WordPress, Another page will open, and you can change the width, height, background color, and layout of your Instagram feed. The default setting for the feed layout is four columns and 20 pictures in length.
You can change whatever you want to, and remember to check the blue“Save changes.” Button.
The Highlight Layout type, for instance, will give you this kind of feed. You can play around with the different layouts and select what’s best for you.
It is also possible to include multiple feeds from multiple Instagram accounts on your feed in WordPress. Just select “Display Your Feed” in the top menus, and you can use multiple feeds. You can apply hashtags only to view specific pictures, and you can attach descriptive measures like hashtag feeds to combine with your shortcode to change your settings.
By selecting “Appearance,” “Widget,” you can use the created widget to place the Instagram feed anywhere on the page. Here you can see the Instagram widget, with only three pictures displayed, was placed in the Sidebar. In this example, three images were selected through different hashtags:
The customizing possibilities are endless. If you want to moderate what is displayed in WordPress on your Instagram feed. You can go back to the Dashboard and select “Moderation” on the top menu bar.
On the next page, you can go ahead and select, using hashtags, which images you want to remove, and which photos containing what text you don’t want in your feed in WordPress.
This is a short introduction to customizing your Instagram feed on WordPress. You can go ahead and dig deep into all the settings available if these do not satisfy you. At least now you know where to look for further customization, and you can do the basic customization.