How to Create a Client Portal in WordPress
If you offer WordPress services to multiple clients at once, it might be appropriate to create a personal client portal for each of them. It will allow you to better manage and control your business and will provide clients with access to all files and the ability to publish news.
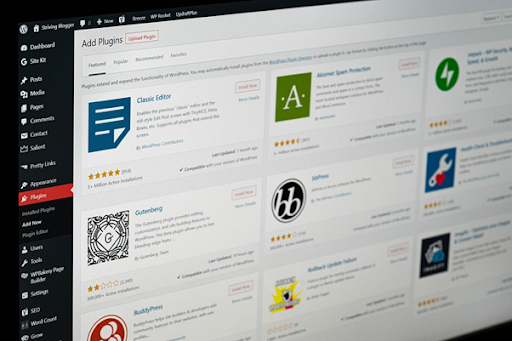
In addition to facilitating communication between a customer and a brand, portals are also easy to create. There is a plugin for each purpose and a few clicks are enough to implement them in WordPress.
These are not all the features of the client portal. We offer you to consider all the benefits of implementing a customer portal and a guide to installing the plugin.
What is a WordPress Client Portal?
The Client Portal is the place in WordPress where the user’s sensitive information is stored. It can be used both by himself and the company that owns the site. In it, customers can create and follow their profile, evaluate transaction history and send secure messages, as well as download files and news.
When to create a customer portal?
There are many target options for implementing a client portal. Businesses of any industry will benefit from the use of a client portal: hotel, legal, financial, retail, etc. It is used in the following cases:
- When you want to allow authors to publish their content on your site. With it, they will not only upload files but also be able to communicate with you.
- When your site is used for e-commerce. Your customers will be able to receive an invoice, track delivery, and make a return under your control in their personal accounts.
- When you have a membership site. Users will be able to fully manage their requests, change the number of subscriptions, etc.
You should create a portal if your site has a lot of users and you want to increase their number. It will provide optimal user support at every stage of interaction with your company.
Build targets and plugins
To work on creating a client portal, various plugins are offered depending on the needs. For example:
- for freelancers – Freelance Manager for managing clients and payments. This is a handy plugin for creating a responsive portal. The freelancer will be able to create a space where he will upload information about the client’s project (deadline, sketches, drafts, etc.), and the latter will have access to view its contents.
- for membership – MemberMouse allows users to create a personal profile to participate in various discussions. Everyone is given their own level of access to data, which guarantees their security.
- for support – Awesome Support for contacting support, checking call history and receiving notifications.
- for learning – LearnDash helps to create virtual classrooms, build a curriculum, conduct testing, etc. Each schoolchild/student will be able to get their own office, to which the teacher will send the necessary information.
There are also other options for both these and other purposes.
Benefits of the customer portal
The main advantages of the portal:
- management of customers, content, products, and services by the company;
- management of personal data and services by the client;
- financial management in the form of sending invoices and updating information about payments from both sides;
- transfer of any files in two-way order;
- project management from both the business and client-side.
These are general benefits that are available across many platforms. The following will be about implementing a client portal specifically in WordPress:
- increasing the level of legitimacy of your business;
- thanks to self-service, customers will receive answers and solutions to common questions and problems;
- increasing the memorability and brand awareness;
- improving the quality of service, which means increasing loyalty;
- the purposefulness of payments and reduction of the risk of late payment;
- saving time for a constant stream of messages to the support service;
- due to a large number of tools, it is easier to manage the business.
In addition to all the advantages presented, the client portal provides secure storage of data for your company and your customers. For 2020, WordPress has 50 security experts.
How to Create a Client Portal in WordPress
To create a customer portal, you need to choose the optimal plugin. Today we will walk through the creation of a Post type user interface. It is a native WordPress plugin that will help your customers get a great experience with your brand. Let’s move on to the steps:
No. 1. New copy of WordPress
Install a fresh copy of WordPress on your development server. Next, select the “understrap” theme. It will allow you to get started faster because it is a boilerplate. Thanks to the Post plugin, the settings will not depend on the theme.
No. 2. Removing and installing plugins
Remove all plugins that are installed on your default WordPress copy. Install “Classic Editor”, “Advanced Custom Fields” and “Custom Post Type UI”.
No. 3. Custom post type
Create a new custom post type using the Custom Post Type UI plugin. You can call it “client”, but write everything down in the singular only. This will make it easier to create templates in the following steps.
Also, do not use spaces in the design. Use underscores instead, and the tu_ prefix minimizes the possibility of conflict.
No. 4. Interface
Next, we add/edit custom message types. We write the tags “customers” in the plural and leave the “customer” in the singular. This data will be visible to the WordPress admin.
Capital letters can be used to make the menu attractive.
No. 5. Overwrite shortcut
To make it easier to interact with your customers, implement an overwrite shortcut that you can customize. By using the “tu_” prefix, you create a personal link for each user. The output looks like “/ tu_customer / example-company”. Not neat, right? With overwriting shortcuts, you can eliminate the writing of the prefix and simplify the structure.
No. 6. Field support and creation
From the CPT UI menu, select the “Support” field and then “Custom Field”. They are at the bottom of the page. In the menu, check the box next to the “Custom Field” setting and save the changes. Also at the bottom of the page set “Add message type” and save.
The post type has been created, now you need to add custom fields. To do this, add a field group named Customer Portal and embed several individual fields in it. The first will be the “brief” field. It is set as the field type “file”. Now the administrator will be able to upload any files, and they will all be stored in one place. All that remains is to set the “file URL”.
No. 7. Brand profile
The “Brand Profile” field consists of the “URL” link to the Google form. This option is the most optimal. It can be used for other fields as well if they contain xrefs.
No. 8. WordPress Template
In order for WordPress to display the client dashboard correctly, the template must be installed. To do this, create a template file for each type of publication.

No. 9. Single message layout
Next, you need to create a full-size layout that will contain the content. To do this, add 2 functions in the single-tu_customer.ph file: get_footer and get_header. To retain content, add a full-area layout between these features.
No. 10. Cycle launch and content creation
Go to the <main> element and enter the_post. In it, form the elements that will be filled with information. Now you have cards, you can fill them with content and links at your discretion. And use the “the_field” function to send all the required content to the client template.
No. 11. Adding clients and finalizing the interface
In your WordPress dashboard, on the left side, you will find the Clients menu. Select “Add new client” from the drop-down list. All custom fields you created appear at the bottom. Try writing text to make sure they function correctly.
After creating a coherent structure, you should style the interface. Use CSS for this. It can be used to customize the page color and the appearance of the content.
No. 12. Remove from search
Custom Post Type should not be allowed to show up in a regular search query. To do this, using the SEO plugin, remove this post type from the sitemap.
The client portal is ready!
Conclusion
Creating a client portal in WordPress is an important and necessary stage for every business. Thanks to him, you will facilitate interaction with the site for both yourself and your customers. There are plugins for each task. Decide on a goal and choose the best option. We’ve walked through the tutorial using our own Post-type WordPress plugin as an example. Go through each step and you have the perfect client portal for your business.
About the author
Amber Martin is an experienced freelance writer. She specializes in quality content related to marketing for the audience. When she is not writing, you can find her in the kitchen as she is an excellent cook. Please contact her at the email address – [email protected].