
In a perfect world, keeping everything up to date will help your websites operate smoothly while fixing known issues, increasing performance, and mitigating security issues. However, in some cases, this is not the norm. Updating to the latest version might cause compatibility issues with a plugin or theme, etc. In such situations, the best option is to downgrade WordPress installation to a previous version to troubleshoot.
What to consider before reverting WordPress to a previous version
Reverting to a previous version of WordPress comes with its risks. By default, there is no inbuilt functionality to downgrade WordPress to a previous version of WordPress. Unless you are proficient enough with the WordPress ecosystem, we would advise against trying to restore a previous version.
Following are a couple of instances where you will need to downgrade WordPress sites.
- To troubleshoot an Incompatible plugin or theme that has caused issues with the website functionality.
- WordPress upgrades are incompatible with some underlying fringe hardware and software configurations.
- WordPress backups are configured for a previous version. Therefore sometimes, downgrading the site to the backed-up WordPress version is required to restore the backup.
- For testing and debugging purposes.
Downgrading a WP site comes with its own set of challenges. If the downgrade process is interrupted or corrupted, the whole WordPress installation can be unusable. Moreover, downgrading WordPress will make the website vulnerable to security threats.
Downgrading WordPress will not always provide a solution for update issues. When a plugin or theme gets updated, this might change the compatibility with previous versions or change the functionality and the structure of the site. In such situations, make sure to test with different versions of the plugin or the theme before reverting the whole WordPress installation. Also, a plugin or a theme may be incompatible with newer PHP versions bundled together with each update. We can mitigate this issue by merely downgrading the PHP version while keeping the overall WordPress update.
Reverting a WordPress site should be the last resort in any WordPress troubleshooting process and only be downgraded for the troubleshooting period. It is strongly recommended to keep regular backups regardless of whether you are planning an upgrade or a downgrade.
In this article, we will investigate multiple WordPress downgrade methods, both manual and assisted. In addition to that, we will discuss how we can downgrade plugins and modify the PHP version of a WordPress installation.
Reverting to a previous version manually
Manual reverting to a previous version should be the final option when there is a need to downgrade a WordPress website. Manual downgrades while providing a complete reset can be a complicated process. This section will provide you with a step by step guide to safely revert the WordPress installation to the previous version. Please note that the WordPress installation directory will differ according to the deployment method. We will be using a preconfigured WordPress installation provided by Bitnami hosted on AWS Lightsail.
Step 1 – Make a backup
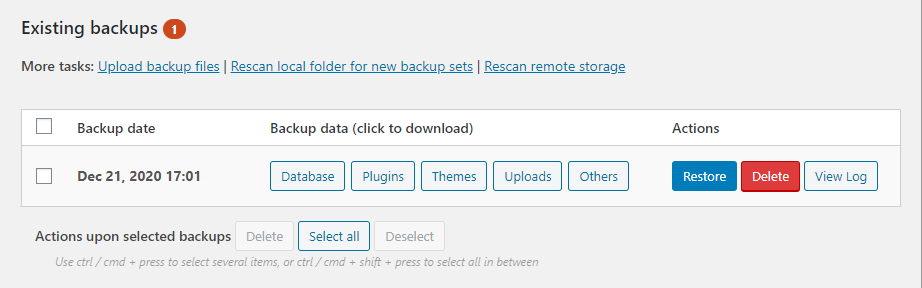
It’s a must you have a complete backup of the WordPress website before you proceed any further. This can be done either using a plugin or simply backing up all the files within the WordPress installation through FTP. While there are many backup plugins available, it is better to use a proven backup solution such as UpdraftPlus, Jetpack or BackupGaurd
The following examples show us how to make a backup using the UpdraftPlus plugin. This backup can be downloaded to the local machine for safekeeping.
Make the Backup via the plugin interface by clicking the “Backup Now” button.
After a successful backup, UpdraftPlus will create separate backup files for each component, which can then be downloaded. These files can be reuploaded to restore the backup.
Step 2 – Download WordPress
We can download the previous version of WordPress using the official releases page. It is advisable to always revert to a single version as it is less likely to cause major inconsistencies with the site functionality while minimizing the security vulnerability.
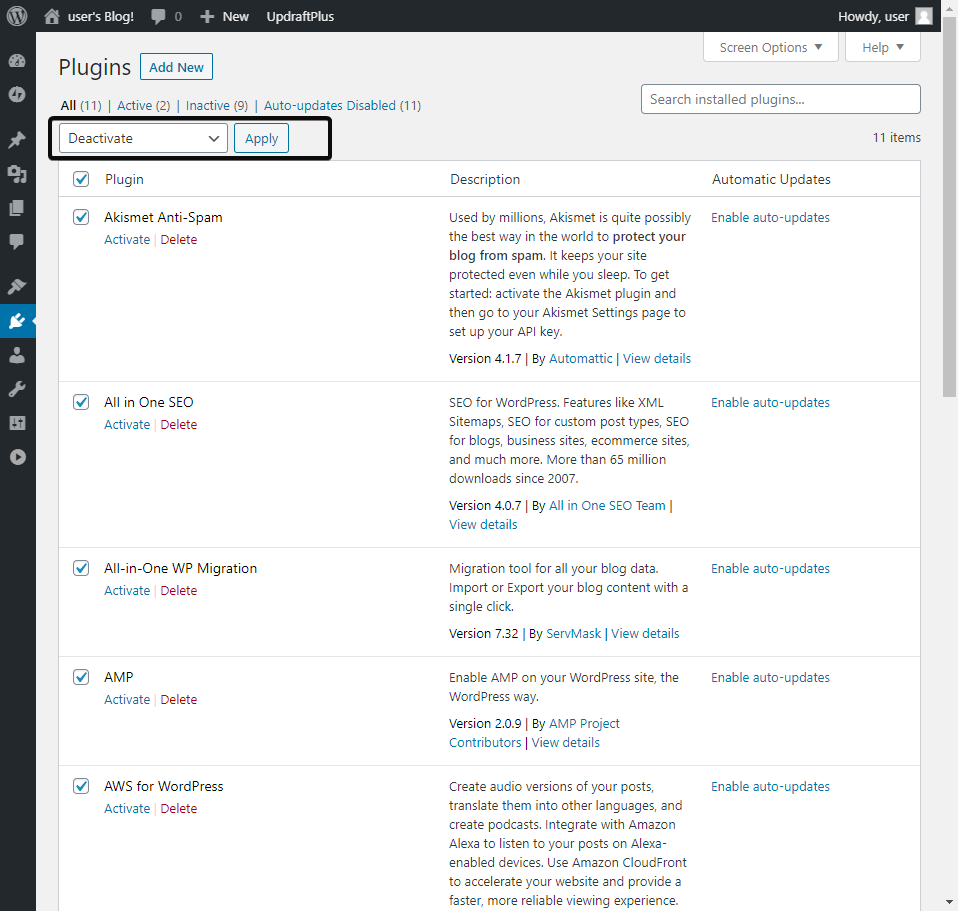
Step 3 – Disable the plugins
Next, we will disable all the plugins to mitigate any compatibility issues. This can be done in the WordPress admin interface. In the Plugins sections, select all the plugins, and Deactivate using the “bulk actions” dropdown.
If the user is unable to access the WordPress admin interface, we can simply rename the plugins within the “wp-content/plugins/” directory to deactivate the plugins. Renaming each folder within the plugins directory can be done by accessing the server through FTP or a web-based file manager of your hosting platform.
Plugins directory

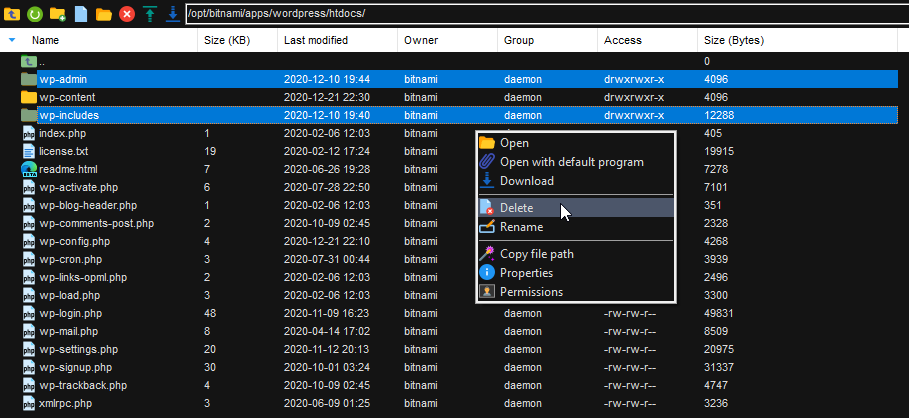
Step 4 – Delete the wp-admin and wp-includes folders.
Using an FTP client like FileZilla, WinSCP, or MobaXterm, we can access the files within the WordPress installation and delete the wp-admin and wp-includes folders. In this article, we have used MobaXterm as our FTP client. Please be cautious when deleting the folders because if the wp-content folder is deleted, the WordPress installation will become unrecoverable.
Deleting the Folders
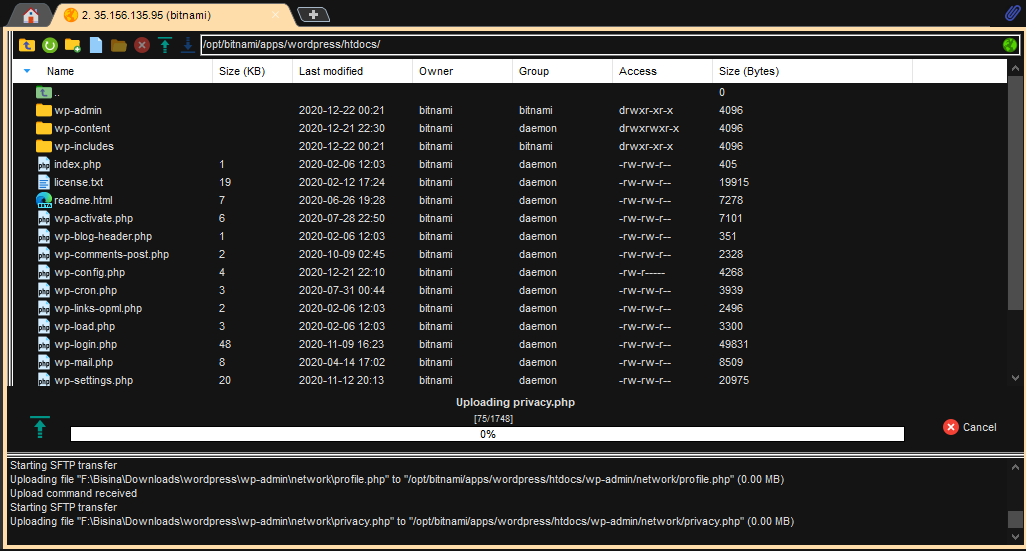
Step 5 – Upload the fresh WordPress copy
After deleting the folders, we can use the earlier version of WordPress that we downloaded in step 2 to repopulate all the necessary files. Extract the contents of the download zip file and upload all the files within the extracted WordPress folder, excluding the wp-content folder, as this will interfere with the existing contents of the WordPress site. Overwrite any existing file within the server if it’s asked.
File and Folders to be uploaded (Pervious version of WordPress)

MobaXterm upload process
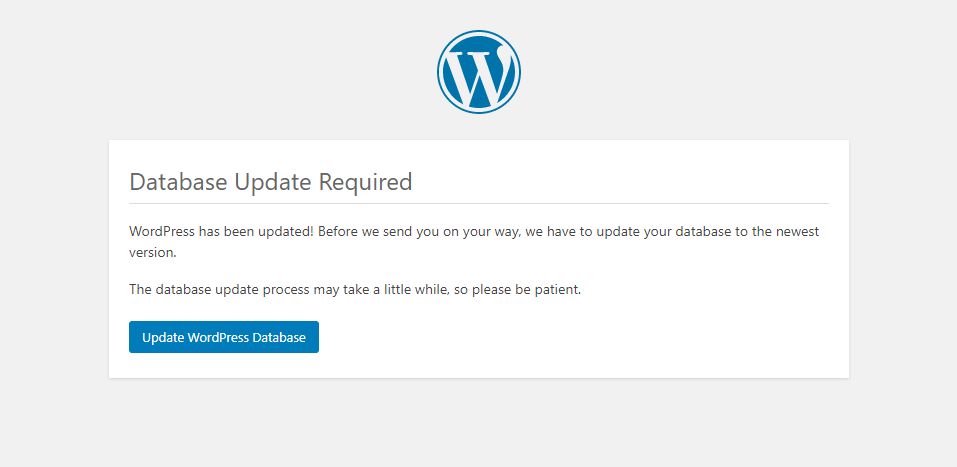
Step 6 – Update the database
Navigate to the WordPress admin interface, and you will be asked to update the Database. Click on the “Update WordPress Database” button to update the database to reflect the changes.
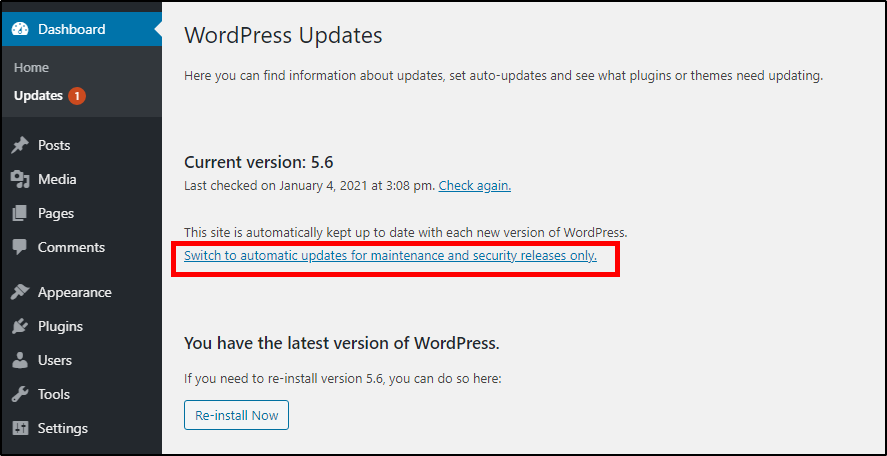
Step 7 – Disable automatic updates
WordPress will always try to update itself to the latest version. We can disable automatic updates in the WordPress instance by editing the wp-config.php file or by using a plugin like Advanced Automatic Updates. We will be editing the wp-config.php file to disable automatic updates. This can be done by adding the following code block to the wp-config.php file.
define( ‘AUTOMATIC_UPDATER_DISABLED’, true );
Disabling automatic updates ensures us that WordPress will remain the rolled back version until we finish our troubleshooting.
Step 8 – Check the WordPress version
Using the About WordPress page, we can identify if we have successfully downgraded the WordPress instance. Here, we have downgraded WordPress from version 5.6 to version 5.5.3
About Page

Step 9 – Reactivate the plugins and troubleshoot
The last step would be to reactivate the plugins and troubleshoot the issues that occurred after updating. It is advisable not to keep running the outdated versions of WordPress for a longer time. After the troubleshooting, we can simply upgrade to the latest version via the WordPress update and enable automatic updates.
Using WP downgrade plugin to revert to a previous version
Manual Downgrades can be time-consuming and a risk-prone process. But thanks to plugins like WP Downgrade, this process has been much easier. WP Downgrade plugin serves a single purpose, which is downgrading the current WordPress version to any previous version of WordPress. The following steps describe how to use this plugin.
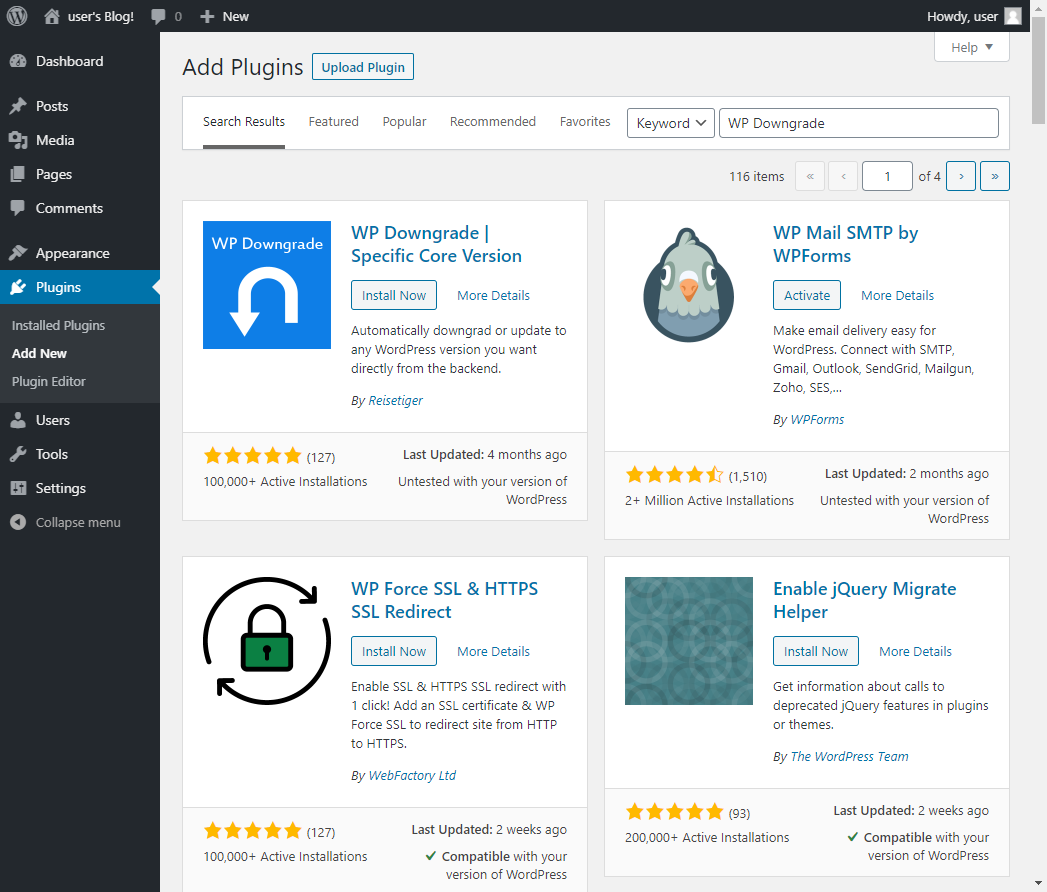
Step 1 – Install the plugin
To install the plugin, click “Add New” in the plugin section. Then search for “WP Downgrade” and click on the “Install Now” button to install the plugin.
Installing the plugin
As a rule of thumb, it is always prudent to make a backup of the existing WordPress installation before attempting a downgrade.
Step 2 – Using the plugin to downgrade
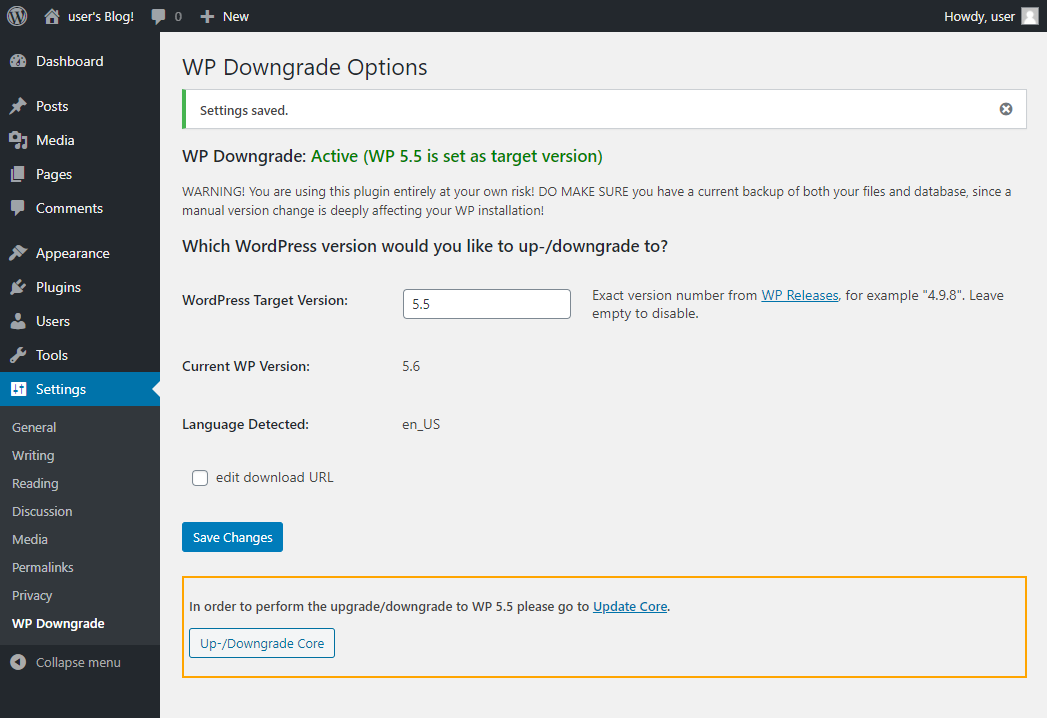
The WP Downgrade is located in the Settings section of the WordPress admin interface. After navigating to the plugin settings section, we will see the following screen.
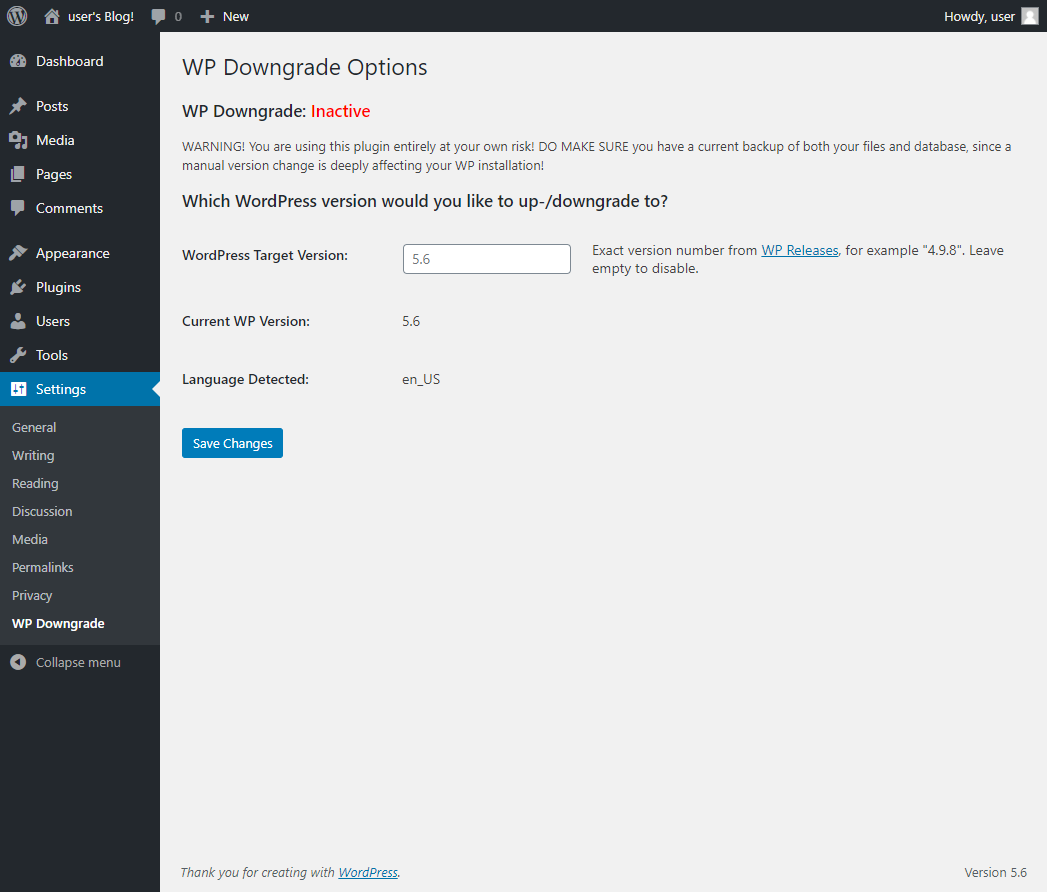
WP Downgrade plugin provides us the current installed WP version and the configured primary language of the site. We can simply downgrade the website by specifying the WordPress version we wish to downgrade to in the “WordPress Target Version” textbox. Remember that the target version must be a valid WordPress release version.
Let us downgrade the current WordPress installation to WordPress version 5.5. First, specify the target version as 5.5 and save the changes. This will activate the WP Downgrade.
Activated plugin
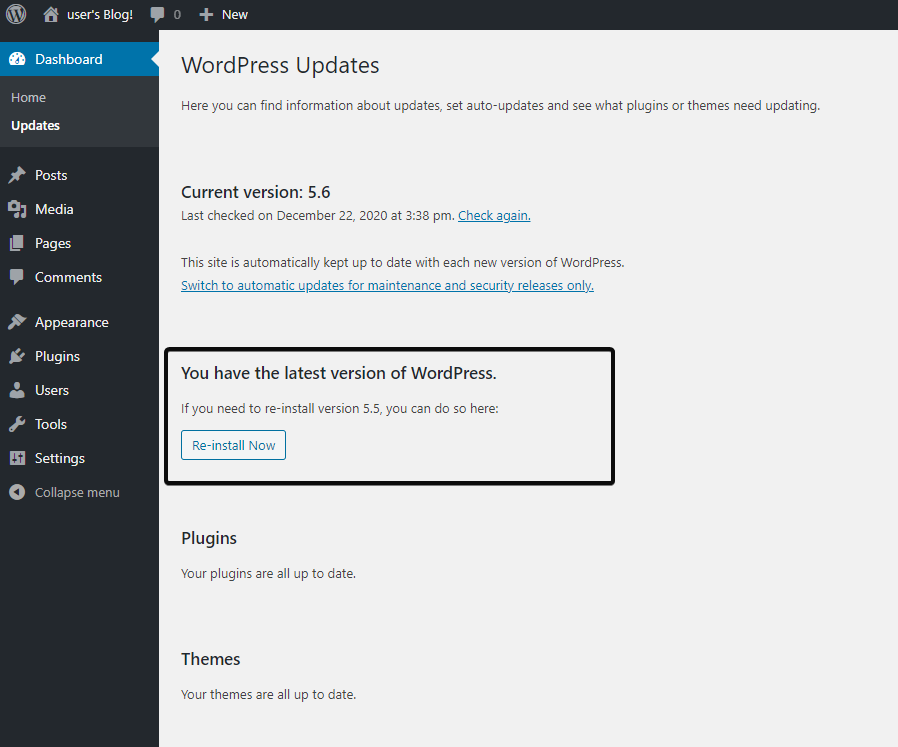
The next step is to perform the downgrade operation by clicking on the “Up/Downgrade Core” button. We will be presented with the WordPress update section, where we will be given the option to reinstall WordPress 5.5 as the latest version. Click on the “Re-install Now” button to start the downgrade.
Step 3 – Update the database
When the downgrade process is completed, we will be given the option to update the WordPress database to reflect the changes made to the WP installation.

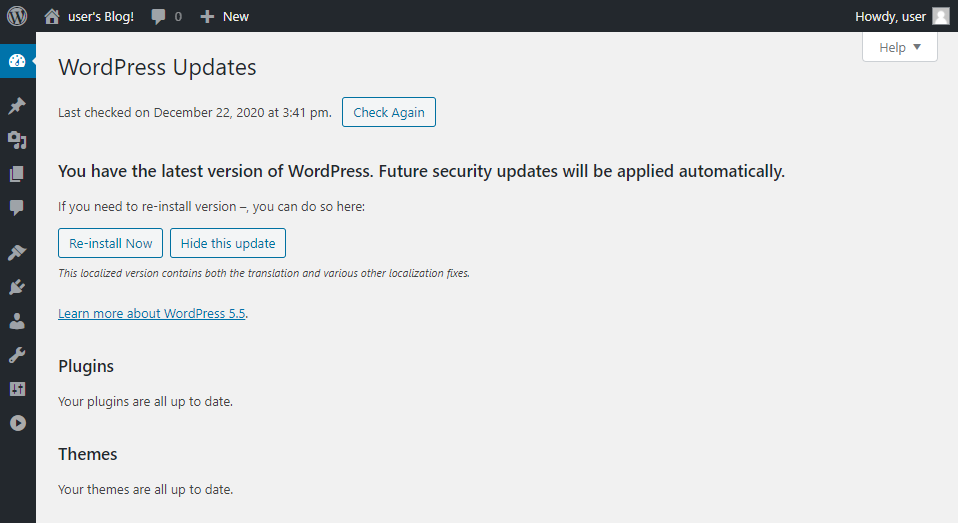
Step 4 – Validate the downgrade
After the Database update, you will see the WordPress update screen confirming the downgrade process.
WordPress update screen
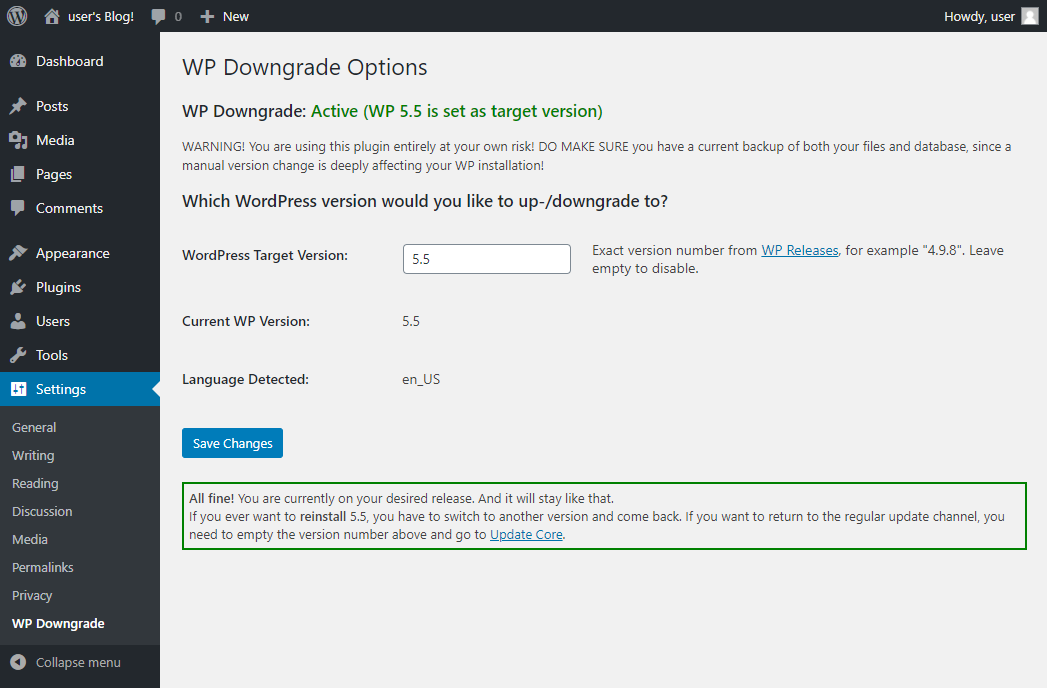
We can further validate the downgrade process by navigating to the WP Downgrade plugin and it will show a message confirming that you have successfully downgraded to the desired version.
WP Downgrade plugin after the downgrade operation.
Downgrading Plugins and Themes
Both the above options let the user roll back the whole WP core to an older version of WordPress. This may not be necessary if the issue within the WP installation is limited to a specific plugin. For such cases, we can simply downgrade the affected plugin. This can either be done manually or by use a plugin like WP Rollback plugin.
Manually Downgrading a Plugin
The downgrade process of a plugin is similar to that of the manual rollback process of WP core. If the plugin was obtained via the WP directory we can search for the desired plugin from the WordPress plugin store.
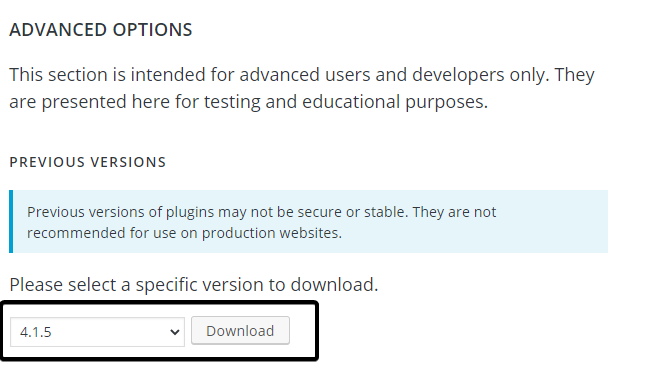
Older versions can be found by going to the Advanced View in the Details tab and downloading the corresponding version. We can manually downgrade a plugin via the admin interface or by using FTP.
Downgrading a Plugin via FTP
In this section, we will look at how we can downgrade a plugin by accessing the plugins directory and replacing the plugin files with an older version. If we are unable to access the admin interface due to a broken plugin, downgrading via FTP is the only available option. To demonstrate the downgrade process, we will be using the UpdraftPlus plugin.
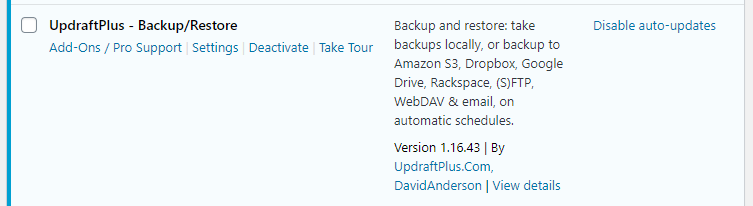
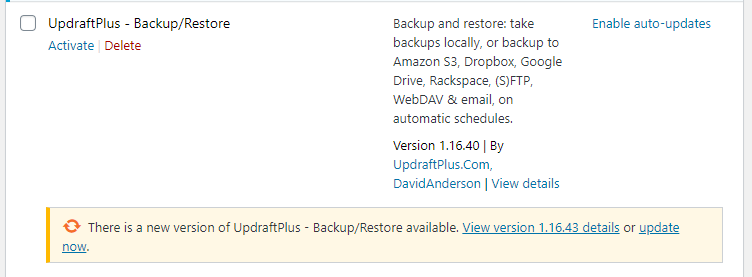
Current UpdraftPlus version
Step 1 – Download the older version
In the WordPress Directory search for UpdraftPlus and go to Advanced View and at the bottom of the page, you will find the “Advanced Options” section where you can download previous versions. Download the desired version and extract the contents.
WordPress plugin directory

Previous versions download

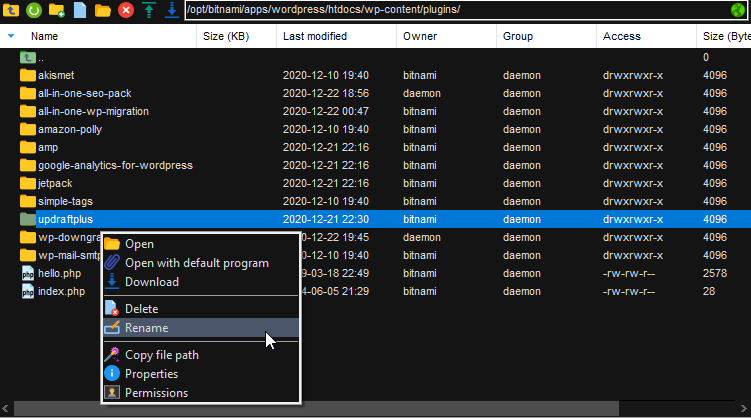
Step 2 – Force Deactivate the Plugin
Before we upload the older version of the plugin, we need to deactivate the existing plugin version. A quick and dirty fix is to rename the older plugin in the wp-content/plugins/ folder. This allows us to keep the plugin data within WordPress while allowing us to upload the desired version. In our example, we will be renaming the “updraftplus” folder to “updraftplus-new”.
Renaming the folder
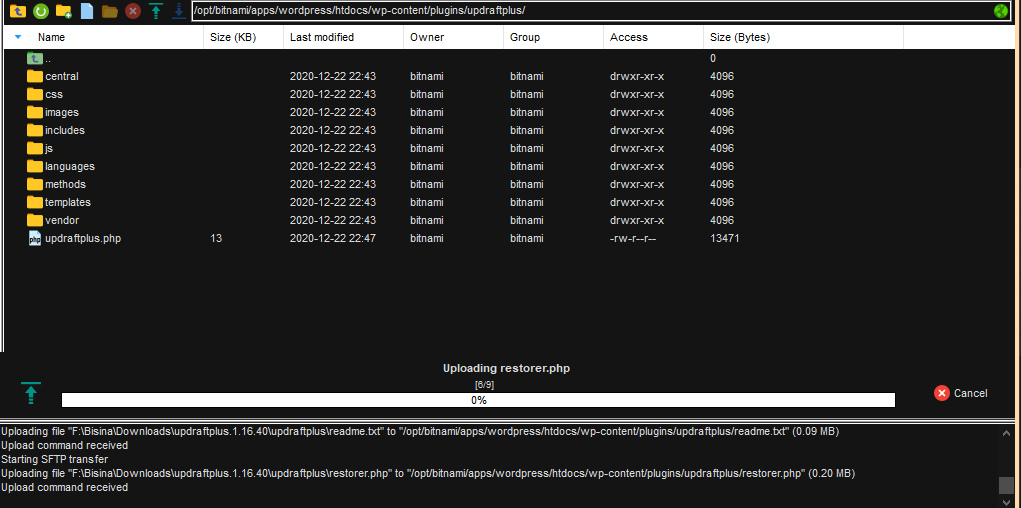
Step 3 – Upload the Older Version
Using the FTP client, we can upload the extracted content of the updraft folder to the plugins directory. (wp-content/plugins/).
Uploading the content
Both plugin versions
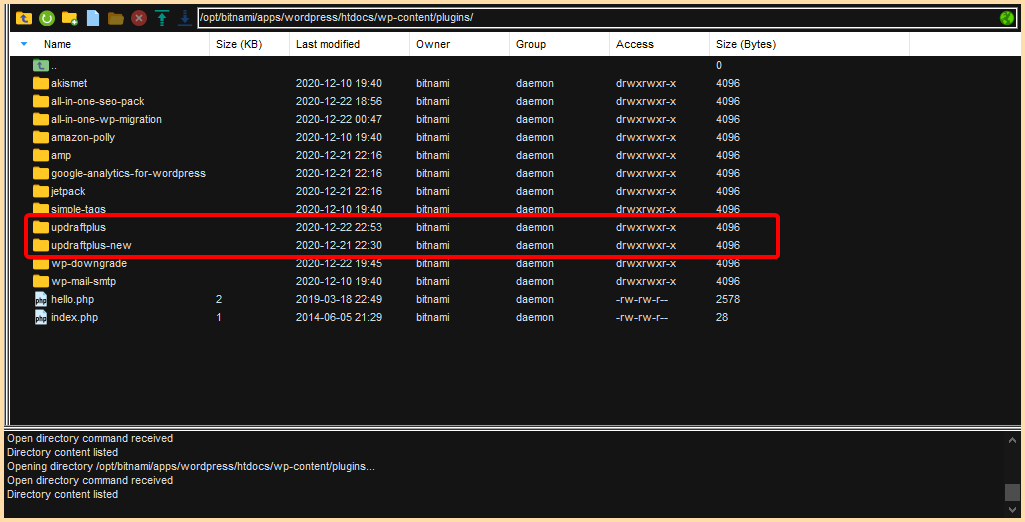
By keeping the newer version of the plugin, we can update to the newest version by simply deleting the older version of the plugin and renaming the folder to the original name.
Step 4 – Verify the Downgrade
Go to the Plugins page and verify the version of the plugin.
Downgraded plugin
The major pitfall when it comes to manual downgrades is permission issues which can lead to disastrous consequences. Always make sure to configure the correct user and group permissions when interacting with folders and files within the server. Manual downgrades through FTP are not recommended unless you are an advanced user.
We can use the following methods to change the file permissions. File permission assignment commands will differ according to the underlying WP deployment architecture in the server.
sudo find <WP directory path> -type f -exec chmod 644 {} \;
sudo find <WP directory path> -type d -exec chmod 755 {} \;
sudo chown -R <user>:<group> <WP directory path>
sudo chmod -R g+w <WP directory path>
sudo chmod 644 <WP directory path>wp-config.php
Downgrading a Plugin via Admin Interface
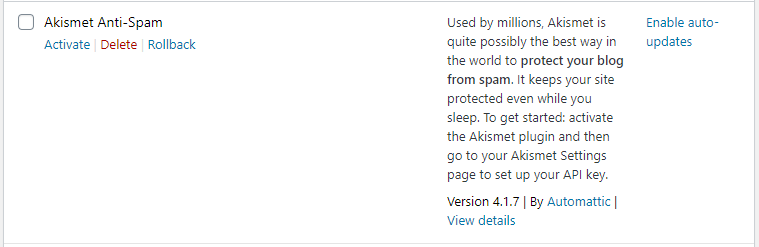
If we have access to the admin interface, the entire process becomes a whole lot easier. Leveraging the Upload Plugin functionality, we can upload the desired version of a plugin. The below steps show us how to safely downgrade the Akismet Anti-Spam plugin.
Current Akismet Anti-Spam plugin version
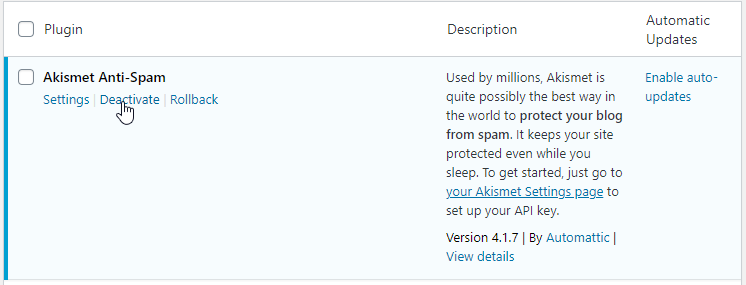
Step 1 – Deactivate the Plugin
Start by clicking on the deactivate link of the plugin in the Installed Plugins Interface.
Deactivating the plugin
Step 2 – Download the Older Version
Using the WordPress plugin directory download the zip file of the older version of Akismet Anti-Spam.
Downloading the older version
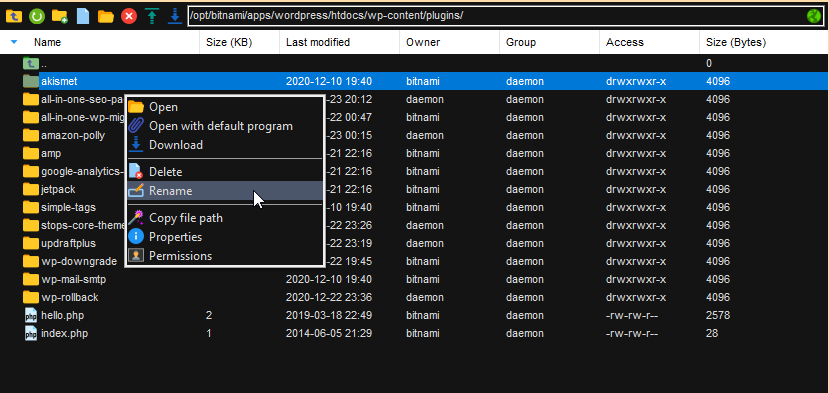
Step 3 – Rename the Plugin Folder
Once we have downloaded the older plugin, we need to access the server using FTP connection and rename the plugin in the wp-content/plugins/ folder. The akismet folder will be renamed to akismet-temp.
Renaming the folder
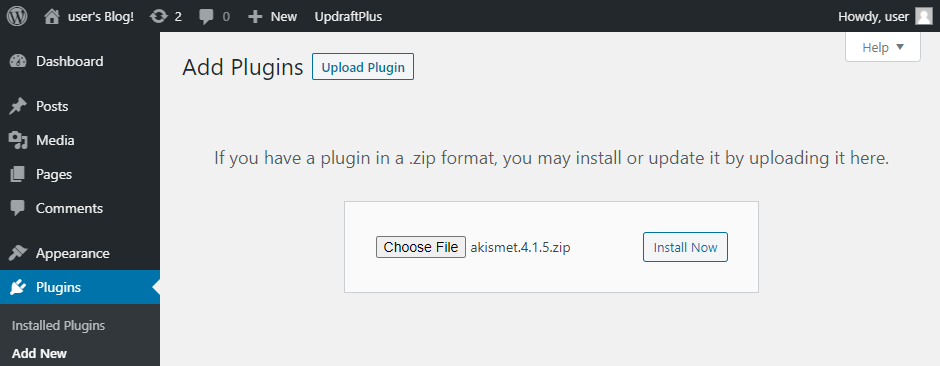
Step 4 – Upload the Plugin
Next, navigate to the Add New section in the admin interface and click on “Upload Plugin”. There you will be provided with the ability to choose the zip file containing the previous version of the plugin and click on “Install Now”.
Upload plugin interface
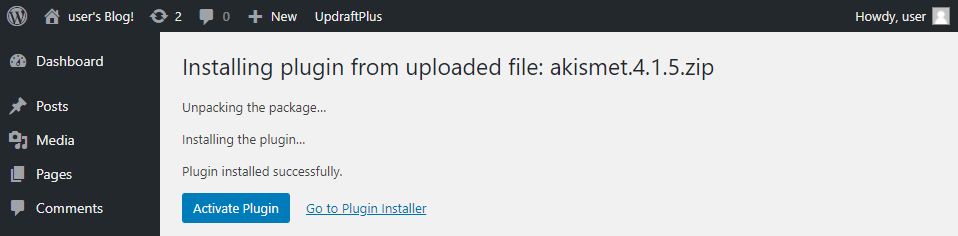
You will be redirected to anew page where you will see the installation progress. Finally, activate the plugin by clicking on the “Activate plugin” button.
Installation progress
Step 5 – Verify the Downgrade
Go back to the Installed Plugins page and verify the version of Akismet Anti-Spam. You will notice that the older version is installed and a message saying a new update is available.
Akismet Anti-Spam version

Both the methods mentioned above require the user to obtain the older versions manually. Notice that if it’s a third party plugin, you may need to contact the developer to obtain a previous version of the plugin.
Downgrading using the WP Rollback Plugin
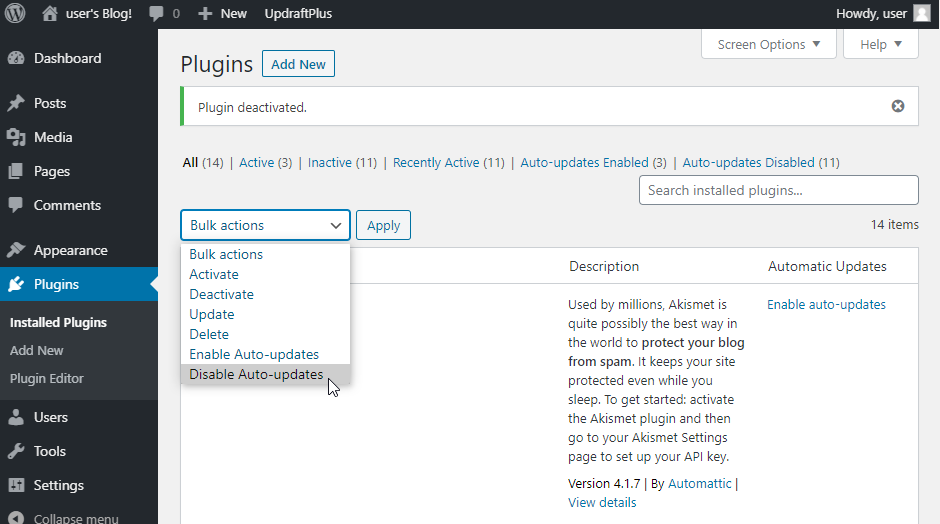
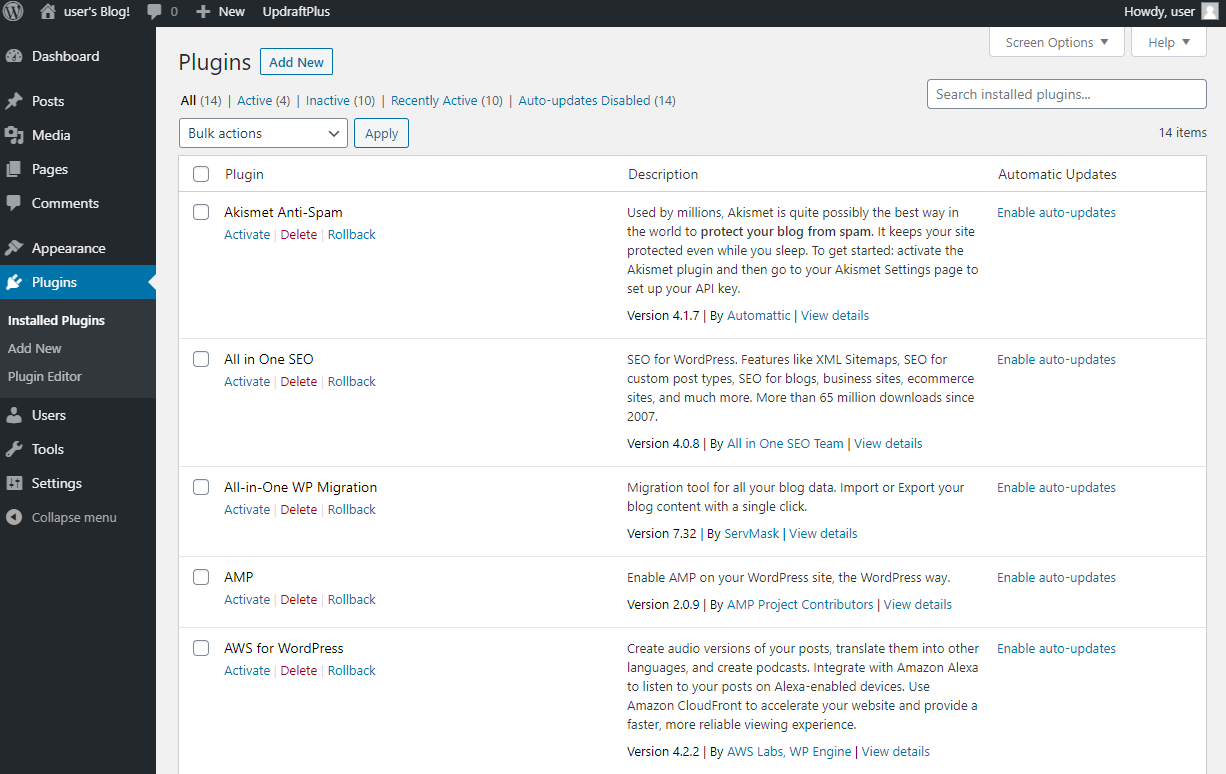
While the WP Downgrade plugin provides an effortless way to downgrade WP core, the WP Rollback Plugin provides an easy option to downgrade both plugins and themes. Before continuing further, we need to disable auto-update functionality for plugins and themes. Select all the plugins and from the bulk action drop-down, click on “Disable Auto-updates” and apply the changes.
Disabling auto-update
Rolling Back Plugins using WP Rollback
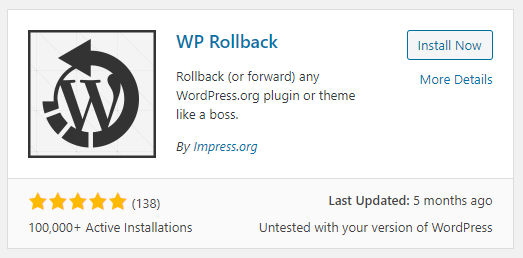
First, we need to install the WP Rollback plugin. Go to “Add New” in the Plugins page and search for WP Rollback. Then install and activate it.
WP Rollback plugin
When you go to the Plugins section you will notice that a new option called Rollback is enabled for each plugin.
Rollback option
A thing to note is that WP Rollback only supports plugins available in the official WP plugin repository.
Rollback Process
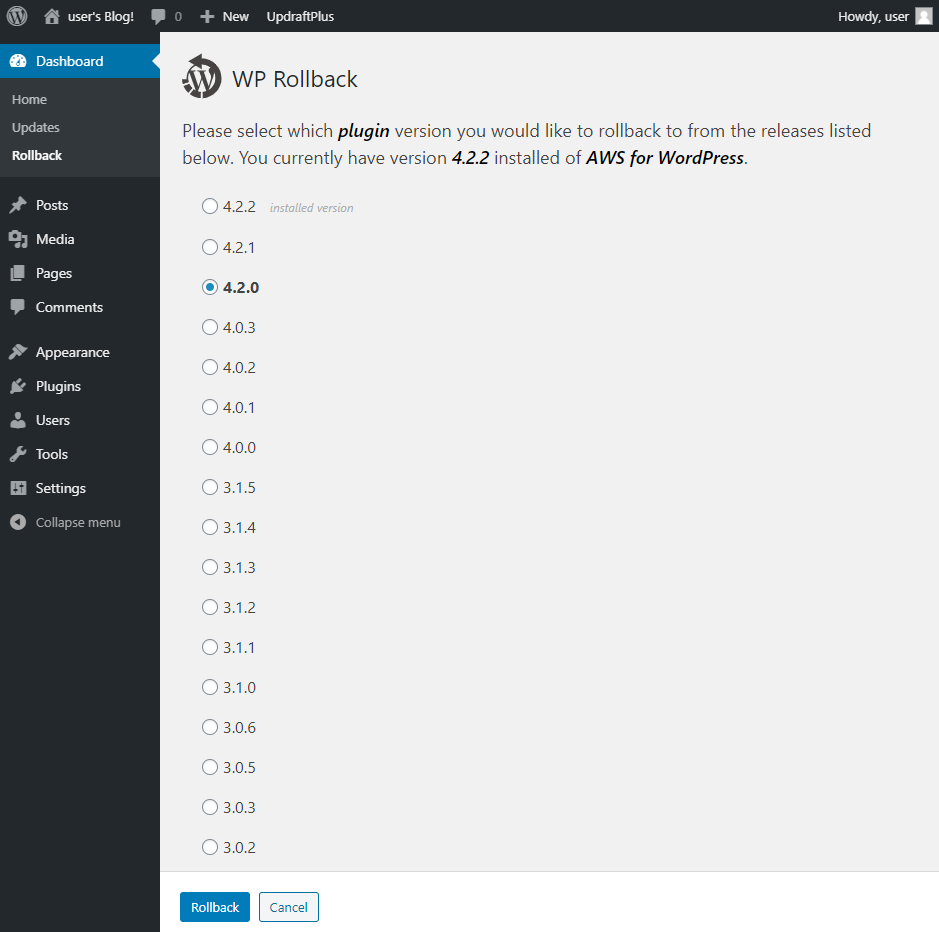
Click on Rollback on the desired extension and you will be presented with the WP Rollback options page . Select the version you wish to downgrade to and click on the Rollback button.
WP Rollback options
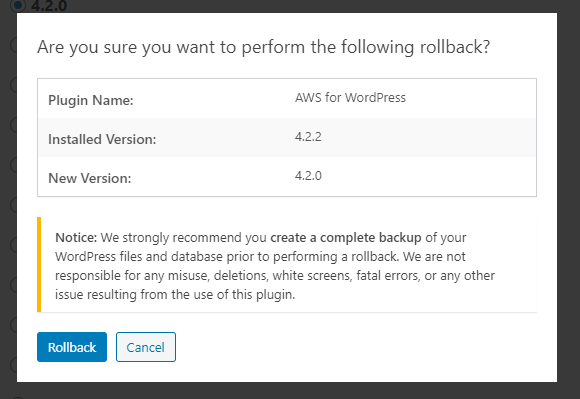
You will be prompted to confirm the downgrade operation. Again click on the Rollback button to confirm the selection.
WP Rollback confirmation prompt
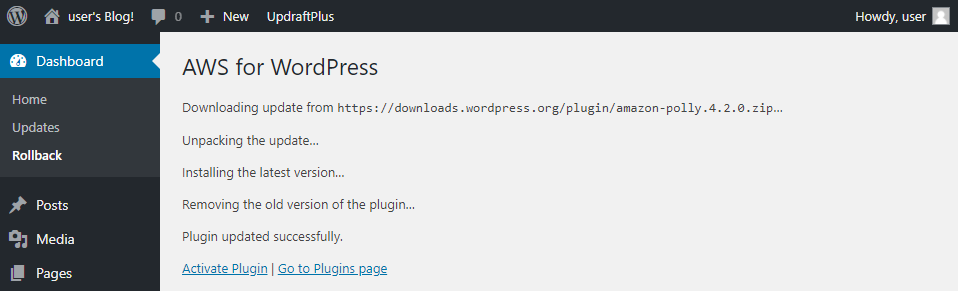
On the next page, you will be presented with the downgrade progress. After the downgrade is completed, we can activate the plugin and check if the version reflected the downgraded version.
Downgrade process
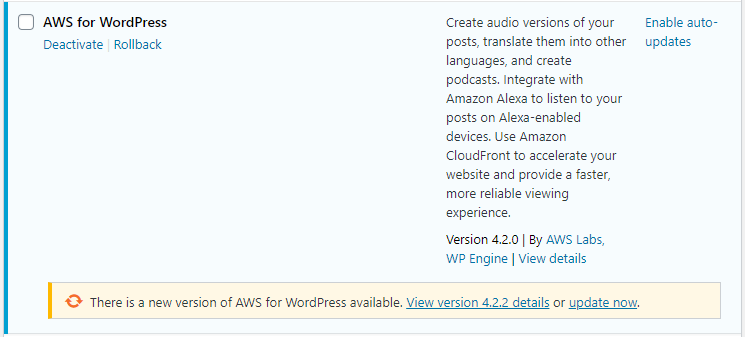
The successful downgrade operation will be reflected from the version of the plugin and will indicate a newer version is available.
Downgraded plugin version
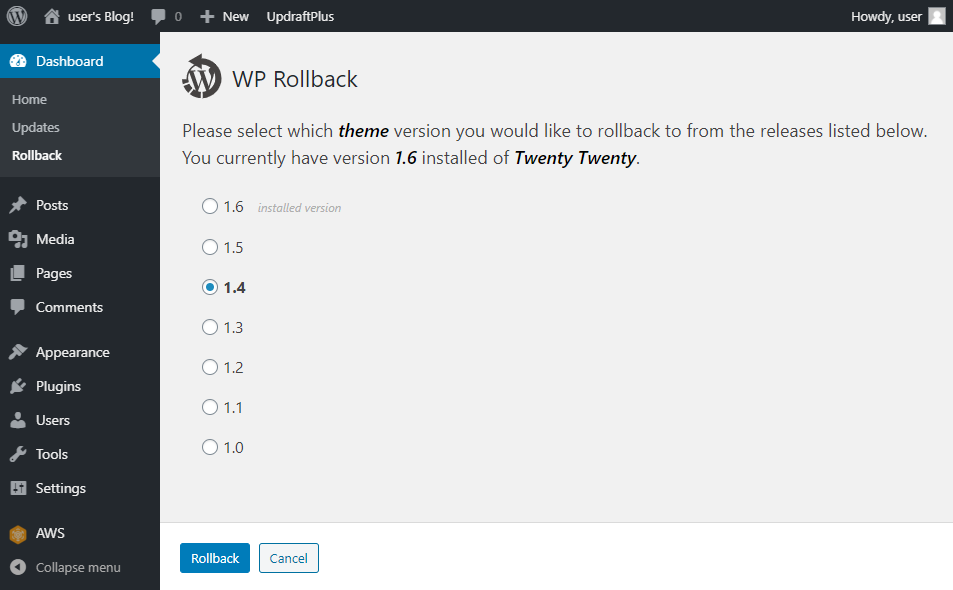
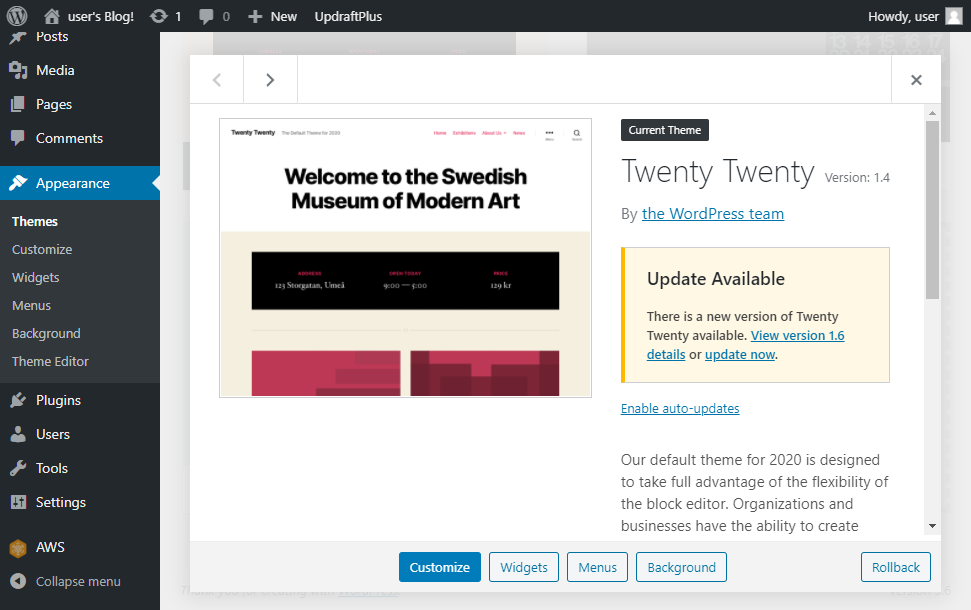
Rolling Back Themes using WP Rollback
WP Rollback extends its rollback functionality to themes as well. We can rollback a theme by going to themes in the Appearance section and clicking on “Theme Details”. This will provide information regarding the theme and the rollback functionality.
Click on the Rollback button and select the previous version you wish to rollback and click on Rollback continue.
WP Rollback themes
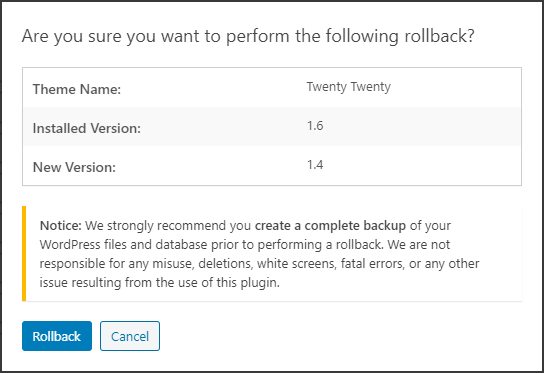
Next, you will be prompted to confirm your sections and accept the confirmation by clicking on the Rollback button.
WP Rollback confirmation
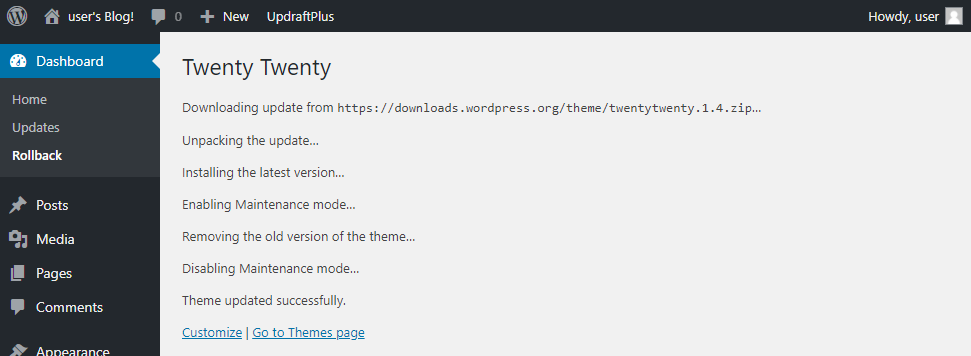
After the confirmation, the rollback operation will be carried out and the user will be informed.
Theme rollback process
Finally, we can verify the theme version by going to the “Theme Details” of the desired theme. The rolled back theme will display a message indicating a newer version is available while showing the older theme version.
Downgraded Theme
Conclusion
Reverting to a different version of WordPress can be a necessary step in any troubleshooting process. In this article, we learned how to restore previous version of WordPress safely and conveniently. We learned how to downgrade WordPress core via the WP Downgrade plugin as well as how to downgrade individual components such as plugins and themes via WP Rollback plugin.
Always remember to make a backup before attempting any downgrades and after troubleshooting always update WordPress core, plugins, and themes to the new version to improve the performance and mitigate security risks of the website. If you have any questions please leave a comment here.