How to create real estate website in 30 minutes
Posted onAre you about to create a real estate website, but wondering how to get started?
This is the step-wise guide on how to create a real estate website in 30 minutes.
It is quite normal to be confused at first when you start an online business, but with proper guidance, it becomes easier and simpler.
This article is for beginners who want to take their real estate business to the next level. It intends to help you create a feature-rich and vivid real estate directory without ever needing help from technical experts to solve your problems.
So the brokers, estate agents, or anyone who wishes to have a real estate website of their own and earn some passive income through the online directory, can start their new venture confidently and avoid making wrong decisions.
You can do it – all by yourself!
Creating and managing websites is no longer a domain of technically skilled people.
Even if you are a student or a housewife wanting to do something productive in leisure, or an estate agent or property dealer wanting to create and manage their own website, a layman looking to earn some passive income, or anyone passionate enough to start something new, I want to assure you-you can do it on your own.
There’s a video as well of this entire process, at the end of this guide.
A great plugin that will help you build all of the features a real estate website needs is Toolset Real Estate which you can use to create features such as custom post types, a search, and front-end forms without complex PHP coding.
Ready to get started..?
Starting a real estate directory website needs a lot of considerations and commitment. Before you get started, there can be certain questions in your mind like where can you start from? What to do once the website is hosted? How can you generate passive income with your real estate website?
So here, is the step-by-step procedure on how to create a fully-functional and complete real estate directory website. Below is the outline of what we’ll see in this article.
- Your website needs its address and web-space(Domain and Hosting)
- Initial setup of your website
- Make it look the way you want
- Add properties to display
- Get paid for advertisements
- Accept online payments
- Get paid for advertising user’s properties
- Promote to get more submissions
Get the Domain name – Your website’s permanent address
Just like your residential address, your website too needs a unique name/address of its own, right?
So before anything else, we need to acquire the domain name(the permanent address of your website) and the server space(room on the server to store your data).
Domain name – The address for your website
The domain name is nothing but a unique address/name for your website. For instance – ‘Templatic.com’ is our domain. It can generally be referred to as the web address.
For the web address – GoDaddy is one of the most popular domain registrars and you can use it to acquire your desired domain name.
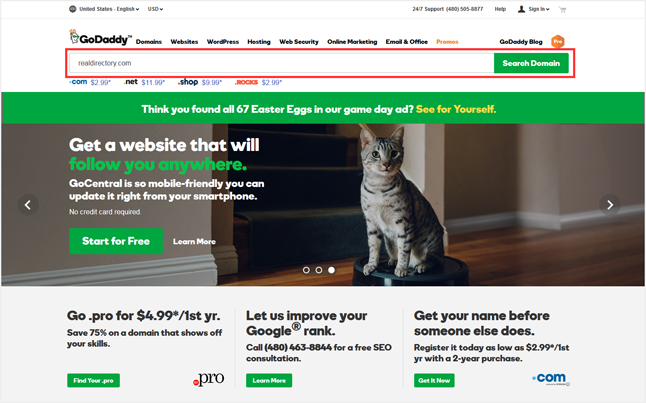
If the domain name is available, you will be shown the price for that domain name, if not available – relevant suggestions will be displayed. You can pick up the one and get a domain name for yourself.
A domain name will typically represent your business online. Here are several points that you should consider while choosing the domain name for your real estate business websites.
- It’s always beneficial to have a .com website for your commercial real estate websites.
- It should be simple and easy to remember.
- Try to keep it short and avoid hyphens.
- Check for a meaningful name that represents your business, for instance –https://www.worldpanamarealestate.com/ is a real estate listing directory for Panama city or http://buywithoutabank.com.au/ is a real estate broker’s website that lists the properties and home and helps people find their home and helps with the loan too.
Hosting – Get your website some server space
So now that you have reserved an address for yourself, the next step will help you acquire a web-space.
Hosting is a prerequisite for starting any website. Fortunately, with the advancement of technologies and the internet, you have a number of hosting companies, competing against each other, and trying to be more beneficial to the end-users. So the options are plenty, and you get to choose from different plans from different hosts, all of whom strive to provide you with the best service.
We recommend BlueHost hosting for your website. To read the full review on why BlueHost is best for small and moderate website hosting, read this article.
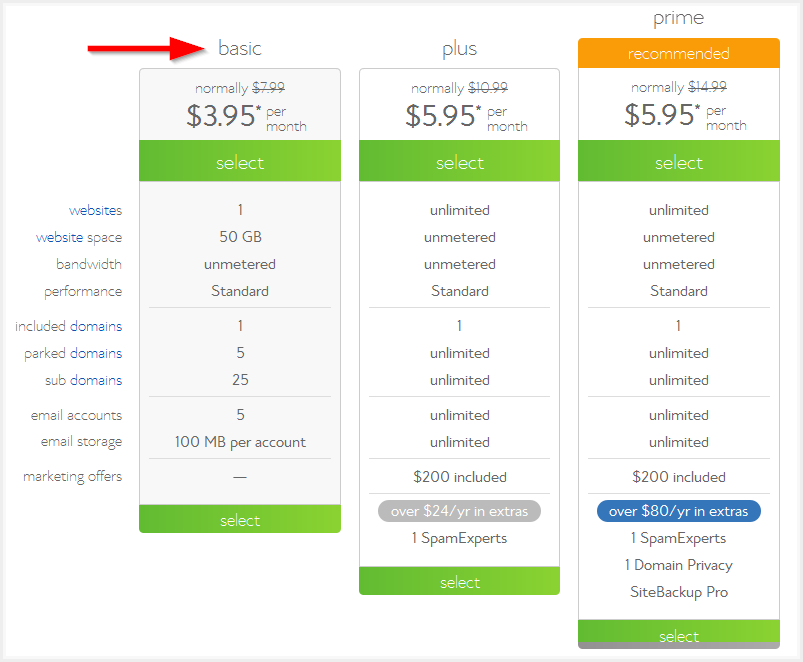
The basic plan is enough to get started, and Bluehost lets you upgrade at any given time, so it’s a wise choice. Choose your plan, proceed with the payment procedure and get your server space booked.
Initial setup of your website
Once you’ve got the domain name registered, and hosting subscribed, you can start with your website. We’ll use WordPress to create the best real estate website.
Why WordPress for your real estate directory?
WordPress is one of the best CMS available in the market. It lets you create amazing websites without writing a line of code. WordPress has enabled a lot of non-technical people to create and manage their own websites. Moreover, you can integrate admin templates that can make your user dashboard more insightful. Here are a few reasons why WordPress is the best option to create your real estate website
- Free and Opensource
- Flexible, with lots of intuitive options
- User-friendly, perfect for beginners as well as pro
- Availability of themes with different niches – Directory, Classifieds, events, business websites, blogs, eCommerce, Real Estate – you name it!
- Abundant plugins(micro software modules) to add new capabilities to your website.
Convincing..isn’t it?? So for creating a real estate listing directory, we will be using WordPress and a real estate directory WordPress theme.
To start with, we’ll first of all install WordPress on the server(host) and associate it with the domain name we acquired with the previous step. Below are the steps to install WordPress on your host.
- Login to your Bluehost Cpanel by using the provided credentials.
- Navigate to the website section and click “Install WordPress“.
- On clicking the install button, you will be asked about the domain name for your website. You may enter the domain name right here.
- With the advanced options – you can change the email address and the username, password for your WordPress login.
- Read and accept the service agreement and license and click “Install now”.
Tip: Even if you don’t go for BlueHost and choose some other hosting service, the installation steps should be almost identical. There are a few hosts that allow one-click WordPress installation for creating your WordPress sites.
With WordPress installed, it’s now time to get a real estate theme with the best monetization features that help you earn through your online property directory. There are plenty of premium WordPress themes for various niches available in the market. You can pick up any right real estate WordPress theme to create your website.
Types of real estate website you can create with WordPress:
First, decide what category the real estate website you address trying to build falls in:
Real estate directory website
This is a general format odd directory website where the listings are in the form of property listings. It is basically a directory website where you can allow your visitors to submit their property listings under different categories for different types of properties like apartments, condos, 3 bedroom apartments, rowhouses, etc.
Single property website
You can create a website for a single property to display its features, location, etc. It’s a very simple website with a few pages, a lot of images to display the property, location information as well add contact information for those who are interested.
Realtors website
This kind of website can be in the form of a business website or a toned-down version of a real estate directory website.
The simplest form of real estate website can be a simple site that tells the visitors about the real estate agency, what they do and what services they provide. It may or may not contain real estate listings. You can easily customize your real estate directory website to create a real estate broker’s website.
Rental property website
A type of real estate directory website where the listings are for rental properties.
Here, we will be using the HomeQuest real estate theme, a feature-packed child theme of our popular directory platform, designed specifically for a property listing directory website. HomeQuest theme is certainly designed for Real estate websites with multiple listings.
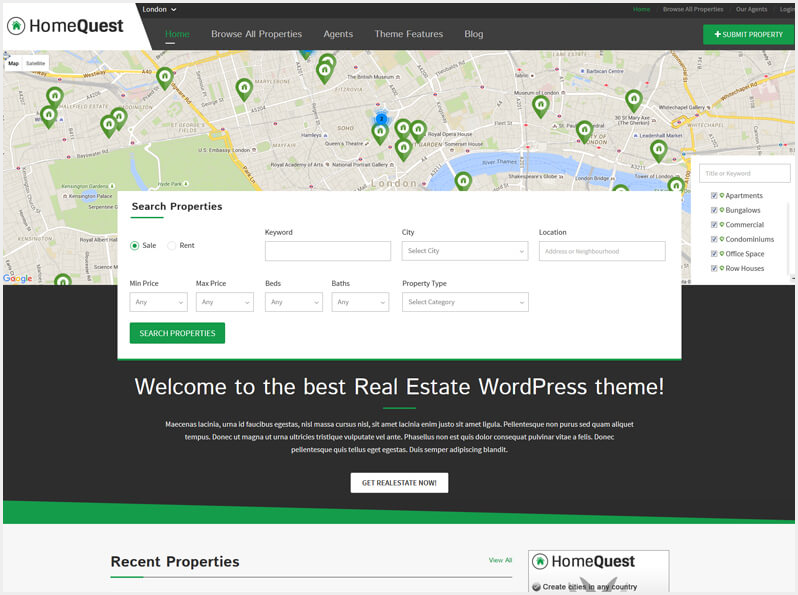
Turn your WordPress into a real estate directory
Download the HomeQuest real estate theme and turn your simple WordPress install into a fully functional real estate website. No need to write lengthy code, or spend weeks designing your website and planning the features.
The installation process is effortless and faster, it helps you install the theme with just a few clicks. Once the theme is uploaded, you can activate the HomeQuest theme. Your theme is now ready to use but wait. You should click the blue button and install the sample data. Why?? Read on to find out.
We recommend you install sample data/demo data
When you buy a premium theme, most of them come with sample data. The sample data is nothing but the example data. Where many of the premium WordPress themes come with the sample data file in XML format, that needs to be imported manually, HomeQuest automates this process. All you need to do is to press the blue button and get the sample data automatically inserted into your website.
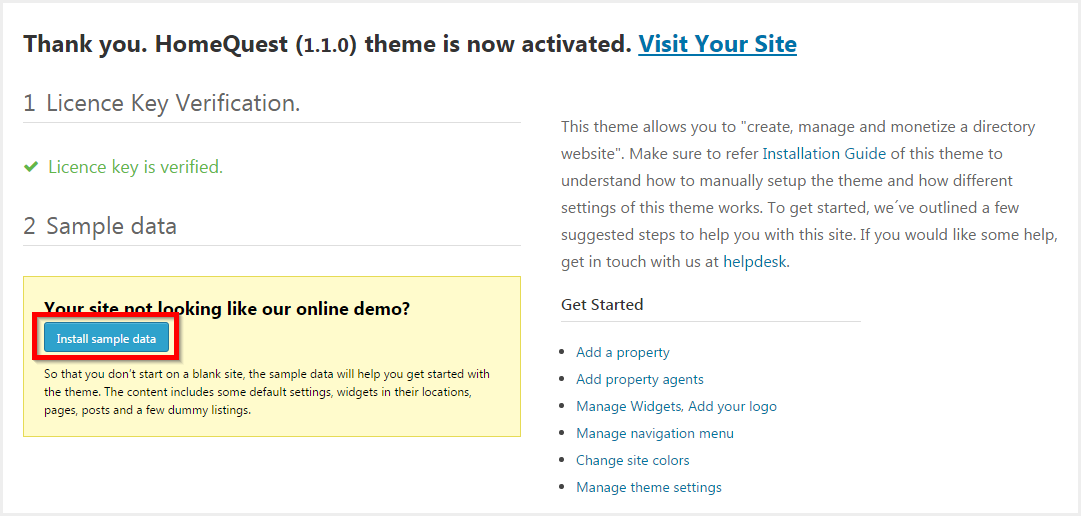
Installing sample data updates your theme with the example data, and what you get is a completely functional website with example listings, widgets into the sidebar, etc. It’s always better to start with sample data than with a blank site.
How does a real estate property listing website work?
A real estate listing website works as a location-based directory website that acts as a middle ground between the property owners and property buyers. It generally has a variety of property categories under which the listings are posted.
Therefore, the property owners can submit their property listings under the relevant category. They can register and use the property listing submission form to submit their listing. As an admin, you can set if you want the listing top new automatically published on submission or to be saved as a draft stop that you review and verify before pushing it live. You can even decide if you want to allow free or paid listing submission.
To allow paid listing submissions on your website you can create payment submission packages. With the advanced features of the HomeQuest WordPress theme, you can even create category-based pricing where you can create different pricing for different categories. The real estate agents can register on your website, choose a pricing package that best does their requirements, and submit their listings using the front-end submission form.
There’s a lot of things you can do with such a real estate website.
An ideal property listing website should have the following features.
User registration:
Fully functional user registration and management system that enables users to quickly register and set up their account on your website.
Property submission:
Along with a special post type for real estate listings, that allows the admin to create a property listing using the back end options, you will also need a flawless front end submission system to allow visitors to post properties on your website.
Payment packages:
There can be one or more subscription packages with a specified number of allowed submissions, the validity of the listing, and the categories under which the listing can be posted. The property owners can choose their package and proceed to pay.
The submission form for property listings:
To allow front-end listing submission by the property owners you will need a listing submission form that enables them to do so. With the HomeQuest property listing theme, you get ready to use a customizable submission form.
Property management:
Property listing owners on tote websites should not just be allowed to list their properties but also to manage them. For this, your website should allow them access to their submitted listings through their account so that they can edit them whenever they want.
Payment processing:
To accept the payments whenever a user decides to buy a property submission package on your website, your website needs a payment collection system.
Categorization, search, and filters:
The categories on your website don’t just help your visitors to find the listings of their choice easily but also helps you keep your website organized. Search and filter facilities will also help them get the desired and relevant results quickly.
Advanced feature (membership-based website)
On an advanced level, you can create protected fields that are granted access to the members only. Threw most common idea is to allow the viewers to access all the listing features except for the contact details odd the listing owner.
Even this is one odd the moray common practice toy can use your own ideas to create protected content and make the visits pay for the exclusive content.
Adjust how your website looks
No size fits all.
Now that we have our website ready with the “dummy data” we can update it with the real data. But before we proceed, we can make a few changes to personalize the website.
HomeQuest is thoroughly customizable and there’s in-depth documentation on how you can customize the theme and manage its appearance as well as features. However, below are a few things that you would want to change before getting started. The images on your real estate site also have to look great. You can try the following real estate photo editing services.
Uploading the logo and site title
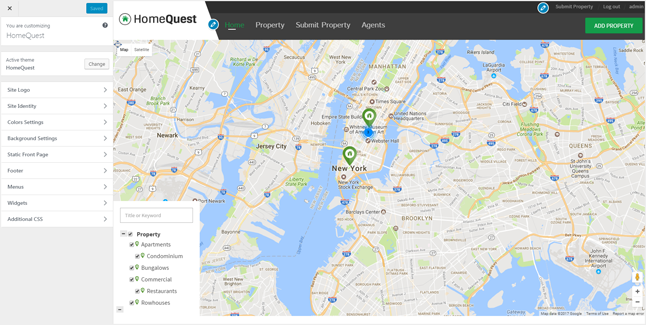
Wouldn’t you want to upload your own logo on your website, or at least give it a title to personalize it? The first step in customization of your website is to upload the logo and site titles.
Changing the colors
You can change the background as well as the foreground colors. You can even set an image as the background of your website. Because too many options are confusing, the customization options are well organized into groups.
For instance – Changing the secondary color will change the color of all the titles at different sections and pages of your website. This helps you maintain consistency and change the look of your website in an organized manner.
Adding the pages and menu
Using the pages option, you can create unlimited pages for your website. Once a page is created, you can show its link into the menu. Create a new page, you can choose the page template the page and set if you want the page to display the right or left sidebar, or no sidebar at all.
Set a proper name for the page. You can add content to the page, you can add images/videos or text, create the web pages as per your requirements. Here’s a simple tutorial on how you can organize the menus of your WordPress website.
Setting up the page elements and sidebars
You may want to change the positions of some of the elements of your website. For instance, you may want to show the categories in the sidebar, at the top, followed by a portion showing the login form.
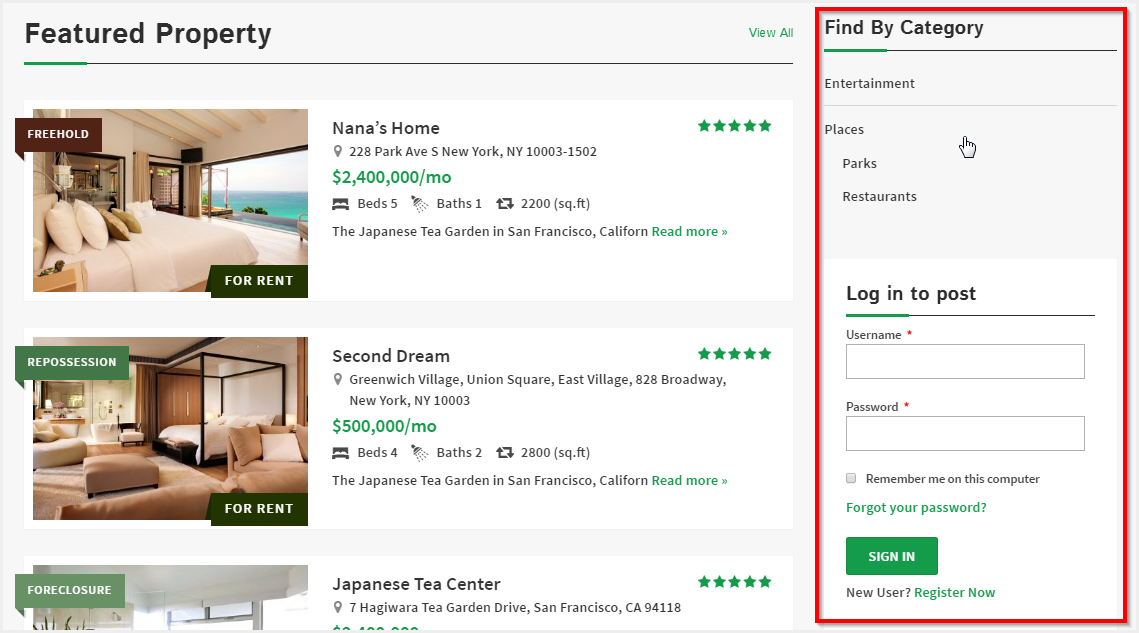
Thankfully, HomeQuest is totally widgetized. The elements you see on the homepage and the sidebar of the pages, all appear through the widgets. And the widgets are movable.
All you need to do here is to drag and drop the widget into the desired widget area and then configure it as required.
Adding Properties to your website
So we have a working website, with our logo and menus, and now is the time we start adding the property listings to the website.
The moment you install the HomeQuest theme, you’ll find some of the links to the documentation to help you set up and get started with the website, right on your screen. You can use these links for managing your website, adding agents and properties and customizing your website.
Creating the categories for a property
We want a well-organized and easy-to-access directory, right?? So the first thing we’ll do is add some categories for the properties.
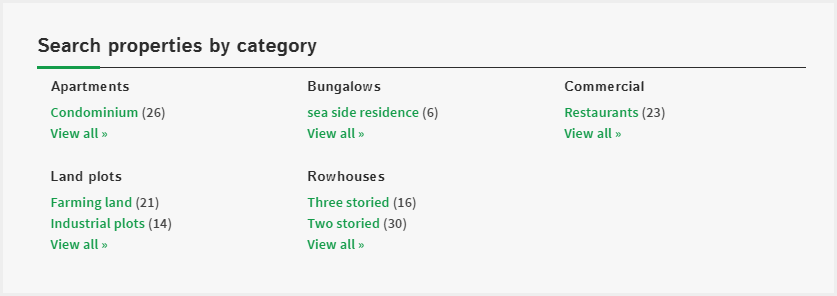
A directory website will show different types of properties. For instance – Apartments, bungalows, rowhouses, offices, penthouse, etc. These categories help to organize the listings on your website based on their type. For the front-end users, the categories make it easy to find the relevant results without wasting time on other categories.
You can create the categories, child categories, set a category as the parent, or delete a property category. Along with it, you can set different prices for different categories, category descriptions, and images too.
Adding properties
A real estate directory website is all about the properties and adding real estate properties is quite simple. You can click on the “Add Property” option on your WordPress Dashboard to add new real estate property listings to your website.
Clicking adds property option will redirect you to the property submission page through which you can add the property by entering values to the fields.
Provide a suitable title for your property listings, select the category, choose the images for your property, key in some description, set the price, and fill in the rest of the details for the property you want to display. This is how a property page looks on your website.
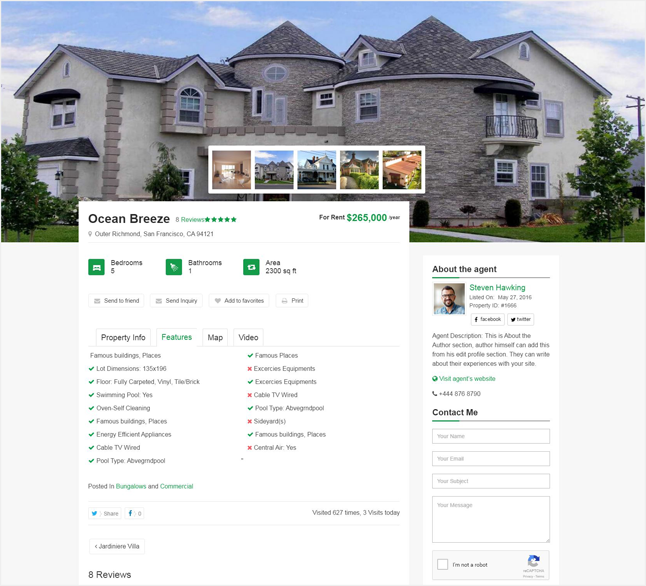
Once all the details are filled up, you can publish your property or you can save it as a draft for publishing it later. Once the property is published, it starts appearing on your website to be viewed by the site visitors.
Add more fields if you wish
Again, if you need some variations in the existing fields of your property submission form, you can do so.
The fields for your property listings aren’t limited to what you see on the form. You can change the fields for your post types using the custom fields settings.
You can delete or update the existing fields or add some new ones. For instance – You want to add fields like nearby locations, where you will display the venues that are in proximity of the properties like – Hospitals, shopping malls, fire stations, etc.
Or, you don’t want to display the field for “swimming pool” for the listings under hospital categories. You can just change it all.
Charge for displaying advertisements
Different forms of directory websites like Job board directory, a classified directory, etc. can help you make money online with different inbuilt features.
The simplest and the easiest way to make money through your website is by displaying advertisement banners. The people who want to display their advertisements on your website can provide you their advertisement content in form of HTML code containing images, videos, or text and you can display it at various sections of your website.
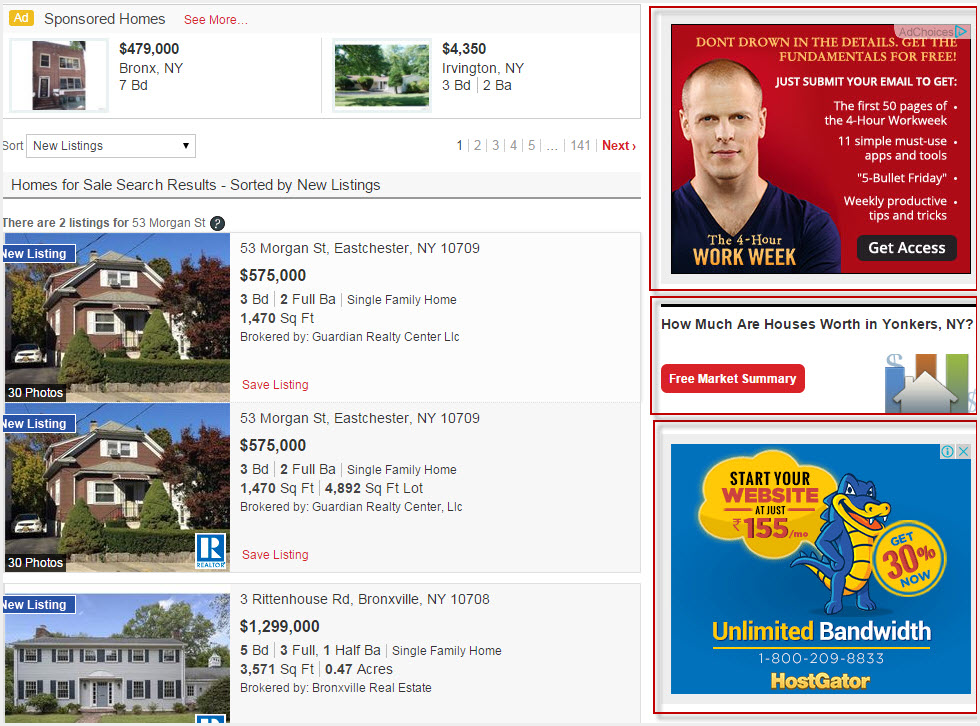
You can charge different amounts for displaying ads at different places. For instance, you may charge more for displaying advertisements at the header, because that is where it gets more user attention. While the price for placing the advertisement in the footer can be comparatively lesser.
Besides banner advertising, there are many other ways to make money through your directory websites.
Get paid for advertising user’s properties
With the above steps successfully executed, your real estate directory is personalized and ready to display properties online.
You can earn money by displaying advertisements on your website. However, the next thing you can do to make money through a website like Yellow pages website, or a real estate directory is to allow paid front-end submission.
Now, let’s see how to enable paid front-end listing submissions and accept payments for it. The process of front-end submission is simple – The user pays and then submits a property listing from the front end.
But before you start allowing front-end submissions, you would want to create the pricing plans that the users can choose from. The directory theme has the easiest options to create pricing packages.
Creating price packages
You can create pricing packages for your users to subscribe to. With this setting option in your WordPress dashboard, you can offer subscription packages for your visitors to choose from.
Create as many price packages as you want, you can define a unique name for each package, the validity of a package, its price, the number of properties you can submit under each package, etc.
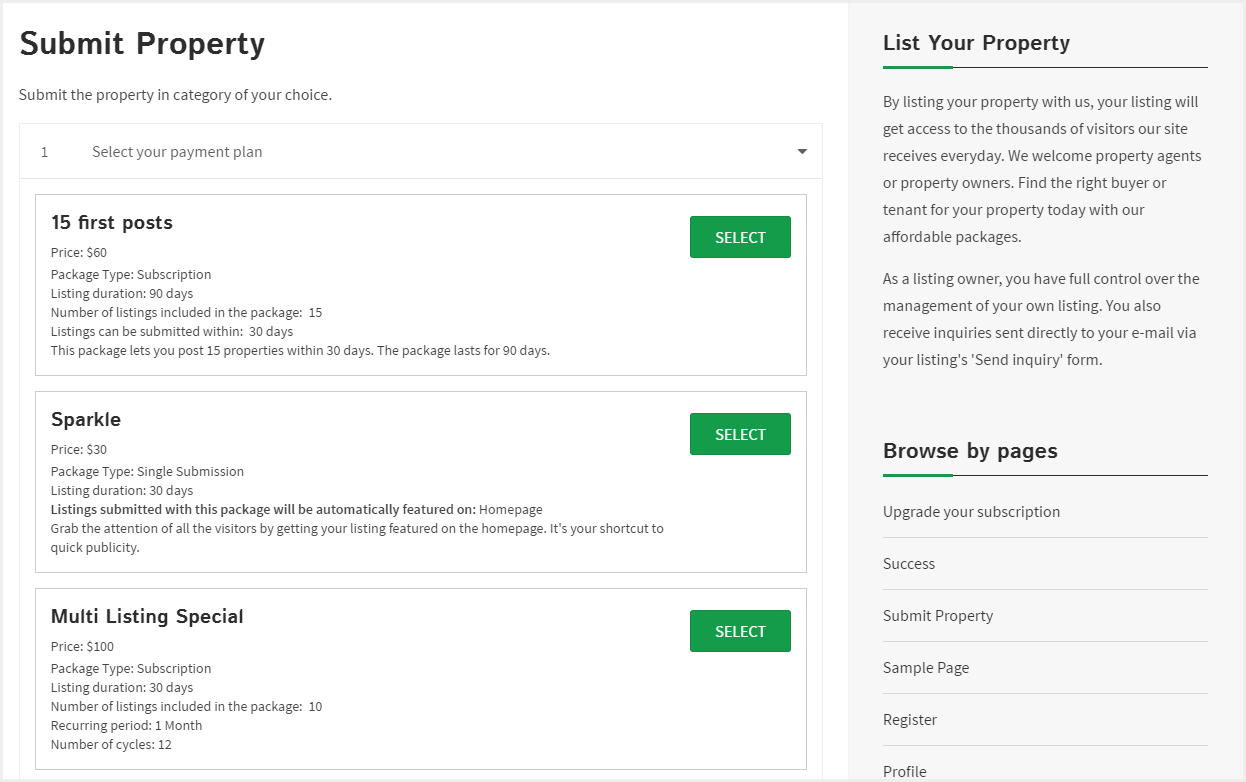
If you are displaying the pricing using the pricing tables, you can use the short links to connect the package to the button on the pricing tables.
Once you create the price package, it starts appearing when the user tries to submit listings. The visitors can select the package of their choice and proceed to pay and submit their listings.
Accept online payments with your website
Accepting payments can be either online or offline. For accepting online payments, you can integrate any payment gateway or use the inbuilt PayPal or choose to accept offline payments. The HomeQuest theme also helps you create subscription-based packages.
There is a simple procedure for servicing offline payments. When the visitors choose to make offline payments, you will have to manually check and publish their listings once the amount is credited into your account. How you wish to accept the payment – cash or cheque – depends totally on you.
However, enabling your website for online payments is always a smarter choice.
When you want to allow online payments, payment gateways are the module of the website through which you can receive the money from the users of your website.
The payment gateway at the user’s end will help them pay on your website. For you, the processors will make sure that the payments made by the customers are safely transferred to your associated bank account.
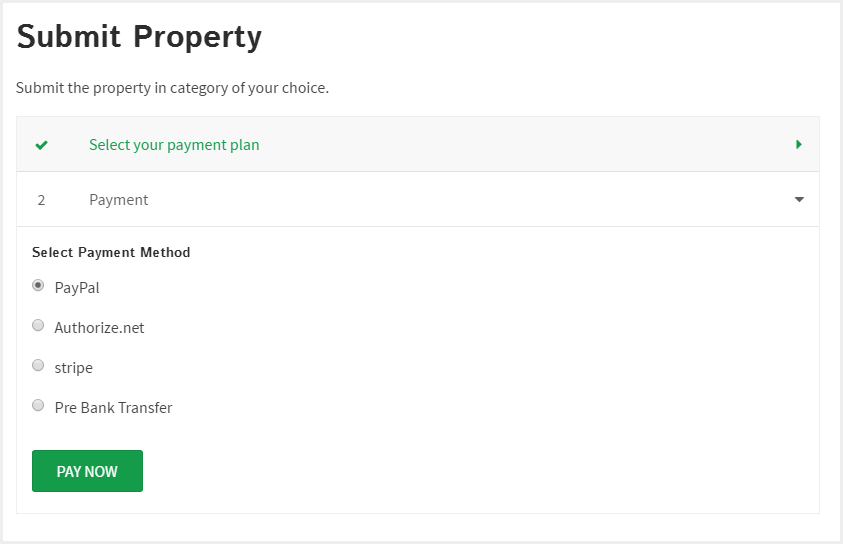
PayPal is one of the most popular and efficient payment gateways and it comes integrated with the theme.
So, all you need to do is to create a merchant’s account at PayPal and enter your account details on your website and start receiving the payments. However, if you want to use any other payment gateway on your website, you can download one from here.
Alternately, you can use any other payment gateway from the list given below. Select the best payment gateway based on your location and currency.
Promote and get more traffic and subscriptions
To start getting front-end submissions and more traffic, you can promote your website using different platforms. You will need to promote your website so that your prospective users can know about it.
Informal promotions
Think about all the things that your friends and family suggest to you. For example – My friend suggested me a website from where I can download free music, My dad suggested me to install a family locator app, etc. Indirectly, they’re just promoting the website/app.
Informal promotions include being vocal about your website. So, the next time you say hi to your friend, you can just ask him/her to check out your website!
You can also carry out promotional campaigns to make the local people aware of your website’s services. You can ask the local business owner if they’re willing to advertise your website to their customers.
Use digital media to advertise your property directory
You can use digital media like online news and magazines, television, video channels, and other websites. More than how good your advertisement is and what is the content of your advertisement, it is important to choose an ideal medium for advertising.
For instance – What is the use of displaying the advertisement of your real estate website on a music video channel. Totally irrelevant, isn’t it?? So instead you can display the advertisement on an economic channel, that discusses finances and investments.
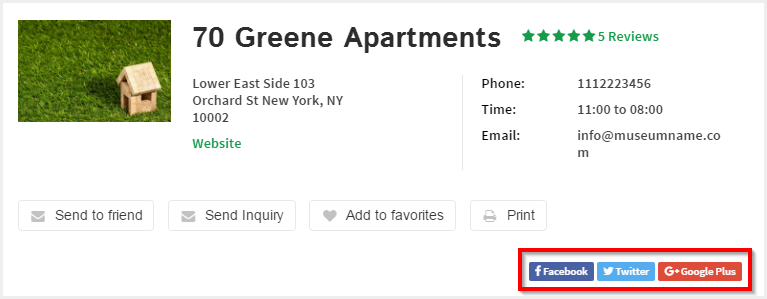
Integrate social media sharing, so that visitors can share your pages. Being socially active helps a lot!!
You can subscribe to Google AdSense
Google AdSense is a smart advertising service from google, that totally makes sense.
Its duty is to ensure that the subscriber’s advertisements reach the relevant audience. It ensures that if a user is searching for real estate themes for a long time, then he will be shown suitable advertisements for properties for sale.
You can subscribe it to get your real estate directory advertised at relevant places, based on the user’s search.
Promote on preferable platforms and start getting the listings
Useful tips and tricks for a successful website
Once your website is all set and ready to accept the front-end listing submission, here are a few tips that can help you enhance the usability and efficiency of your website.
The maps on property pages can be very helpful
Displaying listings on the maps has its own advantage. Even though the HomeQuest Real estate listing theme allows you to replace the homepage map with an elegant slider, we recommend maps.
The homepage map indicates the locations of all the listings on the map through map markers. The visitors can just come to your website and click on the marker to go to the listing detail page directly. This surely enhances the user experience.
Who won’t like to find the best and most relevant content without wasting time and navigating through a series of pages??
There are maps on the category page and the detail page too. So when the user clicks the category page, all the real estate listings posted under that category will be displayed on the map.
The detail page will also display a map for the specific listing, with the street view and navigation features.
Charge more for the featured listings
Featured listings are those listings that are more important than others. You can choose which listings you want to be featured on your website.
And you can obviously charge the users more for getting their listings featured on the homepage. Such listings will get more exposure than ordinary listings. Our property management themes for WordPress, this feature is inbuilt and running.
You just need to configure the price for your featured listing, the duration for which the listing will be featured, etc. Therefore, without any extra hassle, you can earn make some extra bucks!
Create a website that is SEO optimized
SEO is a very, very deep subject, but it’s always good to search the internet and get an idea of the things you can do to optimize your website for the search engine.
- Always go for SEO friendly theme
- Use SEO plugins like Yoast SEO and All in one SEO pack
- Keep your website updated with meaningful, useful content
- Ensure that the content you add to your pages and listings are keyword optimized
Visibility is one of the most important survival necessities for any kind of website. Moreover, with a real estate website, try to rank for generic terms such as – “House for sale in Manhattan”, “Properties in South Shields”, etc.
This can happen over time if you keep your website content updated as per the SEO requirements. There are more than one ways through which you can do this. For the best SEO results, you can look for a local SEO expert and take his advice/help in making your site rank well.
Security of your WordPress directory website
It is also important to see that your real estate website is safe on the internet. This can be ensured by taking proper security measures and tightening the protection against malware for your website.
Security of your Real Estate directory is very vital because it stores the user data, and involves financial transactions and payment processing. These details cannot be compromised. Here are a few tips on how to ensure the security of your WordPress website.
Get ready to see how!
Get started now..
The steps listed above are just a few steps to get started with your IDX-ready real estate website. You won’t have to write a line of code or go through complicated steps to set up your website when you use this real estate theme.
Creating a real estate directory website is much easier than it seems, you see?
With these steps performed, you have a smooth-running and personalized property listing website that can earn for you!
Good Luck with your venture :)


