Ever wondered what does the copyrights section at the end of most of the websites means? Or, why do they have licensing information, and maybe terms and conditions mentioned at their bottoms? Why do some websites have a menu of site-pages at the end of their pages? And how to edit the footer in WordPress?
The section we’re talking about is called a website footer. A nice optimized site is bound to have a good footer area which is user-friendly and also useful in several ways.
Here are some of the benefits of having a website with a footer in WordPress:
- A copyright notice on your website can help you in protecting the content from any infringements. A footer is an appropriate place to share your copyright information.
- A footer is an ideal place to deploy your Google Analytics JavaScript snippet to track user activities on your website.
- You can convey meaningful content like terms of services and licensing information via the footer in WordPress.
- You can display your contact information, site navigation links, and other important links about company policies. Furthermore, you can create a menu for all important pages on your website and add it to the footer section.
- It helps you in removing the ‘Powered by WordPress’ tag and replace it with your own.
Why you should seriously consider having a footer on your WordPress website?
The footer of your website is a section of your site where you can place a lot of useful information. Here’s how we have utilized our website’s footer space to display all of our important links.
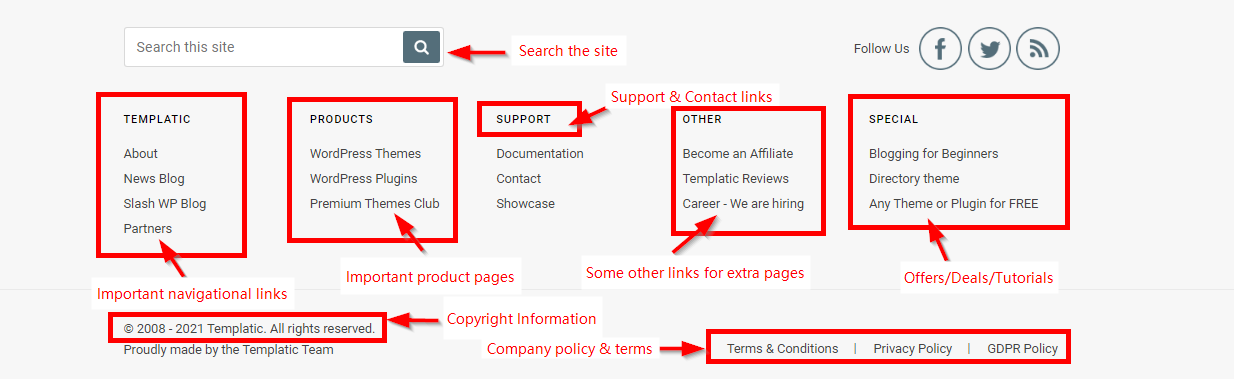
A footer is a very information-rich section of your website. You can use the end section of your website to let your visitors get information about your business, your policies, the year of your establishment, and more importantly if your website has been recently updated. Modern search engines consider websites with footer section and updated information as genuine and rank them higher than compared to others.
It’s a good practice to have your website with a custom footer for SEO since most of the blogs out there would be having ‘powered by WordPress’ as their footer text which is not unique to these search engines. Applying the JavaScript snippet on your footer helps in reducing the load-time of your website as it’s not the first thing that loads. Thus, it helps in tracking users without any extra cost in the performance. It’s more so important to understand how to edit the footer and keep it up-to-date.
How do I edit footer content in WordPress?
It’s simple to edit a footer in WordPress. Here are three easy ways how to edit footer in WordPress:
Theme settings:
The first and simple way to edit your footer is to check if your WordPress theme supports editing the footer. After you’ve logged into the WordPress console, go to Appearances > Customize option. Once inside, check if you could see the footer section in the results. Some themes also refer to it as the copyright section. Select the section and make changes in the editor of the footer text.

You can also use the footer widget (if available) from your WordPress theme. To make the changes, go to Appearances > Widgets and select the footer widget. You can add text, logo, or an image to the widget.
You can also add menu options to your footer widget by creating one. To create a menu log in to the WordPress admin dashboard, go to Appearance > Menu, and select the option to create a new menu. Add the components that you want to add to the menu and save it. In the footer widget, select the menu that you’ve saved earlier.
Save your changes and now go back to your homepage, and you could see your new footer in the footer area of your WordPress website.
Plugins:
There are several plugins available out there that will help you in customizing your theme’s footer. If you’ve already worked with WordPress plugins, you know how to install a new plugin. If not, follow the steps given below:
- Log in to WordPress Admin dashboard
- Go to Plugins on the left-hand side menu
- Now search for the plugin you want and click on the “install plugin” button to install it.
- Most plugins will show up in the left-hand side menu of the
We’ve curated this list of plugins for editing the footer bar of your website. We’ve considered ease of use, editing options, and their compatibility with existing themes while selecting these plugins.
Elementor:

- We found this plugin to be the most flexible and compatible with most themes. It not only helps you in editing the footer, but also helps in editing the site name, site logo, page title, and also site navigation menu.
Please follow the steps below to use this plugin to edit the footer:
- Log in to the WordPress admin console
- Install the plugin.
- Go to Appearance > Header Footer & Blocks section and click on the ‘Add New’ button.
- Select the type of template as the footer and set its location. You can also create your design for the footer in the same section.
- Edit or add new text in the text box for your footer and don’t forget to save the changes.
Reference: https://wordpress.org/plugins/header-footer-elementor/
Elementskit :
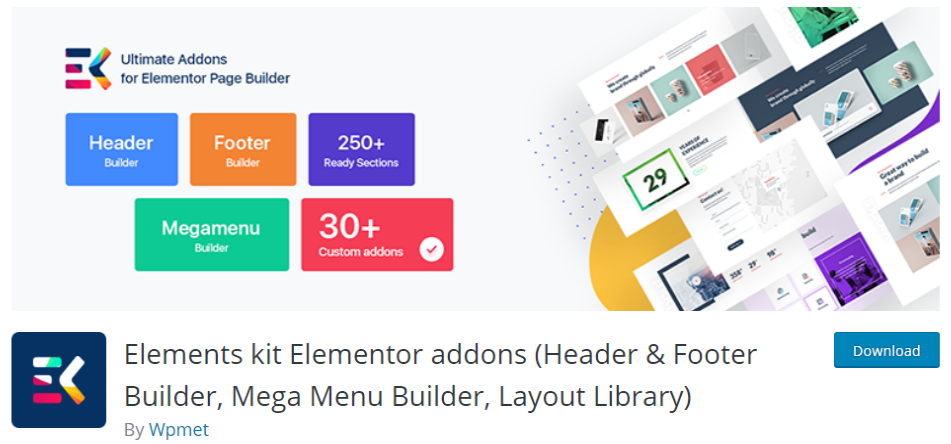
- This is another great header and footer editor for your WordPress website. You can edit the footer with logos and menus. You can decide which pages need to have the footer and also you get the privilege of activating and deactivating the functionality as and when required with just a click of the button.
Please follow the steps given below to edit the footer:
- Install the plugin.
- Log in to the WordPress admin console.
- Select ElementsKit from the left-hand side menu.
- Go to ElementsKit > ElementsKit > Modules
- Make sure that the Headers & Footers tab on the dashboard is selected
- Now, navigate to ‘My Templates’ inside the ElementsKit menu and click on ‘Add New’
- Add your text in the title, select type as the footer
- You can choose to show the footer only on a few pages, like your Homepage, for example. To make such customization, add a condition on the same page and select if you want it for all the pages across your WordPress website or only on select pages
- Don’t forget to activate the component and save it at the end.
- Now go to ‘My Templates’ and select the template that you just created. Click on the edit button and select ‘Edit content’ from the dashboard
- Now inside the editor, select the widgets that you need to edit the footer. For example, you can add text, a menu, or even a logo image to your footer.
- Once done with the edit, click on the update and after that, you may also preview your new footer before publishing by clicking the preview button.
Insert Header and Footers:
- This plugin will help you to add code in your footer text so that you can link your WordPress website to any external source like social media handles or other websites. You can make similar changes to your header as well. This is an all-in-one plugin for your headers and footers, and so we think you should consider it on your next project.
Please follow the steps given below to edit the footer:
- Log in to the WordPress admin console.
- Go to Settings > Insert Headers and Footers
- Enter the HTML/JavaScript code that you have for your footer, or simply enter some text that you’d like to display in the ‘Script for footer’ section.
- Apply the changes and save.
Coding:
You can also change the footer of your website by changing the underlying code in WordPress that controls your footer.
Tips before coding:
Make changes to your code only if you’re good at coding. A minute error can cause your entire work to go into vain. So, to work with the below techniques, we suggest you follow these best practices at the start of all your edits in the future:
Create a backup of your code:
It’s very important that you back up your settings from time to time. If your website crashes, you’re only a click away to restore to the previous version. Also, having a backup from time-to-time will safeguard you and your business from any untoward incident.
Create a child theme:
A child theme is nothing but a clone of the parent theme that helps you in maintaining your website and try out new functionalities in the development mode. A child theme is just another CSS of the parent theme that helps you in creating and testing new functionalities without affecting the live website.
We’ll show you a simple way to create a child theme with the help of a plugin.
How to create a child theme?
- Log in to the WordPress admin console.
- Go to Plugins > Add New
- Search ‘Child theme configurator’
- Install the plugin and Activate the plugin
- Go to Tools > Child Theme
- Select the option ‘CREATE a new child theme’
- Next click on Analyze
- Scroll down without making any changes and click on ‘Create New Child Theme’
- To check the newly created child theme, go to Appearance > Themes
- There you’ll find your new ‘GeneratePress Child’ theme
- Activate the child theme and continue working on your theme editing in the ‘Theme editor’
- To change the footer area with the child, theme go to Tools > Child theme > Files
- Select Footer from the list of files > Copy Selected to Child Theme
- Go back to Appearance > Theme editor
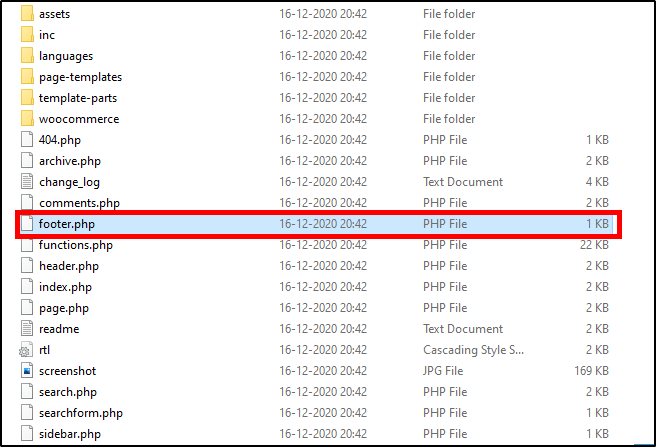
- You can see footer.php in the files list on the right
- Edit the changes in the PHP file and click on ‘Update File’
- Verify if your changes are working perfectly on the website and if yes, make the changes accordingly to your main theme.
Comment entire code:
They say comments are the best friends of a good programmer, and this time they’re true. Commenting your code helps you in trying your code without disturbing the original code. So, in case something turns ugly, you can always get back to the original version without any downtime.
footer php file:
- WordPress core and all the themes that we use are built on PHP. Though it’s not necessary to learn PHP to work with WordPress, it doesn’t hurt to gain more knowledge. So, if you understand PHP, and would like to edit your code and keep your website free from plugins, this is an excellent choice.
- Log in to the WordPress Admin dashboard
- Go to Appearance > themes > and select the theme on the right.
- Search for the theme footer inside the footer.php file.
- Inside the footer PHP file, search the ‘get_template_part’ tag as shown below:
get_template_part( ‘template-parts/footer/site’, ‘info’ );
- Replace it with this line:
echo “Your footer text here”;
- Save your footer code in the footer.php file after you edit, and your results should show the footer content that you’ve just defined.
WordPress footer CSS file:
- Cascading Style Sheets (CSS) is a language for the presentation of an HTML document.
- You can also remove the “Powered by WordPress” text by editing the footer PHP file.
- Log in to the admin dashboard
- Go to Appearance > Customize
- Select customizing Additional CSS
- Inside additional CSS space add the following line:
site-info {display:none}
- However, as per our research online, we’ve come to know that removing the links from your footer content hurts your website’s page ranking in the search engines.
Conclusion:
There are several ways to change or edit the footer in WordPress, and we’ve shared only a few of the simple techniques in which you could. Go ahead and give it a try.